dell laptop does not work after microsoft update

Title: How to fix microsoft store not opening 2025 QUICK FIX
Channel: Etechniz
How to fix microsoft store not opening 2025 QUICK FIX by Etechniz
Dell Laptop Bricked by Microsoft Update?! (Fix Inside!)
Dell Laptop Nightmare: When a Microsoft Update Turns Your PC Into a Paperweight
Hold on a second, are you experiencing a tech tragedy? Has your beloved Dell laptop, once a trusty companion, transformed into a frustrating brick after a recent Windows update? You’re not alone. This unfortunate scenario, though rare, does rear its ugly head. This article aims to illuminate the darkness. It offers a lifeline of hope. Read on to find a potential solution.
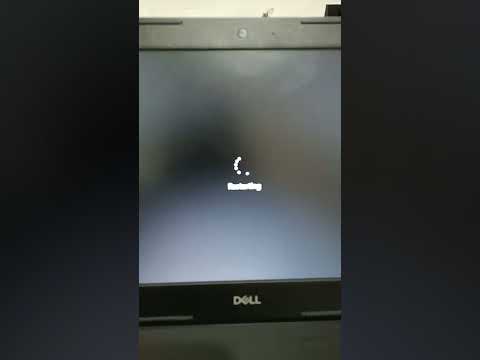
The Dreaded Black Screen: A Familiar Foe?
Imagine this: you boot up your Dell. You expect smooth operation. However, instead, you're greeted with nothing but a chilling black screen. The cursor twinkles mockingly. Your heart sinks. You've probably experienced this irritating issue firsthand. A rogue Microsoft update could be the culprit. These updates, though intended to improve your experience, can sometimes lead to disaster. The update process can fail. It might corrupt critical system files. This leaves your laptop non-functional. Unfortunately, it happens. Thus, knowing how to respond becomes crucial.
Pinpointing the Problem: Is it Really the Update?
Before you panic, try to confirm the source of the issue. First, try a hard reset. Hold down the power button for at least 15 seconds. Then, attempt to restart your laptop. This simple step surprisingly resolves many problems. If this fails, consider the timing. Did the black screen appear directly after a Windows update? If yes, this is a strong indication. However, other factors could be involved, such as hardware failure. So, rule out other possibilities like a faulty hard drive. Also, try connecting an external monitor. If the display functions on the external monitor, the problem is the laptop's screen.
The Recovery Road Map: Getting Your Dell Back on Track
Now, let's explore some potential solutions. These steps might not always work. Yet, they are worth a shot.
First, try booting into Safe Mode. This loads Windows with minimal drivers. It helps isolate the problematic software. To enter Safe Mode, try these steps. Repeatedly press the F8 key during startup. Alternatively, if that doesn't work, try holding the Shift key while clicking the restart option. From there, you should see advanced startup options. Select "Troubleshoot," then "Advanced options," and finally, "Startup Settings." Choose "Safe Mode." If you can boot into Safe Mode, you may be able to uninstall the recent update.
Next, explore System Restore. This reverts your system to an earlier state. Choose a restore point created before the update's installation. This, quite possibly, will undo the damage. Access System Restore through the Advanced Startup Options mentioned earlier. Select "System Restore" and follow the on-screen prompts. Remember that it can take a while. Besides, it might solve your problem.
Advanced Troubleshooting: When Things Get Tricky
If Safe Mode and System Restore fail, it's time for more advanced methods. You might need a bootable USB drive with Windows installation media. You can create this using another working computer. Once you have the bootable drive, boot your Dell from it. Then, choose the "Repair your computer" option.
From these options, select "Troubleshoot," then "Advanced options." Now you have the option to try a few things. Try "Startup Repair". This attempts to fix boot-related issues automatically. If startup repair doesn’t resolve it, consider using the command prompt. From the command prompt, type bootrec /fixmbr, bootrec /fixboot, bootrec /scanos, and bootrec /rebuildbcd. These commands can repair the Master Boot Record and Boot Configuration Data. These are essential for starting Windows correctly.
Prevention is Key: Safeguarding Your Dell
Once you get your Dell laptop working again, prevent this issue from happening again. Delaying updates can be helpful. You can pause updates. Also, consider creating a system restore point. This safeguard helps if an update goes wrong. Furthermore, always back up important data. This ensures data security. Finally, regularly scan for malware. This can prevent various computer issues.
The Bottom Line: Perseverance Pays Off
Facing a bricked Dell laptop after a Microsoft update is frustrating. Fortunately, it's not necessarily game over. Try the solutions outlined here. While success isn't guaranteed, these steps offer a substantial chance. Remain patient. Try different approaches. Take deep breaths. With persistence, you can likely revive your laptop. If all else fails, consider professional help. Don't give up!
HDMI Disaster! Laptop to TV – FIX THIS NOW!Dell Laptop Bricked by Microsoft Update?! (Fix Inside!)
Hey tech enthusiasts! Let's be real, we've all been there. You’re cruising along, feeling like a digital ninja, when bam – a Microsoft update hits your system and your trusty Dell laptop decides to take an unexpected vacation. And sometimes, that vacation looks a whole lot like a bricked device. Don't panic! We're going to untangle this mess together. It's like facing a rogue software gremlin that's decided to sabotage your productivity, but fear not, we've got the battle plan to reclaim your digital domain!
1. The Dreaded Black Screen: Is Your Dell Truly Brick-ed?
First things first: let's diagnose the situation. The term "bricked" gets thrown around casually, but what does it actually mean? It essentially signifies your laptop is as useful as a paperweight – it won't boot, and you're staring at either a blank screen, a loop of errors, or a slightly less exciting version of digital purgatory. Before you throw your hands up in despair, take a deep breath. Are you seeing a solid black screen? Are there error messages? Or is it stuck in an endless boot loop? Knowing the specifics can help us tailor the fix. Think of this as the digital equivalent of checking your pulse!
2. The Usual Suspect: Why Microsoft Updates Go Rogue
Why does this happen? Well, Microsoft updates, bless their often-confusing algorithms, sometimes clash with the specific hardware configurations of your Dell laptop. It's like a recipe gone horribly wrong – the ingredients (software) don’t quite gel with the oven (your laptop), resulting in a burnt offering. Driver incompatibilities, corrupted update files, and even the occasional bug in the update itself can all contribute to this digital disaster. It's a frustrating reality, folks, but you're not alone!
3. Before We Dive In: Your Pre-Rescue Checklist
Before we start hacking into the system (not literally, don't worry!), let's prepare. Make sure your laptop is plugged in. We don’t want to run out of juice mid-rescue mission! Also, gather any documentation you have for your Dell model. This might include the service tag or model number, often found on a sticker on the laptop itself or on the original packaging. This will help us find the correct drivers and solutions specific to your model.
4. The First Line of Defense: The Hard Reset (Try This First!)
Sometimes, a good old-fashioned reboot can do the trick. But we're not talking about a normal restart. We're talking about a hard reset – a digital defibrillator for your laptop. Here’s how:
- Unplug everything: Remove the power adapter, any USB drives, and anything else connected to your laptop.
- Remove the battery (if possible): For some Dell models, the battery is easily accessible. Remove it.
- Press and hold the power button: Hold the power button down for at least 30 seconds. This will discharge any residual power.
- Reassemble and try again: Re-insert the battery (if you removed it), plug in the power adapter, and turn the laptop on. Cross your fingers!
This technique can often reset the system, and if you are lucky, your Dell laptop will boot back up smoothly.
5. The Safe Mode Savior: Getting Back to Basics
If a hard reset doesn't work, Safe Mode is your next best friend. Safe Mode is like a minimalist version of Windows, running only the essential drivers and services. It allows you to troubleshoot without the clutter of potential conflicts.
- Restart your laptop: When you see the Dell logo, repeatedly press the F8 or F12 key (the key may vary depending on your Dell model) or the ESC key to access the boot options.
- Select "Safe Mode": You should see a menu with various boot options. Select "Safe Mode" or "Safe Mode with Networking."
- Diagnose and Repair: Once in Safe Mode, you can try uninstalling recently installed drivers, running System Restore (more on that later), or scanning for malware.
Safe Mode is like a secret passage to troubleshoot and repair the corrupted or damaged files preventing your Dell laptop from booting.
6. The Driver Drama: Updating or Rolling Back
Often, the culprit is a corrupted or incompatible driver. In Safe Mode (or after a successful normal boot), it's time to address these drivers.
- Driver updates: Go to the Dell support website and download the latest drivers for your specific model.
- Driver Rollback: Alternatively, if the problem started after a recent driver update, go to Device Manager, find the device, right-click on it and select "Properties." Then in the Driver Tab, click "Roll Back Driver" if available.
7. System Restore: The Digital Time Machine
System Restore is your time machine for your operating system. It lets you revert your system to a previous state before the update mayhem began.
- Access System Restore: Search for "System Restore" in the Windows search bar.
- Choose a Restore Point: Select a restore point before the problematic update. Follow the prompts.
It's like turning back the hands of time to a point where your Dell laptop was still your friend, not your foe.
8. Boot Repair Tools: When All Else Fails
If you still can't boot, you might need to use a boot repair tool. These tools can often fix corrupted boot files. You'll need a bootable USB drive with Windows installation media.
- Create a Bootable USB: Use the Microsoft Media Creation Tool to create a Windows installation USB drive.
- Boot from USB: Change your BIOS settings to boot from the USB drive.
- Access Repair Tools: Once booted from the USB, choose the "Repair your computer" option. Look for options like "Startup Repair" or "Command Prompt" for advanced troubleshooting.
9. Fresh Start or Reinstall: The Nuclear Option
If all else fails, you might need to consider a fresh start or a complete reinstall of Windows. This will erase all data on your hard drive, so back up your important files beforehand (if possible!).
- Fresh Start: This option reinstalls Windows while preserving your personal files.
- Clean Install: This is a complete reinstallation of Windows.
10. Preventing Future Headaches: Best Practices
Once you've got your Dell back up and running, the goal is to prevent a repeat performance.
- Delay Updates (if possible): If you're not comfortable with the early adopter's life, consider delaying updates for a few days or weeks.
- Create a System Image: Regularly create a system image (a backup of your entire system).
- Driver Management: Keep your drivers updated, but be cautious about installing updates immediately.
11. Dell Support: Don't Go It Alone
Don’t struggle in silence! Dell's support team is there to help, and they might have specific solutions tailored to your laptop model. Check your warranty status too!
12. The Community: You're Not an Island!
The internet is a vast ocean of solutions. Search online forums and communities for your specific Dell model and the error messages you're seeing. Someone, somewhere, has probably encountered the same problem, and they may have a solution.
13. Check Your Hardware: Beyond the Software
Sometimes, the problem isn't software-related. Hardware issues, like a failing hard drive, can mimic the symptoms of a bricked laptop. Run hardware diagnostics to be sure. Dell usually has its own diagnostic tools that can be accessed during boot-up.
14. The Power of Patience: Staying Calm is Key
Trust me, I know! Dealing with a bricked laptop can be intensely frustrating. Take deep breaths, step away from the screen if you need to, and remember that you can get this fixed.
15. The Sweet Taste of Victory: Success Stories
Celebrate those small victories! When your laptop finally boots up, back up your files immediately. Share your success stories online. You’re now a member of the “I Beat the Bricked Laptop” club!
Final Thoughts: Your Dell Laptop is Back!
We've covered a lot of ground, like a digital treasure hunt, right? From hard resets to boot repair tools, we've armed you with the knowledge to tackle that dreaded bricked Dell laptop. Remember, patience and persistence are your allies in this battle. Don't be afraid to experiment, seek help, and most importantly, don't panic. You've got this! Now, go forth and conquer that black screen of doom!
Frequently Asked Questions (FAQs)
Q1: My laptop is completely unresponsive. What do I do?
A1: Start with a hard reset (see section 4). If that doesn’t work, try Safe Mode (section 5). If your Dell still doesn't respond, you might need to create a bootable USB drive with installation media and use the repair tools.
Q2: Will System Restore delete my files?
A2: No, System Restore typically does not delete your personal files. It will revert your system settings to a previous state, potentially removing recently installed software or drivers.
HP Laptop Wi-Fi Nightmare? Solved! (Windows 10 Fix)Fix problems using windows update Windows 11

By Dell Support Fix problems using windows update Windows 11 by Dell Support
WiFi Does Not Work After Installing Windows Update or Feature Upgrade Solution

By MDTechVideos WiFi Does Not Work After Installing Windows Update or Feature Upgrade Solution by MDTechVideos
Fix All Windows Update Error Problems in Windows 1110 Easy Guide

By EasyTechGeek Fix All Windows Update Error Problems in Windows 1110 Easy Guide by EasyTechGeek
Title: Windows 11 taking time to restart after windows update.
Channel: AK Advice Amit
Windows 11 taking time to restart after windows update. by AK Advice Amit
Working With Laptop
Dell Laptop Bricked by Microsoft Update?! (Fix Inside!)
Has your Dell laptop ground to a halt after a recent Microsoft update? Are you staring at a black screen, a looping boot sequence, or error messages that seem to speak a language you don't understand? You're not alone. Across the digital landscape, users are reporting troubling issues following certain Windows updates, specifically impacting Dell laptop owners. But there's a path forward. This comprehensive guide doesn't just identify the potential culprits; it provides actionable, step-by-step solutions to resurrect your valuable device and get you back to productivity, or entertainment, as quickly as possible. Don't despair; let's dive in.
Understanding the Problem: What's Going Wrong with Your Dell Laptop?
The frustrating reality is that software, even from established giants like Microsoft, isn't infallible. Updates, while designed to improve security and functionality, can sometimes trigger a cascade of problems. In the case of Dell laptops, we've observed a few recurring themes leading to "bricked" devices – a term that, in this context, signifies an unresponsive or unusable state. These issues frequently involve:
- Failed Boot Sequences: The laptop attempts to start, displays the Dell logo, then endlessly cycles or freezes. The operating system fails to load.
- Boot Loop Errors: The system repeatedly restarts without ever reaching the desktop. Error messages, if visible, often point to file corruption or system instability.
- Blue Screen of Death (BSOD): The dreaded blue screen appears, displaying error codes that can sometimes indicate the source of the problem. These errors signify critical system failures.
- Driver Conflicts: The updated Windows version may inadvertently clash with existing drivers for hardware components like the graphics card, network adapter, or storage devices. This leads to malfunction.
- Update Corruption: During the update process, files can become corrupted, leading to a broken installation. That can freeze your system.
- Firmware Issues: In some cases, the update can interfere with the laptop's firmware, the low-level software that controls basic hardware functionality.
Identifying the Culprit: Pinpointing the Problematic Update
The first step in repairing your Dell laptop is to determine the specific Microsoft update that caused the issue. This can sometimes be tricky since the system may not boot to a functional desktop. However, a few clues can help:
- Timing: Consider when the problems began. Match the date and time with recent Windows updates. Check your update history.
- Error Codes: If you can access the BSOD, carefully note down the error codes displayed. These codes can be looked up online to provide insight into the root cause.
- Safe Mode: Attempt to boot into Safe Mode (described below). If successful, you may be able to identify and uninstall the problematic update through the update history.
Step-by-Step Fixes: Resurrecting Your Dell Laptop
Now, let's move on to the solutions. These steps are ordered, from least invasive to the more advanced. Always back up your critical data if possible. If your laptop is truly unresponsive, you may need external assistance, such as a repair shop.
1. The Safe Mode Gambit: A Gentle Reboot
Safe Mode is a diagnostic mode that starts Windows with a minimal set of drivers and services. This can allow you to access the system, even if the standard boot process fails.
- Accessing Safe Mode:
- While your Dell laptop is booting, repeatedly press the F8 key, the Shift + F8, or the Esc key. The correct key can vary depending on your Dell model, so experiment.
- If successful, you should see a boot menu. Select "Safe Mode" or "Safe Mode with Networking."
- Within Safe Mode:
- Uninstall Problematic Updates: Go to "Settings" > "Update & Security" > "View update history." Identify the recent update that caused the issue, and uninstall it.
- Driver Updates: If you suspect a driver conflict, try updating (or, if all else fails, rolling back) your graphics card, network adapter, or other crucial drivers. Visit the Dell support website to download the latest drivers for your specific model.
- System Restore: If uninstalling updates doesn't solve the problem, consider performing a system restore. This reverts your system to a previous working state. Search for "Create a restore point" in the Windows search bar and follow the instructions to restore.
2. Startup Repair: Automatic Fixes for Boot Issues
Windows includes a built-in Startup Repair tool that can automatically diagnose and fix common boot problems. Here's how to access it:
- Accessing Startup Repair:
- Start your Dell laptop. If it fails to boot into Windows after a few attempts, the system should automatically launch into the Windows Recovery Environment (WinRE). If this does not happen, you will need to force the system to enter the WinRE. To do this, restart your computer several times, interrupting the boot process each time to force the WinRE to load.
- Select "Troubleshoot" > "Advanced options" > "Startup Repair."
- The Process:
- Startup Repair will scan your system for issues and attempt to fix them automatically. This process can take some time.
- After the process is completed, restart your laptop.
3. System File Checker (SFC): Repairing Corrupted Files
Corrupted system files can prevent Windows from starting correctly. The System File Checker (SFC) is a command-line tool that can scan and repair these files.
- Accessing SFC:
- While in the Windows Recovery Environment (WinRE) (see step 2), select "Troubleshoot" > "Advanced options" > "Command Prompt".
- Running SFC:
- In the command prompt, type
sfc /scannowand press Enter. - The SFC tool will scan your system for corrupted files and attempt to repair them.
- After the scan is complete, restart your laptop.
- In the command prompt, type
4. DISM: The Advanced Repair Tool
The Deployment Image Servicing and Management (DISM) tool is a more powerful command-line utility that can be used to repair the Windows image.
- Using DISM:
- Within the command prompt as described above, use the following commands:
DISM /Online /Cleanup-Image /CheckHealth(checks for corruption)DISM /Online /Cleanup-Image /ScanHealth(scans for corruption)DISM /Online /Cleanup-Image /RestoreHealth(attempts to repair the Windows image)
- These commands can take considerable time to complete. Be patient.
- Restart your laptop after completion.
- Within the command prompt as described above, use the following commands:
5. Resetting Your PC: A Last Resort
If the previous steps fail, resetting your PC is an option. This process reinstalls Windows, either preserving your files or removing them.
- Accessing the Reset Options:
- In the Windows Recovery Environment (WinRE), select "Troubleshoot" > "Reset this PC."
- Choose Your Options:
- Choose between "Keep my files" (preserves your personal files) and "Remove everything" (removes all files). Choose the option wisely.
- Follow the on-screen instructions to complete the reset.
6. Clean Installation of Windows: The Ultimate Solution
If all else fails, a clean install of Windows is the most drastic, yet sometimes the most effective, way to resolve a "bricked" Dell laptop. This involves booting from a USB drive or a DVD containing the Windows installation files and completely reinstalling the operating system. This is the most invasive option, because it will remove all data from the computer.
- Creating a Bootable USB:
- Download the Windows installation media (ISO file) from Microsoft's website.
- Use the Windows Media Creation Tool or a third-party utility (like Rufus) to create a bootable USB drive.
- Booting from the USB:
- Insert the bootable USB into your Dell laptop.
- Restart your laptop and enter the BIOS setup (usually by pressing a key like F2 or Del during startup).
- Change the boot order to prioritize the USB drive.
- Save the BIOS settings and restart.
- Follow the on-screen instructions to install Windows.
Preventative Measures: Protecting Your Dell Laptop
Once you've successfully revived your Dell laptop, consider these preventative measures to minimize the risk of future issues:
- Delay Updates: Consider delaying Windows updates for a few days or a week after release to allow time for any potential bugs to be identified and addressed by Microsoft.
- Create System Restore Points: Regularly create system restore points. This will allow you to revert your system to a previous working state, should a problem arise.
- Keep Drivers Updated: While driver conflicts can cause problems, ensure your drivers are up-to-date. Use the Dell SupportAssist tool or visit the Dell support website to download and install the latest drivers for your specific model.
- Back Up Your Data: Regularly back up your important files to an external hard drive or cloud storage service. Doing this will save you valuable time and headaches if you need to reset your computer.
- **Antivirus/Mal
