cubase laptop audio driver not working

Title: How to Fix No Audio In Cubase Elements
Channel: JTUDA R
How to Fix No Audio In Cubase Elements by JTUDA R
Cubase Laptop Audio Driver Nightmare? FIX IT NOW!
Cubase Laptop Audio Driver Woes: Conquer the Chaos and Craft Your Sound!
Let's face it; you're here because the sweet promise of Cubase on your laptop has soured. Audio driver issues are a plague. They lurk in the shadows, ready to crash your creative flow. You're not alone in this battle. Many producers have faced this frustrating reality. But fear not, friend! We're diving deep to banish these sonic gremlins. We'll turn those headaches into head-bopping triumphs. Get ready to make music, not just wrestle with technology.
Decoding the Driver Drama: Understanding the Culprits
First, let's identify the usual suspects. Laptop audio drivers can be tricky. They are like volatile ingredients in a delicate recipe. Compatibility is your primary concern. Your ASIO driver, the key to low-latency audio, is often the problem. The type of audio interface also matters. It’s the translator between your laptop and the music you’re making. A mismatch causes crackling, dropouts, and the dreaded silence.
Consequently, your laptop’s built-in sound card may not cut it. It’s designed for everyday tasks. It wasn’t built for the demands of professional audio production. Also, conflicting drivers can further muddy the waters. You might have multiple audio drivers installed. They might be vying for control of your precious sound signal.
The ASIO Assassin: Taming the Audio Beast
ASIO drivers are your friends. They are the gatekeepers of low-latency audio. Initially, if you're using an external audio interface, make sure its ASIO driver is correctly installed. Visit the manufacturer's website. Download the latest driver available. Older drivers cause issues sometimes. Don't neglect this important step.
Moreover, within Cubase, select your audio interface as its ASIO driver. Go into the device setup. Choose the correct driver from the dropdown menu. Experiment with the buffer size settings. This is your crucial adjustment knob. Finally, a larger buffer size reduces the CPU load. Sadly, it increases latency. Smaller buffer sizes offer less latency, but they tax the CPU more. Therefore, try balancing performance and latency. The perfect setting depends on your laptop's power.
The Interface Inquisition: Diagnosing Your Hardware
Now, let's turn our attention to your external audio interface. This is the bridge between your instruments and your laptop. Firstly, check the USB or Thunderbolt connection. Make sure it's secure. Try using a different port on your laptop. Sometimes, the port itself is the issue. Also, make sure your interface has enough power. Some interfaces require external power. Finally, consider the interface's driver again. Ensure you have the most up-to-date version.
Furthermore, inspect your audio cables. Faulty cables introduce unwanted noise. They can also cause intermittent dropouts. Replace any suspect cables. Test them thoroughly. It might be a good idea to test different cables. Another valuable test is to use a different audio interface if possible. Consequently, this helps isolate the problem. It's a crucial move for troubleshooting.
Laptop Power Plays: Optimizing Your System for Audio
Your laptop's performance directly impacts audio stability. Battery settings can also introduce problems. Audio production needs consistent power. Therefore, disable any power-saving features. You can also set your power plan to maximum performance. This sacrifices battery life for processing power.
Next, close unnecessary applications. Background processes consume CPU resources. They steal precious power from Cubase. Then, disable your Wi-Fi and Bluetooth. These can sometimes interfere with audio performance. Consider defragging your hard drive. For older laptops, file fragmentation can slow down performance. In that case, regularly defragment is important.
Troubleshooting Tactics: The Art of the Fix
If you are still struggling, don't lose hope. Start by restarting Cubase. Sometimes, a fresh start clears up glitches. Try restarting your laptop. This updates the system. Furthermore, update Cubase to the latest version. Software updates often include bug fixes.
Review your Cubase project for strain. Complex projects with many tracks are taxing. Freeze tracks that are not being modified. Use audio instead of MIDI where possible. Finally, check your laptop's RAM and CPU usage. Overloaded systems struggle with audio processing.
Embrace the Sound: Reaching Audio Paradise
So, you've made it this far! You're now armed with the knowledge to conquer Cubase audio driver issues. You have the tools to diagnose and fix the problems. Moreover, you now know how to optimize your setup for peak performance. Therefore, it’s time to unleash your creativity! Listen to your music with newfound clarity. The digital domain is now your playground. Now go forth and create sonic masterpieces. Don't let technology stand between you. Go make some noise!
Intel Graphics Gaming: SHOCKING Truth About Laptop Performance!Cubase Laptop Audio Driver Nightmare? FIX IT NOW!
We’ve all been there. That moment of pure, unadulterated frustration when you fire up Cubase on your laptop, eager to unleash your musical genius, only to be met with…silence. Or, worse, a cacophony of crackles, pops, and dropouts that make your ears bleed. Yep, we’re talking about the dreaded Cubase laptop audio driver nightmare. It's a universal experience, a rite of passage for any aspiring producer, and frankly, a massive pain in the you-know-what. But fear not, fellow sonic explorers! We’re diving headfirst into this digital quagmire, armed with the knowledge and experience to get you back on track. Buckle up, because we’re about to diagnose and demolish those audio driver gremlins.
1. The Culprit: Understanding the Root of the Problem
Before we start frantically clicking buttons and downloading drivers, let's take a moment to understand why this is happening. Think of your laptop as a complex orchestra, and your audio drivers are the conductors. They're responsible for translating the digital music data from Cubase into audible soundwaves that your speakers or headphones can understand. On a laptop, these conductors are often… well, less than perfect. They might be outdated, conflicting with other software, or simply not optimized for the demands of professional audio production. It's like having a conductor who's constantly tripping over their music stand.
The core issue often boils down to latency. Latency is essentially the delay between when you play a note or trigger a sound in Cubase and when you actually hear it. The lower the latency, the faster the response, and the better your creative flow. High latency can make playing and recording feel sluggish and frustrating, like trying to play a rapid-fire game underwater.
2. Identifying the Enemy: Common Audio Driver Issues
So, what are the common suspects in this audio driver crime scene? Let's take a look at some usual offenders:
- Driver Conflicts: Other programs on your laptop might be vying for the same audio resources, causing conflicts. Think of it as a mosh pit of software fighting for attention.
- Outdated Drivers: Your laptop's built-in audio drivers are often not designed for the rigor of professional music production and can quickly become obsolete.
- ASIO Driver Inefficiencies: ASIO (Audio Stream Input/Output) drivers are specifically designed for low-latency audio on Windows. However, even they can sometimes misbehave or be improperly configured.
- Resource Hogging: Your CPU might be overworked, unable to allocate the necessary power to process audio signals smoothly. Imagine trying to bake a cake while simultaneously running a marathon. Exhausting!
- Incorrect Settings: Cubase settings can often be the source of problems, so you must configure them correctly.
3. Your Weapons of Choice: Essential Tools for the Fight
Before we dive headfirst into solutions, let's equip ourselves with the right weaponry. Here are the essential tools we'll need:
- Your Laptop: Obviously! And make sure it meets Cubase’s system requirements. I know, stating the obvious, but trust me, I’ve seen it all.
- Cubase (Duh!): Your digital audio workstation is the battleground.
- ASIO Driver: The most common and recommended driver for low latency audio on a PC. We’ll get into specifics soon.
- External Audio Interface (Recommended): These are invaluable! An external audio interface, like a Focusrite Scarlett, Presonus AudioBox, or similar, often comes with its ASIO drivers, and massively improves audio quality and latency. It can be a game-changer, like upgrading your sword from a toothpick to Excalibur.
- Patience (Most Important Weapon): Troubleshooting audio issues can be a process, and sometimes it's like untangling a massive ball of yarn. So deep breaths, and let's do this together.
4. Driver Detective Work: Diagnosing the Problem
Okay, now that we're armed and dangerous, it's time to Sherlock Holmes our way through this mystery. First, let’s examine the symptoms:
- Crackling, Popping, and Dropouts: This is the most common symptom of driver issues. Your audio is breaking up, and it sounds like a vinyl record with scratches.
- High Latency: A noticeable delay between when you play a note and when you hear it. It's like trying to play a game with lag.
- No Sound: You might have the perfect synth patch dialed in, the perfect drum groove playing in your mind, but silence is all you get.
- Cubase Crashing: The program might crash when you try to play audio or interact with certain plugins.
Once you’ve identified the symptoms, it’s time to narrow down the possibilities. Try the following:
- Restart Cubase and your Laptop: This is the simplest solution, and surprisingly, it often works. Sometimes a reboot is all that’s needed to clear up minor glitches.
- Test with Different Audio Sources: Try playing audio from other applications, like YouTube or Spotify. If the problem persists, the issue might be with your laptop's default audio settings. If it's isolated to Cubase, the problem is likely within Cubase or its drivers.
- Mute the Default Audio Output: Sometimes, disabling your built-in audio device will force Cubase to use other Audio Interfaces.
5. The ASIO Advantage: Optimizing Your Audio Driver
ASIO drivers are the golden standard for low-latency audio on Windows. They bypass the Windows audio mixer, giving Cubase direct access to your audio interface (or your laptop's sound card).
How to set up an ASIO driver within Cubase:
- Go to Devices > Device Setup.
- Select “VST Audio System.”
- Choose your ASIO driver from the “ASIO Driver” dropdown menu. If you have an external audio interface, select its specific ASIO driver.
- Click “Control Panel”: This will open the control panel for your ASIO driver, where you can adjust settings like buffer size.
6. Buffer Size: The Key to Low Latency (and Avoiding Problems)
The buffer size is a critical setting! Think of it as a temporary storage space for audio data. A smaller buffer size results in lower latency, but it demands more processing power from your CPU. A larger buffer size increases latency but reduces the processing load. The ideal buffer size depends on your system and the complexity of your project.
Experiment with the buffer size:
- Start with a larger buffer size (e.g., 512 or 1024 samples): If you're experiencing dropouts or CPU overload, increase the buffer size.
- Gradually decrease the buffer size: As you experience stability, try reducing the buffer size to get lower latency.
- Find the sweet spot: The goal is to find the lowest buffer size that your system can handle without dropouts or glitches. This is subjective and changes based on project complexity.
Remember: Lower latency is better for recording and playing live, but higher latency is often fine for mixing and editing.
7. External Audio Interfaces: Your Secret Weapon (If You Can Get One!)
If you’re even remotely serious about music production, an external audio interface is a near-essential piece of gear. This is a device that connects to your laptop via USB or Thunderbolt. They offer several benefits:
- Lower Latency: External interfaces often have dedicated ASIO drivers optimized for low latency.
- Improved Sound Quality: They have higher-quality preamps and converters, resulting in a much cleaner, more professional sound than your laptop’s built-in sound card.
- Multiple Inputs and Outputs: This allows you to connect microphones, instruments, and monitors.
- Dedicated Controls: You can often adjust gain levels, monitor volume, and switch between different outputs directly on the interface.
If you can swing it financially, they are well worth the investment.
8. CPU Consumption: Taming the Processing Beast
Unfortunately, many laptops are not designed for the heavy real-time audio processing required for Cubase. If your CPU is constantly maxed out, you'll experience stuttering, dropouts, and high latency. Here's how to optimize CPU usage:
- Freeze Tracks : Freezing complex tracks, rendering them audio, can sometimes temporarily reduce the CPU workload.
- Increase Buffer Size: As we discussed earlier, a larger buffer size reduces CPU load.
- Reduce Plugin Complexity: Some plugins are more CPU-intensive than others. Minimize the use of high-CPU plugins, like those with advanced reverb or complex modeling algorithms.
- Close Unnecessary Applications: Close any other programs that might be consuming CPU resources, like web browsers, video editors, or other DAW software.
- Optimize Your Cubase Project: Consolidate tracks where possible, and delete any unused audio files or plugins.
- Enable “ASIO Guard” (in Cubase): This setting helps protect your CPU by pre-calculating parts of the audio processing.
9. Driver Updates: Keeping Your Conductors in Top Shape
Just like any other piece of software, audio drivers need to be updated regularly. Outdated drivers can often lead
Laptop & Bluetooth Audio DEAD? FIX It NOW!Cubase Pro 13 how to enable sound in laptop PC Cubase Pro 13 no sound in laptop Headphone

By YHVH YHWH, Apha chini BUGRA Cubase Pro 13 how to enable sound in laptop PC Cubase Pro 13 no sound in laptop Headphone by YHVH YHWH, Apha chini BUGRA
Cubase How To plugin Asio4All Driver Lesson 29

By Sangeet Mania Cubase How To plugin Asio4All Driver Lesson 29 by Sangeet Mania
SOLUSI Recording Error ASIO driver is not working pada Cubase
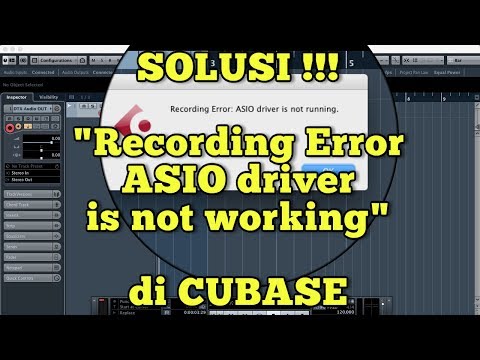
By ArtSonica SOLUSI Recording Error ASIO driver is not working pada Cubase by ArtSonica

Title: Cubase 14 audio device not showing in Audio Connections solved
Channel: Zoe Befree
Cubase 14 audio device not showing in Audio Connections solved by Zoe Befree
My Laptop Work
Cubase Laptop Audio Driver Nightmare? FIX IT NOW!
Navigating the labyrinth of digital audio production on a laptop can often feel like traversing a treacherous landscape. The promise of portability and creative freedom is frequently shadowed by the specter of audio driver issues. This article serves as your comprehensive guide, your lifeline, to conquering the Cubase laptop audio driver challenges that plague so many musicians and producers. We'll dissect the common culprits, offer laser-focused solutions, and equip you with the knowledge to transform frustration into fluid, uninterrupted creativity. Let's banish the "nightmare" and embrace the sonic possibilities that await.
Understanding the Root Causes: Why Are Audio Drivers Such a Headache?
The core of the problem lies in the intricate dance between hardware and software. Your laptop, a complex machine of components, relies on drivers to translate the signals of your audio interface, internal sound card, and other connected devices into something Cubase can understand and utilize. Conflicts, incompatibilities, and poorly optimized drivers often lead to dropouts, latency issues, distorted audio, and the dreaded blue screen of death. The good news? Most of these problems are fixable, and we're going to show you how.
Identifying the Culprit: Pinpointing Your Driver-Related Problems
Before launching into fixes, it's crucial to diagnose the specific issue. This saves time and ensures you're applying the most effective solutions.
Latency Issues: Are you experiencing a delay between a MIDI note being played and the sound being heard? This is a common symptom, and often points to buffer size settings and driver optimization.
Audio Dropouts (Clicks, Pops, and Stuttering): Intermittent or consistent breaks in audio playback are a clear indication of driver conflicts, insufficient CPU resources, or improper buffer configurations.
Device Not Recognized: Cubase failing to detect your audio interface is a frequent frustration. This can stem from driver installation errors, USB port issues, or conflicts with other hardware.
Distorted Audio: Sounds warped or corrupted? This usually indicates a problem with the sample rate, buffer settings, or possibly a hardware fault.
Blue Screen of Death (BSOD): While rarer, a BSOD during audio playback can be a sign of a serious driver conflict.
Performance Issues: If your CPU is maxing out or struggling under load, this could also suggest driver optimization issues or the result of a bad audio driver.
Step 1: The USB Conundrum – Ensuring a Stable Connection
A shaky USB connection is the bane of many audio production setups. Let’s look at how to stabilize this crucial link.
USB Port Selection: Avoid using USB hubs. Plug your audio interface directly into a USB 2.0 or USB 3.0 port on your laptop. USB 3.0 ports are generally preferable, offering better bandwidth.
Power Management: Disable USB power-saving features in Windows that might be interfering with audio performance. Go to Device Manager, find your audio interface, right-click, go to Properties > Power Management, and uncheck "Allow the computer to turn off this device to save power."
USB Cable Quality: Use a high-quality, shielded USB cable. Cheap or damaged cables can introduce noise and instability.
USB Driver Updates: Ensure your USB controllers have the latest drivers from your laptop manufacturer.
Step 2: Driver Installation – The Foundation of a Smooth Workflow
Proper driver installation is paramount.
Download the Correct Driver: Always download the latest ASIO driver (or the driver specifically designed for your audio interface) from the manufacturer's website. Avoid using generic drivers.
Clean Installation: Remove any previous audio interface drivers before installing the new ones. A clean install reduces conflicts.
Administrator Privileges: Run the driver installer as an administrator.
Reboot: Restart your computer after the driver installation to ensure the changes are fully implemented.
Step 3: Optimizing Cubase Audio Settings – Fine-Tuning Your Performance
Once the drivers are installed, it’s time to configure Cubase.
Device Setup: Open Cubase and go to Studio > Studio Setup. Select your audio interface. Ensure the driver type is set to ASIO (the industry-standard for low-latency audio).
ASIO Control Panel: Click on the Control Panel button (usually located next to your audio interface selection). Access the interface's ASIO control panel – this is where you’ll adjust core buffer settings.
Buffer Size is King: This is the single most critical setting for latency. Start by increasing the buffer size to 512 samples or 1024 samples. Gradually decrease it (e.g., to 256, then 128, then 64) until you achieve acceptable latency without dropouts or pops. Trade-off: lower buffer size = lower latency, but higher demands on your CPU.
Sample Rate: Match the sample rate of your Cubase project to the supported sample rate of your audio interface. Using a consistent sample rate between the project and the interface minimizes potential issues. Typical rates are 44.1 kHz, 48 kHz, 88.2 kHz, 96 kHz, 176.4 kHz, and 192 kHz.
Processing Precision: Set the processing precision to the maximum available in your Cubase preferences (e.g., 32-bit float).
Step 4: System-Wide Optimization – Smoothing Out the Road
Beyond Cubase settings, laptop configuration plays a vital role.
Disable Unnecessary Background Processes: Close applications that consume CPU resources like web browsers, email clients, and any other programs you don’t need for your music production session.
Background Services: In Windows, type "services" in the search bar and open the Services app. Disable unnecessary services, such as Windows Search, Superfetch, and other potentially resource-intensive processes. Be cautious – only disable services you understand.
Power Plan: High Performance: Select the "High Performance" power plan in Windows settings. This ensures your laptop operates at its full potential, crucial for real-time audio processing. Go into Power Options, and choose High Performance.
Disable Wi-Fi and Bluetooth (if possible): These can sometimes interfere with audio performance, particularly on certain laptops.
Disk Optimization: Defragment your hard drive regularly, especially if you are using a traditional HDD. SSDs don't require defragmentation. This minimizes disk access times, which is especially critical when dealing with large sample libraries.
CPU Throttling: Some laptops may throttle the CPU's performance under heavy load to prevent overheating. Ensure your laptop has adequate cooling or consider undervolting your CPU (advanced users).
Step 5: Troubleshooting Advanced Problems and Conflicts
If the above steps don’t resolve your issues, then deeper investigation is required.
Driver Conflicts: Use the "Device Manager" (accessed by typing "Device Manager" in Windows search) to identify potential driver conflicts. Look for yellow exclamation marks next to devices. Try updating those drivers or disabling conflicting devices.
Audio Interface Firmware: Check your audio interface manufacturer's website for firmware updates. Outdated firmware can sometimes cause issues.
Monitor CPU and RAM Usage: Use the Task Manager (Ctrl+Shift+Esc) to monitor CPU and RAM usage during playback. Identify any plugins or tracks overloading your system.
Plugin Conflicts: Suspect a plugin? Try temporarily removing or replacing plugins to isolate whether a particular plugin is the culprit. Sometimes, older or poorly coded plugins can hog CPU resources or cause instability.
External Hard Drives: Use a dedicated external hard drive for your audio files and sample libraries. The internal laptop hard drive can become a bottleneck during production. Ensure it is connected via USB 3.0 or Thunderbolt for optimal speed.
BIOS Update: Although rarer, outdated BIOS can sometimes cause compatibility issues. If everything else fails, consider updating your laptop's BIOS (be extremely careful, and follow the manufacturer’s instructions precisely).
Contact Support: If you've exhausted all other options, contact the technical support of your audio interface manufacturer and Steinberg (Cubase). They can offer specific advice for your hardware.
Step 6: Pro Tips for a Seamless Workflow
- Regular Backups: Back up your Cubase projects regularly to avoid data loss.
- Stay Updated (But Be Cautious): Keep your operating system, Cubase, and plugins updated, but always test updates thoroughly before using them on critical projects.
- Use a Thunderbolt or USB-C Audio Interface (if available): These interfaces often provide more bandwidth and faster data transfer compared to standard USB 2.0.
- Monitor Temperatures: Keep an eye on your laptop's CPU and GPU temperatures, especially if you're running demanding plugins. Overheating can lead to performance issues and instability.
- Reduce Track Count: If you are struggling with high CPU usage, try grouping multiple tracks into buses or using auxiliary sends and returns to simplify your project.
Conclusion: Transform Your Audio Driver Struggles into Creative Triumph
By systematically addressing the root causes of Cubase laptop audio driver problems, you can regain control over your production workflow. Implement these solutions, follow these guidelines, and transform your laptop from a source of frustration into a powerhouse of sonic innovation. Enjoy the creative freedom you deserve.
