spacebar key not working in dell laptop

Title: How To Fix Replace Keyboard Key - Dell Laptop Enter Space Backspace Shift Large Key
Channel: PC Monkey
How To Fix Replace Keyboard Key - Dell Laptop Enter Space Backspace Shift Large Key by PC Monkey
spacebar key not working in dell laptop, space bar not working on dell laptop, why are some keys in my laptop not working, spacebar key not working in hp laptop, how to fix spacebar on dell laptop keyboard
Dell Laptop Spacebar Dying? This SHOCKING Fix Works!
Dell Laptop Spacebar Blues? Reclaim Your Typing Bliss!
Have you ever wrestled with a sticky, unresponsive spacebar on your Dell laptop? It's a frustrating experience, isn't it? Suddenly, composing emails or writing documents becomes a chore. It can cripple your workflow and test your patience. Moreover, it feels like a minor annoyance that quickly escalates into a significant problem.
Identifying the Spacebar Culprit: Is It Really Dying?
Before you panic, let’s assess the situation. Is your spacebar completely kaput, or is it just acting up occasionally? Does it require a forceful press to register? First, observe the behavior of the spacebar closely. Then, there are certain telltale signs that point to a potential issue. For instance, a spacebar that consistently fails to register, or one that is consistently double-spacing, indicates a problem. It's also important to note any physical changes, such as the spacebar feeling "mushy" or loose.
Dust Bunnies and Debris: The Usual Suspects
Often, the culprit isn’t a dying component. Instead, it’s everyday grime. Dust, crumbs, and other tiny particles can accumulate beneath the spacebar. Eventually, these invaders disrupt its smooth operation. These unwelcome guests obstruct the mechanical workings. As a result, they prevent the spacebar from making reliable contact.
A Surprisingly Simple Solution: The Cleaning Crusade
Fortunately, there's a straightforward fix. You don’t need to dismantle your entire laptop. So what is it? Grab some basic cleaning supplies and prepare for a cleaning crusade! Now, let's get started.
Gather Your Arsenal: The Essential Tools
First, you’ll need a can of compressed air. These cans are readily available at most electronics stores. Next, find a small, soft-bristled brush. You can utilize a toothbrush or a specialized keyboard cleaning brush. Furthermore, consider a microfiber cloth for delicate wiping. You might also need a toothpick or a thin piece of plastic. These can help dislodge stubborn debris.
The Cleaning Process: A Step-by-Step Guide
First, power down your Dell laptop. Then, position the laptop to minimize dust accumulation. Next, tip your laptop at an angle. Gently blow compressed air under and around the spacebar. Direct short bursts of air, targeting the edges and center of the key. After that, use your brush to gently sweep around the spacebar. These actions should help to loosen any trapped particles. If necessary, utilize the toothpick or thin plastic to gently pry up the edges. Be very careful not to apply too much force. Now, repeat the compressed air process, aiming to clear out any remaining debris. Finally, wipe the area around the spacebar with your microfiber cloth.
Beyond Cleaning: Troubleshooting Deeper Issues
If cleaning doesn't resolve the problem, further investigation is warranted. Try other potential solutions. For example, check your keyboard settings. Furthermore, ensure that Sticky Keys and Filter Keys are disabled. Also, inspect for any liquid spills. Sometimes, spilled liquids can damage the internal mechanisms. In such cases, professional repair might be necessary.
Hardware Hurdles: When to Call for Backup
Sometimes, the problem surpasses simple cleaning. If your spacebar remains unresponsive after cleaning, a hardware issue might exist. A spring could be broken. The keycap itself might be damaged. The switch beneath the spacebar could be faulty. In these scenarios, consider reaching out to Dell's support team. Contacting a qualified repair technician is also a viable option. They can diagnose and fix the issue efficiently.
Prevention is Key: Maintaining Your Keyboard's Health
After you've resolved the spacebar issue, remember the preventative measures. Regularly cleaning your keyboard can help. This includes dusting and wiping it down. Refrain from eating or drinking near your laptop. If you tend to spill something, consider getting a keyboard cover. This offers protection against spills and crumbs.
Reclaiming Your Typing Proficiency: A Happy Ending
Ultimately, a malfunctioning spacebar is a common nuisance. Fortunately, a simple cleaning routine can often restore functionality. So, armed with the right knowledge and a few basic tools, you can conquer this common Dell laptop problem. You'll be back to typing smoothly in no time. Now, go forth and reclaim your typing proficiency!
This Gaming Laptop Secretly Crushes Work!Dell Laptop Spacebar Dying? This SHOCKING Fix Works!
Hey there, weary Dell laptop user! Is your spacebar acting up? Does it feel like it’s decided to go on a permanent vacation, leaving you to painstakingly tap your way through sentences like a digital woodpecker? Trust me, we get it. We’ve all been there. That sticky, unresponsive spacebar can be the bane of a laptop user's existence, turning simple tasks into frustrating endurance tests. But before you resign yourself to the expense and hassle of a new keyboard or, shudders, a whole new laptop, take a deep breath. Because what we're about to share with you might just save the day (and your sanity!).
1. The Spacebar Saga: Why Does This Happen?
Let’s face it, the spacebar is a workhorse. It’s hammered constantly, taking more abuse than the other keys combined. Dust, crumbs, and the general wear and tear of everyday life all conspire against it. Think of it like the engine of a car – constantly under pressure, eventually needing some maintenance. The most common culprits?
- Dust and Debris: Tiny particles of everything from your morning coffee to that rogue Cheerio can wedge themselves under the keycap, gumming up the works.
- Sticky Substances: Sugary spills are the enemy. Think juice, soda, or even that seemingly innocent dollop of honey. They dry and create a sticky residue that hinders movement.
- Mechanical Failure: Sometimes, the internal mechanism of the spacebar itself – its stabilizers and the rubber dome beneath – simply wears out or breaks.
2. Don't Panic! Your Spacebar Isn't Doomed (Yet)
Before you start mentally budgeting for a new keyboard, understand that in many cases, the issue is completely fixable. We're talking about solutions that can take you from keyboard despair to typing bliss in a matter of minutes (seriously!). It's like the difference between a minor car tune-up and a full engine rebuild – often, a quick adjustment is all you need.
3. The Tools of the Trade: What You'll Need
Luckily, the fix is usually straightforward, and you probably have most of the necessary tools lying around the house. Here's your toolkit:
- A Small, Flat-Head Screwdriver or Plastic Pry Tool: Essential for gently prying off the keycap.
- Isopropyl Alcohol (90% or higher): Your cleaning agent of choice. It evaporates quickly and is gentle on electronics.
- Cotton Swabs or a Soft Cloth: For applying and wiping away the alcohol.
- Compressed Air: To blast away stubborn debris.
- A Clean Workspace: Trust us, you don't want to be fishing for tiny keycap pieces in a cluttered environment.
- Optional: Tweezers: For grabbing and manipulating tiny parts.
4. Step-by-Step: The Shocking Fix That Works!
Alright, let's get down to business. Follow these steps, and you'll be back to smooth typing in no time:
- Power Down and Unplug: Safety first! Turn off your Dell laptop and unplug it from the power source.
- Remove the Spacebar Keycap: This is the trickiest part, but don't worry, it's not as hard as it seems. Gently insert the flat-head screwdriver (or pry tool) under the edge of the spacebar and carefully pry it upwards. The keycap should pop off. If you're nervous or unsure, there are plenty of videos online showing this process for various Dell laptop models.
- Inspect and Clean: Once the keycap is off, take a good look at the underlying mechanism. You'll likely see a rubber dome (the thing that actuates the key) and two metal stabilizers. Use your compressed air to blow away any loose debris.
- Alcohol Intervention: Dampen a cotton swab or a corner of your soft cloth with isopropyl alcohol. Don't soak the cotton swab – you just want it slightly damp. Carefully clean around the rubber dome and the stabilizers. Try to get in all the nooks and crannies where gunk might be hiding.
- Dry Time: Let the alcohol evaporate completely. This usually takes only a few seconds. You should see the cleaned components sparkling.
- Reattach the Spacebar: Carefully align the keycap with the mechanism and press down firmly until it snaps back into place. You should feel a satisfying click.
- Test and Celebrate: Power up your laptop and test that spacebar! If it works, give yourself a high five. If not, repeat the process (sometimes it takes a couple of tries to get it just right.)
5. Beyond the Basic Clean: Deeper Dive
Sometimes, a simple cleaning isn't enough. If your spacebar is still feeling sluggish, you might need to delve a little deeper. This is where things get a tiny bit more complex, but still manageable.
- Stabilizer Issues: If the stabilizers (those metal bars) are bent or broken, you might need to replace them. This can be a little fiddly, but replacement stabilizer kits are readily available online.
- Rubber Dome Problems: The rubber dome itself might be worn out. Replacing the entire keyboard might be an option at this stage, or you may want to seek professional help.
6. Prevention is Key: Stop the Spacebar Blues
Like any good relationship, the best way to keep your spacebar happy is to take good care of it. Implement these preventative measures:
- Regular Cleaning: Wipe down your keyboard regularly with a damp cloth to prevent dust and debris buildup.
- No Food or Drinks: Avoid eating or drinking near your laptop. Accidents happen!
- Keyboard Cover: Consider using a keyboard cover to protect your keys from spills and debris.
- Gentle Touch: Avoid hammering on the keys.
7. Model-Specific Considerations: Every Dell is Unique!
Dell laptops come in various models, and the keyboard designs can differ slightly. Before you start the cleaning process, it's a good idea to quickly search online for instructions specific to your Dell model. This will help you avoid any unexpected surprises during keycap removal. Search "How to remove spacebar keycap Dell [your model number]"
8. Troubleshooting: When Things Go Wrong
Sometimes, even with the best intentions, things don't go smoothly. Here's what to do if you run into trouble:
- Keycap Won't Come Off: Be patient and apply gentle pressure. If it's still stuck, double-check that you're using the correct method for your Dell model.
- Keycap Breaks: Don't panic! Replacement keycaps are easily found online.
- Spacebar Still Not Working: Repeat the cleaning process, paying extra attention to any sticky residue. If it persists, it's time to consider a more in-depth inspection.
9. The Joy of Typing: Why a Good Spacebar Matters
We take a working spacebar for granted. The difference between frustration and ease makes your daily work better. This simple fix can have a huge impact on your productivity and enjoyment.
10. DIY vs. Professional Help: Knowing When to Call in the Cavalry
While we're all about empowering you to tackle the problem yourself, there are times when professional assistance is the best option:
- Warranty Coverage: Check if your Dell laptop is still under warranty. If so, a professional repair is likely covered.
- Complex Damage: If you suspect serious mechanical damage (broken stabilizers or a faulty rubber dome), it's probably best to consult a technician.
- Beyond Your Comfort Zone: If you're not comfortable handling the repair yourself, don't hesitate to seek professional help.
11. Avoid These Common Mistakes
Avoid these common mistakes to ensure a successful spacebar repair:
- Using the Wrong Cleaning Agents: Avoid harsh chemicals or excessive water, as they can damage your keyboard.
- Forcing the Keycap: If a keycap won't budge, don't force it. You could break it.
- Losing Small Parts: Keep track of all the components you remove.
12. Finding Replacement Parts: The Digital Marketplace
If you need replacement parts, the internet is your friend:
- Amazon: Amazon offers keycaps, stabilizers, and even keyboards in various price ranges.
- eBay: You can find used, new, and refurbished parts, often at a lower cost.
- Dell's Website: Dell itself might stock replacement parts for some models.
13. Before You Throw in the Towel: Last-Ditch Efforts
Even after a thorough cleaning, if your spacebar is still being stubborn, try these last-ditch efforts:
- Software Conflicts: Sometimes, software conflicts can affect keyboard behavior. Try restarting your laptop in Safe Mode to see if the issue persists.
- Driver Issues: Update your keyboard drivers.
- External Keyboard Test: Connect an external keyboard to see if the problem is with the laptop itself.
14. The Satisfaction of Self-Repair: A Victory for the DIYer
Successfully fixing your spacebar is a gratifying experience. You save money, learn something new, and avoid the hassle of sending your laptop for repair.
HP DV6 Fingerprint Reader DEAD? FIX It NOW! (Easy Steps!)Backspace key is not working on your Laptop

By Facts Backspace key is not working on your Laptop by Facts
How to repair replace the spacebar for most Microsoft Notebook Keyboards here Surface Book 1

By apfeltasten How to repair replace the spacebar for most Microsoft Notebook Keyboards here Surface Book 1 by apfeltasten
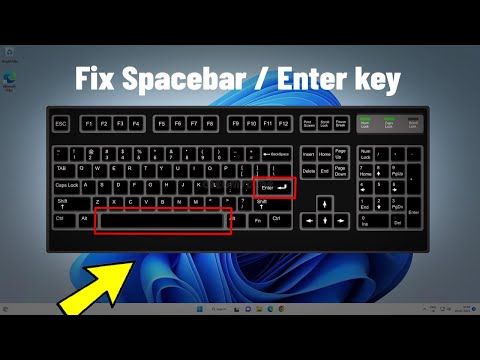
Fix Spacebar Or Enter key Not Working in Windows 11 10 How To Solve space bar enter Button
By Victor Explains Fix Spacebar Or Enter key Not Working in Windows 11 10 How To Solve space bar enter Button by Victor Explains

Title: Spacebar or Enter Key is Not Working Windows 1110 FIX Guide
Channel: MDTechVideos
Spacebar or Enter Key is Not Working Windows 1110 FIX Guide by MDTechVideos
Laptop Working
Dell Laptop Spacebar Dying? This SHOCKING Fix Works!
Have you ever been in the middle of composing a crucial email, drafting a compelling report, or even just casually chatting with friends, only to be abruptly stopped by the frustrating silence of a non-responsive spacebar on your Dell laptop? The sinking feeling that accompanies this technical hiccup is all too familiar. The spacebar, the unassuming workhorse of your keyboard, suddenly refuses to cooperate, and your productivity screeches to a halt. But before you resign yourself to the expense and inconvenience of a laptop repair or, worse, a complete replacement, take a deep breath. We’re here to provide a solution, a fix that has worked wonders for countless Dell laptop owners, and, dare we say, it's almost shockingly simple.
Identifying the Culprit: Why Your Dell Laptop Spacebar Acts Up
Before diving into the remedy, it's important to understand the potential causes of a malfunctioning spacebar. While the underlying mechanisms can vary slightly depending on the specific Dell laptop model, some common culprits include:
Dust and Debris Buildup: The spacebar, being the largest and most frequently used key, is particularly susceptible to accumulating dust, crumbs, and other microscopic particles. These insidious invaders can obstruct the key's proper mechanical function, leading to intermittent or complete failure.
Mechanical Wear and Tear: With constant use, the internal mechanisms of the spacebar, including the stabilizers and the rubber dome beneath the keycap, can degrade over time. This wear and tear can result in a reduction in responsiveness or even a complete inability to register keystrokes.
Liquid Damage (Even Minimal): Accidental spills, even seemingly minor ones, can wreak havoc on laptop keyboards. Liquids can corrode the delicate circuitry beneath the keys, causing shorts and malfunctions.
Software Glitches: Although less common, software conflicts or driver issues can occasionally interfere with keyboard functionality, including the spacebar.
The SHOCKINGLY Simple Solution: A Deep Clean is the Key
The most effective and often surprisingly successful fix for a dying Dell laptop spacebar is a thorough and meticulous cleaning. This process can eliminate dust, debris, and other impediments that are preventing the spacebar from working correctly. Here’s how to do it:
Step 1: Gather Your Arsenal
You'll need a few essential tools for this mission:
- Compressed Air: This is your primary weapon against dust and debris. A can of compressed air with a precision nozzle will allow you to direct a powerful stream of air into the crevices around the spacebar.
- Soft-Bristled Brush: A small, soft-bristled brush, like a clean toothbrush or a specialized keyboard brush, will help dislodge stubborn particles.
- Microfiber Cloth: A microfiber cloth is ideal for wiping down the keycap and surrounding area.
- Isopropyl Alcohol (Optional): If you suspect liquid damage or want to be extra thorough, a small amount of isopropyl alcohol (isopropyl alcohol of at least 70% concentration) can be used to clean the keycap and the area around it. Be very careful when using it, as excess liquid can cause more problems.
- Keycap Puller Tool (Highly Recommended): A keycap puller facilitates safe removal of the spacebar for enhanced cleaning. These are inexpensive and widely available.
- Patience: This is crucial. Be methodical and take the time to do it right.
Step 2: Power Down and Unplug
Before you begin any cleaning, it's imperative to power down your Dell laptop completely and unplug it from any power source. This will minimize the risk of electrical shocks and prevent accidental damage.
Step 3: The Air Assault
With the laptop powered off and unplugged, begin by using the compressed air. Hold the nozzle close to the spacebar and direct short bursts of air into the gaps between the keycap and the surrounding frame. Angle the nozzle from different directions to ensure you reach all areas. Focus especially on the edges of the keycap, where dust and debris tend to accumulate.
Step 4: The Brushing Technique
Next, use the soft-bristled brush. Gently brush around the edges of the spacebar and between the keys to dislodge any remaining particles. Avoid applying excessive pressure, as this could potentially damage the keycap or surrounding components.
Step 5: The Keycap Removal (Recommended, but Optional)
For a truly comprehensive clean, consider removing the spacebar keycap. This will allow you to access the underlying mechanisms and thoroughly clean any debris buildup. Use a keycap puller tool to gently pry the spacebar from its base. Insert the tool under the edges of the spacebar and carefully apply upward pressure. There may be small plastic clips or stabilizers underneath the keycap. Take a picture before you remove the keycap to see the arrangement of these small components.
Step 6: Deep Cleaning the Underbelly (With Keycap Removed)
Once the keycap is removed, use the compressed air and brush to clean the area beneath the spacebar. Pay close attention to the rubber dome and the stabilizers. These components are essential for the key's smooth operation. Gently wipe these components with a damp microfiber cloth if necessary. If there is residue, you can use a cotton swab dipped in isopropyl alcohol (ensure it’s nearly dry) to wipe the underside of the keycap.
Step 7: Reassembly and Testing
After cleaning, if you removed the keycap, carefully snap it back into place. Align the keycap with its base and press firmly until it clicks into place. Turn your Dell laptop back on and test the spacebar. Type in a text editor or a search bar and assess if the issue persists.
Beyond the Clean: Additional Troubleshooting Tips
If the cleaning process doesn't fully resolve the spacebar issue, consider these additional troubleshooting steps:
- Restart Your Dell Laptop: A simple restart can sometimes resolve minor software glitches that might be interfering with keyboard function.
- Update Keyboard Drivers: Outdated or corrupted keyboard drivers could be contributing to the problem. Visit the Dell support website, enter your service tag, and download/install the latest drivers for your laptop model.
- Run a Hardware Diagnostic Test: Dell laptops typically have built-in hardware diagnostic tools. Access this tool (usually by pressing a specific key during startup) and run a keyboard test to identify any underlying hardware issues.
- External Keyboard Test: Connect an external USB keyboard to your Dell laptop. If the external keyboard works correctly, this further indicates a problem with your laptop's built-in keyboard.
- Check Sticky Keys Settings: Ensure that the Sticky Keys feature is disabled. This feature can sometimes interfere with keyboard functionality.
When to Call for Professional Help
While the deep cleaning method often yields positive results, there are instances where the problem may be more complex. If the spacebar continues to malfunction after attempting the above steps, it might be time to seek professional assistance. Consider contacting a Dell-certified technician or a reputable laptop repair service.
Signs that professional help is necessary:
- Liquid Damage is Extensive: If you suspect significant liquid damage, avoid attempting to repair the keyboard yourself. Liquid can cause corrosion and other damage that requires specialized expertise.
- Hardware Failure: If the spacebar exhibits signs of mechanical failure, such as a broken stabilizer or rubber dome, a replacement keyboard component might be required.
- Persistent Problems: If the spacebar issues persist despite cleaning and other troubleshooting steps, it's likely that a more in-depth diagnosis and repair are needed.
- Other Keys Are Also Malfunctioning: If multiple keys on your keyboard are malfunctioning, it indicates a potentially more severe problem that warrants professional attention.
Protecting Your Dell Laptop Spacebar in the Future
Preventative measures can go a long way in prolonging the life of your Dell laptop's spacebar. Consider these tips:
- Regular Cleaning: Make it a habit to regularly clean your keyboard. A quick wipe-down with a microfiber cloth and a burst of compressed air can help prevent dust and debris buildup.
- Keyboard Cover: Using a keyboard cover can provide an extra layer of protection against spills, dust, and other contaminants.
- Avoid Eating and Drinking Near Your Laptop: This is a simple, yet highly effective, preventative measure.
- Gentle Key Pressing: Avoid excessive force when pressing the spacebar or other keys.
The malfunctioning spacebar on your Dell laptop can be a significant inconvenience, but it doesn't necessarily indicate a catastrophic hardware failure. By following the detailed cleaning procedure outlined above and implementing preventative measures, you can often restore your spacebar to its former glory and extend the life of your laptop. Remember, patience and a methodical approach are key to success. Now, go forth and reclaim your spacebar!
