keyboard not working dell laptop

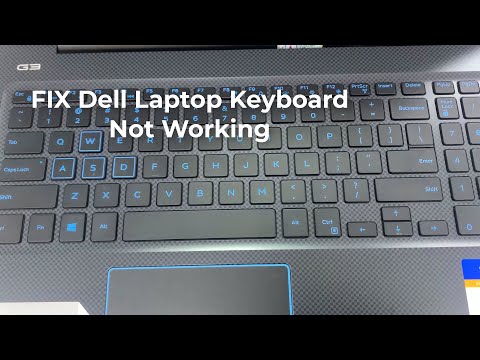
Title: FIX Dell Keyboard Not Working Windows 10 Dell Inspiron 15 3501
Channel: Cap Trong Nam - How To
FIX Dell Keyboard Not Working Windows 10 Dell Inspiron 15 3501 by Cap Trong Nam - How To
keyboard not working dell laptop, keys not working dell laptop, keyboard not working dell inspiron 15, keyboard not working on dell laptop windows 11, keyboard light not working dell laptop, keyboard backlight not working dell laptop, qweruiop keys not working dell laptop, function keys not working dell laptop, 1qaz keys not working dell laptop, arrow keys not working dell laptop
Dell Laptop Keyboard Disaster: I Fixed It! (You Can Too!)
Dell Laptop Keyboard Calamity: My Redemption Story (And How You Can Achieve It!)
My Dell laptop and I have a complex relationship. Honestly, it’s been a roller coaster of productivity and frustration. The keyboard, a vital component, decided to stage a revolt. Suddenly, several keys stopped registering my keystrokes. Therefore, I was staring down the barrel of a major problem. I was facing a keyboard crisis.
The Initial Panic: Facing the Silent Keys
Initially, a wave of panic washed over me. Losing access to essential keys made my work nearly impossible. I rely on my laptop daily for everything. The absence of a functional keyboard felt like a digital amputation. However, I refused to surrender to this technical setback. I needed to find a solution, and fast.
Troubleshooting Tactics: A Deep Dive into Diagnostics
First, I tried the obvious. I restarted the laptop, hoping for a temporary fix. Sadly, the keys remained stubbornly silent. Next, I delved into the Dell support website. I tried their recommended troubleshooting steps. I updated drivers, hoping to resolve the issue. Surprisingly, nothing changed, despite all my efforts. So, I knew a more involved approach was necessary.
The DIY Approach: Dissecting the Beast
Eventually, I knew I had to take matters into my own hands. I decided to embrace my inner tech guru. Admittedly, I'm not a hardware expert. Nonetheless, I was determined. I researched online tutorials and videos. I gathered the necessary tools, including a small screwdriver set. Then, with a sense of trepidation, I began the disassembly process.
The Keyboard's Inner Workings: Unveiling the Mechanism
The process was surprisingly straightforward. Gently, I removed the screws securing the keyboard bezel. After that, I carefully detached the keyboard ribbon cable. It's a delicate operation, so I took my time. I carefully examined the keyboard's internal components. Dust and debris had accumulated. Fortunately, it wasn’t a complete disaster.
A Closer Inspection: Identifying the Culprit
On closer inspection, I identified the problematic keys. Some keys appeared to be sticking. Others showed signs of accumulated grime. The culprits were clear. The grime had infiltrated the key mechanisms. It was causing them to malfunction. So, I formulated a plan.
The Cleaning Crusade: Restoring Functionality
Armed with isopropyl alcohol and a cotton swab, I began the cleaning process. I carefully cleaned each key switch. I removed any obstructions I found. It was a tedious task, but the potential reward was worth it. After meticulous attention to detail, I reassembled the keyboard.
Reassembly and the Moment of Truth: Will It Work?
The reassembly phase was just as delicate as the disassembly. I carefully reconnected the ribbon cable. Then, I replaced the screws. With bated breath, I powered up my Dell laptop. The moment of truth had arrived.
Success! The Keys Sing Again
The moment I saw the login screen, I knew. I typed test sentences. The keys functioned flawlessly! A wave of relief washed over me. The keyboard was alive again! The satisfaction of fixing the problem myself was immense.
Lessons Learned: Embracing DIY Repair
This experience taught me valuable lessons. First, taking the time to troubleshoot can save time and money. Secondly, don't be afraid to delve into DIY repairs. Online resources can be invaluable guides. Also, the satisfaction of fixing something yourself is immeasurable.
You Can Do It Too: Practical Advice and Tips
If you're facing a similar keyboard issue, don’t panic. Gather your tools. Research the steps. Watch video tutorials. Take your time and be gentle. With patience and persistence, you can likely revive your keyboard too. You will be surprised at how simple it can be.
Conclusion: Thriving Beyond the Keyboard Crisis
My Dell laptop keyboard crisis had a happy ending. I now have a fully functioning laptop. Moreover, I gained a newfound appreciation for DIY repairs. More importantly, learning to fix it gave me confidence. I hope my experience inspires you. Remember, you can overcome tech challenges, too! Embrace the challenge, and you'll succeed.
Lenovo Laptop Mic Dead? This SHOCKING Fix WORKS!Dell Laptop Keyboard Disaster: I Fixed It! (You Can Too!)
Let's be honest, there's a special kind of dread that washes over you when your laptop keyboard starts acting up. For me, it was a Dell. Picture this: I’m in the middle of a crucial project, deadlines looming, and suddenly – poof – the "E" key decides it's on permanent vacation. Or maybe it's a key that types a random series of numbers and letters. Pure, unadulterated panic! It’s like your trusty steed suddenly morphs into a stubborn donkey in the middle of a race. We've all been there, haven't we? Well, buckle up, buttercups, because I'm about to share my keyboard-saving saga. And trust me, if I can fix it, so can you!
The Keyboard Calamity Unfolds: My Dell Nightmare Begins
It started subtly. A missed keystroke here, a sticky key there. I brushed it off, assuming I’d spilled something (which, let's face it, is a distinct possibility considering my desk is a culinary battlefield). But then, the symptoms worsened. Complete letters vanished, random characters materialized like digital poltergeists, and my productivity plummeted faster than a lead balloon. My Dell laptop keyboard, once a reliable friend, had become a treacherous enemy. Frustration mounted like a pressure cooker set to explode.
Diagnosing the Digital Disease: What Went Wrong?
Before diving into a fix, we need to understand the enemy. The keyboard on a laptop is a complex beast, but the common culprits behind these keyboard woes usually boil down to one of a few things. It's like trying to figure out why your car won't start:
- Dust Bunnies and Debris: The most common offender. Tiny crumbs, dust particles, and pet hair can sneak their way under the keys and wreak havoc. It’s like trying to run a marathon with a pebble in your shoe – incredibly frustrating.
- Spilled Liquids: Liquids are the keyboard's worst enemy. Coffee, soda, even water can seep in, causing corrosion and electrical shorts. Think of it as a digital drowning.
- Software Glitches: Sometimes, the problem isn’t physical. Corrupted drivers or conflicting software can also mess with your keyboard's functionality. It's like an invisible gremlin messing with your code.
- Physical Damage: Dropping your laptop or using it harshly can damage the keyboard's internal components. Unfortunately, sometimes the problem is not easily fixed.
Troubleshooting 101: First Aid for Your Keyboard
Before you start dismantling your entire laptop (which, let's be honest, sounds intimidating), let's try some basic troubleshooting. These are the equivalent of putting a band-aid on a paper cut.
- Restart Your Laptop: Sounds simplistic, but often the easiest solutions are the best. A simple restart can resolve temporary software glitches. Consider this your keyboard's "reset button."
- Update Your Drivers: Outdated drivers are a common cause of keyboard problems. Navigate to your device manager and update your keyboard drivers. Think of it as giving your keyboard a software tune-up.
- Run a Keyboard Troubleshooter: Windows has a built-in troubleshooter that can identify and fix common keyboard issues. It's like having a tech support genie at your fingertips.
- Clean the Keyboard (Gently): Use compressed air to blast away dust and debris. Be gentle – we don’t want to dislodge anything further. Think of it as a digital spring cleaning!
My Dell Keyboard Rescue Mission: The Disassembly Begins
Unfortunately, the basic troubleshooting steps didn't work for me. My keyboard issues were deeper, more systemic. So, I decided to take the plunge and disassemble my Dell. This is where things got interesting, and, admittedly, a bit nerve-wracking.
- Gather Your Tools: You'll need a small Phillips head screwdriver, a plastic spudger or credit card (for prying), and a clean, well-lit workspace. A strong cup of coffee wouldn't hurt either!
- Power Down and Unplug: Safety first! Make sure your laptop is completely powered off and unplugged from any power source. It's like going into surgery – you want the patient to be stable, or at the very least, not electrocuted.
- Consult Your Dell's Manual (or Online Guides): Dell, thankfully, provides manuals (and countless online guides) detailing how to disassemble your laptop. There are videos available on YouTube as well. It's like having a detailed map before embarking on an adventure.
- Carefully Remove the Back Panel: Locate the screws on the back of your laptop and carefully remove them. Use the plastic spudger to gently pry open the back panel. Be patient and avoid forcing anything.
- Locate the Keyboard Connector: Once the back panel is off, locate the keyboard connector. It's typically a small ribbon cable that connects the keyboard to the motherboard.
Keyboard Detachment: The Delicate Dance
Now, for the trickiest part (for some). Removing the keyboard.
- Disconnect the Ribbon Cable: Gently detach the ribbon cable from the motherboard. This is a delicate process; you don't want to tear the cable. Sometimes, a small clip needs to be released, or a small lever that you can lift or pull.
- Unscrew the Keyboard (if applicable): Some Dell laptops have small screws that secure the keyboard. Carefully remove these.
- Gently Pry Up the Keyboard: Using your spudger, gently lift the keyboard out of its chassis. Again, be patient.
The Deep Clean: Removing the Grime and Grubbiness
Once I had the keyboard out, I could see the problem. It was a veritable dust bunny convention in there! I also noticed some sticky residue from past spills.
- Compressed Air is Your Friend: Use compressed air to blast away all the dust, crumbs, and debris. Focus on the key mechanisms.
- Gentle Cleaning with Isopropyl Alcohol: For sticky residue, I used a cotton swab dipped in isopropyl alcohol. This is a good solvent that will not damage the electrical components. Be careful not to use too much liquid.
- Inspect the Key Mechanisms: Examine each key mechanism for any damage or obstruction. If a key is stuck, you may need to carefully remove the keycap (using a small flathead screwdriver or a keycap puller) and clean the mechanism underneath.
Reassembly: Putting Humpty Dumpty Back Together
After a thorough cleaning, it was time to reassemble the keyboard. This is the reverse of the disassembly process.
- Reattach the Keyboard: Carefully position the keyboard back into its chassis.
- Reconnect the Ribbon Cable: Gently reattach the ribbon cable to the motherboard. Make sure it's securely connected.
- Screw Things Back Together: Replace any screws that secured the keyboard.
- Replace the Back Panel: Carefully reattach the back panel, ensuring it's properly aligned. Screw it back in.
- Double-Check Everything: Before powering on your laptop, double-check that all connections are secure.
The Moment of Truth: Powering Up and Praying!
With everything back together, it was time to power on my Dell. I held my breath. Would it work?
Success! The Keyboard Returns to Glory
And, voila! My keyboard was back to its former glory. The "E" was resurrected. The random characters vanished. I could type again, faster and more accurately than before. It was a moment of pure, unadulterated joy!
What If It's Beyond Repair? Keyboard Replacement Options
If cleaning doesn't work, you may need to replace your keyboard. Luckily, this is a relatively straightforward process, and replacement keyboards are available online.
- Identify Your Laptop Model: This is crucial for finding the correct replacement keyboard.
- Search Online Retailers: Websites like Amazon, eBay, and specialized laptop parts stores offer a wide selection of replacement keyboards.
- Watch Installation Videos: Before you start the replacement process, watch a video tutorial.
- Follow the Disassembly/Reassembly Steps: The process is the same as cleaning, only you're replacing the entire keyboard unit.
Preventing Future Keyboard Catastrophes: Keeping it Clean and Safe
Once my keyboard was fixed, I was determined to prevent another disaster. Here's what I learned:
- Regular Cleaning: Clean your keyboard regularly with compressed air to prevent dust and debris buildup.
- Avoid Food and Drinks: Keep food and drinks away from your laptop. It's tempting, but remember the peril.
- Use a Keyboard Cover: A keyboard cover can offer an extra layer of protection against spills and debris.
- Handle with Care: Avoid dropping or mishandling your laptop.
- Consider an External Keyboard: An external keyboard can give your laptop keyboard a break.
Concluding Thoughts: You Got This!
Fixing a laptop keyboard can seem daunting, but it doesn't have to be! With a bit of patience, the right tools, and a sprinkle of courage, you can tackle the problem yourself. It’s like your own little tech-powered adventure. I'm so glad I fixed my Dell laptop keyboard. If I can do it, anyone can. You can too! So go forth, my friends, and save your keyboards!
Alienware Trackpad Dead? This FIX Will SHOCK You!FIX DELL keyboard not working in Windows 1087 3 METHODS
By Cap Trong Nam - How To FIX DELL keyboard not working in Windows 1087 3 METHODS by Cap Trong Nam - How To
How to Fix Dell Keyboard Not Working in Windows

By Dell Support How to Fix Dell Keyboard Not Working in Windows by Dell Support
Fix Some keys on Laptop Keyboard Not Working in Windows 10 Solve keyboard keys Won't typing

By Victor Explains Fix Some keys on Laptop Keyboard Not Working in Windows 10 Solve keyboard keys Won't typing by Victor Explains

Title: Dell Laptop Keyboard Not Working - How To Fix
Channel: Tothepoint Tutorials
Dell Laptop Keyboard Not Working - How To Fix by Tothepoint Tutorials
Laptop Working
Dell Laptop Keyboard Disaster: I Fixed It! (You Can Too!)
The rhythmic click-clack of a functional keyboard is a symphony for any writer, programmer, or student. But when that familiar sound transforms into a frustrating cacophony of missed keystrokes, sticky keys, or complete silence, panic sets in. My Dell laptop, a trusty companion for countless hours, recently succumbed to this very keyboard disaster. Specific keys began failing. Others became unresponsive. The once-reliable input device had become a liability. This is a tale of that ordeal – and, more importantly, how I resurrected my Dell laptop keyboard, and how you can likely do the same.
Identifying the Culprit: Diagnosing the Keyboard Malfunction
Before diving into repairs, accurate diagnosis is paramount. A shotgun approach to fixing a keyboard problem often leads to more damage than good. We need to pinpoint the underlying cause. In my case, the symptoms pointed to a collection of potential culprits.
- Sticky Keys: The "s," "e," and "n" keys felt sluggish, prone to sticking after each press. This often signals debris infiltration – dust, crumbs, or even dried liquids lodged beneath the keycaps.
- Unresponsive Keys: The "Shift" key would sometimes refuse to register, forcing me to rewrite entire sentences. This could indicate a faulty connection or a failure within the key switch itself.
- Ghost Typing: Occasionally, the keyboard would generate characters without me pressing any keys. This is a sign of short circuits, or phantom keystrokes. This is often caused by liquid damage or corrosion.
- Complete Failure: The "Enter" key and the spacebar had completely gone silent. This indicated either a critical failure in the circuit board or a severe buildup of debris.
To accurately diagnose, I followed a methodical process:
- External Keyboard Test: I connected an external USB keyboard. If this keyboard functions correctly, the problem almost certainly lies with the laptop’s integrated keyboard.
- Boot-up Test: I accessed the BIOS (Basic Input/Output System) during startup. Because the BIOS utilizes the keyboard, this step tested whether the problem was affecting the system’s core functionality. If keys are non-responsive, the problem is more severe.
- Software Diagnostics: Dell laptops often come with pre-installed diagnostic software. I ran a keyboard test using this software, which pinpointed unresponsive keys with remarkable accuracy.
- Visual Inspection: I powered down the laptop, removed the battery, and carefully inspected the keyboard for any obvious signs of damage, such as liquid residue or visible debris.
The Battle Begins: Cleaning and Disassembly Procedures
With the diagnosis complete, the repair process commenced. My approach was methodical and involved several critical steps: cleaning, disassembly, component inspection, and final reassembly.
The Initial Cleaning: The most straightforward step was a thorough cleaning. I started by turning the laptop upside down and gently shaking it to dislodge loose debris. Then, using a can of compressed air (available at most electronics stores), I directed short bursts of air between the keys, aiming to blast away any lingering particles. A soft-bristled brush helped dislodge any remaining dirt.
Keycap Removal: Removing the keycaps is the most intimidating step, but it's often essential. Each keycap has a specific method for removal. Most Dell laptops use a simple clip-on design, but there are nuances. I used a plastic pry tool (or in a pinch, a small flathead screwdriver, but with extreme care to avoid scratching the surrounding plastic) to gently pry up each keycap, starting at the corner of the key. It is useful to take photos of the keyboard layout BEFORE removing the keys for easier reassembly. Some longer keys, like the spacebar and shift keys, incorporate stabilizing bars. Note the orientation of these bars before removal.
Internal Cleaning: With the keycaps off, I accessed the internal components of the keyboard. Using the compressed air, I meticulously cleaned each key switch, the small plastic mechanism beneath each keycap. A cotton swab lightly dampened with isopropyl alcohol can be used to remove stubborn grime. Be cautious with the alcohol, using only a tiny amount.
Disassembly of the Keyboard Module: If the initial cleaning failed to resolve the issue, the next step was to remove the keyboard entirely. This required consulting the Dell laptop’s service manual (available online). This document provides detailed instructions for disassembly and reassembly, specific to your laptop model. The process typically involves removing the bezel surrounding the keyboard, then unscrewing retaining screws. Carefully disconnect any ribbons or connectors.
Component Inspection and Potential Component Replacement: Once the keyboard module was removed, I inspected the connecting ribbon cable for damage. The ribbon itself needed to look clean and free of kinks. In my case, the connector on the keyboard module was clean. The underlying circuit board was examined under a magnifying glass. If any soldering points looked damaged, this signaled a bigger problem that required professional help.
Reassembly and Testing: Bringing the Dell Keyboard Back to Life
The reassembly process is, in many ways, the reverse of disassembly. Careful attention to detail is vital to avoid errors.
- Keyboard Module Reinstallation: Following the service manual's instructions, I carefully re-installed the keyboard module, ensuring all screws and connectors were securely fastened.
- Keycap Reinstallation: After carefully realigning each keycap, I pressed down firmly until it clicked into place. The stabilizing bars of the longer keys needed to be meticulously repositioned to ensure proper alignment.
- Testing: I powered on the Dell laptop and immediately tested the keyboard, starting with the BIOS to verify functionality. I then opened a text editor (like Notepad) to test the response of each key, methodically typing out the alphabet, numbers, and special characters.
- Software Tweaks: In some cases, software tweaks can influence keyboard performance. I checked the keyboard driver in the Device Manager and updated it. I also ensured that any accessibility features, such as sticky keys or filter keys, were disabled unless needed.
Preventive Measures: Keeping Your Dell Keyboard Healthy
Fixing a Dell laptop keyboard is often straightforward, but regular maintenance is the best defense against keyboard problems.
- Regular Cleaning: Making a habit of cleaning your keyboard regularly can prevent the accumulation of debris that leads to key malfunctions. Use compressed air every week or two.
- Avoid Eating and Drinking: Minimize the risk of spills by avoiding food and drinks near your laptop. If a spill occurs, power off the laptop IMMEDIATELY.
- Protective Covers: Consider using a keyboard cover, especially if you frequently transport your laptop or work in a dusty environment.
- Gentle Typing: Avoid unnecessary force. A gentle touch on the keys prolongs the life of the keyboard.
- Professional Maintenance: Schedule keyboard maintenance checks with a service professional. They can identify and fix problems before they affect the keyboard's usefulness.
The Victory of a Functional Keyboard
After hours of careful work, the Dell laptop keyboard was once again fully functional. The satisfaction derived from restoring this essential component was immense. The symphony of the perfect click-clack was back. If you encounter a keyboard disaster, don't despair. Armed with the right tools, the service manual, and a little patience, you can likely fix your Dell laptop keyboard, too.
