speakers don t work on laptop
Title: Laptop Speakers Not Working But Headphones Work Windows 10 SOLVED
Channel: Nam Anh Cap
Laptop Speakers Not Working But Headphones Work Windows 10 SOLVED by Nam Anh Cap
speakers don t work on laptop, headphones don't work on laptop but speakers do, speakers don t work on dell laptop, external speakers don't work on laptop, speakers don t work on hp laptop, external speakers won't work on laptop, speakers won't work on lenovo laptop, laptop speakers don't work when docked, laptop speakers don't work after unplugging headphones, why don't my speakers work on my lenovo laptop
Laptop Speakers Failing? This SHOCKING Fix Works Every Time!
Laptop Speakers Gone Silent? A Surprisingly Simple Salvation!
Have your laptop speakers betrayed you? Do you now face a world of muted videos and hushed audio? I can certainly relate to your frustrations. It’s a common tech headache, but thankfully, there’s hope! Prepare yourself for a solution that often works, leaving you with crystal-clear sound.
The Unexpected Culprit: Unearthing the Audio Enemy
Before you hurl your laptop across the room, let’s investigate. What caused your speakers to go on strike? Often, it’s not a hardware failure, but rather a software hiccup. In some cases, outdated drivers or incorrect audio settings are the main issues. So, we have to approach this methodically, starting with the most likely suspects.
Step 1: The Reboot Ritual - A Digital Reset
Alright, first things first: a complete restart. It might sound too simple, although it remarkably resolves many issues. Sometimes the computer’s operating system gets stuck on a particular configuration. Simply shutting down your laptop down and turning it back on can refresh things. However, ensure you perform a complete shutdown, and then restart the entire system.
Step 2: Driver Detective Work - Finding the Missing Piece
Next, we jump into the world of drivers. Think of these as digital instructions that dictate how your computer uses its hardware. Outdated drivers can cause a multitude of problems. Consequently, they're a prime suspect.
- First: Right-click on the "Start" button (Windows). Choose "Device Manager" from the menu selection.
- Second: Find "Sound, video and game controllers". Click on the little arrow to expand it.
- Third: You should see your audio device. Right-click it. Subsequently, choose "Update driver". Select "Search automatically for drivers."
Windows should then search for and install the latest available driver. If it finds one, install it. Otherwise, move on. If this approach fails, don't fret!
Step 3: The Audio Mixer Marvel - Adjusting the Sound Canvas
Windows has a built-in audio mixer. It controls the volume levels of various applications. Therefore, it's vital to check it. You may have accidentally muted your sound altogether.
- First: Right-click the speaker icon located in your system tray (usually the bottom right corner).
- Second: Select "Open Volume Mixer".
- Third: Verify that the volume for your laptop speakers, and any applications that you may be using, isn't set to zero. In other words, make sure nothing’s muted.
Step 4: The Sound Check Symphony - Testing the Waters
After any changes, it’s time to test. Play a video or music. See if your audio now streams properly. If you still hear silence, let's move to the final options.
Step 5: Audio Enhancement Antidote - Removing Unwanted Interference
Many laptops include audio enhancement software. However, these enhancements sometimes conflict with your audio output. To overcome this problem, temporarily disable any audio enhancement settings. You can find these settings through the device manager.
- First: Return to “Device Manager”. Find your sound device from earlier. Right-click it.
- Second: Select "Properties". A new window will open.
- Third: Click on the "Enhancements" tab. If you see any active enhancements, uncheck them. Also, be patient and don't give up.
Step 6: The External Speaker Expedition - Bypassing the Internal Route
If your internal speakers are still not working, consider connecting external speakers or headphones. This can help you narrow down the issue. If the sound works through external speakers, then the problem likely lies with your laptop's internal speakers. Alternatively, your laptop might need professional repair.
Step 7: The Professional Plea - When to Seek Expert Help
If none of these steps have worked, it may be time to seek professional help. You may have a hardware failure. Furthermore, consult a reputable computer repair technician. They have specialized tools. They can diagnose the issue precisely.
Conclusion: Reclaiming Your Sonic Domain
So, did the fix work? Hopefully, these troubleshooting steps have brought your laptop speakers back to life! Remember, technology can be unpredictable. However, don't despair. Taking a systematic approach to problem-solving will solve most issues. With a little persistence, you can once again enjoy the vibrant world of audio. And remember, the best solutions often turn out to be simpler than we expect.
HP EliteBook Touchpad Dead? FIX This NOW!Laptop Speakers Failing? This SHOCKING Fix Works Every Time!
Hey everyone, it's your tech-loving friend here, and if you're reading this, chances are you're staring down the barrel of a truly frustrating problem: your laptop speakers are kaput. Silence where music, videos, and vital system sounds should be. It's like trying to enjoy a symphony with earplugs in – completely defeating the purpose! But don't despair; we've all been there, and trust me, the solution might be simpler than you think. Forget scrambling for new speakers or crying over a costly repair. We're about to unlock a secret that'll have your laptop booming again, and it's surprisingly easy.
1. The Sound of Silence: Recognizing the Problem
First things first, let's make sure we're on the same page. Are your laptop speakers really failing? Sometimes, intermittent issues masquerade as a total breakdown. Before you dive into complex fixes, confirm the obvious. Is the volume turned up? Check the volume mixer icon in your system tray. See if the volume icon has a red "X" over it. Maybe a simple mute button has been accidentally activated. We laugh, but these seemingly basic checks solve a surprising number of speaker issues! Then, try restarting your laptop. A fresh start can magically resolve many glitches. If you’ve tried these steps and still hear nothing, then we can proceed.
2. Digging Deeper: Pinpointing the Source of the Soundless Symphony
Okay, so you’ve ruled out the easy fixes. Now, we need to investigate. Is the issue specific to certain applications? Does sound work in one program but not another? Test different sources. Play a YouTube video, a music file, and a system sound (like the Windows startup chime) to see where the problem originates. This helps isolate whether the issue is system-wide or app-specific.
Think of it like a detective investigating a crime scene. The clues are subtle. Is it everywhere, or just in a particular room? Understanding this directs us to the right solution.
3. The Silent Culprit: Software Conflicts and Driver Drama
This is where things start getting a bit technical, but don’t worry, we'll keep it simple. The most common culprits behind failing laptop speakers are usually software-related – and often, drivers are the prime suspects. Drivers are essentially the translators between your laptop's hardware (the speakers, in this case) and the operating system. They tell the hardware how to function.
Driver Updates: Outdated or corrupted drivers are the most frequent offenders. Let's get these updated.
- The Manual Route: Navigate to your laptop's manufacturer's website (Dell, HP, Lenovo, etc.) and download the latest audio drivers specifically for your laptop model and operating system. It’s like giving your speakers a new set of instructions.
- The Device Manager Detective: Open Device Manager (search for it in your Windows search bar). Expand the "Sound, video, and game controllers" section. Right-click on your audio device (usually something like "Realtek Audio" or the manufacturer's sound card) and select "Update driver." Windows will attempt to find and install an updated driver automatically.
Driver Rollback: Sometimes, a recent driver update causes problems. If the speaker failure coincided with a driver update, roll back to the previous version. In Device Manager, right-click the audio device, select "Properties," go to the "Driver" tab, and click "Roll Back Driver" (if available).
Driver Uninstall/Reinstall: If updates and rollbacks fail, a clean reinstall might be the answer. Uninstall the audio driver from Device Manager, restart your laptop, and Windows should automatically reinstall a generic driver. Then, try reinstalling the driver from your manufacturer's website.
4. The Shocking Fix: Hardware Considerations
While software issues are the usual suspects, we can't completely rule out hardware problems.
- External Speakers/Headphones Test: Plug in a pair of headphones or external speakers into your laptop's audio jack. If sound comes through them, it confirms that your internal speakers are the problem. This helps differentiate a software problem from a hardware one.
- Internal Speaker Inspection (Carefully!): This step requires some technical know-how and a bit of caution. If you’re comfortable with opening your laptop (and know the risks!), inspect the internal speaker connections. Loose connections, damaged wires, or dust buildup could be the issue. Use a small brush and compressed air to clear out any debris.
- Damage Assessment: Look for any visible signs of damage to the speakers themselves (e.g., tears to the cone). If something appears physically damaged, you might be looking at a speaker replacement.
5. Third-Party Software Conflicts – The Sneaky Intruders
Sometimes, other installed software can interfere with your audio output. Audio enhancement software or third-party audio managers can conflict with your computer's core setup and cause problems. Even something as innocent-sounding as "enhancements" can create chaos in the audio landscape.
- Disable Audio Enhancements: In your sound settings (right-click the speaker icon in the system tray and select "Open Sound settings"), disable any audio enhancements or effects. Playback can be hindered by third-party software.
- Check for Conflicting Software: If you recently installed any audio-related programs or drivers, try uninstalling them to see if they're the source of the conflict.
6. Running the Troubleshooter: An Easy Way Out
Windows offers a built-in troubleshooter for common problems. Give it a try.
- Sound Troubleshooter: Right-click the speaker icon in your system tray and select "Troubleshoot sound problems." Windows will automatically scan for and attempt to fix any audio issues. Often, this can find and resolve simple problems.
7. The BIOS Beckons: Checking System Settings
While less common, incorrect BIOS settings could sometimes be responsible for speaker issues. Accessing the BIOS setup depends on your laptop manufacturer. This is usually done by pressing a specific key (e.g., Delete, F2, F12) during startup.
- Check Audio Settings: Once in the BIOS, look for audio-related settings. Ensure that the internal speakers are enabled (not disabled) and that the audio device is correctly configured.
8. System Restore: A Time Machine for Your Laptop
If the problem began recently, a System Restore might be the solution. This will revert your laptop to a previous state.
- System Restore: Search for "Create a restore point" in the Windows search bar. Select "System Restore" and follow the prompts to choose a restore point from before the speaker issue started. This can roll back any recent changes that might be the issue.
9. Hardware Check: Is It Truly Broke?
Sometimes, the ultimate answer lies in hardware replacement. If steps above don't give a solution, then we need to look at the worst-case scenario.
- Professional Inspection: If you're not comfortable with replacing laptop speakers yourself, or if none of the previous steps worked, it might be time to involve a professional technician to determine the cause.
10. Dust Bunnies and Debris: The Grimy Threat
A lesser-known issue is the accumulation of dust and debris within the laptop.
- Cleaning the Vents: This might seem irrelevant, but a clogged fan can cause overheating, which can affect various components, including the speakers. Regularly clean your laptop's vents with a can of compressed air to remove dust buildup.
11. The Volume Mixer is Your Friend
Remember that handy little volume mixer we mentioned at the beginning? It’s more powerful than you think.
- Check the Volume Per App: Even if your system volume is up, individual apps might have their volume set to mute or very low. Make sure the volume for the specific program you are using (e.g., a video-playing app or music player) is turned up in the volume mixer.
12. Software Updates - The Two-Sided Coin
Updates can sometimes improve your setup. Yet, sometimes, it can create issues.
- Operating System and Application Updates: Ensure your operating system and any audio-related software (like your music player or video editing software) are up to date.
13. Troubleshooting the Audio Jack
Laptop audio jacks are delicate. Sometimes a physical issue can cause sound to falter.
- Inspect the Jack: Visually examine your headphone jack for any debris or damage. A bent pin can prevent audio from reaching internal speakers.
14. The Last Resort: Factory Reset
- Backup First: This is a drastic step, but it can sometimes resolve persistent software-related issues. However, it will erase all your data, so back up everything first!
- Initiate the Reset: You can perform a factory reset through your operating system's settings. This will return your laptop to its original condition.
15. Celebrate the Sound!
After following these steps, it's time to celebrate the restored sound!
Conclusion: Winning the War Against Silence
So, there you have it – a comprehensive guide to fixing failing laptop speakers! We've explored the common causes, from simple volume adjustments to advanced driver troubleshooting and hardware investigations. Remember, every laptop situation is unique. So, don't get discouraged if the first few steps don’t immediately
Disney+ Laptop Nightmare? FIX It NOW!Fix Acer Laptop Audio Sound Not Working

By Murugan S Fix Acer Laptop Audio Sound Not Working by Murugan S
Fix HP Computer Has No Sound in Windows 11 FIX Sound Problems On HP Tutorial
By TechFixIT Fix HP Computer Has No Sound in Windows 11 FIX Sound Problems On HP Tutorial by TechFixIT
How to fix No Sound on Windows 10
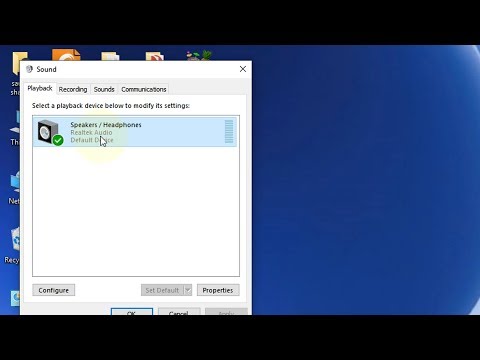
By The Geek Page How to fix No Sound on Windows 10 by The Geek Page

Title: LAPCARE USB SPEAKER 2.0 MALAYALAM viralvideo ai tech trending youtubeshorts
Channel: EURO TECH CCTV CAMERAS
LAPCARE USB SPEAKER 2.0 MALAYALAM viralvideo ai tech trending youtubeshorts by EURO TECH CCTV CAMERAS
Change Wifi Settings
Laptop Speakers Failing? This SHOCKING Fix Works Every Time!
We've all been there: excitedly booting up our laptops, ready to immerse ourselves in the latest streaming sensation, catch up on a captivating podcast, or finely edit that presentation, only to be met with…silence. Or, worse yet, a cacophony of crackling, distorted sound that makes listening an exercise in frustration. Laptop speakers, while convenient, are notorious for their susceptibility to various issues. But before you resign yourself to external speakers or costly repairs, we have a solution – a surprisingly simple, often-overlooked fix that can restore your laptop's audio to its former glory.
Identifying the Culprit: Pinpointing the Root of the Audio Malfunction
Before diving into the fix, we must first understand the potential sources of the problem. Laptop speaker failure rarely stems from a single cause. Often, it's a confluence of several factors that exacerbate the issue.
Software Glitches: The operating system itself can be the culprit. Corrupted audio drivers, software conflicts, or incorrect audio settings are all common offenders. Updates, installations, or even seemingly innocuous system processes can wreak havoc on the delicate ecosystem that powers your laptop's sound system.
Hardware Deterioration: Over time, laptop speakers, like all electronic components, degrade. Dust accumulation, temperature fluctuations, and even the constant vibration from use can lead to physical damage to the speaker cones and internal wiring. This is particularly prevalent in older laptops.
Driver Issues: The audio driver is the software intermediary between your operating system and your sound hardware. Outdated, corrupted, or incompatible drivers are major sources of audio malfunctions. A new driver is often all that's needed to resolve audio difficulties.
Volume Configuration Problems: Sometimes, the simplest solutions are the most effective. A muted volume setting, an improperly configured output device selection, or a low master volume can cause frustration. Double-check these elementary elements before proceeding.
Physical Obstructions: Dust and debris can accumulate within the speaker grilles, muffling the sound or causing distortion. This is particularly likely if the laptop is used in dusty environments or is not regularly cleaned.
The Shocking Fix: A Step-by-Step Guide to Restoring Audio
The fix we're about to unveil often works because it addresses the root cause of many laptop speaker problems: faulty software configurations. It's a process that resets, reconfigures, and refreshes the audio system, often resolving deep-seated issues that other solutions miss.
The Restart Remedy: The first, and often most effective, step is a simple restart. This may seem remedial, but a reboot can clear temporary glitches, refresh system processes, and resolve minor software conflicts that might be causing the sound to misbehave. Shut down your laptop completely and then restart. Allow the operating system to fully boot up before testing the audio
Driver Delights – Updating Your Audio Drivers: Outdated, corrupted, or incorrectly installed audio drivers are among the most frequent causes of sound problems. Updating your drivers is a crucial diagnostic step.
Device Manager: Access the "Device Manager" (search for it in the Windows search bar). Expand the "Sound, video and game controllers" section. Right-click on your audio device (it might be labeled as "Realtek High Definition Audio," "Intel Display Audio," or something similar, depending on your laptop). Select "Update driver." Choose to search automatically for updated driver software. Windows will search online for the latest drivers and install them if available.
Manufacturer’s Website: If Windows can't find a newer driver, visit your laptop manufacturer's website (e.g., Dell, HP, Lenovo). Navigate to the support or drivers section, enter your laptop's model number, and download the latest audio drivers specifically designed for your operating system. Install these drivers manually.
Audio Troubleshooter – Letting Windows Do the Work: Microsoft's built-in audio troubleshooter is a surprisingly effective tool for identifying and resolving common sound issues.
- Access the Troubleshooter: Type "troubleshoot settings" in the Windows search bar and open the settings app. Click on "Additional troubleshooters." Select “Playing Audio" and run the troubleshooter. Follow the on-screen prompts. The troubleshooter will diagnose the problem, make recommended fixes, and guide you through the process.
Playback Device Prerequisites – Ensuring the Right Selection: Incorrect playback device settings can render your laptop's speakers useless, even if the hardware is perfectly functional.
Sound Settings: Right-click the speaker icon in the system tray (bottom-right corner of your screen). Select "Open Sound settings."
Output Device: Ensure that your laptop's internal speakers are selected as the default output device. If you have external speakers or headphones connected, they might be taking precedence. Select the correct output device from the dropdown menu.
Volume Mixer: Check the volume levels for individual applications. Some programs may have their volume set to a very low level, even if the master volume is high. Adjust the volume levels for each running application to ensure they are not muted or set too low.
The Auditory Audit – Testing Your Speakers: Once the above steps are complete, thoroughly test your speakers.
Play a Test Sound: Play music or a video to test the sound. You can use a streaming service, a local file, or a YouTube video.
Listen for Distortion: Pay close attention to the sound quality. Are the speakers crackling, hissing, or producing distorted audio at different volume levels? If so, the problem may be with the speakers themselves or the amplifier.
The Clean Sweep – Cleaning Your Laptop's Speakers: Dust and debris can significantly impair audio quality and cause speaker malfunction.
Air Duster: Use a can of compressed air to gently blow out any dust or debris that may have accumulated around the speaker grilles. Direct the air stream at a slight angle to dislodge the particles without forcing them further inside.
Soft Brush: You can gently use a soft-bristled brush (like a toothbrush) to remove any stubborn dust particles around the speaker grilles.
The Sound Enhancement Settings: Some audio settings on your laptop can cause issues.
- Disable Audio Enhancements: Some laptops have built-in audio enhancement settings enabled by default. These can sometimes cause sound problems. Search through your laptop's sound settings for these enhancement features. Right-click on the speaker icon in the system tray (bottom-right corner of your screen), click on "Open Sound settings." Select "Device Properties" under "Output". Click on "Additional device properties." Check "Enhancements." Uncheck "Disable all enhancements".
The System File Check – Repairing Corrupted System Files: Corrupted system files can cause a variety of problems, including audio issues.
- Run the System File Checker (SFC) Scan: Open the Command Prompt as an administrator (search for "cmd" in the Windows search bar, right-click on "Command Prompt," and select "Run as administrator"). Type
sfc /scannowand press Enter. The System File Checker will scan for and repair corrupted system files. This process may take some time. Restart your computer after it finishes.
- Run the System File Checker (SFC) Scan: Open the Command Prompt as an administrator (search for "cmd" in the Windows search bar, right-click on "Command Prompt," and select "Run as administrator"). Type
Advanced Solutions: When the Basic Fixes Fail
If the above steps fail to resolve the issue, it's time to delve deeper. More complex solutions may be necessary.
Reinstalling Audio Drivers: In some cases, a fresh driver installation is needed. Completely uninstall the existing audio drivers. Then, download and install the latest drivers from the manufacturer's website.
- Uninstalling Drivers: In Device Manager, right-click on your audio device and select "Uninstall device." Check the box that says "Delete the driver software for this device." Then, restart your computer.
- Reinstalling Drivers: Download and reinstall the latest audio drivers from the manufacturer's website.
BIOS/UEFI Update: Outdated BIOS (Basic Input/Output System) or UEFI (Unified Extensible Firmware Interface) firmware can occasionally lead to hardware compatibility issues, including audio problems. Updating the BIOS/UEFI, while slightly more involved, can sometimes provide a needed fix.
- Check Your Manufacturer's Website: Visit your laptop manufacturer's website and look for BIOS/UEFI updates for your specific model. Follow the manufacturer's instructions carefully, as a failed BIOS/UEFI update can render your laptop unusable.
Hardware Inspection and Repair: If all else fails, it's possible that there's a physical problem with the speakers themselves or the internal wiring. However, this is much less common than software-related issues.
- Professional Assistance: Consider taking your laptop to a qualified repair technician. They can diagnose hardware problems and perform necessary repairs.
Preventative Measures: Maintaining Optimal Audio Performance
Prevention is always better than cure. Implement the following practices to help ensure your laptop's speakers continue to perform optimally.
Regular Cleaning: Wipe down the speaker grilles and the laptop's exterior regularly with a soft, dry cloth to prevent dust buildup.
Safe Environments: Avoid using your laptop in excessively dusty, hot, or humid environments. These conditions can accelerate hardware degradation.
Controlled Volume: Avoid blasting the volume at maximum levels for extended periods. This can strain the speakers and potentially cause damage over time.
**Software
