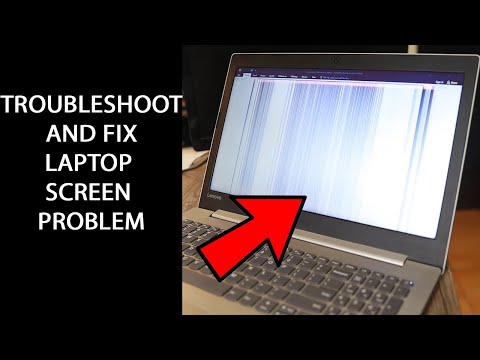
right side of laptop screen not working

Title: How to turn your computer screen upside down and side ways
Channel: Walker
How to turn your computer screen upside down and side ways by Walker
right side of laptop screen not working, right side of my laptop screen is not working, why is the right side of my screen not working, why does the right side of my screen not work
Laptop's Right Side DEAD? FIX This NOW!
My Laptop's Right Side is Silent! Help, What Do I Do?
Alright, let’s be honest. Has your laptop’s right side suddenly decided to take a vacation? Maybe the USB ports are ghosts, or the audio has vanished into thin air. That sinking feeling happens, doesn't it? Breathe easy. We’re diving into this together. This isn’t a tech-fueled nightmare but a solvable puzzle. The good news is you're in the right place. We’re going to explore the possibilities. We'll get your right side back rocking and rolling.
Troubleshooting: First Steps to Tech Recovery
First things first, let's check for the basics. Because sometimes, the simplest solutions are the best. Ensure your laptop is properly connected to a power source. Next, a full restart is a simple, yet surprisingly effective, first aid. After this reboot, see if the issue resolves. Many times, a simple restart clears minor glitches. This works wonders in many scenarios. It's a fantastic starting point. Consequently, before we dive deeper, double-check all physical connections. Look closely at any external devices, like a mouse or headphones. Make sure everything is firmly plugged in. Furthermore, examine the ports themselves for any visible debris or damage. Believe me, this simple check often uncovers the culprit. Sometimes, dust bunnies are the adversaries.
The USB Labyrinth: Dealing with Port Problems
If USB ports on the right side are unresponsive, the plot thickens. Therefore, we should explore it with care. For instance, plug-in, and unplug various USB devices into other ports. Do other ports function? This will help isolate the problem. Likewise, we can consider the following: Is the device recognized, even if it doesn't work? This is important information. Consequently, a driver issue could be the reason. You may need to update or reinstall drivers. Check device manager and look for any yellow exclamation points. In essence, this indicates a driver conflict. You can resolve driver issues. Search online for appropriate drivers. Remember to install the correct ones. Subsequently, restart your laptop. See if the problem is solved. It's a good practice to check for any USB hub issues. USB hubs can sometimes fail. Consider plugging directly into the laptop to eliminate them.
Audio Anarchy: When the Sound Goes Silent
Now, let's address potentially dead audio. Moreover, consider the possibility. First, check your system sound settings. Ensure the correct output device is selected. Is the volume turned up? In the same vein, check in the system tray. Is the speaker icon muted? If so, unmute it. Besides, your headphones: Are they properly connected? Notably, test them on another device. This can help determine if the fault lies with the headphones. Equally important, your audio drivers could be corrupted. Go again to Device Manager. Look for warnings attached to the sound card. You might need to update or reinstall them. Because of that, sometimes a simple reboot will fix it.
Software Snafus and System Checks
Software can cause many problems. A software conflict could be at play. Sometimes, recently installed software causes problems. In other words, consider uninstalling or rolling back the recent software. Furthermore, run a system scan for malware. Malware often interferes with system functions. A good anti-malware scan can help. As a result, it might expose the underlying cause of problems. Use your preferred antivirus software. Additionally, consider running the system file checker. This tool detects and repairs corrupted system files. This tool can be quite helpful. Open the command prompt as an administrator. Then, type sfc /scannow and press enter. Then, let it run.
The Hardware Hurdle: When It's Physical
If software fixes fail, we must face the hardware. Therefore, this is a more complex area. Perhaps, some physical damage occurred to the ports. Examine them carefully. Additionally, try to gently clean them with compressed air. You must be extra cautious here. Consequently, further damage must be avoided. Another thing to consider, a component failure could be the culprit. The right side of the laptop might have a dedicated circuit. Therefore, a component failure is possible. If your laptop is still under warranty, contact the manufacturer. For this reason, they can provide repair services. If it's out of warranty, consider a reputable repair shop. Sometimes, specialized knowledge is needed.
Prevention: Keeping Your Right Side Alive
Prevention is always better than cure. Protect your laptop from physical damage. Therefore, be careful when transporting it. Avoid dropping it or spilling liquids on it. Furthermore, keep the vents clear. Overheating causes many problems. Regularly update your drivers. Software updates are important. Keep your antivirus software updated. They will help protect against issues. Likewise, make sure you’re backing up your important data. This protects against potential data loss. Lastly, using a surge protector helps. Power surges can damage electronics.
You've Got This!
This process might seem daunting. However, you've got this! You’ve now got all your solutions. You’re equipped with the knowledge to try and fix your laptop’s right side. Approach the problem systematically. Be patient. Take it one step at a time. Most problems have solutions. Don’t feel discouraged. Ultimately, you'll be back in business. Good luck.
Laptop Adapter DEAD?! (Fix It NOW!)Laptop's Right Side DEAD? FIX This NOW!
Hey there, fellow tech travelers! Ever felt that gut-wrenching moment when your beloved laptop throws a digital tantrum? You know, the one where the right side just… dies? No clicks, no functions, just a blank, unresponsive expanse of plastic and circuits. Been there, done that, and trust me, it's a frustrating experience. But fear not! We're diving deep into the abyss of laptop malfunctions and pulling you back to the land of the functional. We're going to explore why your laptop's right side might be playing dead and, most importantly, how to resurrect it. Think of it as a digital CPR session for your precious machine.
1. The Panic Button: Is it REALLY Dead?
Before we start tearing things apart (or worse, giving up!), take a deep breath. Sometimes, a seemingly dead right side is just a temporary glitch. It's like when you hit a mental block. Sometimes, just a little nudge is required.
- Restart! This is your first line of defense. A simple reboot can work wonders. Think of it as hitting the "reset" button on your brain.
- Check the Obvious: Are you plugged in? Is the charger working? A dead battery can cripple more than just the right side.
- External Devices: Unplug anything plugged into the right side - USB drives, mice, etc. Sometimes, a faulty accessory causes the problem.
If these basic checks don't work, it's time to delve deeper. Remember, we're detectives here, not immediately calling in the forensic team.
2. The Culprit: Identifying the Root of the Problem
Okay, the basics didn't work. Now for the investigative phase. What could actually cause the right side to go dark? Let's break down the likely suspects:
- Hardware Failure: This is the big, scary one. Think of it as a blown fuse. A faulty USB port, a fried trackpad, or even a failing motherboard component could be to blame.
- Software Glitches: Sometimes, it's not the hardware. A corrupted driver, a pesky malware infestation, or a software conflict can cause the right side to malfunction. Imagine it as a traffic jam on the digital highway.
- Physical Damage: Dropped your laptop? Spilled coffee? These are the usual suspects for physical trauma. Consider the possibilities of the impact.
- Operating System Issues: The core of your digital world!
3. USB Port Problems: The Gateway to Frustration
Let's focus on the right side's usually-busiest friends: The USB ports. They're the gatekeepers to all your peripherals. If they're playing up, it's a major headache.
- Test with Different Devices: Plug in different devices like a mouse, a flash drive, or a phone to see if any of them work. If one works, it narrows down the culprit.
- Inspect the Port: Sometimes, a bent pin or debris can block the connection. Use a flashlight to take a good look inside the port. Be gentle!
- Driver Updates: Head to your device manager. Look for any devices with a yellow exclamation mark. These indicate driver problems. A quick update might solve the issue.
4. The Trackpad Tango: Is Your Cursor Dancing?
The trackpad is your navigation buddy. A dead right side usually means your mouse clicks are gone, rendering it useless.
- Trackpad Settings: Make sure the trackpad is enabled! Sounds silly, but sometimes it's disabled in the settings.
- Driver Issues: Driver problems can cause a trackpad to act weird.
- External Mouse: Does an external mouse work? If it does, then the trackpad is most definitively the issue.
- Physical Obstruction: Is there anything on the trackpad? Sometimes, a sticker or a piece of dust can cause functionality issues.
5. Buttoned Up: Checking the Physical Buttons
Sometimes, the buttons located on the right side, like power buttons, are the source of issues.
- Button Check: Try pressing your power button. Does it work, or is nothing happening?
- Unplug The Power: Removing the power and pressing the power button for 15 seconds can also help.
6. Troubleshooting Software: The Digital Cleaner
Software issues can be sneaky culprits. Let's clean up the digital clutter.
- Run a Virus Scan: Malware loves to mess with your system. A good antivirus scan is your first line of defense.
- Driver Reinstallation: If you suspect a driver problem (which we've already touched on), try reinstalling the drivers for the affected devices.
- System Restore: If the problem started recently, try a system restore to revert to a previous working state.
7. Hardware Detective: If All Else Fails
When software fails to provide an answer, it's time to look at the hardware.
- Check All Cables: Make sure all the internal cables are securely connected.
- Professional Help: If you take your laptop apart and are not tech-savvy, seek professional help to avoid further damage.
8. The Power of Prevention: Keeping Your Right Side Alive
Prevention is always better than cure, right? Let's put some digital armor on your machine.
- Regular Updates: Keep your operating system and drivers updated.
- Clean Up Regularly: Remove unnecessary files and applications to keep your system running smoothly.
- Use a Surge Protector: Protect your laptop from power surges.
- Handle with Care: Avoid dropping your laptop or exposing it to liquids.
9. Diving Deep: When to Call in the Experts
Sometimes, you need reinforcements.
- Warranty Check: Is your laptop still under warranty? If so, contact the manufacturer or a certified repair shop.
- Independent Repair: If the warranty has expired, find a reputable laptop repair service.
- Data Backup: Ensure you backup your important files before sending your laptop in for repairs.
10. Replacing Components: The Surgical Route
If the problem is hardware, it might involve replacing components.
- Trackpad Replacement: A relatively straightforward repair if the trackpad is the issue.
- USB Port Replacement: Requires technical knowledge and specialized equipment.
- Motherboard Repair/Replacement: This is a major repair and can be expensive.
11. The DIY Approach: Do It Yourself (With Caution!)
If you're a tech enthusiast, you might consider DIY repairs. However, proceed with caution.
- Research Thoroughly: Watch videos, read guides, and understand the risks.
- Gather Tools: You'll need the right tools.
- Take Your Time: Rushing can lead to more damage.
12. The Aftermath: What to Do After a Fix
Once you've revived the right side, it's essential to take some precautions.
- Test Everything: Make sure all functions are working correctly.
- Monitor Performance: Keep an eye on your laptop's performance.
- Create Backups: Back up your important data regularly.
13. Cost Considerations: Budgeting for Repairs
Laptop repairs can be costly.
- DIY vs. Professional: Determine the cost-effectiveness of DIY repairs.
- Quote and Compare: Get multiple quotes from repair services.
- Consider Replacement: Sometimes, the cost of repair outweighs the value of the laptop.
14. The Future of Laptop Design: Keeping it Right
Laptop design is constantly evolving.
- Durable Construction: Manufacturers are focusing on durability to reduce failures.
- User-Friendly Designs: Easier access to components for repairs will become a priority.
- Advanced Diagnostics: Improved diagnostic tools will help identify problems quickly.
15. Final Thoughts: Troubleshooting Your Laptop's Right Side
Dealing with a dead right side can be stressful, but with the right approach, it can be solved. Remember to stay calm, systematically troubleshoot the problem, and don't be afraid to seek help when needed. Your laptop is a valuable tool, and with a little perseverance, you can get it back to working order. Keep those ports plugged in, and those clicks clicking smoothly!
In closing, we've covered a lot of ground, from the initial panic to the solutions for fixing your laptop's right side. Like a phoenix rising from the ashes, we hope you have the tools and knowledge to breathe life back into your laptop. Remember, with a little patience and possibly a screwdriver (or a professional!), you'll be back to browsing, creating, and connecting in no time. Stay tech-savvy, stay curious, and keep those laptops humming!
FAQs
1. My laptop's right side is completely unresponsive. What should I do first?
First, try a simple restart. Then, check if the device is plugged in and if all the external devices are functioning or not.
2. What are the most common causes of a dead right side on a laptop?
Common causes include USB port issues, trackpad failures, driver problems, hardware failures, and software glitches.
3. How can I troubleshoot USB port problems?
Test different devices in the port, inspect the port for damage or debris, and update
Bluetooth Nightmare? Fix Your Laptop's Connection NOW!Troubleshooting Tips Weird Monitor Error Half Black Screen Linus Tech Tips

By Linus Tech Tips Troubleshooting Tips Weird Monitor Error Half Black Screen Linus Tech Tips by Linus Tech Tips
Laptop Display Screen Problem How to troubleshoot and repair it yourself
By Torogi Pro Laptop Display Screen Problem How to troubleshoot and repair it yourself by Torogi Pro
how to fix laptop right click mouse bottom in windows, kaise right click mouse bottom fix kare.

By RaiSolutionTech how to fix laptop right click mouse bottom in windows, kaise right click mouse bottom fix kare. by RaiSolutionTech

Title: Monitor problem cut off edges fix in 1 minute
Channel: Tech N Hack BD
Monitor problem cut off edges fix in 1 minute by Tech N Hack BD
Laptop Wifi Connect
Laptop's Right Side DEAD? FIX This NOW!
Is the right-hand side of your laptop acting up? Perhaps the USB ports are unresponsive, the audio jack refuses to cooperate, or the built-in card reader seems to have vanished into the digital ether. Don't despair! A non-functional right side on a laptop is a surprisingly common ailment, and, in most cases, a straightforward fix can restore full functionality. This guide delves deep into the potential causes behind these frustrating issues and provides actionable solutions, empowering you to troubleshoot and revive your laptop's right-hand side.
Pinpointing the Problem: Initial Diagnostics
Before delving into the more intricate fixes, a systematic approach to diagnosing the problem is crucial. This initial assessment will help to isolate the issue and prevent unnecessary steps.
Visual Inspection: Begin with a thorough visual check. Examine the right side of your laptop for any obvious signs of damage. Look for cracks, loose components, or any protruding wires. Are the USB ports physically damaged? Is the audio jack bent or obstructed? Even seemingly minor damage can lead to significant functionality issues. Dust and debris accumulation in the ports and jacks is also frequently a culprit.
Device Manager Examination (Windows): On a Windows-based laptop, the Device Manager is your best friend. Access it by typing "Device Manager" into the Windows search bar. Once open, carefully scan the list of hardware devices. Look for any devices listed with an exclamation mark (!) or a downward-pointing arrow. These indicate driver issues or disabled devices. Expand the "Universal Serial Bus controllers" section to check for USB-related errors. Similarly, look under "Sound, video and game controllers" for audio-related issues.
System Information (Windows): Type "System Information" in the Windows search bar and open the System Information application. This utility provides a detailed overview of your system, including connected hardware. Navigate the left-hand panel to investigate any perceived conflicts.
Hardware Test (If Applicable): Some laptops come with built-in hardware diagnostic tools. Consult your laptop's manual or manufacturer's website for instructions on running these tests. These tests can often identify specific hardware failures, such as a malfunctioning sound card or a failing USB controller.
Basic Power Cycle: A simple power cycle, including a full shutdown, removal of the battery (if possible and safe), and unplugging the power adapter for at least 30 seconds to allow residual power to dissipate, can sometimes resolve temporary glitches. Then, power the device back up and test the functions.
USB Port Troubleshooting: Restoring Data Transfer Capabilities
USB ports are frequently the first components noticed when issues arise on the right side of a laptop. They're essential for connecting a wide range of peripherals, and their malfunction can significantly hamper productivity.
Driver Updates/Reinstallation: Outdated or corrupted USB drivers are a common cause of port failure. In Device Manager, right-click on each USB controller listed and select "Update driver." If this doesn't work, right-click again, select "Uninstall device," and then restart your laptop. Windows should automatically reinstall the drivers upon reboot. Ensure you visit the manufacturer's website to update your drivers directly.
USB Selective Suspend Setting: Windows power management settings can sometimes cause USB ports to be disabled to conserve power. To rectify this, go to "Power Options" in the Control Panel (or Settings, depending on your Windows version). Select your current power plan and then click "Change plan settings." Select "Change advanced power settings" and expand "USB settings." Under "USB selective suspend setting," ensure it’s set to "Disabled" for both "On battery" and "Plugged in" scenarios.
USB Root Hub Power Management: In the device manager, expand "Universal Serial Bus controllers." Right-click on each "USB Root Hub" and select "Properties." Go to the "Power Management" tab and uncheck the box that says "Allow the computer to turn off this device to save power."
Test Different USB Devices: Test multiple USB devices (flash drives, mice, keyboards, etc.) to determine if the problem is specific to a particular device or affects all USB connections. If only one device is failing, the problem might be with the device itself.
Check for Physical Obstructions: Inspect the USB ports for any foreign objects that may be blocking the electrical contacts. Dust, lint, or small debris can interfere with the connection. Use a can of compressed air to carefully clean out the ports. Avoid using sharp objects, as you could damage the internal pins.
Audio Jack Issues: Re-Establishing Sound Output
A non-functional audio jack can quickly transform your laptop into an isolating device. Getting the sound back is extremely important for productivity, entertainment, and communication.
Driver Updates/Reinstallation for Audio: Similar to USB ports, audio driver issues can cause jack malfunctions. In Device Manager, locate your sound card under "Sound, video and game controllers." Right-click and update the driver or uninstall and restart.
Audio Playback Device Selection: Ensure that the correct audio output device is selected in your operating system settings. Right-click the speaker icon in the system tray and select "Open Sound settings." Under "Output," make sure your headphones or external speakers are selected. This also helps resolve issues with external devices, such as monitors with external speakers.
Hardware Conflicts: Hardware conflicts can occasionally interfere with audio output. Review the Device Manager for any yellow exclamation marks or red X's indicating conflicts.
Audio Jack Inspection: Physically inspect the audio jack for any damage or obstructions. The plug may not be making proper contact. Clean the jack with compressed air if necessary.
Test with Different Headphones/Speakers: Test the audio jack with different headphones or speakers to rule out a problem with your audio equipment.
Card Reader Troubleshooting: Recovering Storage Access
Card readers are a common feature on the right side of laptops, providing convenient access to memory cards.
Driver Updates/Reinstallation for Card Reader: Like the other components, drivers for the card reader may be outdated or corrupted. In Device Manager, look for your card reader. (It may be listed under "Disk drives"). Right-click and update or reinstall the driver.
Check Device Manager's Disk Driver Options: If a device is connected but not appearing, go to the Device Manager. Right-click on the "Disk Drives" section. Choose "Scan for hardware changes."
Card Compatibility: Ensure the memory card is compatible with your laptop's card reader and is correctly formatted. Some card readers support multiple card formats, but not all.
Test with Different Memory Cards: Test the card reader with different memory cards to determine if the problem is card-specific. If only one card doesn't work, the problem might be with the card itself.
Hardware Conflicts & Troubleshooting: Review the Device Manager for unusual behavior.
Hardware Repairs: When Diagnostics Yield Failure
If the troubleshooting steps above fail to resolve the issue, the problem may lie with a hardware defect.
Internal Component Inspection: For skilled users, opening up the laptop (after disconnecting power and removing the battery) and visually inspecting the internal components on the right side can sometimes reveal the problem. Be extremely careful when doing this, as you could void your warranty or cause further damage. Look for loose connections, damaged cables, or signs of burnt-out components.
Professional Repair: If you are uncomfortable opening your laptop, or if you've identified a hardware failure that you cannot repair, it's best to take your laptop to a qualified repair technician. They have the tools, skills, and expertise to diagnose and repair hardware problems, whether that's a faulty USB controller, a damaged audio jack, or a defective card reader.
Component Replacement: Depending on the issue, the technician may need to replace specific components on the right side of your laptop, such as the USB ports, the audio jack, or the card reader. The cost of repair varies based on the part and the technician's rates.
Motherboard Issues: In some cases, the malfunction may be due to a problem on the motherboard. Motherboard repairs are often complex and expensive, but they are sometimes necessary to restore full functionality.
Preventative Measures: Keeping the Right Side Healthy
Once you've resolved the issue, here are some steps to prevent reoccurrence.
Routine Cleaning: Regular cleaning of your laptop's ports and jacks with compressed air can help prevent dust and debris buildup.
Careful Handling: Avoid dropping your laptop or subjecting it to excessive force, which can damage the physical components.
Safe Plugging and Unplugging: Always insert and remove USB devices, audio jacks, and memory cards carefully and gently. Avoid excessive force, which can damage the connectors.
Regular Driver Updates: Keep your laptop's drivers up to date to ensure compatibility and optimal performance.
Surge Protection: Using a surge protector or a UPS (Uninterruptible Power Supply) can help protect your laptop from power surges and electrical damage.
By systematically troubleshooting and deploying the recommendations above, you can effectively address the problem, restore functionality, and keep your laptop running smoothly.
