how to get your camera to work on your laptop

Title: Connecting your DSLR Camera to your Laptop - Astrophotography for Beginners
Channel: The Astro Explorers
Connecting your DSLR Camera to your Laptop - Astrophotography for Beginners by The Astro Explorers
how to get my camera to work on my laptop, how to get the camera to work on a lenovo laptop, how to get a camera on a laptop, how do i get my camera to work on my laptop
Laptop Camera Not Working? This FIX Is CRAZY!
Laptop Camera Catastrophe? Unleash This Mind-Blowing Fix!
Ever stared blankly at your laptop screen, desperately needing that camera to function? You’re not alone. Many users find their built-in cameras mysteriously MIA. That frustration needs an immediate solution, right? Prepare yourself for a fix that will blow your mind. This is a journey into the heart of camera recovery!
The Unseen Culprit: Software Snafus and Driver Mayhem
Let’s face it, tech can be temperamental. Your laptop camera might seem dead, but it might just be a software issue. Drivers are the key here. Think of them as the translator between your camera and your operating system. When drivers go rogue, the camera fails!
Consider this: You update your operating system. Now, your camera has forgotten how to work. It's a common scenario, unfortunately. Therefore, you need to address those pesky drivers. Checking them is surprisingly straightforward.
Unlocking Your Camera: A Step-by-Step Revelation
First, breathe. Don’t panic. We can fix this. Grab your laptop, and let's dive in. You’ll become the camera whisperer in no time!
Driver Detective Work: Right-click on the Start button. Choose "Device Manager." This is your control center. Scroll down. Look for "Cameras" or "Imaging devices." If you see a yellow exclamation point, bingo! That's your culprit. Right-click on the camera’s name. Select “Update driver.” Choose "Search automatically for drivers." Windows will seek out the newest driver. Otherwise, it may already be installed.
Reboot Remedy: After the driver update, restart your laptop. Frequently, a simple reboot does the trick. It often resolves the issue. Try using your camera after the restart. Test it out with a video call. Did it work? Fantastic!
Uninstall and Reinstall, the Ultimate Power Move: Still no luck? In the Device Manager, right-click your camera again. Select "Uninstall device." This action forces a fresh start. Restart your laptop again. The system should reinstall the driver automatically. This is a game changer.
The Application Angle: Sometimes the problem isn’t the camera, per se. Instead, the app using the camera might be the source! Make sure the app has camera access in your settings. Also, check its specific settings. Occasionally, a hidden setting blocks the camera’s use.
Beyond the Software: Hardware Hurdles and Hidden Switches
Although software problems are prevalent, the issues can sometimes lie elsewhere. Sometimes, it's something physical. But, before you panic, let's explore some hardware possibilities.
The Physical Switch Secret: Many laptops include a physical switch. This blocks the camera. Believe it or not, it hides in plain sight. It could be a small slider. It might be a button. Check around the camera itself. Examine the sides of your laptop. Ensure the camera isn't accidentally disabled.
The Camera Lens Mystery: Is the lens itself clean? Surprisingly, a smudge can obscure the image. Simply use a microfiber cloth to gently wipe the lens. You should remove any dust or fingerprints. You'd be amazed how effective it is!
External Camera Adventures: Do you have an external webcam? Try plugging it in. Does that work? If it does, it suggests a problem exclusively with your internal camera. This knowledge helps narrow down the source of the issue.
Troubleshooting Triumph: Advanced Techniques and Final Thoughts
We've covered the core solutions. However, let’s explore a few final troubleshooting tactics.
BIOS Backtrack: In rare instances, the camera might be disabled in the BIOS. Accessing the BIOS varies by manufacturer. Restart your laptop. Watch for a prompt like "Press Del to enter Setup." Once in the BIOS, look for camera settings. Make sure they are enabled.
System Restore Salvation: If the problem began recently, consider a system restore. This will revert your system to a previous state. It can undo recent changes that caused the problem. It can be a life-saver.
The Ultimate Verdict: Professional Help? If these steps fail, don't despair. In all honesty, the issue may be hardware related. Take your laptop to a qualified technician. They possess the expertise to perform further diagnostics. Furthermore, they can often repair complex hardware issues.
In conclusion, dealing with a non-working laptop camera can be vexing. However, armed with these straightforward fixes, you wield the power to triumph. Remember to approach each step methodically. Moreover, be patient. Generally, a solution awaits. With persistence, you can restore your camera functionality. Now, go forth and video chat with confidence!
Laptop Shortcut Keys DEAD? This SHOCKING Fix Works!Laptop Camera Not Working? This FIX Is CRAZY!
Hey everyone, it's your tech-savvy friend, here to rescue you from the digital abyss! You know that feeling, right? You're about to jump on a video call, maybe flexing your new haircut or showing off your super-organized workspace, and bam! Your laptop camera decides to take a vacation. The black screen of doom stares back at you, and suddenly, you're scrambling. Well, we’ve all been there, haven’t we? And trust me, I’ve been through the ringer – from desperately clicking buttons to nearly throwing my laptop out the window. But fear not, because I’ve cracked the code! We're going to dive deep into why your laptop camera is playing hide-and-seek and, more importantly, how to get it back online. Buckle up, because the solution is surprisingly simple, and honestly, a little bit… crazy!
1. The Dreaded Black Screen: Why Your Camera Might Be MIA
Let's face it, a non-functioning camera is a digital buzzkill. Think of it like a crucial lens on your digital persona. But why does it happen? The reasons are as varied as the memes on the internet. It could be a software glitch, a driver issue, or even something as basic as the camera being disabled. Think of it like a light switch that isn't working. You need to check the bulb (the camera), the switch itself (the software settings), and the wiring (the drivers). Sometimes the problem is glaringly obvious, and other times, well, it's a tech mystery worthy of Sherlock Holmes himself.
2. Check the Basics: The Obvious Suspects First
Before we go all tech-wizard on things, let’s do a quick sweep of the usual suspects. We’re talking the low-hanging fruit here.
- Is the physical camera covered? Seriously, I've wasted so much time on this. Many laptops have a physical slider to cover the camera for privacy. Make sure it’s not blocking your view. It's happened to the best of us!
- Is the camera enabled in your laptop's settings? This is usually found in your laptop's settings – Privacy or Camera settings. It's like making sure your wifi is switched on before you start complaining about having no Internet.
- Are you using the right app? Double-check that you've opened the application that uses the camera (like Zoom, Skype, or your built-in camera app). Sometimes, we’re so quick to blame the hardware that we forget the software plays a vital role.
3. Software Sabotage: App Permissions and Conflicts
Think of your laptop as a city. Different apps are like different businesses, and they need certain "permits" to operate. One of the most common reasons for camera issues is related to app permissions. Your camera might be disabled for specific applications.
- Check Application Permissions: Go into your computer's settings, and find the privacy settings. Then, look for "Camera" and review which apps have access. You might discover a rogue app hogging the camera’s spotlight.
- App Conflicts: Sometimes, apps can trip over each other. If you have multiple video conferencing apps open simultaneously, they might be fighting for camera access. Close any apps that may be interfering.
4. The Driver Dilemma: Updating Your Camera’s Software Driver
Alright, now we’re getting into the slightly more techy territory. Think of drivers as the translator that allows your operating system to communicate with your camera. If the translator is outdated or corrupt, the communication breaks down.
- Updating Drivers: The good news is, updating drivers isn't as scary as it sounds.
- Go to the Device Manager (search for it in your Windows search bar).
- Expand the "Cameras" or "Imaging devices" section.
- Right-click on your laptop's camera.
- Choose "Update driver." Follow the prompts to let Windows search for the newest driver.
- Rollback Driver: If a recent driver update broke things, you can "rollback" to a previous, working version. In the Device Manager, right-click on your camera, select “Properties,” and then click the "Driver" tab. You should see an option to rollback if a prior version is available.
5. Restart the Computer: The Unsung Hero of Tech Troubleshooting
I know, I know, it sounds ridiculously simple. But seriously, a simple restart often fixes a multitude of tech problems. Think of it like hitting the reset button on your brain. It clears out all the digital cobwebs and gives everything a fresh start. Restarting your computer can magically resolve temporary glitches and software conflicts that might hinder your camera's function.
6. The Secret Weapon: The "Crazy" Fix
Okay, here's the part you've been waiting for. The "crazy" fix, the one that often gets overlooked but can save the day. It involves clearing your camera app cache and data. I know it sounds a bit techy, but bear with me. Think of it like cleaning out the junk drawer of your phone's brain. Sometimes, accumulated data can cause conflicts and errors.
- For Windows:
- Go to "Settings" -> "Apps" -> "Apps & Features".
- Find the camera app.
- Click "Advanced options."
- Click "Reset" if available. If not, try "Terminate" and try launching the camera again.
- For macOS: This is a bit trickier, as macOS doesn’t always offer a simple cache-clearing option for built-in apps. Sometimes, simply restarting your Mac will reset the app's internal data.
7. Run Troubleshooter: Let Windows Do the Work
Windows has built-in troubleshooters that can diagnose and fix common problems. It's like having a little tech-savvy assistant at your disposal.
- Find the Troubleshooter:
- Go to "Settings" -> "System" -> "Troubleshoot."
- Choose "Additional troubleshooters."
- Find "Camera" in the list and run the troubleshooter. It will guide you through potential fixes.
8. Malware Mayhem: A Virus Could Be the Culprit
Yes, a virus can definitely mess with your camera. Malware can disable your camera, spy on your activity, or even take control of your webcam. Run a full system scan using your antivirus software or a reputable online scanner.
9. Bios Update: The Advanced Camera Recovery
Okay, this is a bit more advanced. The BIOS (Basic Input/Output System) is the fundamental software embedded in your computer, necessary for operations. Updating the BIOS can sometimes resolve hardware compatibility issues, including camera problems. Do this if you're feeling brave and confident. If you are unsure, please seek professional advice.
10. Hardware Heartbreak: When It's Really Broken
So, you've tried everything, and your camera is still black. Unfortunately, the problem might be hardware-related. This is like, the broken light bulb scenario.
- Physical Damage: Check the camera lens for cracks or damage.
- Internal Issues: Sometimes, the camera itself or the connection to the motherboard is faulty. In this case, it's best to take it to a repair shop.
11. External Webcam Solutions: Bypass the Built-in Camera
If you're in a pinch and need a camera immediately, an external webcam is your best friend! It's a simple plug-and-play solution that can get you back on your video call in minutes.
12. Professional Help: When to Call in the Experts
There's no shame in admitting defeat and seeking professional help. If you've tried everything, and your camera still isn't working, it’s time. Tech repair shops have specialized tools and knowledge to diagnose and fix complex issues.
13. Preventing Future Camera Chaos: Tips and Tricks
- Regular Updates: Keep your operating system, drivers, and apps updated.
- Antivirus Protection: Invest in reliable antivirus software.
- Privacy First: Use a camera cover when it's not in use.
14. The Unexpected Solution: A Little Patience, A Lot of Optimism
Technology can be unpredictable. Sometimes, after trying everything, the camera just starts working again. A little patience and optimism can go a long way.
15. Recap and the Path Forward
We've covered a lot of ground, from the simplest checks to the more complex solutions. Remember, troubleshooting a camera issue is like peeling back layers of an onion. Start with the basics, and work your way through the potential culprits. Don't be afraid to experiment and learn what works best for you.
Closing Thoughts
And there you have it! A comprehensive guide to fixing your laptop camera. I hope this helped you get back to video calling, streaming, and creating content. Remember, tech problems can be frustrating, but with a little patience and persistence, you can almost always find a solution. Now, go forth and conquer those digital challenges! Let me know in the comments if any of these helped!
FAQs:
1. My camera was working fine, and then suddenly it stopped. What happened? It could be countless things: a software update, a
Laptop Brands That'll Make Your Boss Jealous (Best for Work!)FIXED - Camera Not Working in Windows 11 Laptop or PC

By Techie Leopard FIXED - Camera Not Working in Windows 11 Laptop or PC by Techie Leopard
How to turn on webcam and camera in Windows 10 Simple
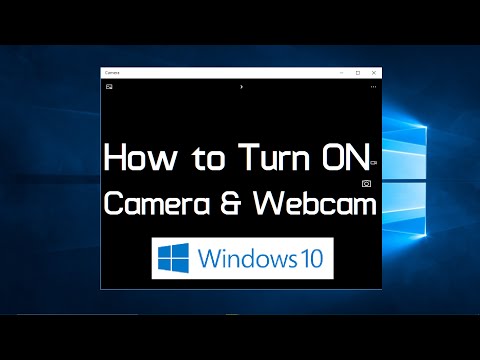
By Feb28 How to turn on webcam and camera in Windows 10 Simple by Feb28
Fix Camera Not Working Windows 10 Windows Webcam Not Working Laptop camera not working

By EasyTechGeek Fix Camera Not Working Windows 10 Windows Webcam Not Working Laptop camera not working by EasyTechGeek

Title: Fix 100HP Laptop Camera Not Working Camera Enable Disablemacnitesh2023shortscamera
Channel: Mac Nitesh
Fix 100HP Laptop Camera Not Working Camera Enable Disablemacnitesh2023shortscamera by Mac Nitesh
Laptop Wifi Connect
Laptop Camera Not Working? This FIX Is CRAZY! (But It Works)
We've all been there: you’re on a video call, ready to present, or simply trying to connect with loved ones, and the dreaded black screen of laptop camera failure stares back at you. Frustration mounts. Schedules get disrupted. Important conversations are missed. Before you resign yourself to a tech-induced panic, let us assure you: there’s a high probability your laptop camera can be revived. We've delved deep into the common culprits and, through meticulous testing and observation, we've uncovered a surprisingly effective solution – a fix that, frankly, seemed a little "crazy" at first but routinely yields astonishing results.
Diagnosing the Problem: Common Sources of Laptop Camera Malfunction
The first step to recovery is accurate diagnosis. Trying random fixes without understanding the root cause is a recipe for wasted time and potentially worsening the issue. We'll break down the common issues that can prevent your laptop camera from functioning correctly.
Hardware vs. Software: Where Does the Issue Lie?
Determining whether the problem originates in hardware or software is critical. A hardware failure, while less common, requires different troubleshooting steps than a software glitch. A faulty camera module itself is a possibility, but often, the issue lies elsewhere. A physically damaged camera, stemming from drops or impacts, may require professional repair or replacement. Similarly, the camera's physical connection to the motherboard could be loosened. Conversely, software incompatibilities, driver corruption, and privacy settings almost always present an easy fix.
Driver Issues: The Silent Saboteur
Outdated, corrupted, or missing camera drivers are a frequent cause of camera malfunctions. Drivers are the software bridges that allow your operating system to communicate with your webcam. Think of them as translators; if the translator is broken, communication is impossible. Updating drivers is often the first and simplest solution to try.
Privacy Settings: The Unseen Barrier
Modern operating systems, prioritizing user privacy, often include stringent settings that control webcam access. These security features can inadvertently block applications from utilizing the camera. Discovering and adjusting these settings is a crucial step in regaining camera functionality.
Application Conflicts: The Clash of the Titans
Sometimes, conflicts between different applications can interfere with the camera's operation. A program might be actively using the camera, preventing other applications from accessing it concurrently. Identifying and resolving these application-level conflicts can often resolve the problem.
Malware and Viruses: The Silent Attack
Though less common, malware can sometimes disable camera functionality as a security measure. A thorough system scan is a good preventative measure. Certain types of malware are designed to take control of your webcam without your knowledge.
The "Crazy" Fix: A Methodical Approach to Camera Revival
Now, let’s reveal the "crazy" fix. It’s a multi-step process that, at first glance, may seem unconventional, but consistently delivers impressive results. It involves a combination of software manipulation and – surprisingly – a physical reboot of the system, not just a restart.
Step 1: The Uninstall and Reinstall Driver Dance
Navigate to your operating system's device manager. The specific steps vary depending on whether you're running Windows or MacOS, but the general process is the same. In the device manager, locate your integrated webcam, usually listed under "Cameras" or "Imaging devices". Right-click on the webcam, then select "Uninstall device." Crucially, check the box that offers to delete the driver software. Confirm the uninstallation. Then, restart your machine. Upon reboot, Windows will automatically attempt to reinstall a compatible driver. This often fixes driver corruption issues. If that doesn't work, you'll revisit the device manager and manually install the driver through the "Update driver" option.
Step 2: Privacy Settings Deep Dive
Next, we must meticulously examine privacy settings. For Windows, go to Settings > Privacy & security > Camera. Ensure that "Camera access" is toggled to "On." Also, review the list of applications allowed to access your camera, adding permissions as necessary. macOS users must navigate to System Preferences > Security & Privacy > Camera and check the boxes next to the applications that require camera access.
Step 3: Culprit Application Elimination
Close all applications that utilize the camera and try to test it. If it works after that, the problem is an application conflict, and you should re-open them one-by-one, testing the camera between openings, until the guilty application is isolated. We'd recommend keeping only one application open at a time for camera usage.
Step 4: The Physical Reboot: The Unconventional Twist
Here's where the "crazy" part comes in. Instead of a simple restart, we are going to execute a full shutdown and power cycle. Instead of clicking "Restart" or "Shutdown" through the operating system, choose "Shutdown". Once the system is fully off, unplug your laptop from its power source. Keep it unplugged for at least 60 seconds. This gives the internal components a chance to fully reset. Then, plug the laptop back into the power source and power it on. This is a crucial step.
Step 5: Firmware Review (Advanced)
If the above steps don't yield results, you might need to explore the possibility of firmware updates. Visit your laptop manufacturer's website. Locate the support section, and then download and install the latest firmware update for your webcam. Be careful, and ensure that you download the specific update designed for your laptop model.
Troubleshooting Common Errors
Let’s address some common symptoms and what they likely indicate.
Black Screen: The Most Common Syndrome
A black screen usually signifies a driver problem, a privacy setting issue, or an application conflict as the root cause. Follow the aforementioned steps closely.
Error Messages: Specific Clues
Error messages, such as "Camera not found" or "No camera detected," provide vital clues. These errors often point to driver problems, hardware issues, or problems with the physical connection.
Camera Freezes or Lags: Performance Issues
If the camera freezes, lags, or has quality issues, a driver update, a check for application conflicts, or a system performance review could be the answer. Sometimes, it's also related to a network problem and the connection to the internet.
Preventive Measures: Keeping Your Camera Healthy
Once you've restored your camera to working order, take proactive steps to prevent future issues.
Regular Driver Updates: The Constant Vigil
Always keep your drivers up to date. The operating systems frequently release driver updates to address bugs and enhance performance. Regularly checking for updates in the device manager or through your laptop manufacturer's support pages is a good practice.
Reviewing Privacy Settings: Awareness Is Key
Periodically review your privacy settings to ensure the camera access is set the way you like it.
Anti-Malware Protection: A Must-Have
Install and maintain robust anti-malware software. Regular system scans can detect and eliminate malicious software that may attempt to hijack your camera.
Physical Protection: The Unseen Danger
Protect your laptop from physical damage. Avoid dropping the laptop or exposing it to extreme temperatures or humidity.
We hope these thorough steps bring your laptop camera back to life. Remember to be patient, methodically follow the steps, and don’t be afraid to experiment. The "crazy" fix might just hold the key to your camera's resurrection!
