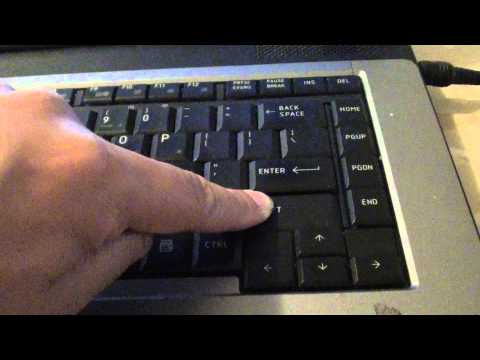
hidden not working keyboard on toshiba satellite laptop

Title: FIXED Toshiba Laptop Keyboard Not Working With Some Keys
Channel: ITJungles
FIXED Toshiba Laptop Keyboard Not Working With Some Keys by ITJungles
Toshiba Satellite Keyboard Nightmare: FIXED! (Easy Steps Inside)
Toshiba Satellite Keyboard Troubles? Conquer the Chaos!
Ah, the Toshiba Satellite. A trusty companion for countless adventures. But, let's be honest, that keyboard? Sometimes, it feels like a rogue party of keys, right? You’ve likely experienced it—stuck keys, unresponsive commands, or a general sense of frustration. Well, breathe easy, friend. We're about to embark on a journey to reclaim your typing sanity. Prepare yourself, because that keyboard nightmare is about to become a distant memory.
The Keyboard Kerfuffle: A Common Complaint
First off, you aren't alone. Toshiba Satellite keyboards, though generally reliable, are prone to issues. Dust, debris, and the occasional spilled beverage are all common culprits. Moreover, software glitches and driver conflicts can also contribute to the problem. Rest assured, though, solving it is within reach. Therefore, let's dive in.
Step 1: The Initial Keyboard Reconnaissance Mission
Before getting into anything complex, sometimes the simplest solutions are the most effective. Firstly, carefully inspect your keyboard. Are any keys physically stuck? Do they feel sticky or unresponsive? Consequently, remove any visible debris. Use a can of compressed air. Direct the air jets between the keys. This can dislodge dust or crumbs. Furthermore, give the keyboard a gentle shake upside down. That might dislodge stubborn particles.
Step 2: Reboot and Revive Your System
Next, the old reliable: a system reboot. Often, a simple restart can magically fix software glitches. Therefore, close all your applications. Then, shut down your Toshiba Satellite. Wait a few moments. Power it back up. Consequently, see if your keyboard now functions correctly. This step resolves many temporary software issues.
Step 3: Driver Detective: Unmasking the Culprit
Still having trouble? The keyboard driver might be the issue. Access the Device Manager. You can find it in the Windows search bar. Type "Device Manager" and select it. Furthermore, look for "Keyboards." Expand this section. Right-click on your keyboard device. You may see options like "Update driver," "Uninstall device," or "Disable device".
- Update Driver: Choose "Update driver." Select the option to automatically search for updated drivers. Windows will search for the most up-to-date version. It will install it.
- Uninstall and Reinstall: If updating fails, try uninstalling the driver. Right-click on the keyboard device. Then, select "Uninstall device." Restart your laptop. Windows will automatically reinstall the correct driver upon startup.
- Disable and Enable: As an alternative, try disabling the keyboard. Then, re-enable it. This can sometimes reset communication issues.
Step 4: Cleanliness is Next to Keyboardliness
It is also worth noting that regular cleaning prevents future issues. Invest in a keyboard cleaning kit. These kits often include small brushes and cleaning solutions. Carefully clean between the keys. Use a microfiber cloth to wipe down the surface. Remember to unplug your laptop. This is especially important if using cleaning solutions.
Step 5: The Diagnostic Deep Dive (Advanced Tactics)
Okay, so far, so good? If the keyboard still acts up, it’s time for further investigation. Consider the following.
- External Keyboard Test: Connect an external USB keyboard. Does it work flawlessly? If so, this strongly suggests the problem resides within the laptop's keyboard hardware.
- System Restore: If the problem appeared recently, consider using System Restore. This will revert your system to an earlier point in time. It might fix any software conflicts.
- Hardware Inspection (Extreme Measures): If comfortable, open your laptop (exercise caution!). Inspect the keyboard's ribbon cable connection to the motherboard. A loose connection can cause problems. However, this is only for the tech-savvy.
Step 6: When to Seek Professional Help
Admittedly, sometimes the issue is beyond DIY repair. If you’ve exhausted all these steps, consider professional help. Furthermore, a hardware malfunction might be to blame. A technician can diagnose and repair the problem. Especially, if your keyboard has failed or is beyond repair.
Conclusion: Typing Triumph Achieved!
Congratulations! By following these steps, you've increased your odds of resolving your Toshiba Satellite keyboard woes. Consequently, you’ll be typing away with renewed confidence. Remember to be patient. Be systematic. In fact, a little troubleshooting can often save you a lot of money. You can definitely do it. Now, get back to enjoying your laptop! Happy typing!
HDMI Dead? Fix Your Laptop's Mystery HDMI Glitch!Toshiba Satellite Keyboard Nightmare: FIXED! (Easy Steps Inside)
Hey everyone! We’ve all been there, right? That heart-stopping moment when your trusty laptop keyboard decides to throw a tantrum. For Toshiba Satellite owners, this often manifests as sticky keys, unresponsive letters, or even a complete keyboard blackout. It's enough to make you want to chuck the whole thing out the window! But before you resort to drastic measures, take a deep breath. We’re diving deep into the Toshiba Satellite keyboard woes and, more importantly, how to fix them. This isn't a technical manual; think of it as a friendly chat with a tech-savvy buddy who's been through the trenches and lived to tell the tale.
1. The Keyboard Kraken: Understanding the Problem
Before we start waving our tech wands, it's crucial to understand the enemy. Keyboard problems in Toshiba Satellite laptops are a bit like a hydra; solve one issue, and another might pop up. Common culprits include dust and debris, liquid spills (oh, the horror!), driver conflicts, and sometimes, sadly, hardware failure. Diagnosing the root cause is the first step to victory. Think of it as a detective game – we need to find the clue that unlocks the solution.
2. Spotting the Symptoms: Is Your Keyboard Really Crying Out?
Let's be honest, not every little glitch is a full-blown keyboard catastrophe. Sometimes, it’s just a fleeting hiccup. Here's a quick checklist to help you determine the severity of the situation:
- Sticky Keys: Keys feel gummy, hard to press, or stick when released.
- Unresponsive Keys: Certain keys, or even the entire keyboard, fail to register your input.
- Erratic Behavior: Keys type the wrong characters, repeat themselves, or act randomly.
- Water Damage Indicators: Spilling liquid is like dropping a grenade on your keyboard. Look for visible liquid, strange smells, or unusual behavior.
- Keyboard Not Detected: Your laptop doesn't register the keyboard at all, even after a restart.
If one or more of these symptoms ring true, then it’s time to roll up your sleeves – your keyboard is calling for help!
3. Dust Bunnies and Crumbs: The Great Keyboard Cleaning Adventure
This is often the easiest and most effective first line of defense. Dust, crumbs, and tiny debris are keyboard kryptonite. We’ll need:
- Canned air: Your trusty weapon against the dust devils.
- A soft brush: Like a gentle paintbrush, to loosen stubborn particles.
- A microfiber cloth: For the final polish.
Turn off and unplug your laptop. Turn the laptop upside down and gently shake it to dislodge loose debris. Use the canned air to blast between the keys, aiming at a slight angle. Be patient and thorough! Then, use the soft brush to gently dislodge any remaining particles. Finally, wipe down the keyboard with the microfiber cloth. Sounds simple? Well, sometimes the simple solutions are the best.
4. Spill Alert! Rescuing Your Keyboard from Liquid Mayhem
Liquid spills are the keyboard's worst nightmare. The speed you act matters. Here’s what to do:
- Power Down Immediately: Unplug the power cord and turn off your laptop as fast as you can. This is the most critical step.
- Flip It Over: Gently turn the laptop upside down (keyboard facing down) to let the liquid drain out.
- Absorb the Excess: Use a clean, absorbent cloth to soak up any visible liquid.
- Air It Out: Leave the laptop upside down to dry for at least 24-48 hours in a well-ventilated area. (Patience is key!)
- Seek Professional Help: If the spill was substantial or you're worried about internal damage, it's best to consult a qualified technician.
5. Software Sabotage: Driver Troubleshooting
Sometimes, the problem isn’t hardware; it's software. Corrupted or outdated drivers can wreak havoc. Here’s how to tackle this:
- Open Device Manager: Search for "Device Manager" in the Windows search bar and open it.
- Expand Keyboards: Find "Keyboards" in the list and expand it.
- Right-Click and Update: Right-click on your keyboard device and select "Update driver." Windows will search for updated drivers automatically.
- Uninstall and Reinstall: If updating doesn’t work, try uninstalling the keyboard driver and restarting your laptop. Windows should automatically reinstall the driver.
6. Run the Troubleshooter: Let Windows Take a Stab at It
Windows has built-in troubleshooters designed to diagnose and fix common problems. Give it a shot!
- Open Settings: Go to Settings (the gear icon).
- Update & Security: Click on "Update & Security."
- Troubleshoot: Select "Troubleshoot" from the left-hand menu.
- Keyboard Troubleshooter: Find the "Keyboard" option and run the troubleshooter by clicking "Run the troubleshooter." Follow the on-screen instructions.
7. Physical Inspection: The Anatomy of Your Keyboard
Sometimes, the solution lies in a visual inspection. Carefully examine the keyboard for any obvious signs of damage. Look for:
- Loose Keys: Are any keys physically detached or wobbly?
- Damage to the Key Caps: Are any keys cracked or broken?
- Visible Debris: Is any foreign matter lodged beneath the keys?
If you find any obvious damage, you might need to consider replacing the keyboard, or, at least, the affected keycaps.
8. Keyboard Replacement? When the Fix Isn't Enough
Sometimes, the damage is beyond repair. If you've tried all the troubleshooting steps and the keyboard still isn't working, it might be time for a replacement. This can be a bit daunting, but it’s often easier than you think!
- Research: Find the correct replacement keyboard model for your Toshiba Satellite laptop.
- Tutorials: Watch online videos on how to replace your keyboard.
- Patience: Take your time and follow the steps carefully.
9. Avoiding Future Fiascos: Keyboard Care 101
Prevention is always better than cure! Here are a few tips to keep your keyboard functioning smoothly for the long haul:
- Regular Cleaning: Vacuum or gently wipe the keyboard regularly.
- No Eating or Drinking: Keep food and drinks away from your laptop.
- Protective Cover: Consider using a keyboard cover to protect from spills and debris.
- Gentle Typing: Avoid excessive force when typing.
10. Keycap Removal and Cleaning (Advanced Technique, Proceed with Caution)
If you're feeling brave and a keycap is sticky, you can try removing it for cleaning.
- Power Down: Turn off your laptop and unplug it.
- Gentle Removal: Use a small, flat tool (like a plastic spudger) to carefully pry the keycap off. Be gentle to avoid damage.
- Clean Thoroughly: Clean the keycap and the area underneath with isopropyl alcohol and a cotton swab.
- Reattach: Carefully snap the keycap back into place.
11. Checking for External Keyboard Interference
Sometimes, an external keyboard or a malfunctioning USB port can interfere with your laptop's internal keyboard. Try these steps:
- Disconnect External Devices: Unplug any externally connected keyboards, mice, and other USB devices.
- USB Port Testing: Test your laptop’s internal keyboard and reboot to check if things improved. If so, you may try a different USB port.
12. Battery Issues: The Unexpected Culprit
Believe it or not, sometimes a failing battery can cause unusual laptop behavior, including keyboard issues. Try this:
- Remove the Battery: Power off your laptop and remove the battery.
- Power On with AC Adapter: Plug in the AC adapter and try booting up the laptop.
- Test the Keyboard: Does the keyboard function correctly? If so, the battery could be the culprit. Consider replacing your battery.
13. BIOS Update Considerations (Use with Caution!)
A BIOS update can sometimes resolve hardware compatibility issues. However, this is a more advanced step, and it carries risks. Only proceed if you are comfortable with this procedure and have backed up your data.
- Research: Find the correct BIOS update for your Toshiba Satellite model on the Toshiba support website.
- Follow Instructions: Carefully follow the manufacturer's instructions for updating the BIOS.
- Important: Do not interrupt the BIOS update process!
14. The Ultimate Reset: Factory Reset (When All Else Fails)
As a last resort, you can try a factory reset. This will restore your laptop to its original settings, which can often resolve deeply embedded software issues. Important: This will erase all your data, so be sure to back up anything you want to keep.
- Backup: Back up your important data.
- Factory Reset: Follow the instructions for performing a factory reset on your Toshiba Satellite laptop. These instructions can vary depending on your model, so search online for specific instructions for your laptop model.
Toshiba How-To Troubleshooting keyboard issues on a Toshiba Laptop

By Toshiba Toshiba How-To Troubleshooting keyboard issues on a Toshiba Laptop by Toshiba
Toshiba Laptop Keyboard Not Working and Making Dull Click Sound
By ITJungles Toshiba Laptop Keyboard Not Working and Making Dull Click Sound by ITJungles
Fix Toshiba Keyboard Not Working Windows 1087 - 3 Solutions 2025

By TechFixIT Fix Toshiba Keyboard Not Working Windows 1087 - 3 Solutions 2025 by TechFixIT

Title: Fix Toshiba Laptop Malfunction Keyboard and Touch Pad
Channel: ITJungles
Fix Toshiba Laptop Malfunction Keyboard and Touch Pad by ITJungles
Working With Laptop
Toshiba Satellite Keyboard Woes: A Comprehensive Troubleshooting Guide
The Toshiba Satellite laptop. A stalwart companion for work, study, and entertainment, it has seen its share of service. But, like any piece of technology, it's not immune to the occasional hiccup. One of the most common complaints? A malfunctioning keyboard. Whether it's sticky keys, unresponsive keys, or complete keyboard failure, these issues can quickly derail productivity and lead to frustration. This in-depth guide provides a step-by-step approach to diagnosing and resolving Toshiba Satellite keyboard problems. We'll explore the likely culprits and offer practical, easy-to-follow solutions designed to bring your keyboard back to its full functionality.
Identifying the Problem: Recognizing Keyboard Failure Symptoms
Before diving into solutions, it's crucial to accurately identify the specific keyboard issue. Incorrect diagnosis can lead to wasted time and unnecessary repairs. The following list outlines common symptoms, categorized for clarity:
- Unresponsive Keys: Certain keys, or the entire keyboard, fail to register any input. This might happen intermittently or consistently.
- Sticky Keys: Keys remain depressed after being released, often feeling sluggish or resistant.
- Repeated Characters: A single keystroke produces multiple characters. This could stem from physical debris or software conflict.
- Incorrect Character Output: The wrong characters appear when a key is pressed. This signals a driver or hardware malfunction.
- Random Keyboard Behavior: Unexplained actions, such as cursor movement, unexpected text entry, or program launching.
- Complete Keyboard Failure: The keyboard ceases to function entirely. This is often the most obvious indication of a serious problem.
- Physical Damage: Visible damage, such as missing keys, liquid spills, or noticeable wear and tear.
Carefully observe your keyboard's behavior to pinpoint the precise nature of the problem. This initial assessment is key for selecting the most appropriate troubleshooting steps.
Preliminary Checks: Simple Fixes for Toshiba Satellite Keyboards
Before moving on to more advanced solutions, start with these straightforward checks. They may resolve the issue without requiring technical expertise:
- Restart Your Toshiba Satellite: A simple reboot can often resolve temporary software glitches that are affecting the keyboard's functionality. A complete shutdown and then restart often solves more issues then a simple restart. Ensure everything is closed and saved, and then restart your computer.
- Check the Caps Lock, Num Lock, and Scroll Lock Lights: Make sure these lights are behaving as expected. If these keys are not functioning as intended, then the problem may be with the function keys, and not the keyboard itself.
- Inspect the Keyboard Cable (If Applicable): If your Toshiba Satellite has an externally connected keyboard, ensure the cable is securely plugged into the laptop's port. Check for any damage to the cable itself.
- Clean the Keyboard: Debris such as dust, crumbs, and pet hair can accumulate under the keys, causing them to stick or malfunction. Use compressed air and a soft brush to remove any visible debris.
- External Keyboard Test: Connect an external USB keyboard to your Toshiba Satellite. If the external keyboard works flawlessly, the problem lies within the laptop's built-in keyboard. If the external keyboard does not work, the problem lies somewhere else.
Software Troubleshooting: Resolving Driver and Operating System Conflicts
Software issues are a frequent cause of keyboard problems. Troubleshoot these potential conflicts:
- Check for Driver Issues: Outdated or corrupted keyboard drivers can cause various problems. To update your drivers:
- Right-click the Start button and select Device Manager.
- Expand the Keyboards section.
- Right-click on your keyboard device (it may be listed as "Standard PS/2 Keyboard" or similar) and select Update driver.
- Choose Search automatically for drivers.
- Uninstall and Reinstall Keyboard Drivers: If updating doesn't work, try uninstalling and reinstalling the keyboard drivers. In Device Manager, right-click the keyboard device and select Uninstall device. Restart your Toshiba Satellite, and Windows will automatically reinstall the drivers.
- Run the Keyboard Troubleshooter: Windows has a built-in troubleshooter that can identify and fix common keyboard problems. Go to Settings > System > Troubleshoot > Additional troubleshooters, and select Keyboard.
- Check for Malware: Malware can sometimes interfere with keyboard functionality. Run a full system scan using your preferred antivirus software. Scan your whole computer for any potential dangers.
- Operating System Updates: Ensure your operating system is up-to-date. Software updates frequently include bug fixes and driver improvements that can resolve keyboard issues. Check for these updates and install them.
- Roll Back Recent Windows Updates: If the keyboard problems started after a recent Windows update, consider rolling back to a previous version. Go to Settings > Update & Security > Recovery to access the rollback options.
Hardware Troubleshooting: Addressing Physical Damage and Keyboard Malfunctions
Sometimes, the issue is hardware-related. Here's what to do:
- Keyboard Disassembly (Proceed with Caution): If you are comfortable with hardware repairs, you may attempt to disassemble the keyboard for thorough cleaning or replacement. However, this can be risky, especially if you're not experienced with laptop repairs. Consult the Toshiba Satellite's service manual for disassembly instructions.
- Cleaning Under the Keys: Carefully remove the keycaps (if possible) using a keycap puller or similar tool. Clean the area under the keys with compressed air and isopropyl alcohol (90% or higher) to remove any debris or sticky residue.
- Keyboard Replacement: If cleaning doesn't work, or if the keyboard is physically damaged, replacement may be necessary. Replacement keyboards are available online. Before purchasing, ensure you select the correct keyboard model compatible with your specific Toshiba Satellite model.
- Liquid Damage: If liquid was spilled on your keyboard, immediately shut down your laptop and disconnect the power. Attempt to dry the keyboard thoroughly, but consider professional repair or replacement, as liquid damage can cause severe corrosion.
Advanced Troubleshooting: Specialized Solutions
If the above steps haven't resolved the problem, consider these more advanced techniques:
- BIOS Settings: Access your Toshiba Satellite's BIOS settings during startup (usually by pressing a key like Del, F2, F12, or Esc). Ensure that the keyboard is enabled in the BIOS. Reset the BIOS settings to their default values.
- System Restore: If the keyboard problems started recently, use the System Restore feature to revert your system to a previous state when the keyboard was working correctly.
- Check for Third-Party Software Conflicts: Some third-party software, such as keyboard remapping programs or utilities, could be interfering with the keyboard functionality. Uninstall any recently installed software that might be causing problems.
- Contact Toshiba Support: If all else fails, contact Toshiba's customer support for assistance. They may be able to provide further troubleshooting assistance or arrange for a repair.
Prevention: Maintaining Your Toshiba Satellite Keyboard
Preventing keyboard problems is easier than dealing with them. Here are some preventative measures:
- Regular Cleaning: Clean your keyboard regularly, using compressed air and a soft brush.
- Avoid Eating and Drinking Near the Laptop: This minimizes the risk of crumbs or spills.
- Use a Keyboard Cover: A keyboard cover can protect your keyboard from dust, spills, and other debris.
- Handle Your Laptop Gently: Avoid dropping or subjecting your laptop to excessive force. Protect your investment.
- Software Updates: Keep your operating system and drivers up to date.
By following these detailed instructions, you can effectively troubleshoot and resolve most Toshiba Satellite keyboard problems, restoring your laptop's functionality and productivity. From simple software fixes to complex hardware solutions, this guide provides comprehensive guidance for a seamless keyboard experience.
