usb keyboard not working on laptop

Title: How To Fix USB keyboard not Working on Windows
Channel: TheDroidGuy
How To Fix USB keyboard not Working on Windows by TheDroidGuy
usb keyboard not working on laptop, external keyboard not working on laptop, external keyboard not working on laptop windows 10, usb mouse and keyboard not working on laptop, external keyboard not working on hp laptop, external keyboard not working on dell laptop, external keyboard not working on lenovo laptop, internal and external keyboard not working on laptop, external keyboard not working when laptop is closed, usb keyboard is not working in windows 10
USB Keyboard DEAD? Fix Your Laptop's Typing Nightmare NOW!
My Laptop's Keyboard Quit! What Now? (No Panic, We've Got This)
Ever stared at a blinking cursor, utterly defeated because your laptop's keyboard decided to stage a rebellion? Yeah, it's a frustrating experience. That sense of disconnect, the inability to simply type your thoughts—it's the digital equivalent of being stranded on a deserted island. But breathe easy. Before you chuck your precious machine across the room, let's tackle this head-on. Because, honestly, nine times out of ten, the solution is surprisingly easy.
Is It Really Dead, or Just Playing Hard to Get?
First things first: accurate diagnosis is key. Is your keyboard truly deceased, or is it merely experiencing a temporary glitch? To figure this out, we need to conduct a few simple tests. Try an external USB keyboard. If that one works, then—bingo!—the focus shifts to your laptop's built-in keyboard. Also, check your keyboard shortcuts. Sometimes, especially after an update, settings can shift. For example, Ensure your Num Lock isn't enabled if you're trying to type letters. Lastly, restart your computer. This seemingly basic step often works wonders.
Troubleshooting: Your Keyboard's Comeback Trail
Okay, so the external keyboard sings with a joyful hum, yet your laptop's built-in one remains stubbornly silent. Don’t lose faith! Here’s a practical roadmap to troubleshoot the issue.
1. The Power Cycle Power Play:
This is the digital equivalent of a reset button. First, completely shut down your laptop. Next, disconnect the power cable and remove the battery (if you can). Wait a solid minute—yes, sixty seconds—then reconnect the battery (if applicable) and the power cable. Power the laptop back up. In essence, this clears any lingering power issues that might be causing the keyboard to malfunction.
2. Driver Doctor to the Rescue:
Often, outdated or corrupted drivers are the culprits. To update them, you should access Device Manager. You can do this by right-clicking the Start button (or pressing Windows key + X) and selecting "Device Manager." In the Device Manager, expand the "Keyboards" section. Right-click on your laptop's keyboard and select "Update driver." Select "Search automatically for drivers." Windows will then try to find and install the latest driver. If that fails, you might try uninstalling and reinstalling the keyboard driver.
3. The Sticky Keys Situation (and Other Crumbs):
Sometimes, a single stuck key can cripple the whole operation. Take a good, hard look at the keyboard. Are any keys depressed? Is there obvious debris lurking beneath them? If so, give the keyboard a gentle cleaning. Use compressed air to dislodge any crumbs or dust. Be careful not to apply excessive force. For those stubborn keys, you can try using a soft brush or cotton swab dipped in isopropyl alcohol.
4. Hardware Hiccups: A Closer Inspection:
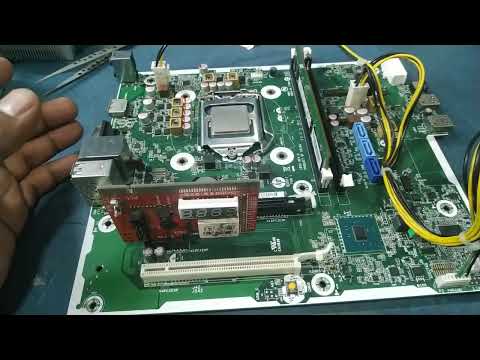
If the software solutions fail, it's time to delve into the potential hardware issues. It is very important to verify the connection. Check the keyboard cable inside your laptop. Locate the cable and make sure it's seated correctly. But, this usually requires technical skills. Consider opening the laptop with caution and carefulness. If you are not comfortable, then it is time to seek expert help.
5. System Restore: Rolling Back to a Better Time:
Think of System Restore as a digital time machine for your computer. If the keyboard problem started recently, consider rolling back your system to a point before the issue started. However, please note that you will lose any changes made since that point.
6. Is it a Software Conflict?
Certain applications could be interfering with your keyboard. In such cases, identify the specific applications that coincide with your keyboard malfunction. You can verify by uninstalling these to see if the issue resolves. Reinstall them one by one after resolving your key issue.
When to Call in the Professionals
If you've tried all these steps and your keyboard is still stubbornly unresponsive, it's time to accept defeat. It is time for professionals. Don't attempt further DIY repairs if you're uncomfortable or unsure. Take your laptop to a trusted repair shop. They will have the tools and expertise to diagnose and fix hardware issues.
Don't Give Up!
A dead keyboard can feel like a major setback. But, typically, these issues are resolvable. Following these steps, you'll be typing again in no time. Stay calm, stay persistent, and remember: you've got this! Keep in mind that even the most frustrating tech problems often have straightforward solutions.
Unleash Your Productivity Beast: The Top Laptops for Office Domination!USB Keyboard DEAD? Fix Your Laptop's Typing Nightmare NOW!
We've all been there. You're in the middle of a crucial email, a marathon gaming session, or maybe just trying to crank out a killer blog post (like this one!), and suddenly… nothing. Your trusty USB keyboard, the silent partner in your digital adventures, has betrayed you. The cursor stands still, the letters refuse to dance across the screen, and a sinking feeling creeps in. Are you staring down the barrel of a mechanical failure? Or is there a simple fix lurking just around the corner? Don't panic! We're here to guide you through the troubleshooting process and get you back in typing shape pronto. Think of us as your keyboard paramedics, ready to resuscitate that unresponsive input device.
1. The Initial Panic: Observing the Symptoms
Before we dive into the toolbox, let's take a deep breath. The first stage is always the worst: the gut-wrenching realization that something's gone wrong. But instead of letting panic take hold, let's analyze the situation. Is every key unresponsive, or just a few? Does the keyboard's backlight still shine (if it has one)? Knowing the details will help us narrow down the problem faster. This is like a doctor asking about your symptoms before prescribing medicine. Remember, a calm assessment is the key to a speedy recovery.
2. The Simple Checks: The Low-Hanging Fruit
Let's start with the basics. Sometimes, the fix is astonishingly simple, like a dropped pencil, a loose connection waiting in the shadows.
- Check the USB Port: This is the digital equivalent of checking if your car has gas. Try plugging the keyboard into a different USB port on your laptop. Sometimes, one port is just being temperamental. Think of it as a grumpy outlet that needs a little coaxing.
- Try a Different Keyboard (If You Have One): Got another USB keyboard lying around? Great! This helps us isolate whether the problem is with your laptop or the keyboard itself. If the second keyboard works, we know the issue is likely with your primary keyboard.
- Is the Cable Secure?: For wired keyboards, ensure the USB connector is firmly plugged into both the keyboard and your laptop. It's easy to accidentally bump the cable. A loose connection is like a loose shoelace: easy to trip over!
- Restart Your Laptop: This classic tech reset often works wonders. Restarting can flush out temporary glitches that might be interfering with the keyboard's functionality. Consider it a digital reboot, clearing the system's memory.
3. Diving Deeper: Software & Driver Troubles
If the simple checks didn't do the trick, we may be dealing with a software-related issue. Don't worry; it's rarely as complex as it sounds.
- Driver Updates: Outdated or corrupted drivers are common culprits. To update your keyboard's driver:
- Open the Device Manager (search for it in the Windows search bar).
- Expand "Keyboards".
- Right-click on your keyboard.
- Select "Update driver".
- Choose "Search automatically for drivers". Windows will try to find the latest drivers.
- Uninstall and Reinstall the Driver: If updating the driver doesn't work, try uninstalling the keyboard and then reinstalling it:
- In Device Manager, right-click on your keyboard again.
- Select "Uninstall device".
- Unplug the keyboard, and then plug it back in. Windows should automatically reinstall the driver.
4. Unearthing Hardware Problems: The Skeletal Examination
If the software solutions don't help, it's time to consider hardware issues. Thankfully, in most cases, it might not be as grave as it seems.
- Inspect the Keyboard for Physical Damage: Are any keys physically stuck or damaged? Look for spilled liquids, crumbs, or anything that might be interfering with the keys' functionality. This is like checking for any obvious wounds on the patient.
- Dust and Debris: Sometimes, just blowing compressed air into the keyboard can clear out dust and debris that could be obstructing the keys. Think of it as performing some digital spring cleaning.
5. Power Issues: Is Your Keyboard Getting Enough Juice?
Some keyboards, especially those with extra features like backlighting or external USB ports, can be power-hungry.
- Try a Powered USB Hub: If your laptop has a limited power supply to its USB ports, a powered USB hub could provide the keyboard with more power. This acts as a power booster that might give your keyboard the extra juice it needs to function properly.
- Battery Check (Wireless Keyboards): For wireless keyboards, ensure that the batteries are not dead. It may seem simple, but this is often overlooked. Replacing them is a quick and easy fix.
6. Bluetooth Blues (Wireless Keyboards Edition!)
For wireless Bluetooth keyboards, the troubleshooting process has a few extra layers.
- Check the Bluetooth Connection: Ensure that Bluetooth is enabled on your laptop and that your keyboard is paired correctly. If the connection has dropped, simply re-pair the keyboard. This is often like a simple reset, making sure both devices are synchronized.
- Distance Matters: Bluetooth has a range limit. Make sure your keyboard is within a reasonable distance from your laptop. Think of it like trying to talk to someone from across a stadium – it's not always easy to get your words across.
- Interference: Other devices or wireless signals can interfere with Bluetooth connections. Try moving your keyboard and laptop away from other electronic devices.
7. Delving into BIOS/UEFI Settings: The System's Core
This is for the more technically inclined, and it concerns system level settings.
- Enable USB Legacy Support (if applicable): Some BIOS/UEFI settings might disable USB keyboard support if the system believes it needs it. Accessing these settings varies depending on your laptop model. Usually, you access the BIOS with repeated taps on a key (Del, F2, F12, or Esc) during startup.
- Check USB Settings: Within the BIOS/UEFI settings, look for any USB-related settings and ensure they are enabled.
8. System File Corruption: The Underlying Illness
Sometimes, the issue is a deeper, systemic one involving corrupted system files.
- Run System File Checker (SFC): Windows has a built-in tool to scan and repair corrupted system files. Open Command Prompt as an administrator and type
sfc /scannow. This will check for and fix any corrupt files.
9. External Devices Clashes: The Digital Neighbors
Sometimes, external devices, such as mice or other USB devices, can interfere with your keyboard's functionality.
- Disconnect Other USB Devices: Try unplugging all other USB devices connected to your laptop, leaving only the keyboard plugged in. This can isolate the conflict.
- Driver Conflicts: Though less common, it's possible that a driver from another USB device is conflicting with your keyboard's driver.
10. Keyboard Specific Software: The Hidden Settings
Some keyboards come with their specialized software, which may interfere with things.
- Check the Keyboard's Software: If you installed dedicated keyboard software, open it up. Make sure that the keyboard is enabled within the software and look for any settings that might disable certain keys or features.
11. The Last Resort: Resetting Your Laptop
As a last resort, resetting your laptop to factory settings can solve many persistent problems.
- Back up your data: Resetting your laptop will erase everything, so back up all your important files first.
- Reset Windows: Open the Settings app and go to "Update & Security" > "Recovery". There, you will find options to reset your PC. Follow the on-screen instructions.
12. Keyboard Replacement: The Farewell
If you've tried all the steps above, and your USB keyboard is still dead as a doornail, it might be time to bid it farewell.
- Consider a replacement: New keyboards are reasonably priced, and you can find a model according to your needs.
- Explore warranty options: If your keyboard is still under warranty, contact the manufacturer for a replacement or repair.
13. Preventive Measures: Keeping Your Keyboard Healthy
Prevention is always better than cure.
- Clean Regularly: Keep your keyboard clean to prevent the build-up of dust and debris. Use compressed air to remove particles.
- Protect from Spills: Avoid eating or drinking near your keyboard. The accidental spill can turn into a disaster.
- Proper Ventilation: Ensure that your keyboard is kept in a well-ventilated environment.
14. Seeking Professional Help: When to Call the Experts
Sometimes, a hardware issue is too complex to fix at home.
- Laptop Repair Shop: If the problem persists contact a repair shop. These professionals have the tools and expertise to diagnose and fix complicated keyboard issues.
15. The Digital Checklist: Keyboard Recovery Plan
This is a summary of the essential steps, so you can refer to them again in the future.
- Symptom Analysis: Start by acknowledging the problem.
- Initial Checks: The core troubleshooting of USB ports, replacement, cable assessment, and restarts.
- **Driver Diagnostics
keyboard is not working in BOOT or BIOS solutions 2022

By Solution Domain keyboard is not working in BOOT or BIOS solutions 2022 by Solution Domain
Hp motherboard keyboard mouse not working in all usb port solution rear front usb 100 free
By TRC TECH Hp motherboard keyboard mouse not working in all usb port solution rear front usb 100 free by TRC TECH
USB DEVICE NOT RECOGNIZED Window 7 Keyboard Connect problem

By NilTalks USB DEVICE NOT RECOGNIZED Window 7 Keyboard Connect problem by NilTalks

Title: USB Keyboard Not Recognized in Windows 10 FIX Solution
Channel: MDTechVideos
USB Keyboard Not Recognized in Windows 10 FIX Solution by MDTechVideos
Laptop Wifi Connect
USB Keyboard DEAD? Fix Your Laptop's Typing Nightmare NOW!
Let's face it: a non-functional keyboard on your laptop is not just an inconvenience – it's a digital disaster. Whether you're battling a critical deadline, composing an important email, or simply catching up on your favorite online content, a dead USB keyboard throws a major wrench into your workflow. Fear not! We're here to guide you through a comprehensive troubleshooting roadmap, ensuring you regain control of your digital interface and banish that frustrating typing nightmare, forever.
Diagnosing the Problem: Pinpointing the Culprit
Before we dive into solutions, we need to accurately diagnose the root cause. Is it the keyboard itself, the USB port, or an underlying software issue? Let's methodically investigate.
1. The Keyboard: Evaluating the External Device
a) Physical Inspection: Begin with a visual check. Examine the USB keyboard's cable for any obvious damage – cuts, kinks, or fraying. These can interrupt the electrical signals and prevent communication. Also, inspect the USB connector itself. Are the pins bent, or is there any debris obstructing a solid connection? Dust and dirt can accumulate over time, creating connectivity issues.
b) Testing on Another Device: The simplest and often most effective diagnostic step is to connect your USB keyboard to another computer (another laptop, a desktop, etc.). If it works flawlessly on the other machine, you've narrowed the problem down to your original laptop. If it doesn't work, the issue likely resides within the keyboard itself. Perhaps the keyboard is defective, or the internal components have suffered damage.
c) Battery Check (For Wireless Keyboards): If you're using a wireless USB keyboard, fresh batteries are absolutely essential. Replace the batteries with new ones, ensuring they're of the correct type and installed correctly. Also, check the keyboard's power switch to ensure it's turned on.
2. The USB Port: Investigating the Laptop's Interface
a) Multiple USB Ports: Your laptop likely has multiple USB ports. Try connecting your USB keyboard to each of them, one at a time. If the keyboard functions using one port but not another, the non-functioning port is likely the issue. Sometimes, a single USB port can become damaged or malfunction, while others continue to operate normally.
b) Port Inspection: Visually inspect the USB ports on your laptop. Look for any signs of physical damage, such as bent pins or debris. Use a flashlight to get a better view. Be extremely cautious when inspecting the ports, as any forced insertion or manipulation can worsen the situation.
c) Device Manager (Windows): Access the Device Manager (search for it in the Windows search bar). Expand the "Keyboards" section. Is your USB keyboard listed? If it has a yellow exclamation point or a red "X" next to it, there's a problem. Right-click on the keyboard entry and select "Update driver" to install the latest drivers. Consider uninstalling and reinstalling the keyboard from Device Manager.
d) System Information (macOS): Go to Apple Menu > About This Mac > System Report. Under "Hardware," click "USB." Does your keyboard appear in the USB device list? If it's not listed, the laptop isn't recognizing it at all, suggesting a hardware or driver problem.
3. The Operating System: Software-Related Troubles
a) Driver Issues: Outdated, corrupted, or incompatible drivers are a primary cause of keyboard malfunctions. Reinstalling the drivers is often a solution.
b) Software Conflicts: Certain software applications can interfere with keyboard functionality. If you recently installed any new software or updated existing programs, try uninstalling them one by one and see if that resolves the keyboard problem.
c) Operating System Updates: Ensure your operating system is up-to-date. Updates often include bug fixes and driver improvements that can address keyboard issues. Install any pending updates and restart your computer.
d) Keyboard Settings: Check your operating system's keyboard settings. In Windows, go to Control Panel > Keyboard. In macOS, go to System Preferences > Keyboard. Ensure the keyboard language and layout are correctly configured for your needs.
Step-by-Step Solutions: Conquering the Typing Crisis
Now that we've assessed the problem, let's implement targeted solutions.
1. Simple Solutions First: The Quick Fixes
a) Restart Your Laptop: This simple step often resolves software glitches and temporary conflicts. Shut down your laptop completely, wait a few seconds, and then restart it.
b) Unplug and Replug: Disconnect the keyboard from the USB port, wait a few seconds, and then plug it back in. This refreshes the connection and can sometimes resolve minor communication issues.
c) Try a Different USB Cable (if applicable): If your keyboard has a detachable USB cable, try connecting it using a different cable. The original cable might be faulty.
2. Troubleshooting Driver-Related Problems
a) Update Drivers: As mentioned, outdated drivers are a common culprit. In Device Manager (Windows), right-click on the keyboard entry and select "Update driver." Choose "Search automatically for drivers." Windows will attempt to find and install the latest drivers.
b) Uninstall and Reinstall Drivers (Windows): In Device Manager, right-click on the keyboard entry and select "Uninstall device." Then, unplug the keyboard. Restart your computer. After the computer restarts, plug the keyboard back into the USB port. Windows should automatically attempt to reinstall the drivers.
c) Download Drivers from the Manufacturer's Website: If the automatic driver update fails, visit the keyboard manufacturer's website and download the latest drivers for your specific keyboard model. Install the drivers manually.
3. Addressing USB Port Issues:
a) Test Different USB Ports: As mentioned, try each USB port on your laptop.
b) Use a USB Hub (with external power): Connect your keyboard to a powered USB hub. This can provide a more stable power supply and can sometimes bypass problematic USB ports.
c) Check Power Management Settings (Windows): In Device Manager, right-click on "USB Root Hub" and go to Properties > Power Management. Uncheck "Allow the computer to turn off this device to save power."
d) Hardware Check (If Necessary): If none of the above solutions work, the USB port itself may be damaged. This can require professional repair services.
4. Advanced Troubleshooting Techniques
a) System Restore (Windows): If the keyboard issue began recently, you could try a system restore. This will revert your computer to a previous state when the keyboard was functioning correctly. However, it will also undo any changes you've made since the restore point.
b) BIOS/UEFI Settings (Advanced): In very rare cases, the keyboard settings within the BIOS/UEFI might be the issue. This is a more advanced area and requires caution. Consult your laptop's manual for specific instructions.
c) Clean Boot (Windows): Perform a "clean boot" to start Windows with a minimal set of drivers and startup programs. This helps determine if a third-party application is interfering with your keyboard. Search for "msconfig" in the Windows search bar, go to the "Services" tab, check "Hide all Microsoft services," and then click "Disable all." Reboot your computer.
5. When to Seek Professional Help
While we've covered extensive troubleshooting, some issues require professional intervention. Consider contacting a qualified computer technician or repair service if:
- You suspect a hardware failure (e.g., damaged USB port)
- You've tried all the steps above without success
- You're not comfortable performing advanced troubleshooting steps
Preventative Measures: Keeping Your Keyboard Happy
Prevention is always better than cure! Implement these simple tips to minimize future keyboard problems:
- Handle Cables Gently: Avoid pulling or yanking the USB cable.
- Clean the Keyboard Regularly: Use compressed air to remove dust and debris from the keys and the USB connector.
- Software Updates: Keep your operating system and drivers updated.
- Surge Protection: Use a surge protector to protect your laptop (and all your electronics) from power surges.
Conclusion: Reclaiming Your Digital Productivity
A dead USB keyboard can be a frustrating experience. By systematically following the diagnostic steps and the troubleshooting solutions outlined above, you can effectively diagnose the problem and restore your laptop's keyboard functionality. Don't let a typing nightmare hold you back! Take action now, and reclaim your digital productivity. You'll be typing smoothly and efficiently again in no time!
