cooling fan not working laptop

Title: Laptop Over Hitting Problem Cooling Fan not workingmacniteshlaptop
Channel: Mac Nitesh
Laptop Over Hitting Problem Cooling Fan not workingmacniteshlaptop by Mac Nitesh
cooling fan not working laptop, cooling fan not running laptop, laptop cooler fan not working, dell laptop cooling fan not working, hp laptop cooling fan not working 90b, lenovo laptop cooling fan not working, acer laptop cooling fan not working, asus laptop cooling fan not working, hp laptop cooling fan not working correctly, toshiba laptop cooling fan not working
Laptop Fan Died? This SHOCKING Fix Will Cool Your Overheating PC!
Laptop Fan Fried? Don't Sweat It! Cool Solutions for Your Overheating PC
Have you ever felt that surge of panic as your laptop starts sounding like a jet engine preparing for takeoff? Then, you likely know the dread of a dying fan. It can be a real nightmare. That searing heat radiating from your keyboard isn't just uncomfortable. It's also a major threat to your precious data. We're talking about potential component meltdowns. But, hold on. Don't rush to the electronics store, or worse, resign yourself to a costly repair. Instead, let's explore some surprisingly effective solutions that might just save the day.
Identifying the Overheating Culprit: A Quick Diagnosis
Before diving into fixes, we must confirm the fan is the problem. The first sign is the loud noise itself. However, it could mean something else. Listen closely. Does the noise fluctuate, or is it constant? Is the exhaust vent blowing hot air? If not, something else may be at fault. Thus, you'll need to consider other possibilities. Then, observe the machine's performance. Is it sluggish? Does it freeze or crash frequently? Take appropriate action. These are all telltale signs of a heat-related issue. If you're still unsure, check your CPU temperature. It is easily achieved. You can find free temperature monitoring tools online. These tools will tell you if your CPU is reaching dangerous levels.
The Emergency Cooling Protocol: Immediate Actions to Take
Your laptop is scorching. Now what? First, stop using the device immediately. Shut it down. Then, unplug the power adapter. This is crucial. Next, place the laptop on a hard, flat surface. Avoid using it on a bed or a soft cushion. Moreover, these surfaces can trap heat. After that, elevate the laptop. You can use books or small objects to prop it up. This improves airflow underneath. This will often help a little.
DIY Cooling Solutions: Simple Fixes That Work Wonders
Now, let's get hands-on, shall we? Surprisingly, you can often resolve overheating issues yourself. First, consider compressed air. Dust is a major enemy of laptop cooling. It accumulates over time. It clogs the fan and vents. Get a can of compressed air. Carefully direct it into the vents. Then, give the fan and the internal components a good blast. You can use a small brush. Use it to gently dislodge stubborn dust particles. In addition, a laptop cooling pad is a great investment. It provides an external fan. Therefore, it boosts airflow. There are many models available. Choose one that fits your laptop's size.
Delving Deeper: Intermediate Troubleshooting Techniques
If the basic fixes don't work, let’s dig deeper. Firstly, examine your software. Resource-intensive applications can strain the CPU. They will also generate more heat. Close any unnecessary programs. Also, consider uninstalling any unwanted software. Sometimes, background processes are the culprit. Review your startup programs. Disable any that you don't need. Then, update your drivers. Outdated drivers can also cause performance issues. They may also contribute to overheating. Lastly, perform a system restore. This is to when your laptop was running smoothly.
Advanced Techniques: When It's Time for More In-Depth Action
Are you still having trouble? It might be time for more advanced methods. Consider opening the laptop. This is for cleaning or component replacement. However, proceed with caution. Make sure your laptop is unplugged. Then, consult your laptop’s service manual. It provides detailed opening instructions. For less confident users, it might be better to call in professionals. You could also replace the thermal paste. Over time, it dries out. Therefore, it loses its effectiveness. Replacing it can significantly improve cooling. This is a more advanced repair. Ensure you do your research.
Prevention is Key: Maintaining a Cool and Happy Laptop
Prevention is always better than cure. Therefore, make it a habit. Keep your laptop clean. Regularly dust the vents. Also, keep it away from direct sunlight. Avoid using it in hot environments. Furthermore, monitor your CPU temperature. This helps you identify any emerging issues. By following these tips, you can enjoy a cool and efficient laptop.
The Ultimate Takeaway: Empowering Yourself with Knowledge
Ultimately, an overheating laptop is a common problem. You don't need to feel helpless. With a little knowledge, you can resolve it. So, don't panic. Follow these steps. You can keep your laptop running smoothly. You'll be well-equipped to tackle any heat-related issues.
Is Your Gaming Laptop Secretly a Productivity Beast? (Office Work SHOCK!)Laptop Fan Died? This SHOCKING Fix Will Cool Your Overheating PC!
Hey everyone, and welcome! We've all been there. That dreaded moment when your laptop starts sounding like a jet engine taking off, or worse, just completely shuts down without warning. You check the vents, feeling for airflow, and… nothing. Yep, you guessed it. Your laptop fan has probably kicked the bucket. It's a frustrating situation, leaving you with an expensive paperweight that’s hotter than a jalapeño in July. But don't despair! We're going to dive into this issue head-on and explore some shockingly effective solutions to cool that overheating PC.
1. Identifying the Culprit: Is it REALLY the Fan That's Dead?
Before you rush out and buy a new fan (or worse, a whole new laptop!), let's be absolutely sure the fan is the problem. Sometimes, the solution is far simpler than you think. Have you checked these common culprits?
- Dust Bunnies' Reign of Terror: Dust, the silent killer of electronics, loves to accumulate inside your laptop, especially around the fan and vents. Think of it as a fuzzy blanket suffocating your cooling system.
- Software Overload: Are you running a bunch of programs simultaneously? Heavy applications, like video editors or games, demand a lot of processing power, causing your CPU to heat up.
- Outdated Drivers: Believe it or not, outdated drivers can sometimes hinder your fan's performance. This is like having a faulty conductor leading your cooling orchestra.
- The Battery's Demands: Older or worn-down batteries can sometimes contribute to overheating.
So, before you start contemplating fan replacement, give your laptop a thorough cleaning with compressed air, close unnecessary applications, update your drivers, and consider your battery's age. These simple fixes can often do the trick!
2. The Emergency Procedures: Immediate Actions to Prevent Melt-Down
Okay, so you've confirmed the fan situation, and it's not looking good. What do you do right now to prevent your laptop from completely frying itself? Time is of the essence!
- Power Down (If Possible): If the laptop is still functional, shut it down immediately. This gives it a chance to cool off and prevents further damage.
- Elevate and Ventilate: Place your laptop on a hard, flat surface, like a desk or table. Avoid using it on your bed or a soft surface, which can block the vents. Prop it up slightly (use books, a box, anything!) to improve airflow underneath.
- External Cooling Intervention: If you have access to an external USB-powered cooling pad, now's the time to break it out. This can provide some much-needed relief.
- The Ice Pack Gamble (Use with CAUTION!): In dire emergencies, and I stress, with extreme caution, you could place a cold pack (NOT ice directly!) on the underside of your laptop. Make sure it's wrapped in a towel to prevent condensation. This is a temporary measure only.
Think of these steps as first aid for your overheating laptop. They're designed to buy you some time while you figure out a more permanent solution.
3. Exploring the Repair Options: From DIY to Professional Help
Alright, now that we've stabilized the patient, let's discuss some potential repair strategies. You have several options, each with its own pros and cons.
- DIY Fan Replacement - The Braveheart Approach: If you're feeling adventurous and technically inclined, you can replace the fan yourself. This often involves disassembling your laptop, which can be a bit daunting. But hey, there's a certain satisfaction in fixing something yourself, isn't there? You'll need to find the correct replacement fan model for your specific laptop model, which you can usually find online (Amazon or eBay are your friends!). Important note: make sure you have the right tools (small screwdrivers, anti-static wrist strap, etc.) and follow a good, reliable online guide (YouTube is your best friend here).
- Professional Repair - The Safety Net: If you're not comfortable tinkering with electronics, or if your laptop is still under warranty, consider taking it to a professional repair shop. They have the expertise, tools, and replacement parts to get the job done right. The downside? It can be more expensive than DIY.
- The "Laptop-as-a-Desktop" Hack - The Creative Solution: Okay, so this one is a bit outside the box, but hear me out. If your laptop is consistently overheating and beyond repair, you could potentially connect it to an external monitor, keyboard, and mouse, treating it like a desktop computer. This means the laptop's lid stays open, allowing for better airflow. It’s not a perfect solution, but it can extend the life of your laptop if you can’t afford a new one immediately.
Choosing the right path depends on your comfort level, budget, and the value of your laptop.
4. Diving Deep: How to Replace a Laptop Fan (DIY Edition)
Okay, you're ready to get your hands dirty (or at least, your workspace is!). Here's a simplified overview of the DIY laptop fan replacement process. Remember, this is a general guide; always consult specific instructions for your laptop model.
- Step 1: Gather Your Supplies: You'll need a replacement fan (obviously!), a small Phillips head screwdriver set, an anti-static wrist strap, plastic opening tools (optional, but very helpful), and possibly thermal paste (if you need to reapply it to the CPU/GPU).
- Step 2: Power Down (and Unplug EVERYTHING): Completely switch off your laptop, remove the battery (if possible), and unplug the power adapter.
- Step 3: The Great Disassembly: Flip your laptop over and remove any screws holding the bottom panel in place. Identify the screws, and carefully remove them, ideally keeping them in a safe place that you can remember. Use your plastic opening tools to gently pry the bottom panel open. (Watch video tutorials specific to your model to avoid breaking anything).
- Step 4: Locate the Fan: Once inside, find the fan unit. It will likely be connected to the motherboard with screws and a small cable. Observe how the fan is connected before you start disconnecting components.
- Step 5: Disconnect and Remove: Carefully disconnect the fan's cable from the motherboard. Remove the screws holding the fan in place.
- Step 6: Insert and Connect the New Fan: Place the new fan in the same position and screw it into place. Reconnect the fan cable to the motherboard.
- Step 7: Reassemble and Test: Carefully reassemble your laptop, screwing the bottom panel back in place. Plug in the power adapter and turn the laptop on. Hopefully, the new fan will whir into life! Monitor temps.
Whew! That's a simplified version. Now research your specific laptop model and find a guide. Take your time, be patient, and remember the mantra: “If it doesn’t fit, don’t force it!”
5. Preventing Future Overheating: Cooling System Best Practices
So, you've fixed your fan, or maybe you're rocking the “laptop-as-a-desktop” life. Great! But how do you prevent this from happening again?
- Regular Cleaning is KEY: Dust is the enemy! Make it a habit to clean your laptop's vents with compressed air at least once a month, or more frequently if you use it in a dusty environment.
- Surface Matters: As mentioned before, use your laptop on hard, flat surfaces whenever possible. Avoid using it on your bed, a blanket, or other soft surfaces that can restrict airflow.
- Monitor Your CPU/GPU Temperature: There are free software programs available (like HWMonitor) that allow you to monitor your CPU and GPU temperatures in real time. This can help you identify potential overheating problems before they become critical.
- Update Drivers Regularly: Keep your graphics card drivers and other hardware drivers up to date. They often include performance and efficiency improvements.
- Consider a Cooling Pad: If you frequently use your laptop for demanding tasks, a cooling pad can provide an extra layer of protection against overheating.
Proactive maintenance is the best medicine! With these habits, you can help your laptop stay cool and happy.
6. The Myths of Overheating: What You Think You Know (But Probably Don't)
There’s a lot of misinformation out there about laptop overheating. Let's debunk a few common myths.
- Myth 1: Higher Ambient Temperature = Instant Disaster: While a hot room can contribute to overheating, laptops are designed to operate in a wide range of temperatures. It’s usually excessive internal heat from use, not the room temperature, that's the primary concern.
- Myth 2: Replacing the Fan is Always Necessary: As we’ve seen, sometimes the solution is a simple cleaning or driver update. Don't jump to conclusions!
- Myth 3: Closing the Lid While Connected to an External Monitor is Safe: Mostly safe, yes, but still monitor temps, and make sure there's adequate air circulation around the laptop. This can depend on your laptop’s design.
- Myth 4: More RAM Solves All Overheating Problems: RAM can certainly help with multitasking and performance, but
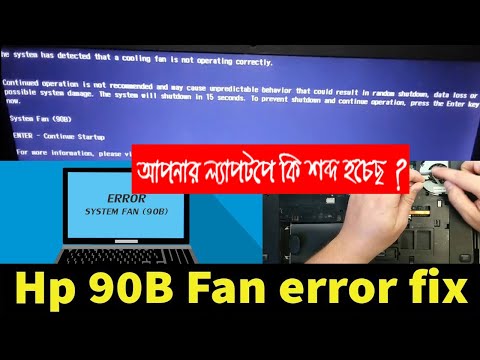
Laptop System Fan 90B Error Fix in Bangla The system has detected that a cooling fan not working
By AL-HERA Multimedia Laptop System Fan 90B Error Fix in Bangla The system has detected that a cooling fan not working by AL-HERA Multimedia
Laptop Computer PC Fan Not Spinning Not Turning Overheat Overheating Grease Lubricate Repair Fix

By It's Binh Been Repaired & Everything Reviewed Laptop Computer PC Fan Not Spinning Not Turning Overheat Overheating Grease Lubricate Repair Fix by It's Binh Been Repaired & Everything Reviewed
How to check if the laptop fan is working

By Tech-Care How to check if the laptop fan is working by Tech-Care

Title: The System Has Detected That A Cooling Fan Is Not Operating Correctly HP Fan Error 90B Fixed
Channel: TARIQ LAB
The System Has Detected That A Cooling Fan Is Not Operating Correctly HP Fan Error 90B Fixed by TARIQ LAB
My Laptop Work
Laptop Fan Died? This Shocking Fix Will Cool Your Overheating PC!
The sudden, agonizing silence. The creeping heat. The dread. Your laptop fan, the tireless guardian of your precious processor, has given up the ghost. You're staring down the barrel of a potential system shutdown, data loss, or worse: permanent hardware damage. Don't panic. We understand the frustration, the urgency. But before you resign yourself to a trip to the repair shop or an expensive component replacement, let’s explore the often-overlooked, surprisingly effective solutions that can breathe new life into your overheated laptop. The goal is to get you back to your work, gaming, or streaming as swiftly and comfortably as possible.
Understanding the Enemy: Why Your Laptop Overheats in the First Place
Before implementing any fixes, it's crucial to grasp the underlying causes of laptop overheating. This understanding empowers you to not only address the immediate problem but also to prevent future occurrences. Modern laptops, particularly ultra-thin models, cram a lot of powerful components into a compact space. This inherently leads to heat buildup. The primary culprits are the CPU (Central Processing Unit) and GPU (Graphics Processing Unit), which generate significant heat when processing demanding tasks. Here’s a breakdown of the common contributing factors:
- Dust and Debris Accumulation: This is the number one enemy. Over time, dust, pet hair, and other debris infiltrate the laptop’s internal components, particularly the fan and heat sink. This accumulation acts as an insulator, blocking airflow and trapping heat.
- Demanding Software: Resource-intensive applications, such as video editing software, high-end games, and virtual machines, push your CPU and GPU to their limits, generating substantial heat.
- Ambient Temperature: Hot environments exacerbate the problem. Using your laptop in direct sunlight or a poorly ventilated room intensifies the heat load.
- Aging Thermal Paste: The thermal paste, a crucial component that bridges the gap between the CPU/GPU and the heat sink, degrades over time. Its effectiveness diminishes, leading to inadequate heat transfer.
- Fan Malfunction: Naturally, a non-functioning or underperforming fan is a primary cause. The fan is directly responsible for dissipating heat.
- Software Conflicts and Malware: Certain software conflicts or the presence of malware can consume excessive CPU resources, contributing to overheating.
Step-by-Step Recovery: Reviving Your Overheated Laptop
We'll proceed with a multi-faceted approach. Even if the fan itself is the primary issue, other steps can minimize future problems.
1. The Immediate Response: Cooling Strategies to Prevent Total Meltdown
When your laptop starts to overheat and you hear the telltale signs of fan failure (or no sound at all), immediate action is required. The goal is to reduce the internal temperature as quickly as possible to prevent damage. Prioritize these actions:
- Shutdown is Key: The first and potentially most important step is to shut down your laptop immediately. Do this, and do this fast! This halts the heat-generating processes. A forced shutdown (holding the power button) is acceptable if the system won't respond otherwise, but ensure you save your work beforehand because it can lead to data loss.
- External Cooling Solutions: If a complete shutdown isn't feasible (perhaps in the middle of crucial work), employ some external cooling strategies. A laptop cooling pad is a worthwhile investment. These pads typically have fans that blow air onto the bottom of your laptop, improving airflow. Ensure the cooling pad is connected, and that any vents are not blocked. If you do not have a cooling pad, elevate the laptop to promote natural convection. Place the laptop on a book or a similar object to improve airflow under the device.
- Resource Monitor Check: Before shutting down, rapidly open your Task Manager (Windows) or Activity Monitor (macOS). Identify any processes that are consuming a disproportionate amount of CPU resources. If you see a highly intensive application that you are not actively using, shut it down. This can immediately relieve pressure.
2. Forensic Investigation: Diagnosing the Problem and Planning Your Attack
With the immediate threat contained, it's time to determine the root cause. This necessitates more detailed analysis.
- Visual Inspection: Once the laptop has cooled considerably, a basic visual inspection can tell you a lot. Carefully examine the vents (usually located on the sides or bottom) for any visible dust buildup. Check to see if any of the fan blades appear damaged or obstructed.
- System Diagnostics (If Possible): Many laptops come with pre-installed diagnostic tools accessible through the BIOS/UEFI settings (accessed by repeatedly pressing a key like Del, F2, or F12 during startup). These tools can often test the fan's functionality. Consult your laptop's manual or manufacturer's website for specific instructions. While this won't fix a dead fan, you can learn how to access vital information from your BIOS.
- Temperature Monitoring: Install a temperature monitoring program (like HWMonitor or Core Temp) to track CPU and GPU temperatures. Run your laptop, and notice the temperature increases. This will help you evaluate the effectiveness of any fixes. The readings allow you to monitor the impact of any changes you make.
3. The Dust Devil: Cleaning the Internal Components
This is where the real work begins. Cleaning the internal components is often the most effective way to restore proper cooling.
- Safety First: Before opening your laptop, disconnect it from its power source. Remove the battery if possible (consult your laptop's manual). You're working with sensitive electronic components, so static electricity can be a danger. Ground yourself by touching a grounded metal object before you begin, consider using an anti-static wrist strap.
- Disassembly: Refer to your laptop's service manual or online guides (YouTube is your friend here). Carefully remove the necessary screws and panels to access the fan and heat sink. Be meticulous in your organization and note the location of screws. Keep anything that could be lost in a secure location.
- The Air Cannon: Use compressed air to thoroughly clean the fan blades, heat sink fins, and surrounding components. Direct the air blasts carefully to dislodge dust and debris. Avoid excessive force that could damage the fan blades.
- Gentle Cleaning: For stubborn grime, a soft brush (like a toothbrush) or cotton swabs lightly dampened with isopropyl alcohol can be used to clean the fan blades and heat sink. Be very gentle to avoid damage.
- Reassembly: Once the area is clean, carefully reassemble the laptop, ensuring all screws and panels are properly secured.
4. Thermal Paste: The Lubricant of Heat Transfer
Thermal paste is a critical component of your laptop's cooling system. If the laptop is old, consider replacing the thermal paste.
- Removal: Carefully disconnect the heat sink from the CPU/GPU. With the use of isopropyl alcohol, remove the old thermal paste from both the CPU/GPU and the heat sink. Use a lint-free cloth or cotton swab for this task.
- Application: Apply a small amount of new thermal paste to the CPU/GPU. There are various application methods (dot, line, spread). Research what is best for your CPU/GPU.
- Reassembly: Carefully reattach the heat sink, ensuring proper contact with the CPU/GPU.
5. The Fan Replacement: When DIY Fails
If the fan is truly dead (doesn’t spin) and cleaning and other measures yield no results, fan replacement is your next step.
- Part Identification: Identify the correct replacement fan. This usually involves finding the model number printed on the fan itself (often hidden). Search online retailers for the specific fan model number.
- Replacement Procedure: Carefully disassemble the laptop to access the fan. Detach the old fan’s connection to the motherboard. Install the new fan, connecting it to the correct socket. Reassemble the laptop.
6. Software Solutions and Optimization
While hardware is the primary focus, a few software tweaks can also play a role in mitigating overheating.
- Driver Updates: Ensure your graphics drivers are up to date, as they often include performance optimizations that can reduce heat output.
- Background Processes: Minimize background processes that consume CPU resources. Close unnecessary programs running in the system tray.
- Power Settings: Adjust your power settings to prioritize lower performance. This action will reduce CPU load, and reduce heat production.
Preventative Maintenance: Guarding Against Future Overheating
Once you've resolved the immediate problem, adopt these preventative measures to extend the life of your laptop and prevent future overheating:
- Regular Cleaning: Clean your laptop’s vents and internal components at least every six months (more frequently in dusty environments).
- Elevated Usage: Use a laptop stand or cooling pad, especially during extended use.
- Ventilation Awareness: Avoid using your laptop on soft surfaces that can block vents.
- Consistent Use: Use a laptop stand or a hard surface so the device can breathe.
Beyond the Fix: The Long-Term Outlook
By addressing the root causes of overheating, implementing effective cooling solutions, and practicing preventative maintenance, you can significantly extend the life of your laptop, improve its performance, and prevent costly hardware failures. The above-mentioned approaches will help you solve the problem. From cleaning the device, to replacing the thermal paste, or doing a Fan replacement all these options are available for you. However, a dead fan may be the death of it.
