how to tell if your mic is working on laptop

Title: How to test your speakers, microphone and webcam
Channel: BC Technology for Learning Society
How to test your speakers, microphone and webcam by BC Technology for Learning Society
how to check if your mic is working on laptop, how to check if your microphone is working on laptop, how to check if my mic is working on laptop, how to check your microphone is working on laptop, how do i know if my microphone is working on my lenovo laptop, how to tell if your laptop microphone is hacked, how can i check if my microphone is working on my laptop, how do i check if my microphone is working on my laptop
Is Your Laptop Mic DEAD? This 1 Weird Trick Works!
Laptop Mic Woes? Unearth the Secret That Brings It Back to Life!
My friend, has your laptop's microphone suddenly decided to stage a silent protest? Are your Zoom calls turning into frustrating, audio-less encounters? If so, you’re certainly not alone. This digital age is heavily reliant on crystal-clear communication. Therefore, a non-functional microphone can feel like a major setback. But fret not, because I’ve got a solution. Moreover, it’s not the typical troubleshooting that you've likely encountered. It’s a surprisingly simple fix!
Decoding the Microphone Mystery: Common Culprits
Okay, let's delve into the usual suspects. Firstly, are you sure the microphone isn’t accidentally muted? Double-check that little icon in your system tray. Then, consider your software settings. Perhaps the wrong microphone input is selected. Also, ensure the volume isn't set to zero. Next, perhaps the most frustrating culprit is outdated or corrupted drivers. These digital gatekeepers often cause unforeseen issues. Sometimes, a simple restart can work wonders. However, that's usually not the magic bullet.
In addition, you might want to inspect the physical connections. Is your external microphone properly plugged in? Similarly, is it compatible with your laptop? As a result, troubleshooting can be a tedious process. However, we need to find the root of the problem.
The "Weird Trick" Revealed: A Deep Dive
Now, I'll reveal the secret. This isn't some complex computer repair or expensive hardware replacement. Instead, it's a basic yet often-overlooked strategy. It involves gently massaging your laptop's audio system. But how?
Here's the deal: the solution involves the sound settings itself. Because of its powerful nature, these settings can be quite deep. Thus, it requires a gentle touch and some patience. But trust me, the results are worth it! This isn't a quick fix. However, to truly understand, you must perform these steps.
First, head over to your sound settings. You can usually find this by right-clicking on the speaker icon in the system tray. Next, select “Sound settings” or “Open Sound settings”.
Unveiling the Configuration: Step-by-Step Guide
Now that you're in the sound settings, navigate to the "Input" or "Microphone" section. Here, your laptop’s microphones should be listed. Select the microphone that isn't working.
Then you'll likely see a "Device Properties" option. Click it.
After that, you'll be presented with even more options. The crucial area is usually the "Enhancements" tab. If the tab exists, disable all enhancements. Sometimes, these enhancements can interfere. Afterwards, check the "Levels" or "Volume" tabs. Again, ensure the input volume isn't muted or too low.
Following this, close all the windows and try testing your mic. Try a quick recording. Speak into your microphone. This simple action will allow you to verify everything. Did you hear anything? If so, congratulations!
Beyond the Obvious: Troubleshooting Beyond the Basics
Still no luck? Don't despair! But, first, let's explore some additional troubleshooting steps. After that, consider updating your audio drivers. You can do this through the Device Manager.
To access Device Manager, search for it in your Windows search bar. Then, expand the "Sound, video, and game controllers" section. Right-click on your microphone device. Select "Update driver". Choose "Search automatically for drivers".
Alternatively, you can uninstall the device and restart your laptop. Windows will typically reinstall the drivers automatically. Sometimes, a fresh start is what's needed.
Preventative Measures: Keeping Your Mic Healthy
Now, to help keep your microphone functioning smoothly, consider these preventive measures. Ensure you have adequate system updates. Run regular virus scans. Avoid downloading suspicious software. Keep your laptop clean. Dust and debris can sometimes interfere with hardware functionality. Finally, be mindful of your audio settings. These can change during software updates.
Final Thoughts: Speaking Loud and Clear Again
So, there you have it. A simple trick to revive your lifeless laptop microphone! It's all about diving into the settings. Often, the solution lies within a few clicks. Therefore, don’t give up! Remember, technology can sometimes be fickle. Hopefully, these steps get you back on track.
If you tried this fix, let me know in the comments below! Also, feel free to share your experience. That way, others might benefit from your journey. Now go forth and speak clearly!
Laptop Mouse Dead? This ONE Trick Will SHOCK You!Is Your Laptop Mic DEAD? This 1 Weird Trick Works!
Alright, let's be honest, we've all been there. You're on that super important video call, maybe a crucial presentation, perhaps even attempting to wow a potential employer, and poof…nothing. Your laptop mic decides to take an unscheduled vacation to the land of silence. Frustrating, right? Absolutely! But before you chuck your laptop across the room and scream into the void, let's take a deep breath and troubleshoot. We've got a secret weapon, a weird little trick, that might just resurrect your digital voice. Ready to get started? Let's do it!
1. The Annoying Silence: Recognizing the Symptoms of a Dead Mic
Think of your laptop mic like a moody teenager; sometimes it just won't cooperate. The most obvious sign? Nobody can hear you. You speak, you shout, you practically sing opera, and yet, nothing. Other telltale signs include:
- Unresponsive Microphone Tests: You run a mic test (which we'll discuss later), and…crickets.
- Muffled Audio: You can barely be understood, sounding like you're speaking from the bottom of a well.
- Software Interference: Apps like Zoom, Skype, or even your operating system's voice recorder refuse to pick up any sound.
If any of these sound familiar, we’re definitely on the right track. Don’t worry; we’re here to help.
2. Pre-Trick Checks: Avoiding the Obvious Blunders
Before we unleash our secret weapon (a term I'm using very loosely here…more like a nifty little setting adjustment), let’s cover the basics. These might seem obvious, but trust me, we’ve all missed these at some point:
- Microphone Physical Appearance: Is the mic physically blocked? Are you accidentally covering it with a hand or a sticker? Sounds silly, I know, but it happens!
- Volume Levels: Is your mic muted? Check the system volume, and also the volume controls within the specific application you're using. I once spent a solid 15 minutes troubleshooting only to realize my Zoom mic was set to zero. Facepalm moment, truly.
- Connection Woes: If you're using an external microphone, ensure it’s plugged in properly and recognized by your laptop.
Okay cool, basics are covered. Now, for the fun part…
3. The Weird Trick: Accessing Your Sound Settings
So, here's the "weird trick" - it involves diving into your sound settings. It might sound complicated, but I promise, it's not rocket science. The specific steps will vary slightly depending on whether you're using Windows or macOS:
- Windows: Click the sound icon (usually in the system tray, down in the right corner of your screen). Then, right-click on the volume icon, choose "Open Sound Settings" or "Sound." From here, navigate to "Input" and select your microphone from the dropdown menu.
- macOS: Click the Apple menu in the top left corner and select "System Preferences." Click on "Sound," then select the "Input" tab. Choose your microphone from the list.
This is kind of like opening a safe, but instead of gold bars, you're after… well, sound!
4. Unearthing Your Microphone's Secrets: Configuring Sound Settings
Once you’re in the sound settings, you’ll find a treasure trove of options. Don't panic! Focus on a few critical elements:
- Choosing the Right Microphone: Make absolutely sure you've selected the correct microphone. Your laptop might have built-in mics, and you might have different options if you have external mics connected.
- Increasing the Input Volume: Slide the input volume slider up. Test it, and adjust it until you can hear yourself clearly during a test. Too low, and you'll sound faint; too high, and you'll get distortion.
- Disabling/Enabling Microphone Enhancements. Newer OS versions may have audio enhancements such as noise suppression. Try changing these setting if the sound quality is not quite right.
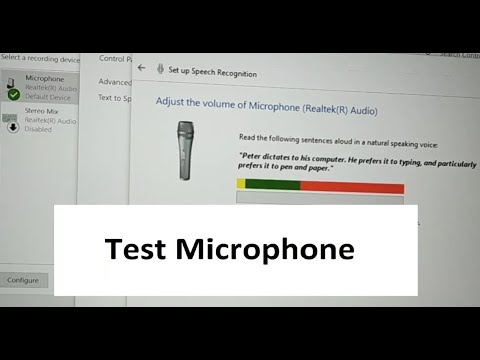
5. Testing, Testing, 1, 2, 3: Performing a Microphone Test
Before you declare victory, test your mic. Windows usually has a built-in voice recorder. On macOS, navigate to the "Input" tab and perform a test by speaking into the selected microphone. See if it picks up your voice! This is your moment of truth. Is your mic alive?
6. The Silent Culprit: Software Conflicts and Permissions
Sometimes, the issue isn't with your hardware settings but with interfering software. Think of it as a crowded party where everyone is trying to talk at once.
- Application Specific Settings: Check if the specific application you are using (Zoom, Skype, etc.) is using the correct microphone. It’s possible the app is still using the wrong one.
- Permissions! On macOS, you need to grant apps permission to access your microphone. Check your system settings and make sure your apps have the necessary access. Windows also manages microphone access via privacy settings.
7. Troubleshooting Software Issues: Restarting & Reinstalling Drivers
If the sound settings look okay, but the problem continues, it's time to apply our software troubleshooting techniques.
- Restart Everything: Restart your laptop. This is the digital equivalent of a good night’s sleep. Sometimes, a simple reboot fixes everything.
- Driver Updates: Driver updates are crucial. Outdated drivers are like a rusty engine: they can cause all sorts of problems, including mic troubles. In Windows, go to Device Manager, expand the "Audio inputs and outputs" section, right-click on your microphone, and select "Update driver." macOS usually handles driver updates automatically.
- Reinstalling Drivers: If updating doesn't work, try uninstalling and reinstalling your microphone drivers.
8. Hardware Malfunctions: When Your Mic May Actually Be Broken
Let's face it; sometimes, the worst-case scenario is the reality. If you’ve tried everything, and your mic still doesn’t work, there's a chance it might be hardware related.
- Inspect the Physical Microphone: Look for any signs of damage. Cracks, breaks, or loose wiring can all kill a mic.
- Test an External Microphone: If you have one, connect it. If the external mic works, then the problem is definitely with your laptop's built-in microphone.
- Professional Help: If all else fails, it might be time to take your laptop to a repair shop.
9. Navigating the World of External Microphones
An external microphone is an excellent alternative. It provides better sound quality and, when your built-in mic is causing issues, acts as a reliable replacement.
- USB Microphones: They are easy to set up (plug and play).
- Microphone with a 3.5mm Jack: If your laptop has a 3.5mm jack, you can use it too.
10. A Deeper Dive on Noise Cancellation
You may want to consider noise cancellation if your microphone isn't performing as expected.
- Software Based Noise Cancellation: Many apps (like Zoom and Microsoft Teams) have built-in noise cancellation features.
- Hardware Based Noise Cancellation: Some microphones and headsets also have built-in noise cancellation.
11. Exploring Microphone Hardware: Types and Features
Knowing the types of microphones available out there can help you make informed decisions.
- Built-in Microphones: They are designed for convenience, but not necessarily for superior audio quality.
- External Microphones (USB, XLR, etc.): External microphones usually offer much better sound quality.
- Microphone Features: There are several features: noise cancellation, directional pick-up patterns, and frequency response.
12. Optimizing Your Audio Environment
The environment in which you use your microphone can also affect audio quality.
- Minimize Background Noise: Do the best you can to minimize background noise.
- Microphone Placement: Experiment with microphone placement to determine the best set-up for your audio.
- Room Acoustics: Consider room acoustics and sound isolation.
13. Advanced Troubleshooting Tips
Sometimes, the issues can be a bit more intricate. You can consider these advanced troubleshooting tips:
- System Restore (Windows): Roll back to a point before the microphone stopped working.
- Hardware Diagnostics: Run hardware diagnostics to test your audio devices. This may be available in your laptop's BIOS/UEFI settings.
14. The Importance of Regular Maintenance
Preventive maintenance. This can help prevent microphone issues.
- Keep Your Drivers Up-to-Date: Regularly update your drivers to avoid issues.
- Protect from Damage: Always handle your laptop with care.
- Clean Your Microphone: Although built-in microphones are protected, external microphones can still be exposed to issues.
15. The "Weird Trick" Revealed (and How to Apply It Consistently)
Let's recap! The "weird trick" is all about checking and tweaking your sound settings in your OS. It's not a magic bullet, but it's
AirPods DEAD on Laptop? This SHOCKING Fix WORKS!Fix Microphone Not Working on Windows 10

By The Geek Page Fix Microphone Not Working on Windows 10 by The Geek Page
how to test a microphone working or not, sound recording or not
By Shabd Tech Support how to test a microphone working or not, sound recording or not by Shabd Tech Support
How To Fix Mic Not Working On PC - Full Guide
By GuideRealm How To Fix Mic Not Working On PC - Full Guide by GuideRealm

Title: Working Solution to Fix Microphone Connected But Not Working on Windows 10
Channel: FIXsage
Working Solution to Fix Microphone Connected But Not Working on Windows 10 by FIXsage
Wifi On Laptop Phone
Is Your Laptop Mic DEAD? This 1 Weird Trick Works!
We’ve all been there. You're in a crucial video conference, eager to make your point, and suddenly… silence. Or, worse, a crackling, barely intelligible whisper emerges from your end. The dreaded laptop microphone failure. It’s a frustrating tech hiccup that can disrupt workflow, derail virtual meetings, and leave you feeling isolated. But before you resign yourself to a new microphone or an expensive repair, let's explore a surprisingly effective solution – a clever maneuver that could breathe new life into your underperforming laptop microphone.
Understanding the Enemy: Common Laptop Microphone Problems
Before we unveil the secret weapon, let's identify the usual suspects behind a malfunctioning laptop mic. These problems can manifest in several ways. Your microphone might be entirely silent, capturing no sound whatsoever. Perhaps the audio is distorted, with crackling, buzzing, or echoing. Maybe your voice is intermittent, fading in and out. Whatever the symptom, the root causes tend to cluster around a few key areas:
- Hardware Failures: The microphone itself can malfunction. Internal components, from the diaphragm to the wiring, can degrade or break.
- Software Glitches: Driver issues are a frequent culprit. Outdated, corrupted, or improperly installed audio drivers can prevent the microphone from functioning correctly. Operating system conflicts can also create havoc.
- Configuration Errors: Incorrect settings within the operating system or specific applications can lead to mic problems. Mute buttons inadvertently engaged, incorrect input source selections, or volume levels turned down too low can all contribute.
- Physical Obstructions: Dust, debris, or even a damaged microphone port opening can block or interfere with sound capture.
- External Interference: Nearby electronic devices, electromagnetic fields, or even the position of your laptop can introduce noise and distortion.
The One Weird Trick: Optimizing Audio Input Through Advanced Settings
Here's the game-changing technique, the secret weapon in our arsenal. This method centers on optimizing your laptop's audio settings, a realm often overlooked yet brimming with potential. It’s not a complex re-installation or a costly hardware replacement. Instead, it's a deep dive into your system's audio control panel. Prepare to become an audio virtuoso.
Accessing the Audio Control Panel: The first step is to find your audio settings. This varies slightly depending on your operating system.
- Windows: Right-click the speaker icon in your system tray (usually in the bottom right corner). Select “Open Sound settings.” Alternatively, type “Sound settings” into the Windows search bar.
- MacOS: Click the Apple menu in the top left corner, then select “System Preferences” or “System Settings.” Click on “Sound.”
Navigating to the Input Tab: Within the sound settings, you’ll find tabs for “Output” (speakers/headphones) and “Input” (microphone). Select the “Input” tab to focus on the microphone.
Selecting Your Microphone: You will be shown a list of available input devices. This list might include the built-in microphone, any external microphones you’ve connected, or other audio input devices. Make absolutely sure your laptop's internal microphone is chosen, or the proper external microphone.
The Magic Touch: Advanced Microphone Properties: Here is where the magic begins. Click on "Device Properties," or a similar option that shows the microphone’s specific details. Dive deep. Find the advanced properties for your laptop microphone. This area provides granular control over the microphone's behavior.
Level Adjustments: Finding the Sweet Spot: In the microphone properties, you will find an area for levels. This is essentially your gain control. It’s absolutely critical to get this right.
- Microphone Level: Experiment with the microphone level slider. Adjust it gradually, while speaking into the microphone. Observe the input level meter (a visual representation of the audio volume). Your goal is to get the meter to register consistent audio input without clipping (the meter going into the red zone). A good starting point is around 70-80% of the maximum setting.
- Microphone Boost: This setting amplifies the microphone signal. However, use extreme caution! Over-boosting can introduce significant noise and distortion. If your microphone sounds quiet, try a moderate boost (e.g., +10 dB to +20 dB) and monitor the input level meter closely. Avoid excessive boosting. Often, +0dB is the best setting.
Enhancements: Unleashing Hidden Potential: This area of the settings panel can make or break the audio quality. Within the "Enhancements" or "Improvements" tab, you may find several options.
- Noise Suppression: This feature attempts to filter out background noise. Enable it and test the microphone, paying close attention to how effectively it reduces unwanted sounds without distorting your voice.
- Echo Cancellation: Essential if you’re using your laptop in a room with echo. Enable this to reduce or eliminate the echo effect during calls or recordings.
- Acoustic Echo Cancellation: Similar to echo cancellation, this feature specifically targets acoustic echoes. Activate it to test.
Exclusive Mode: Taming Audio Conflicts: Some applications, particularly those used for professional audio recording, might take exclusive control over the microphone. This can sometimes lead to conflicts. Check the "Advanced" tab or a similar area and deselect the "Give exclusive mode applications priority" checkbox.
Testing, Testing, 1-2-3: After making these adjustments, it's imperative to test the microphone.
- Windows: Within the sound settings, you can often test the microphone directly. Speak into the microphone and observe the level meter.
- MacOS: In System Preferences/Settings, there is a level meter that can test the set up.
- Application Tests: Open a voice recording app, a video conferencing program (Zoom, Teams, etc.), or any application that uses the microphone. Record a short test message and then listen back to the recording. Evaluate the clarity, volume, and overall quality.
Troubleshooting Beyond the One Weird Trick
While the advanced settings trick is often a quick win, sometimes more investigation is needed. Let’s consider some other troubleshooting steps:
- Driver Updates: Outdated or corrupted drivers are often the culprits. Go to your device manager and search for your microphone. Right-click on it and select "Update driver." If you have the option to update the current driver, choose it. Often, the windows system will install the most up-to-date drivers available.
- Application-Specific Settings: Each application that uses the microphone (e.g., Zoom, Skype, etc.) has its own audio settings. Double-check the input device selected within each application and ensure that the volume levels and other settings are configured correctly.
- Physical Inspection: Carefully examine the microphone port (if external) for any debris or obstructions. Use a can of compressed air to gently remove any dust or particles.
- Reboot: Sometimes, a simple restart can resolve a glitchy microphone. Restart the device to clear temporary files that may have interfered with the performance of the microphone.
- System Restore: If the problem started recently, you may consider using System Restore (Windows) to revert your system to a point where the microphone was working correctly.
- Hardware Check: If, after trying all the these tips, the microphone still doesn't work, it might be a hardware issue. Consider taking your laptop to a qualified repair technician for diagnosis and possible repair or replacement.
Beyond the Basics: Optimizing Your Microphone Environment
Enhancing your audio quality isn't just about the microphone itself. Your environment plays a critical role.
- Minimize Background Noise: Close windows, turn off fans or air conditioners, and minimize any other noise sources that could interfere with the recording.
- Positioning is Paramount: Position the laptop microphone. If there is a microphone, position it closer to your mouth, at an angle. Experiment with different positions to find the optimal balance between clear sound capture and minimizing background noise.
- Use an External Microphone (If Needed): If the built-in microphone is consistently problematic, consider using an external USB microphone. Even a basic external microphone will perform much better than a built-in one with a hardware problem.
Conclusion: Reclaiming Your Voice
Don't let a malfunctioning laptop microphone silence you. The “weird trick” described above, is a powerful technique to diagnose, troubleshoot, and potentially revitalize your built-in microphone. Armed with the knowledge and the settings adjustments, you're now equipped to troubleshoot and hopefully restore clear and crisp audio. By understanding the common causes and working through a systematic approach, you can reclaim your voice and get back to communicating effectively. Remember to remain patient, and experiment with different settings until you find the ideal configuration for your unique setup. Good luck, and start speaking up!
