why did my microphone stop working on my laptop

Title: Fix Microphone Not Working on Windows 10
Channel: The Geek Page
Fix Microphone Not Working on Windows 10 by The Geek Page
why did my microphone stop working on my laptop, why has my microphone stopped working on my laptop, why is my microphone not working on my laptop lenovo, why is my microphone not working on my dell laptop, why is my microphone not working on my hp laptop, why is my microphone not working on my asus laptop, why is my whatsapp microphone not working on my laptop, why is my microphone not working on my hp laptop windows 11, why is my headset microphone not working on my laptop, why is my internal microphone not working on my laptop
Laptop Mic Dead? 😱 FIX It NOW! (Easy Steps)
Laptop Mic MIA? Don't Panic! Quick Fixes to Get You Talking!
Is your laptop microphone suddenly silent? Feeling frustrated because nobody can hear you? Don’t worry, it happens to the best of us. Fortunately, you're in the right place. This article will guide you. We'll cover some quick and easy fixes. You’ll be back in action in no time. So, let's dive right in!
1. The Obvious Checks: A Simple First Line of Defense
Before anything else, take a deep breath. Let’s start with the basics. Often, the simplest solutions are the most effective. First, confirm your physical setup. Is your microphone plugged in correctly? Double-check all the connections. Make sure the cable is firmly seated. If you're using a built-in mic, check that it's not obstructed. Wipe away any dust or debris.
Next, inspect the mute button. It’s surprisingly easy to accidentally mute yourself. Look for a microphone icon on your keyboard or laptop. Ensure it's not illuminated, indicating a mute. Also, examine the microphone icon on the device itself. Furthermore, is the microphone physically damaged?
2. Software Sleuthing: Digging into Your Audio Settings
If the physical checks didn't work, it's time to investigate your software. Go to your operating system's sound settings. For Windows, you can usually find this in the control panel or settings app. MacOS users can find audio settings under "System Preferences".
Now, verify that your desired microphone is selected as the default input device. Many devices have multiple audio inputs. You might have a headset plugged in. Maybe your laptop's internal mic isn't selected. Change the settings. Choose the correct microphone.
Moreover, adjust the input volume. Sometimes, the volume is set too low. Or, perhaps it is muted altogether. Increase the volume slider. Test your microphone sound. You might need to speak into it. See if the input level indicator responds.
3. Driver Dilemmas: Updating and Rolling Back
Drivers are essential for your device functionality. They are software that lets your hardware communicate. Outdated or corrupted drivers can cause issues. Consequently, your microphone might not work. Therefore, you need to update or, in some cases, roll back your drivers.
In Windows, you can manage drivers through Device Manager. Search for it in the Start menu. Expand the "Sound, video and game controllers" section. Locate your microphone. Right-click on it. Select "Update driver". Then select "Search automatically for drivers". Let Windows locate and install the latest drivers.
If the update doesn’t work, try rolling back the driver. Right-click your microphone device again. Select "Properties." Then, go to the "Driver" tab. If the "Roll Back Driver" option is available, use it. This takes you back to a previous driver version.
4. App-Specific Shenanigans: Tailoring Solutions
Some issues can be app-specific. Even if your microphone works generally, it may fail in a particular app. Check the audio settings within the application. For example, think about Zoom, Skype, or Discord.
Make sure the correct microphone is selected within the app’s settings. Also, double-check the app’s volume settings. Sometimes, an app can override your system-wide settings. Review app permission settings on your operating system. Make sure the app is allowed to access your microphone.
In addition, close and reopen the app. It might fix minor glitches. If nothing else works, consider reinstalling the app. A corrupted installation could be the culprit.
5. Troubleshooting Hardware Conflicts: Investigating Deeper
Sometimes, hardware conflicts can creep into your system. These conflicts can disrupt the smooth operation of your microphone. Try these troubleshooting steps to resolve these issues.
First, disconnect any unnecessary USB devices. Then, reboot your computer. Perhaps these devices were interfering. Otherwise, check your BIOS settings. Sometimes the integrated microphone can be disabled at the BIOS level.
Furthermore, run the Windows troubleshooter. Find it in the sound settings or settings app. The troubleshooter can automatically detect and fix common audio problems.
6. Consider External Hardware: Alternatives and Upgrades
If none of these solutions work, it's time to consider this: you may need a new microphone. Perhaps your internal microphone is faulty. In this case, an external microphone is your best option.
Purchase a USB microphone. Connect it and install any necessary drivers. External microphones can offer a significant improvement in sound quality. Alternatively, consider a headset with an integrated microphone. Test this new setup. See if the issue persists.
7. The Last Resort: Seeking Professional Help
Are you stuck? Tried everything? Your microphone might be beyond your DIY repair capabilities. In this situation, don’t hesitate to seek help. Contact your laptop manufacturer's support. They can offer expert advice.
You may need to take your laptop to a repair shop. A technician can diagnose more complex hardware problems. This is particularly important if you suspect internal component failure.
Conclusion: Back to Talking!
So, there you have it! You now have a toolkit. You can troubleshoot your laptop microphone. Follow these steps. Solve the issue. You'll soon be back to video calls. You'll be recording audio. Remember to remain patient. Problem-solving requires persistence. Hopefully, these steps helped. Now, start chatting and recording!
Is Your Work Laptop SPYING On You? (Shocking Truth!)Laptop Mic Dead? 😱 FIX It NOW! (Easy Steps)
Hey there! Ever tried to join a Zoom call, record a voice note, or even just chat with your online bestie, only to be met with…silence? Yep, we’ve all been there. That sinking feeling when you realize your laptop microphone is M.I.A. Don't panic! We're going to walk through the steps to bring your microphone back to life, faster than you can say "Can you hear me now?"
1. The Silent Treatment: Recognizing the Problem
First things first: let's make sure your mic is actually dead. It might just be a software gremlin playing tricks on you. Try these quick checks:
- Test the Mic: Open the default sound recorder your laptop comes with (Windows has "Voice Recorder," Mac has "Voice Memos"). Speak into it, and play back the recording. Hear nothing? Mic issue confirmed.
- Headphone Check: Plug in a headset with a built-in microphone. If the headset mic works, the problem is likely with your laptop's internal microphone.
- App Specific Issues: Sometimes, a specific application (like Zoom or Skype) might be the culprit. Always test in different apps to rule this out. If the mic works fine in some apps but not others, we know where to focus our troubleshooting.
2. Volume Matters! Checking Your Sound Settings (The Low-Hanging Fruit)
Sometimes the fix is ridiculously simple. It's like forgetting to plug in your phone charger – a total facepalm moment. Let's make sure your mic isn't muted or the volume isn't turned down to zero.
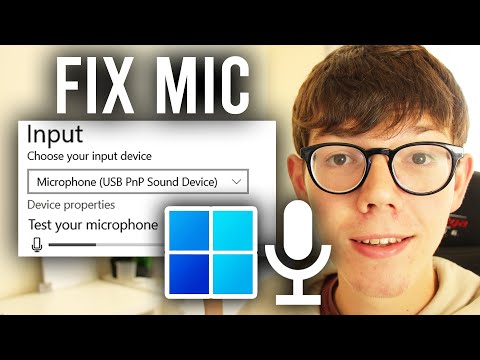
- Windows: Right-click the speaker icon in your system tray (bottom right corner of your screen). Select "Open Sound settings." Then, navigate to "Input" and select your microphone. Ensure the volume slider isn’t all the way down and that the microphone isn’t muted. You can often see a visual representation of the sound input level here, helpful in determining if the microphone is picking up sound.
- Mac: Click on the Apple menu in the top left corner, then "System Preferences," followed by "Sound." In the "Input" tab, select your microphone and adjust the input volume slider. Similarly, make sure the input level is responding when you speak.
3. Microphone Permissions: Letting Your Apps Hear You
Think of your microphone as a guarded gatekeeper. Apps need permission to use it. This is a crucial, often overlooked step.
- Windows: Go to "Settings" -> "Privacy" -> "Microphone." Ensure the "Microphone access" toggle is turned on. Scroll down and verify that individual apps have permission to use your microphone.
- Mac: Go to "System Preferences" -> "Security & Privacy" -> "Privacy" -> "Microphone." Check the box next to the apps that should access your microphone. If you've recently installed an app, it might not have permission yet.
4. Driver's Delight: Updating or Reinstalling Your Microphone Driver
Drivers are like the translators between your laptop and your mic. If the translator's confused, you get silence.
- Windows: Right-click the Windows Start button and select "Device Manager." Expand "Audio inputs and outputs." Right-click on your microphone's entry (it might be listed as "Microphone Array" or something similar) and select "Update driver." Choose "Search automatically for drivers." If that doesn’t work, try uninstalling the device and then restarting your computer. Windows will attempt to reinstall the driver automatically.
- Mac: Apple typically handles driver updates automatically. However, if you suspect a driver issue, try restarting your Mac. It might be all that’s needed. You can also check for software updates in System Preferences.
5. The Physical Examination: Hardware Hurdles
Okay, let's get physical. Is it a hardware problem? While rare, it's a possibility.
- Internal Mic Problems: If you primarily use your laptop's built-in microphone, dust, debris, or even a loose connection within the laptop could be the culprit. Unfortunately, these problems are often difficult to fix without professional help (or a strong DIY streak).
- External Mic Problems: If you use an external USB microphone, make sure it's properly plugged in. Try a different USB port. Consider testing the microphone on another computer to see if it’s the microphone itself that is faulty.
6. Compatibility Conundrums: Software Conflicts
Software can be a tricky beast. Sometimes, different programs try to use the microphone simultaneously, creating conflicts.
- Close Unnecessary Apps: Close other applications that might be using your microphone in the background (like video conferencing apps or voice recording software).
- Check Application Settings: Explore the settings of frequently used apps (Zoom, Skype, Discord) to make sure the correct microphone is selected and that the input settings are appropriate.
7. System Restore: Rolling Back the Clock
If you suspect a recent software update might have broken your mic, try a System Restore. Think of it as traveling back in time to when everything worked perfectly. (This is applicable for Windows, of course.)
- Windows: Search for "Create a restore point" in the Windows search bar. Click "System Restore." Choose a restore point from before the microphone problem started. Follow the on-screen instructions. This will revert your system to a previous state, potentially resolving the issue.
8. Microphone Testing Apps: Pinpointing the Problem
Specialized testing apps can provide more detailed information about your microphone's functionality.
- Online Microphone Testers: There are numerous free online microphone testing tools that will allow you to test your microphone directly through your browser. This is a good way to quickly determine if your microphone is receiving any input at all.
- Dedicated Diagnostic Apps: Search for diagnostic apps for your operating system that can help identify and resolve microphone issues. These apps may offer more in-depth analysis of the microphone's performance.
9. Resetting Audio Settings: A Fresh Start
Sometimes your audio settings get corrupted. A reset is like a digital spring cleaning!
- Windows: While there isn't a single "reset" button, you can manually reset audio settings by first, opening the Sound settings. Navigate through the settings to try changing the default format and bit rate, experiment with different settings to see if you can reestablish functionality.
- Mac: Open Audio MIDI Setup (search for it in Spotlight). In the Audio Devices window, select your microphone. You can delete and re-add the microphone, and experiment with the input settings and channel configurations. (This can sometimes resolve configuration conflicts.)
10. Audio Enhancement Software: A Double-Edged Sword
Audio enhancement software can sometimes interfere with your microphone. While these programs aim to improve sound quality, they can occasionally cause problems.
- Disable Enhancements: If you're using audio enhancement software (like noise cancellation or echo reduction), temporarily disable it to see if it resolves the microphone issue.
- Update or Reinstall: If you rely on the software, make sure it’s up to date. If it’s still causing problems, try uninstalling and reinstalling it.
11. Headphone Jack Woes: External Mic Interference
If an external microphone is not functioning correctly, the issue might be with the audio jack itself.
- Inspect the Jack: Check the physical condition of the headphone jack, ensuring there is no physical damage.
- Test Different Headphones/Microphones: Try using a different set of headphones or an external microphone to determine if the issue lies with the external audio device. This can help determine if the problem is with your computer hardware.
12. Software Conflicts: Multiple Audio Drivers
Conflicts among various audio drivers can sometimes render your microphone inoperable.
- Review and Remove Drivers: Sometimes, conflicting drivers can affect audio functionality. Reviewing installed audio drivers and removing incompatible or unnecessary ones can help resolve this common issue.
- Reinstall Default Drivers: Reinstalling your system's default audio drivers can often resolve the issue. This returns the system to a known working state.
13. Power Cycle: The Simplest Solution
Sometimes, a simple power cycle can work wonders.
- Restart Your Laptop: Restarting your laptop can often resolve minor software glitches that are affecting the microphone. This is akin to turning it off and on again.
- Hard Reset: If a simple restart doesn’t do, try a hard reset. Turn off the laptop. Disconnect the power cord and remove the battery (if applicable). Hold the power button for 30 seconds. Reconnect the power cord or put the battery back in and try powering it on.
14. Consider External Alternatives
If your built-in microphone refuses to cooperate, consider external alternatives.
- USB Microphones: Purchase a USB microphone, which provides clear audio input and is easy to set up.
- Headsets: Use a headset that includes a microphone. High-quality headsets can also offer superior audio performance in general.
15. Contact Manufacturer for Support
If all else fails, it's time to seek professional help.
- Check Warranty: If your laptop is still under warranty, contact the manufacturer for support.
- Professional Repair: Head to a reputable computer repair shop if the problem persists. They can diagnose and
How To Fix Mic Not Working On PC - Full Guide
By GuideRealm How To Fix Mic Not Working On PC - Full Guide by GuideRealm
windows 11 microphone not working microphone not working windows 11-Problem Solved

By JP Tech News windows 11 microphone not working microphone not working windows 11-Problem Solved by JP Tech News
How To Fix Headset Jack Mic Showing Not Plugged In iiFry
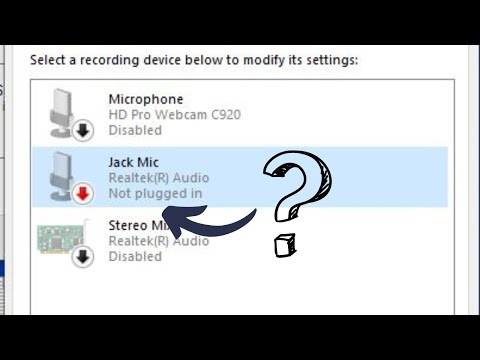
By iiFry How To Fix Headset Jack Mic Showing Not Plugged In iiFry by iiFry

Title: How to fix WhatsApp error Your microphone is unavailable or in-use on another app Windows 10 or 11
Channel: IT Networking
How to fix WhatsApp error Your microphone is unavailable or in-use on another app Windows 10 or 11 by IT Networking
Laptop Working
Laptop Mic Dead? 😱 Reviving Your Audio Input: A Comprehensive Troubleshooting Guide
Have you ever been in the middle of a crucial video call, a spirited online gaming session, or a critical recording, only to realize that your laptop's microphone has suddenly gone silent? Few tech frustrations are as disruptive as a non-functional mic. The good news: in the vast majority of cases, the problem isn't a terminal hardware failure. Instead, it's usually a relatively simple fix. We'll guide you through a comprehensive, step-by-step process to diagnose and resolve your laptop microphone issues, ensuring you're back to clear audio communication in no time. Let's get started!
Step 1: The Obvious Checks – Ruling Out the Basics
Before diving into complex troubleshooting, we must eliminate the simplest possibilities. These initial checks often resolve the issue, saving time and frustration.
- Physical Connection (If Applicable): If you’re using an external microphone (headset, USB microphone), ensure it's securely plugged into the correct port. USB connections should be firm, and headphone jacks need to be fully inserted. Sometimes, a slight wiggle can reveal a loose connection. In cases where your external mic is not working, test the external mic by connecting to your smartphone or other devices.
- Mute Button: This might seem elementary, but it’s the most common culprit! Check for any physical mute buttons on your microphone or headset. Many headsets have a mute switch directly on the cable or the earcup. Also, examine the Windows system tray for a microphone icon and ensure it's not muted. In conferencing applications like Skype or Zoom, there's almost certainly a mute button within the interface itself.
- Volume Levels: Make sure the volume for your microphone isn't set to zero, either in Windows settings or within the specific application you’re using. Sometimes, an accidental adjustment can render the microphone inaudible.
Step 2: System Settings – Plumbing the Depths of Audio Configuration
Next, we’ll delve into the Windows operating system's audio settings to ensure everything is properly configured and enabled.
- Accessing Sound Settings: Right-click the speaker icon in your system tray (usually located at the bottom right of your screen) and select "Open Sound settings." Alternatively, you can go to "Settings" (accessed by clicking the Windows icon or pressing the Windows key) and then click "System" and choose "Sound."
- Input Device Selection: In the "Input" section, verify that the correct microphone is selected. You may have multiple microphone options (internal laptop mic, external headset mic, etc.). Choose the one you intend to use. If your desired microphone isn't listed, try unplugging and replugging it or restarting your laptop.
- Input Device Properties: Click on the selected microphone to open its properties. In this window, you’ll find various settings.
- Volume Levels within Properties: Confirm the microphone volume level is set appropriately. Slide the volume slider to a comfortable level. You can also use the "Test" button to briefly check the audio input. Speak into your microphone while the test is running to monitor the sound levels.
- Device Properties (Advanced Settings): Under the "Advanced" tab, examine the "Default Format" dropdown. This setting determines the audio quality (bit depth and sample rate) used by the microphone. Experimenting with different settings might resolve compatibility issues. Select a lower setting to troubleshoot. 16 bit 44100 Hz is a standard setting.
- Troubleshoot within Device Properties: The "Troubleshoot" button can run an automated diagnostic that attempts to resolve common microphone problems. Follow the prompts provided.
Step 3: Driver Issues – The Silent Saboteurs
Outdated, corrupted, or missing drivers are frequent causes of audio malfunctions. We must take care of driver-related issues.
- Accessing Device Manager: Right-click the Windows icon and select "Device Manager" from the menu. Alternatively, type "Device Manager" in the Windows search bar.
- Locating the Audio Input/Output: In Device Manager, expand the "Audio inputs and outputs" section and also the "Sound, video and game controllers" section. You should find your microphone listed here, along with your audio devices (speakers, headsets, etc.).
- Driver Updates: Right-click on your microphone or audio device and select "Update driver." Choose "Search automatically for drivers." Windows will attempt to locate and install the latest drivers. If Windows can’t find updated drivers, try visiting the manufacturer’s website (such as Realtek, the manufacturer of many sound drivers) to download and install the drivers manually.
- Driver Rollback: If the microphone started malfunctioning shortly after a driver update, you might need to roll back to a previous driver version. Right-click on the microphone in Device Manager, select "Properties," and go to the "Driver" tab. If the "Roll Back Driver" button is active, click it to revert to the previous driver.
- Driver Uninstall and Reinstall: If updating or rolling back the driver doesn’t work, try uninstalling and reinstalling the driver. Right-click on the microphone in Device Manager, select "Uninstall device." Restart your laptop, and Windows should automatically attempt to reinstall the driver after the restart.
Step 4: Application-Specific Settings – Tailoring Configurations for Success
Many applications have their own audio settings that can override or interact with the system-wide settings.
- Application Permissions: Ensure the application you're using has permission to access the microphone. In Windows settings, go to "Privacy & security," then "Microphone." Ensure the application is enabled in the "Let apps access your microphone" section.
- Input Device Selection Within Applications: Open the specific application (Skype, Zoom, Discord, etc.) and navigate to its audio settings. Verify that the correct microphone is selected as the input device. There might be separate volume controls and noise cancellation settings within the application. Adjust these as needed.
- Testing within Applications: Most applications provide a built-in test function to check microphone input. Use this test to confirm that the application is receiving audio from your microphone.
Step 5: Hardware Considerations – Exploring the Physical Realm
If software and configuration fixes have failed, it's time to consider potential hardware issues.
- External Microphone (if used): Test your external microphone on another device (a different laptop, a desktop computer, or even your smartphone) to rule out a microphone malfunction. If the microphone works on another device, the problem lies with your laptop or its settings.
- Internal Microphone: If your laptop's built-in microphone isn't working, it’s possible that the microphone hardware itself has failed. Consider using an external microphone as a workaround.
- Audio Jack/USB Port Issues: If you use an external microphone, ensure that the audio jack or USB port is functional. Try plugging a different device (headphones, USB drive) into the same port to see if it’s recognized. If other devices don't function in that port, it might be a hardware problem.
Step 6: Advanced Troubleshooting – Deep Dive
If your microphone continues to defy efforts, consider these more advanced troubleshooting steps.
- Operating System Updates: Ensure your Windows operating system is up-to-date. Go to "Settings," then "Windows Update," and check for any available updates. System updates often include driver updates and bug fixes that could resolve your microphone issue.
- System File Checker (SFC) Scan: Corrupted system files can sometimes cause audio problems. Run the System File Checker to scan and repair corrupted system files. Open Command Prompt as an administrator (search for "cmd," right-click, and select "Run as administrator"). Then, type
sfc /scannowand press Enter. The scan may take some time to complete. - Clean Boot: Perform a clean boot to start Windows with a minimal set of drivers and startup programs. This helps determine if a third-party program is interfering with your microphone. Search for "msconfig" in the Windows search bar and run System Configuration. On the "Services" tab, check "Hide all Microsoft services," then click "Disable all." On the "Startup" tab, click "Open Task Manager" and disable all startup programs. Restart your computer. If the microphone works in clean boot mode, it suggests that one of the disabled programs was the cause.
- Hardware Diagnostics (Contacting a Professional): If all else fails, it’s possible that the microphone hardware or sound card has failed. In this case, consult a qualified computer technician or contact your laptop manufacturer for assistance. They may need to replace the microphone or the sound card, which is a complex internal process.
Step 7: Prevention – Maintaining Microphone Health
Once you've resolved your microphone issue, take proactive steps to prevent future problems.
- Regular Driver Updates: Keep your drivers up-to-date. Enable automatic driver updates in Windows settings (if available) or periodically check for updates on the manufacturer's website.
- Cleanliness is Key: Keep your microphone clean. Dust or debris can sometimes interfere with the microphone’s functionality. Use a dry cloth or a soft brush to gently clean the microphone.
- Gentle Handling: Avoid physical damage. Be careful not to drop your laptop or expose it to severe temperature changes, which could damage internal components.
By working methodically through these steps, you should
