windows 10 laptop usb ports not working

Title: USB Ports Not Working on Laptop or PC - Windows 10 - Quick Fix
Channel: Ask A Computer Geek
USB Ports Not Working on Laptop or PC - Windows 10 - Quick Fix by Ask A Computer Geek
windows 10 laptop usb ports not working, hp laptop usb ports not working windows 10, dell laptop usb ports not working windows 10, asus laptop usb ports not working windows 10, my laptop usb ports are not working windows 10, windows 10 pc usb ports not working, windows all usb ports not working
Windows 10 USB Nightmare? FIX Your Laptop Ports NOW!
USB Woes on Windows 10? Conquer Your Laptop Ports!
Ever found yourself staring at a blinking cursor, helpless against a USB device refusing to cooperate? It's a familiar frustration, isn't it? We've all been there. That seemingly simple act of plugging in a flash drive or external hard drive can sometimes spiral into a digital headache. Fortunately, you can often troubleshoot these issues and get your ports back in fighting shape. This guide will help you navigate the murky waters of USB connectivity on Windows 10.
The Universal Serial Bus: A Modern Marvel (Sometimes a Mystery)
The USB port is a ubiquitous part of modern computing. It’s the lifeblood of connecting everything from your mouse and keyboard to your printer and smartphone. But, like any complex technology, things can occasionally go sideways.
Troubleshooting 101: Diagnosing the USB Dilemma
So, what happens when your USB devices decide to stage a rebellion? First, don’t panic. Begin with some simple checks. Did you actually plug the device in correctly? Sometimes, the simplest solutions are the most effective. Try a different USB port on your laptop. Maybe the port you're using is faulty. If that doesn't work, try a different USB cable. Faulty cables are more common than you might think.
Driver Drama: Often the Culprit
Drivers, those tiny pieces of software, are essential. They allow your operating system to communicate with your hardware. USB devices are no exception. Moreover, outdated, corrupted, or missing drivers can cause significant problems.
Updating Your Drivers: A Few Steps to Victory
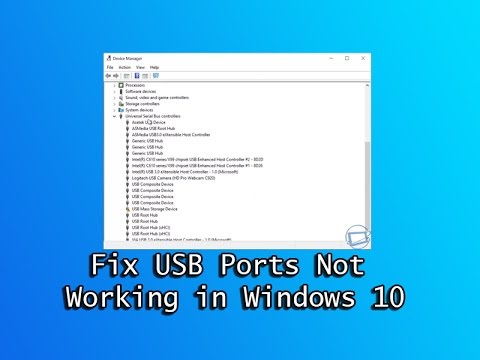
Luckily, resolving driver issues can be relatively straightforward. However, the process involves a few easy steps. First, open the Device Manager. You can search for it in the Windows search bar. You'll see a list of all the hardware connected to your computer. Look for any devices with a yellow exclamation mark. That indicates a driver problem. Right-click on the problematic device. Then, select "Update driver." Choose "Search automatically for drivers." Windows will try to find and install the latest driver.
Power Problems: A Silent Saboteur
USB devices often require power to function. Therefore, limited power can cause connectivity issues. Your laptop's USB ports might not be providing enough juice. The device might not work or work intermittently.
Power Management Tweaks: Unleashing the Potential
Windows has power management settings and sometimes intervenes. You can adjust these settings to allow your USB devices to receive their full power allotment. Again, access the Device Manager as mentioned earlier. Find your USB controllers in the list. Right-click on each USB Root Hub and select "Properties." Go to the "Power Management" tab. Uncheck the option that says "Allow the computer to turn off this device to save power." This will prevent Windows from throttling the power supply.
External Hardware Hurdles
External devices often require more power than the standard USB port can provide. This is especially true for external hard drives. The solution? Either connect the device to another USB port. Alternatively, use a powered USB hub. This provides its own power.
USB Selective Suspend: The Energy Saver
Windows uses a USB selective suspend feature to conserve energy. This can sometimes interrupt the connection. Though, most of the time, it’s a non-issue. However, disabling this setting can resolve some connectivity snags.
Navigating Group Policy Settings
If you have Windows 10 Pro or higher, you can also adjust Group Policy settings. Search for "gpedit.msc" in the search bar. Navigate to "Computer Configuration" > "Administrative Templates" > "System" > "USB." Double-click on "USB Selective Suspend settings." Then, change the setting to "Disabled." Restart your computer.
Last Resorts: When All Else Fails
If you’ve tried all of the above steps, yet still face issues, consider these other possibilities. Check for any physical damage to the USB ports. Clean the ports with compressed air, as dust can sometimes cause problems. Another tactic? Sometimes, you simply need to restart your computer. Also, consider reinstalling your USB controllers. These steps will often solve the problem. In rare cases, the motherboard USB controller may be defective.
The Takeaway: Staying Connected
Dealing with USB issues can be annoying, but it's rarely insurmountable. However, you can troubleshoot and resolve common USB problems using this guide. Moreover, with a few simple steps, you can get your laptop's ports working smoothly again. So, take a deep breath, work through these fixes, and reclaim your digital freedom!
Netflix Offline: Laptop Download Secrets Revealed!Windows 10 USB Nightmare? FIX Your Laptop Ports NOW!
Has your laptop recently decided to wage war on your USB devices? You plug in a flash drive, a mouse, or even your phone, and…nothing. The dreaded "Device not recognized" error message stares back at you, mocking your technological dependence. We've all been there, haven't we? It's a digital headache, a frustrating dance we’re forced to endure repeatedly. But fear not, because we're diving headfirst into this USB wilderness to find some solutions.
The USB Glitch: A Modern-Day Tragedy
Let's be honest, USB ports are the unsung heroes of the modern world. They're the gateways to our digital lives, the conduits connecting us to everything from printers to external hard drives. When they go rogue, it's a genuine disruption. It's like your car keys vanishing just before that important meeting. Suddenly, you’re stranded.
This isn't just a minor inconvenience; it can be a major productivity killer. Think of all the work you can't do, the files you can't access, and the data you can't transfer. It's a modern-day tragedy, a silent scream in the digital realm. But the good news is, you rarely have to throw your laptop out the window (though the temptation is real!).
Decoding the USB Port Mystery: What's REALLY Going On?
Before we get into fixes, we need to understand the enemy. What causes this USB port chaos in the first place? Think of your laptop’s USB ports like tiny, intricate highways. Data is supposed to flow freely through them, but sometimes, something clogs the system. Here's a breakdown of the usual suspects:
- Driver Issues: Your laptop's "drivers" are essentially the traffic controllers for your hardware. If a driver is outdated, corrupted, or missing entirely, it's like a broken traffic light causing a massive jam.
- Power Supply Problems: USB ports need power to function. If your laptop isn't providing enough juice, devices might not work. It's like trying to start a car with a dead battery.
- Hardware Malfunctions: Sometimes, the port itself can be physically damaged. This could be due to wear and tear, or even a simple impact. Think of it like a pothole in the highway.
- Software Conflicts: Conflicts between different programs or applications can sometimes interfere with USB functionality. It’s like a multi-car pileup caused by a driver's error.
- Corrupted Windows Updates: Occasionally, a problematic Windows update can introduce issues that affect USB ports. This is akin to a software virus that infects your computer.
Step-by-Step Solutions: Taming the USB Beast
Now for the good stuff: the fixes. We're going to explore several troubleshooting techniques to get your USB ports back in working order. Think of this as a pit stop for your laptop, a chance to get everything running smoothly again.
Method 1: Driver Detective Work – Updating and Reinstalling
Driver issues are the most common culprits, so let's start there.
- Option A: Automatic Updates: The simplest approach is to let Windows handle it.
- Type "Device Manager" into the Windows search bar and open it.
- Expand the "Universal Serial Bus controllers" section.
- Right-click on each "USB Root Hub" or "USB 3.0 eXtensible Host Controller" entry.
- Select "Update driver."
- Choose "Search automatically for drivers." Windows will look for and install the latest drivers.
- Option B: Manual Intervention: If automatic updates don’t work, we need a little more manual effort.
- In Device Manager, right-click on each USB entry again.
- Select "Uninstall device."
- Restart your computer. Windows should automatically reinstall the drivers upon restart. This is like hitting the reset button on your computer!
Method 2: Power Management – Fueling Your Ports
Sometimes, Windows might be too aggressive with power-saving settings, shutting off power to your USB ports to conserve battery life. Here’s how to fix that:
- Go back to Device Manager (yes, it's your new best friend!).
- Expand "Universal Serial Bus controllers."
- Right-click on each "USB Root Hub" (again!) and select "Properties."
- Go to the "Power Management" tab.
- Uncheck the box that says "Allow the computer to turn off this device to save power." This is like giving your USB ports their own private power line.
Method 3: Hardware Inspections and Physical Checks
Let's get physical. Are the ports themselves damaged?
- Inspect the Ports: Visually examine the USB ports on your laptop. Look for any bent pins, debris, or other physical damage. If you see anything amiss, gently try cleaning it with compressed air.
- Try Different Ports: Test your USB devices in every single port on your laptop. If some ports work and others don’t, you’ve narrowed down the problem.
- External Testing: If possible, try connecting your USB device to another computer. This will help you determine if the problem lies with the device itself, or the laptop's ports.
Method 4: Troubleshooting Software Conflicts
If the problem arose after installing new software or a Windows update, it could be a software conflict.
- System Restore: Use System Restore to revert your computer to a previous state, before the problems started. Think of it as a software time machine!
- Clean Boot: Perform a "clean boot" to start Windows with a minimal set of drivers and startup programs. This will help you identify if a third-party program is causing the interference.
Method 5: A Quick Windows Toolkit: Running the Troubleshooter
Windows has built-in troubleshooters that can often diagnose and fix USB issues automatically.
- Type "Troubleshooting" into the Windows search bar and open it.
- Click on "Hardware and Sound."
- Select "Hardware and Devices" and follow the on-screen instructions. Let the wizard work its magic!
Don't Give Up: Persistence is Key
Sometimes, fixing USB port issues is a process of elimination. It's like being a detective piecing together clues until you solve the mystery. Don't get discouraged if the first solution doesn't work. Try different methods, and be patient. The problem is usually fixable, and the feeling of triumph when you do is unparalleled.
Advanced Tips: For the Tech-Savvy
If you've tried everything and still no luck, here are a few more advanced techniques for the more technically inclined:
Manipulating the Registry
Warning: Editing the Windows Registry can be risky. Back up your registry before making any changes.
- Press Windows key + R, type "regedit," and press Enter.
- Navigate to
HKEY_LOCAL_MACHINE\SYSTEM\CurrentControlSet\Services\USBSTOR. - Double-click on the "Start" key.
- Change the "Value data" to 3 and click “OK”.
- Restart your computer.
Reinstalling USB Controllers
- In Device Manager, uninstall all USB root hubs, USB controllers, and USB host controllers. Restart your computer - Windows will then reinstall them.
Beyond the Basics: Prevention is Better Than Cure
Once you’ve fixed your USB port problems, it’s time to think about prevention. Here are some tips to keep those ports happy and healthy:
- Safe Eject: Always safely eject USB devices before unplugging them. This prevents data corruption and can extend the lifespan of your ports.
- Avoid Overloading: Don't plug too many devices into a single USB hub, especially if it's not powered. This can strain the port's power supply.
- Keep it Clean: Regularly clean your laptop's ports with compressed air to remove dust and debris.
- Regular Updates: Keep your Windows and drivers updated to avoid compatibility issues.
The Emotional Toll: Coping with USB Frustration
Let's be honest, dealing with USB problems can be incredibly frustrating. There's nothing more maddening than when technology doesn't work the way it's supposed to. It’s okay to feel annoyed. This isn't you against a broken machine; it's you against a common problem. Take a deep breath; grab a coffee; and remember, you're not alone in this battle.
When to Call in the Cavalry: Seeking Professional Help
If you've exhausted all these troubleshooting steps and your USB ports are still playing up, it might be time to seek professional help. A computer technician can diagnose more complex hardware problems. Think of it as calling in the SWAT team for your laptop!
Closing Thoughts: USB Port Victory!
We've covered a lot of ground, from understanding the common causes of USB port issues to providing step-by-step solutions. By following these techniques, you can hopefully tame the USB beast and get your devices working again. Remember, troubleshooting is a process, and persistence is key.
So, go forth and conquer those USB woes! You now have the knowledge to win the war against those pesky connectivity problems.
Work From Home? This Laptop Will CHANGE Your Life!How to Fix USB Ports Not Working in Windows 1011

By The Geek Page How to Fix USB Ports Not Working in Windows 1011 by The Geek Page
How to Fix USB Ports Not Working in Windows 10 FAST

By SkillsBuild Training How to Fix USB Ports Not Working in Windows 10 FAST by SkillsBuild Training
Fix USB Ports Not Working in Windows 10
By Britec09 Fix USB Ports Not Working in Windows 10 by Britec09

Title: How to Fix USB Ports not Working on Windows 10
Channel: SoftTech Tutorials
How to Fix USB Ports not Working on Windows 10 by SoftTech Tutorials
Working With Laptop
Windows 10 USB Nightmare? FIX Your Laptop Ports NOW!
Navigating the digital landscape has become synonymous with seamless connectivity. Yet, for many Windows 10 laptop users, the promise of effortless data transfer and device integration can quickly devolve into a USB nightmare. The frustration of unresponsive ports, intermittent connections, and the dreaded "USB device not recognized" error can grind productivity to a halt and leave even the most tech-savvy users feeling defeated. We understand your pain. And we have the solutions. This article meticulously explores the common culprits behind these USB woes and provides a comprehensive suite of fixes, empowering you to reclaim control over your laptop's vital ports and restore a smooth, efficient workflow.
Diagnosing the Digital Demons: Identifying the Root Cause
Before diving into solutions, it's crucial to pinpoint the specific issue. The problems are varied, and the solutions will vary to match. Is it a hardware failure threatening the USB ports, or software glitches obstructing the connection? Here's a breakdown of common USB issues and how to identify them:
- Connectivity Chaos: Sudden disconnections, intermittent recognition of USB devices, and slow data transfer speeds often point to power delivery problems or potential driver conflicts.
- The Unrecognized Device Error: This infuriating message typically arises from corrupted drivers, incompatible devices, or insufficient power supply to the USB ports.
- Port Paralysis: When no USB devices are recognized at all, the fault most likely lies with a driver issue, physical damage to the port, or a disabled USB controller in your BIOS or UEFI settings.
- Device-Specific Dilemmas: Certain devices, such as external hard drives or printers, may exhibit unique issues. These problems often stem from outdated drivers, insufficient power, or compatibility problems.
By carefully observing the symptoms, you can narrow down the potential causes and focus your troubleshooting efforts.
Unleashing the Power of Troubleshooting: Step-by-Step Solutions
Once the issue is identified, it's time to implement the fix. We'll walk through a series of solutions, ranked from easiest to most complex, to address your USB problems.
1. The Reboot Remedy: A Simple Yet Effective First Step
Sometimes the simplest solution is the best. A complete system restart often resolves temporary software glitches that may be affecting USB port functionality. Before moving on to more complicated troubleshooting, perform a full shutdown and restart. Ensure that all connected USB devices are disconnected before the reboot. After the system has fully restarted, reattach the USB devices and test to see if the problem is gone.
2. Inspection Time: Physical Checks and Device Diagnostics
Before delving into software solutions, it's important to rule out hardware problems. Examine the USB ports on your laptop for any signs of physical damage, such as bent pins or debris. Inspect the USB cables for damage, frayed wires, or loose connections. Try different USB cables and ports to isolate the damaged equipment. Clean the ports of any visible dust or debris, using a can of compressed air if necessary.
3. Driver Detective: Updating, Reinstalling, and Rolling Back Drivers
Outdated or corrupted drivers are major culprits behind USB connection problems. The driver is essential for communication with the hard drive. To update your USB drivers:
- Open Device Manager: Right-click the Start button and select "Device Manager".
- Expand Universal Serial Bus controllers: Locate the USB controllers, right-click them, and select "Update driver".
- Choose Automatic Search: Select the option to automatically search for updated driver software.
- Repeat for all USB controllers: Do this for each USB controller listed.
If updating doesn't work, try uninstalling and reinstalling the drivers:
- Open Device Manager: As before, right-click the Start button and select "Device Manager".
- Expand Universal Serial Bus controllers: Locate the USB controllers, right-click them, and select "Uninstall device".
- Restart Your Computer: Restarting the computer automatically reinstalls the drivers.
4. Power Saving Problems: Disabling USB Selective Suspend
Windows' power-saving features can sometimes interfere with USB port functionality. To disable USB selective suspend:
- Open Control Panel: Search for "Control Panel" in the Start menu and open it.
- Navigate to Power Options: Select "Hardware and Sound," then "Power Options".
- Change Plan Settings: Click "Change plan settings" next to your current power plan.
- Change Advanced Power Settings: Click "Change advanced power settings."
- Disable USB Selective Suspend: Expand "USB settings" and then "USB selective suspend setting." Set both "On battery" and "Plugged in" to "Disabled."
- Apply and Save: Click "Apply" and then "OK" to save the changes.
5. Power Delivery Pitfalls: Addressing Insufficient USB Power
Some USB devices, especially external hard drives, require more power than a standard USB port can supply. To remedy an insufficient power supply:
- Use a Powered USB Hub: A powered USB hub has its own power supply, providing more power to connected devices. This can be a useful workaround.
- Try Different USB Ports: Try different USB ports, including those on the rear of your laptop, which may deliver more power.
- Connect Directly to a Wall Outlet: If using an external hard drive, connect it directly to a wall outlet, using its own power adapter if available.
6. BIOS and UEFI Configuration: Ensuring Proper Port Settings
The BIOS or UEFI settings are essential for controlling the hardware features of your laptop. Sometimes, the USB ports can be disabled or misconfigured in these settings. To check and adjust the BIOS or UEFI settings:
- Restart and Enter BIOS/UEFI: Restart your laptop and press the appropriate key (usually Del, F2, F12, or Esc) during startup to enter the BIOS or UEFI setup. The key varies depending on your laptop model.
- Navigate to USB Settings: Locate the USB configuration section, which might be under "Advanced," "Integrated Peripherals," or a similar tab.
- Enable USB Ports: Ensure that all USB ports are enabled.
- Check USB Legacy Support: Enable "USB Legacy Support" to ensure that USB devices are recognized during the boot process.
- Save and Exit: Save the changes and exit the BIOS/UEFI, restarting your laptop.
7. System File Integrity: Scanning for Corrupted System Files
Corrupted system files can sometimes cause USB problems. To check for and repair corrupted system files:
- Open Command Prompt as Administrator: Search for "cmd" in the Start menu, right-click "Command Prompt," and select "Run as administrator."
- Run the System File Checker: Type
sfc /scannowand press Enter. This will scan for and attempt to repair any corrupted system files. - Wait for Completion: The scan may take a while. Do not interrupt the process.
- Restart Your Computer: After the scan is complete, restart your computer.
8. Consider a Clean Boot: Identifying Software Conflicts
Sometimes, third-party software may conflict with USB devices. Try a clean boot to identify software conflicts:
- Open System Configuration: Press Windows key + R, type
msconfig, and press Enter. - Disable Non-Microsoft Services: Go to the "Services" tab, check "Hide all Microsoft services," and click "Disable all."
- Disable Startup Items: Go to the "Startup" tab and click "Open Task Manager." Disable all startup items.
- Restart Your Computer: Restart your computer.
9. Hardware Matters: Potential Hardware Failures
If you've exhausted all software solutions, it's time to consider the possibility of a hardware failure. A damaged USB port or a faulty USB controller can cause problems. If the ports are physically damaged, consider taking your laptop to a professional repair service.
10. The Nuclear Option: Resetting Windows 10
As a final resort, resetting Windows 10 can often resolve persistent USB issues by restoring your system to its default settings. Before resetting, be sure to back up all important data as this process will delete all installed programs and user files. The setting is found in the Windows menu.
Proactive Prevention: Best Practices for USB Hygiene
Preventing future USB problems is just as important as resolving them. Here are best practices:
- Safely Eject Devices: Always safely eject USB devices before unplugging them to prevent data corruption.
- Use High-Quality Cables: Invest in high-quality USB cables to ensure reliable connections.
- Keep Your System Updated: Regularly update Windows and your device drivers.
- Install Antivirus Software: Protect your system from malware, which can sometimes cause USB problems.
- Avoid Overloading Ports: Avoid plugging too many devices into a single USB port or hub, as this can overload the power supply.
- Handle USB Ports with Care: Avoid excessive force when inserting or removing USB devices.
By implementing these proactive measures, you can minimize the chances of encountering USB nightmares in the future and ensure a seamless and efficient computing experience.
We hope this guide has provided you with the solutions and knowledge to conquer your laptop's USB woes. With the correct approach, you can regain control of your ports and enjoy the full potential of your Windows 1
