hdmi cable mac laptop to tv not working
Title: Macbook Pro HDMI port not working Here's a quick fix
Channel: Levy
Macbook Pro HDMI port not working Here's a quick fix by Levy
HDMI Cable Mac to TV FAIL? This SHOCKING Fix Works!
HDMI Cable Mac to TV Nightmare? Don't Panic! Here's the Secret Weapon.
Okay, so you’re staring at a blank TV screen. Your Mac seems to be connected, yet nothing is happening. Sound familiar? Ugh! The frustration is real. You just want to stream that movie, share those photos, or maybe even give a killer presentation. Instead, you're facing a tech showdown. Don’t worry; I get it. And guess what? There's a good chance you can fix this. Let's dive in and rescue your viewing experience.
The Mac-to-TV Connection Conundrum: What's Going Wrong?
First things first, let's acknowledge the elephant in the room: HDMI. It sounds simple, right? Plug it in, and it works. Sadly, it's not always that easy. Many factors can contribute to this head-scratcher. We will explore those factors later. Typically, the problems are surprisingly commonplace. Sometimes, it's a simple oversight. Other times, it's a deeper, hidden issue. But, ultimately, the solution often lies within your grasp. We'll get there.
Troubleshooting 101: Quick Checks Before the Deep Dive
Before we get into more complex solutions, let's do a quick check. Think of it as a digital health checkup for your setup. Firstly, confirm your HDMI cable is firmly plugged into both your Mac and your TV. Secondly, make sure everything is powered on. Sounds obvious, right? However, it's easy to miss. Thirdly, verify that your TV's input is set to the correct HDMI port. This is surprisingly a big culprit. Perhaps you've already checked all of this. That is completely fine.
Nevertheless, a quick restart of both your Mac and your TV can often work wonders. After a reboot, try again. In the event that the problem persists, let's move on.
Unveiling the Hidden Culprit: The Display Settings Detective
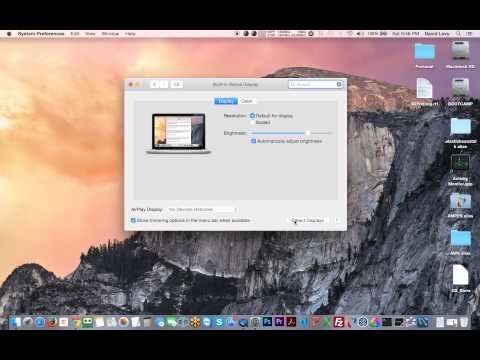
Alright, let's dig a little deeper into your Mac's settings. Consequently, we will uncover some often-overlooked configurations. This area frequently holds the key to a successful HDMI connection. Head over to your System Preferences (or System Settings, depending on your macOS version). Then, look for the "Displays" or "Displays" area. This is where the magic happens.
Here, you should be able to see your connected TV. If not, click a button that searches for displays. Often, it’s a simple button. Does the TV appear now? If it does, excellent! However, if it’s still not showing, there might be a slight issue.
In this case, you might be dealing with resolution or refresh rate problems. Therefore, play around here. Experiment with different options to see what works. Adjust the resolution. Change the refresh rate. Because the process is a bit trial and error, don’t be disheartened. After all, you are learning.
The HDMI Handshake: Why the Conversation Fails
Sometimes, the problem stems from a breakdown in communication. Picture this: Your Mac and your TV have to "shake hands" and agree on a signal. This is known as the HDMI handshake. Sometimes, this handshake fails. It can cause a frustrating disconnect. Frequently, this handshake gets blocked.
Hence, the best advice is to ensure your devices are up-to-date. Consequently, update your Mac's operating system. Check your TV's firmware. Older versions may not be compatible. Next, try using a different HDMI cable. Cables simply can fail. Ensure it is a known good cable. Also, try another HDMI port on your TV, just in case.
Audio Issues? Mastering the Sound Settings
Furthermore, let's talk about audio. Because a video connection is working, your Mac may not be routing the sound correctly. Go back to System Preferences (or System Settings). Subsequently, look for "Sound" or "Audio". After that, find the "Output" tab.
Confirm your TV is selected as the output device. If you don't see your TV listed, there might be a problem with the audio transmission. Therefore, try restarting your Mac and TV. Additionally, check the volume levels. You never know!
The Ultimate Fix: Resetting the SMC (For Intel Macs)
Moreover, if you have an older Intel-based Mac, there is one more thing to try: resetting the System Management Controller (SMC). This can sometimes resolve stubborn hardware issues. However, it is very specific. The process varies depending on the Mac model. Nonetheless, it is worth researching.
Firstly, make sure your Mac is shut down. Then, follow the specific instructions for your model. Finally, restart your Mac. Subsequently, check the HDMI connection again.
Embracing the Connection: Final Thoughts and Pro Tips
Ultimately, getting your Mac connected to your TV often boils down to a little patience. Therefore, don't give up! Besides, it is often a simple fix. With that said, remember these key takeaways.
- Check the Basics: Cables, power, inputs.
- Dive into Settings: Explore Displays and Audio.
- Update Everything: Keep your software current.
- Experiment: Play with resolutions and refresh rates.
Additionally, here are a few pro tips:
- Use a high-quality HDMI cable.
- Avoid using hubs or adapters if possible (they can introduce issues).
- Consult your TV's manual for HDMI compatibility information.
In conclusion, you can conquer this tech hurdle. Consequently, you will be streaming in no time. Now, go forth and enjoy those movies and presentations! Let me know if there is anything else I can assist you with!
Duet Display on MULTIPLE Laptops? This SHOCKING Trick WORKS!HDMI Cable Mac to TV FAIL? This SHOCKING Fix Works!
Hey tech lovers! Have you ever been there? You're ready to binge-watch your favorite show on the big screen, you've got your Mac, your TV, a shiny new HDMI cable plugged in… and nothing. Just a blank screen, a flickering display, or maybe even a cryptic error message that might as well be written in hieroglyphics. We've all been through the HDMI cable Mac-to-TV dance of despair, haven't we? The frustration is real, and the feeling of helplessness can be overwhelming. But don't you worry, because we're here to crack the code and get you back to your binge-watching bliss. This isn't just another troubleshooting guide – this is your survival kit for HDMI connection woes!
The Mac-to-TV HDMI Headache: Why Does This Happen?
Alright, let's get down to brass tacks. Why is it that connecting your Mac to your TV via HDMI can be such a pain? It's like the HDMI cable itself has a mind of its own, deciding when and if it wants to cooperate. There are several sneaky culprits at play, each causing its own brand of digital drama. It's like a digital dance-off, with your Mac and TV battling for supremacy.
- The Cable's Role in the Chaos: First, let's consider the cable itself. Is it a high-quality cable, or a cheap imitation? Sometimes, the cable is just not up to the task. Think of it like a garden hose trying to supply a fire hydrant: insufficient.
- The Ports are a Problem: Both your Mac and your TV have HDMI ports, but they don't always play nicely. These ports can sometimes be finicky, especially after a software update.
- Resolution and Refresh Rate Conflicts: Your Mac and your TV need to agree on a resolution and refresh rate. When they're singing different tunes, you get a visual stalemate. It's like trying to understand two different languages.
- Software Glitches and Driver Issues: Sometimes, it's not the hardware at all. Software glitches, outdated drivers, or even simple conflicts can throw a wrench in the works. This is the digital equivalent of a short circuit.
Troubleshooting 101: Checking the Obvious First
Before we dive into the more complex solutions, let's rule out the easy fixes. This is like checking your fuse box before calling an electrician. These are the low-hanging fruit of troubleshooting.
- Power Up and Ensure Everything's On: Make sure both your Mac and your TV are powered on. Sounds simple, right? But it's surprising how often this is the problem!
- Physical Connections are King! Unplug the HDMI cable from both ends, and then firmly plug it back in. Make sure it's seated snugly. I once battled for an hour only to realize the cable wasn't fully inserted – face palm moment!
- Select the Correct Input: On your TV, make sure you've chosen the correct HDMI input. This is usually a button on your remote labeled "Input" or "Source."
- Restart Your Devices: This is the tech world's equivalent of a reset button. Restart both your Mac and your TV. This can often clear up minor glitches.
Diving Deeper: Advanced HDMI Troubleshooting Tactics
If the basics didn't work, don't worry, we're just warming up! Let's explore some more advanced methods to get your Mac and TV talking again. This is where we get our detective hats on.
- The Secret Sauce: Try a Different HDMI Cable: As mentioned, a faulty cable is often the culprit. Try a different HDMI cable, ideally one you know to be of good quality. This is your digital lifeline!
- The Port Shuffle: Experiment with different HDMI ports on your TV. Sometimes, one port is just more cooperative than another. This is like trying a different door to enter your house.
- The Display Settings Dance on Your Mac: Go to System Preferences (or System Settings on newer Macs) > Displays. Make sure your TV is detected. If it's not, click "Detect Displays." See if it appears now.
- Resolution and Refresh Rate Detective Work: In Display Settings, look at the resolution and refresh rate settings. Try different combinations to see if you can find one that works. Your TV manual should list the resolutions it supports.
The SHOCKING Fix: The EDID Override!
This is the secret weapon, the ace up our sleeve, the solution that often saves the day. EDID stands for Extended Display Identification Data. In simple terms, it's the information your TV sends to your Mac about its capabilities. Sometimes, this information gets corrupted, leading to connection problems.
What is EDID? EDID is how your TV tells your Mac or other devices what it can do (resolutions support, etc.). Think of it as a digital introduction between devices.
Why EDID Can Fail: EDID communication can break down. It could be caused by an outdated driver, a software glitch, or even a faulty cable.
The Solution: Override the EDID: While it sounds technical, it is not actually difficult. It might sound like a risky move, but don't worry, we'll walk you through it.
- Download an EDID Override Tool: You'll need a third-party utility that allows you to override the EDID data. One popular option is "SwitchResX." This app is a game-changer.
- Create a Custom EDID: In SwitchResX, you can create a custom EDID profile that forces your Mac to recognize your TV. It's like giving your Mac a cheat sheet.
- Apply the Override: Apply the custom EDID, and see if your TV magically appears. It essentially tricks your Mac into thinking it’s connected to a display it accepts.
More Tricks to Try: Tweaking and Troubleshooting
If even the EDID override isn’t working, don't despair! There are a few more tactics we can deploy.
- Check for Software Updates on Your Mac: Make sure your macOS is up to date. Apple releases updates that sometimes fix compatibility issues.
- Update Your Graphics Drivers (if applicable): If your Mac has a dedicated graphics card (e.g., AMD or Nvidia), check for driver updates.
- Clear the PRAM/NVRAM: This is a small step, but it can sometimes resolve conflicts. Restart your Mac and hold down Command + Option + P + R until you hear the startup chime again.
- Reset SMC (System Management Controller): Resetting the SMC can fix issues with power management and other hardware-related problems. The process varies depending on the Mac model. (Google your model for instructions.)
The HDMI Cable: Finding the Right One
Choosing the right HDMI cable can make a world of difference. Not all cables are created equal.
- Different HDMI Standards: There are various HDMI standards (1.4, 2.0, 2.1). The newer the standard, the more features it supports (e.g., 4K, HDR, higher refresh rates).
- High-Speed Cables are Your Best Friend: Opt for a "High-Speed" HDMI cable. These cables are designed to handle higher bandwidth requirements.
- Consider the Length: The longer the cable, the more potential for signal degradation. Keep it as short as possible while still providing the desired reach.
- Brand Matters (Sometimes): While not always necessary, reputable brands often offer better build quality and reliability.
The "Mirror Displays" vs. "Extend Display" Debate
When you finally get a connection, you have a choice: mirror your display or extend it.
- Mirror Displays: Shows the same content on both your Mac and your TV. Great for presentations or watching movies with others.
- Extend Display: Turns your TV into a second screen. This allows you to work on your Mac while simultaneously watching something on your TV.
- Choosing the Right Mode: Select the mode that best suits your needs. You can usually switch between them in Display settings.
The Audio Angle: Getting Sound Through HDMI
Getting video is one thing, but sound is a different beast!
- Audio Output Settings: Go to System Preferences (or System Settings) > Sound. Make sure your TV is selected as the output device.
- Check Your Volume: Ensure that the volume is turned up on both your Mac and your TV.
- HDMI Audio Issues: If you’re still not hearing any sound, try a different HDMI port, or check if there is a separate audio cable connection needed.
The Future of HDMI: What's Next?
HDMI technology is always evolving. Keep an eye on what's coming next.
- HDMI 2.1: The latest standard offers even higher resolutions, refresh rates, and bandwidth. This is great for gaming and future-proofing your setup.
- 8K and Beyond: HDMI is paving the way for 8K resolution and beyond.
- eARC (Enhanced Audio Return Channel): eARC improves audio quality and supports advanced audio formats. This feature is coming to many displays.
- HDMI over Ethernet: New methods of carrying signals, for a better and easier setup and communication.
Final Thoughts: You've Got This!
Laptop Touchpad Freaking Out? The SHOCKING Fix!How To Fix HDMI Audio from Mac to TV or Monitor macbookpro hdmi tv monitor fixed

By QuantumWeb How To Fix HDMI Audio from Mac to TV or Monitor macbookpro hdmi tv monitor fixed by QuantumWeb
External Display Not Working on Mac

By Jayati.design External Display Not Working on Mac by Jayati.design
How to Fix External Monitor Not Working on Mac Second Display Not Working

By Tenorshare 4DDiG Data Recovery How to Fix External Monitor Not Working on Mac Second Display Not Working by Tenorshare 4DDiG Data Recovery

Title: HDMI Tidak Berfungsi di Mac Cara Memperbaikinya
Channel: The Geek Page
HDMI Tidak Berfungsi di Mac Cara Memperbaikinya by The Geek Page
Laptop Working
HDMI Cable Mac to TV FAIL? This SHOCKING Fix Works!
Have you ever dreamed of effortlessly mirroring your Mac's stunning display onto your television, transforming your living room into a personal cinema or a collaborative workspace? You’re not alone. We, too, have experienced the frustration, the hair-pulling, the dreaded "no signal" message that appears after painstakingly connecting your Mac to your beautiful TV. The promise of seamless connectivity often crumbles, leaving you staring at a blank screen and wondering where things went wrong. But before you resign yourself to a life of squinting at your laptop, rest assured: We have been there.
This seemingly simple task – connecting an HDMI cable from your Mac to your TV – can sometimes feel like deciphering a complex riddle. The good news? The solution, or rather, a suite of solutions, is often far more straightforward than you might think. This guide provides a comprehensive, step-by-step approach to troubleshooting and resolving those persistent connection issues. We will move beyond the superficial and delve into the specifics, providing you with the knowledge and tools to conquer the Mac-to-TV HDMI hurdle once and for all.
The Initial Connection: Checking the Fundamentals
Before diving into more complex troubleshooting, let's address the basics. This is not just about being elementary; it's about establishing a solid foundation. First and foremost, meticulously examine your physical connections. Is the HDMI cable securely plugged into both your Mac and your TV? A loose connection, even a seemingly insignificant one, can be the culprit. Unplug and replug the cable at both ends, ensuring a firm, unwavering connection.
Next, confirm your HDMI cable is functioning correctly. It might seem obvious, but cables, like any hardware, can fail. If possible, test the cable with another device, such as a Blu-ray player or game console, connecting it to the same TV input. If the other device displays correctly, you can, with a reasonable amount of certainty, rule out a faulty HDMI cable. Similarly, try testing the Mac with another television if possible. This helps isolate whether the issue lies with the Mac's port or the TV.
Finally, verify your television's input selection. With many modern TVs featuring multiple HDMI ports, it's easy to select the wrong one. Use your TV's remote to cycle through the input options until you locate the HDMI port to which your Mac is connected. A simple oversight here is a very common source of frustration.
Software Shenanigans: Addressing Mac Display Settings
Assuming your physical connections are sound, the next area of focus is your Mac’s display settings. macOS offers extensive control over how your display behaves. These settings are often the source of connectivity problems.
Detecting Displays: Open System Preferences (or System Settings on newer macOS versions) and navigate to the “Displays” section. Here, you should see a list of connected displays. If your TV isn't recognized, click the “Detect Displays” button. This action prompts your Mac to actively search for connected devices. If your TV still doesn't appear, this is a clear indicator that the connection issue is not being solved.
Mirroring vs. Extended Desktop: Once your TV is recognized, choose the display configuration that best suits your needs. “Mirror Displays” duplicates your Mac's screen onto your television, useful for presentations or sharing content. “Extended Desktop” treats your TV as a second monitor, allowing you to expand your workspace. Switching between these modes is a quick test to see if one configuration works where the other does not.
Resolution and Refresh Rate: Within the “Displays” settings, you can adjust your TV's resolution and refresh rate. Ensure that the selected resolution is supported by your TV. Experiment with different resolutions, starting with the recommended one. If you are experiencing issues, try lowering the resolution temporarily to see if it resolves the connection problems. Similarly, review the refresh rate. While most TVs support 60Hz, older models might operate at lower rates. Matching the refresh rate to your television's capabilities can significantly improve performance.
Arrangement Adjustments: If you've chosen the "Extended Desktop" option, you can arrange the position of your displays within the "Arrangement" tab. This allows you to specify where each screen sits in relation to the other. Adjusting the layout can help resolve alignment issues.
Audio Output: Configuring Sound Through HDMI
Often overlooked, incorrect audio settings can lead to the illusion of a failed connection. Your Mac might be successfully displaying the picture, but no sound is being transmitted through the HDMI cable.
Selecting the Output: Open System Preferences (or System Settings) and go to “Sound.” Within the “Output” tab, you will find a list of available audio devices. Your TV should appear as an option, likely identified by its model name or "HDMI Output." Select your TV as the output device.
Volume Control: Once your TV is selected as the output, check the volume slider. Ensure the volume is not muted and that the level is sufficiently high. Adjust the volume on your TV as well.
Troubleshooting Audio Issues: If you're still not hearing sound, try restarting your Mac. This simple step can often resolve minor software glitches. If the problem persists, consider checking your TV's audio settings. Many TVs have settings for audio output that might need to be adjusted to accept audio from an external source.
HDMI Cable Specifications: Understanding the Technicalities
HDMI cables are not all created equal. Especially when dealing with 4K or high-refresh-rate displays, the cable's version and specifications become critical.
HDMI Versions: There are different HDMI versions (e.g., 1.4, 2.0, 2.1). Newer versions support higher resolutions, refresh rates, and features such as Enhanced Audio Return Channel (eARC). Ensure your cable meets the requirements of your TV and your Mac. A cable that's too old might be the root of your difficulties.
Cable Certification: Look for "Premium High Speed HDMI Cable" or "Ultra High Speed HDMI Cable" certification. These certifications guarantee the cable can handle the bandwidth required for high-resolution video and audio.
Cable Length: Longer HDMI cables can experience signal degradation. If you’re using a long cable, consider a premium, certified cable.
TV Firmware and Mac Updates: Keeping Things Current
Outdated software on either your television or your Mac can cause compatibility issues.
TV Firmware: Regularly update your TV's firmware. Check your TV’s manufacturer's website for instructions on how to update the firmware, which often takes place over Wi-Fi or through a USB drive. New firmware versions frequently include improvements in HDMI compatibility.
macOS Updates: Ensure your Mac is running the latest version of macOS. Apple frequently releases updates that address bug fixes and compatibility issues, including those related to HDMI connectivity. Keep your software up-to-date.
Beyond Display Settings: Advanced Troubleshooting Techniques
Sometimes, the solution escapes the obvious. These advanced techniques might provide the key.
Resetting the System Management Controller (SMC): The SMC manages low-level functions, including display-related settings. Resetting the SMC can sometimes resolve persistent display problems. The process varies depending on your Mac model. Research how to reset the SMC for your specific Mac model.
Using a Different HDMI Port on Your TV: Some TVs have specific HDMI ports designed for certain uses, like gaming. Try connecting your Mac to a different HDMI port on your TV. This is a quick way to test if the first one is faulty.
External Adapters: Exploring Workarounds: In some instances, the inherent incompatibility between your Mac and TV might require a workaround. External adapters, such as a USB-C to HDMI adapter, can provide a reliable solution. These adapters often have built-in signal processing capabilities, which can help overcome connection issues. Ensure you get a high-quality adapter from a reputable manufacturer.
Diagnosing the Problem: A Systematic Approach
The first step is to identify the specific symptoms you are experiencing. Are you seeing a blank screen, experiencing intermittent flickering, or facing audio issues?
Document Your Setup: Keep a log of your equipment, including the Mac model, TV model, and HDMI cable specifications. This documentation will be invaluable when seeking assistance.
Isolate the Issue: If possible, test your Mac with another TV or your TV with another device. This helps narrow down the source of the problem.
Consult Apple Support: If all else fails, consult Apple Support. They have specialized tools to help with display issues. Be prepared to provide detailed information about your setup and the troubleshooting steps you’ve already taken.
Conclusion: The Path to Seamless Connectivity
Connecting your Mac to your TV shouldn’t feel like an uphill battle. By methodically working through these steps, from checking the basics to delving into advanced techniques, you are equipped to overcome HDMI connection issues. Remember to be patient, persistent, and methodical. With a bit of troubleshooting, you’ll soon be enjoying your Mac's content on the big screen, free from frustration and ready to enjoy your media without connection headaches.
