how do i work the camera on my hp laptop

Title: 100 SOLVED NEW 2024 - We cant find your camera ERROR CODE 0xA00F4244 in Windows 1011- NEW 2024
Channel: How To Fix Tech
100 SOLVED NEW 2024 - We cant find your camera ERROR CODE 0xA00F4244 in Windows 1011- NEW 2024 by How To Fix Tech
how do i use the camera on my hp laptop, how do i use the camera on my hp laptop windows 11, how to use the camera on my hp laptop, how do i get the camera to work on my hp laptop, how do i activate the camera on my hp laptop, how do i flip the camera on my hp laptop, how do i unblock the camera on my hp laptop, how do i test the camera on my hp laptop, how do i switch the camera on my hp laptop, how do i enable the camera on my hp laptop
HP Laptop Camera Secrets: The Ultimate Guide!
Unveiling the HP Laptop Camera: Your Insider’s Handbook
Ever felt like your HP laptop’s camera was holding out on you? You’re not alone. Many users struggle with camera settings. After all, hidden depths often await exploration. This guide offers a detailed look. We are diving deep, right now. Let's expose some secrets!
Beyond the Basics: Initial Camera Setup
First things first: ensuring your camera functions. It seems obvious, however, it's important. Start by checking your operating system. It plays a vital role. For instance, confirm the drivers are up to date. Go to the Device Manager. Find "Cameras" or "Imaging devices." Right-click your HP webcam. Select "Update driver." If issues persist, consider restarting your laptop. Sometimes a simple reset fixes things.
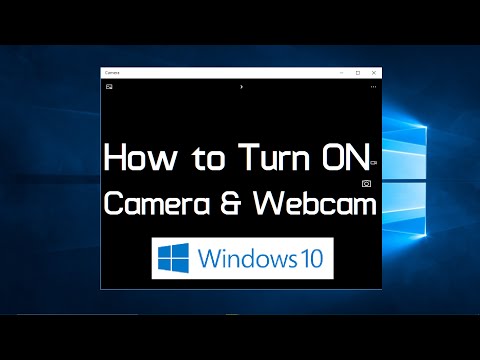
Mastering the Built-In Camera App
Now, let's get into the native camera app. It varies depending on your Windows version. However, basic functionalities are usually the same. Open it by typing "Camera" in the search bar. Before shooting, take a moment to explore settings. You’ll usually find options for photo and video resolutions. It is worth experimenting with various settings. These influence your image quality. You can also adjust the aspect ratio. Furthermore, consider the timer function. This allows for hands-free shots. Now, let's dig deeper.
Illuminating the Shadows: Lighting and Composition
Good lighting is crucial. Consequently, poor lighting spoils pictures. Avoid backlighting. It can cast your face into shadow. Instead, position yourself towards a light source. Natural light often provides the best results. However, the amount of light matters. Experiment with different angles. Observe how light shapes your face.
Moreover, composition is key. This impacts how your photos appear. Consider the rule of thirds. Imagine dividing your screen into nine equal parts. Place important elements along those lines. Thus, it enhances visual appeal. Frame your subject well. Make sure the background is not distracting. Small details matter.
Unlocking Advanced Features: Software and Settings
Beyond default settings, consider third-party software. They can enhance your camera capabilities. Many free or paid apps are available. Look for options like ManyCam or OBS Studio. These offer advanced features. You can add filters, effects, and virtual backgrounds. Moreover, these tools enable streaming.
Furthermore, delve into your laptop's settings. Go to the "Privacy" settings. Find "Camera." Ensure apps have permission to access your camera. Sometimes permission is turned off. Without it, your camera is useless. Likewise, review your video conferencing apps. These apps probably have specific camera settings. Experiment with those.
Troubleshooting Common Camera Problems
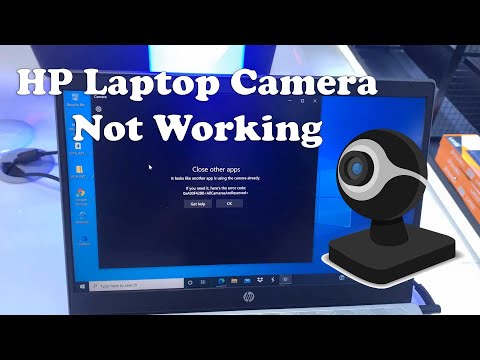
Encountering problems? First, check your privacy settings. Then, restart your laptop. This simple step resolves many issues. Make sure no other application is using the camera. Only one app can use the camera at once.
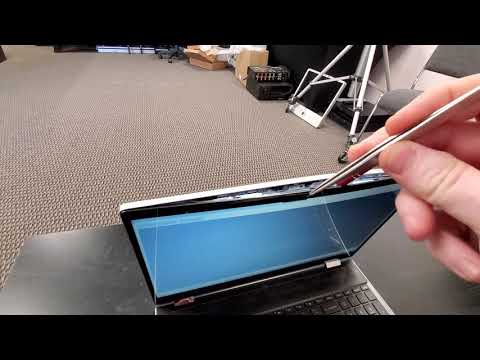
Furthermore, ensure the camera lens is clean. A dusty lens blurs the image. Use a microfiber cloth to wipe the lens gently. Check your internet connection. Poor connections hinder video calls. Next, evaluate your microphone. It is part of the overall experience.
Enhancing Audio Quality for Video Calls
Audio is as vital as visuals. Improve audio with an external microphone. These mics generally offer better sound quality. Position your microphone correctly. Speak clearly and directly into it. Avoid background noise. Close windows and doors.
Subsequently, test your audio. Make sure the microphone's volume is appropriate. Adjust settings within your calling software. You can also use noise cancellation features. These features minimize distractions. Therefore, consider a headset. It delivers focused, clear audio.
Keeping Your Camera Secure: Privacy Matters
Privacy is significantly important. Cover your camera when not in use. This protects against unauthorized access. Use a physical camera cover. Alternatively, install a software solution. These solutions block unwanted access. Change default passwords. This adds a layer of security. Update your operating system. Updated systems often include security patches.
Final Thoughts: Maximizing Your HP Laptop Camera
Your HP laptop camera has much to offer. By understanding the settings, you can enhance your experience. Additionally, always prioritize your privacy. Enjoy your video calls and capture those precious moments. Now you are ready to go further.
Laptop Bluetooth Not Working? SHOCKING Fix You NEED!HP Laptop Camera Secrets: The Ultimate Guide!
Hey tech enthusiasts! Ever feel like your HP laptop camera is playing hard to get? You know, blurry images, weird angles, or just a general sense of "meh" when you hop on a video call? Well, you're not alone! We've all been there. The good news is, that little camera hiding in your laptop lid is capable of so much more than it seems. This guide is your secret weapon, a treasure map to unlocking the full potential of your HP laptop's camera. We’re diving deep, uncovering hidden features, and transforming you from a webcam novice into a video call virtuoso. Get ready to level up your online presence!
1. Unveiling the Mystery: Why Is My HP Laptop Camera Acting Up?
Before we start performing digital magic, let's troubleshoot. Think of it like trying to bake a cake without understanding why it's flat. Several culprits can cause that less-than-stellar camera performance. Are your drivers updated? Is the camera physically obstructed (dust, fingerprints, a rogue sticker)? Are applications hogging access to the camera? We'll get into the nitty-gritty of each of these, but just like a detective, we need to analyze the scene first.
2. Driver Dilemma: Keeping Your Camera’s Software Up-to-Date
Drivers are the unsung heroes of your laptop's functionality. They're like the internal translators that allow your camera to communicate with your operating system. Outdated drivers? That's like trying to chat in a language you barely know. Consequently, your camera might work poorly.
- How to Update: Head to your HP support website, enter your model number, and search for the latest camera drivers. Download and install them. Alternatively, Windows Device Manager also provides a way through which you can update drivers. Right-click on your camera and select "Update driver." It's like giving your camera a fresh breath of air!
- Regular Checks: Make this a monthly habit. Technology evolves fast; keeping your drivers current ensures optimal performance.
3. Camera Access Permissions: Granting the Green Light
Think of your camera as a very polite guest. It needs permission to enter the party (your apps). Windows has evolved to protect your privacy, so you must explicitly grant apps access to use your camera.
- Check Your Settings: Go to Settings > Privacy > Camera. Make sure the toggle for "Allow apps to access your camera" is turned on. Below, you'll see a list of apps and their individual camera access permissions. Ensure your preferred apps are also set to 'on'.
4. Physical Obstructions: Removing the Blinders
Sounds simple, yet it’s often overlooked. Fingerprints, dust, or anything blocking the lens will ruin your video quality. Think of it as trying to see through a dirty window.
- Clean the Lens: Gently wipe the lens with a microfiber cloth. Avoid harsh chemicals or paper towels, which can scratch the surface.
- Inspect the Surroundings: Ensure nothing is physically blocking the lens, like a post-it note or a protective cover (if you have one).
5. Mastering HP's Built-in Webcam Settings
Did you know your HP laptop likely comes with built-in camera settings? They're your secret weapon for tweaking the image quality.
- Accessing the Settings: The location varies depending on your HP model and operating system, but try searching for "Camera" or "HP Webcam" in the Windows search bar. Look for a settings icon or right-click the video in your video-calling app to see settings.
- Adjusting the Basics: Explore brightness, contrast, saturation, and sharpness. Experiment and find what looks best in your lighting conditions. You might be surprised at the difference!
6. Lighting: The Silent Star of Your Video Calls
Lighting is everything! It’s the artist's brush that sets the mood. Without proper lighting, even the best camera will struggle.
- Natural Light is King: Position yourself facing a window during daylight hours. Avoid direct sunlight, which can cause harsh shadows.
- Artificial Alternatives: Invest in a ring light or a desk lamp. Place the light source in front of you, not behind. Think of it as casting a spotlight on your face.
7. Framing Your Shot: Creating a Visual Masterpiece
How you frame yourself within the video is crucial. It is about more than what is being said; the setting of your video creates impressions.
- The Rule of Thirds: Imagine your screen divided into nine equal parts by two horizontal and two vertical lines. Position your face along one of these lines, not in the very center. Leave some headroom above your head.
- Eye Contact is Key: Look directly at the camera (the little lens) not the screen. This creates a sense of connection with whomever you are talking.
8. Leveraging Third-Party Apps for Enhanced Features
While the built-in settings are good, third-party applications can take your camera game to the next level. I personally enjoy using a variety of apps to create different filters.
- Experiment with Options: Explore software like OBS Studio or Cyberlink YouCam. They offer advanced features like virtual backgrounds, special effects, and noise reduction. The options are truly mind-boggling!
- Choose Wisely: Consider your needs and the app's ease of use. Some applications are free, while others offer premium subscriptions.
9. Audio Matters: Enhancing Your Sound Quality
Let's face it, a grainy video with great audio is preferable to a crystal-clear video with muffled audio.
- Built-in Mic Limitations: Your laptop's built-in microphone might pick up background noises.
- Upgrade Your Audio Game: Invest in an external microphone (even a simple headset will do). This will significantly improve your audio quality.
10. Troubleshooting Common Camera Glitches
Even with all the tips, things can still go wrong. Let's address some common issues.
- The Camera Won't Turn On: Verify that its not disabled in your system settings. Ensure the camera is connected. Restart your Laptop.
- The Image is Upside Down: Check your camera settings for rotation options; you may have to go into your third-party app, this problem is rare, but possible.
- The Camera is Blurry: Adjust your focus, clean the lens, and ensure adequate lighting.
11. Advanced Techniques: Delving into the Pro Realm
Ready to take things up a notch? Let’s dive into some advanced techniques.
- Virtual Backgrounds: Explore third-party apps for impressive virtual backgrounds.
- Gesture Control: Some HP laptops have gesture control features. Experiment with these capabilities within the application you are using.
12. Maintaining Privacy: Keeping Your Camera Secure
Privacy first! You have to be vigilant about securing your camera.
- Camera Covers: Physical camera covers are a great way to prevent unauthorized access.
- Regular Security Checks: Run antivirus scans and keep your system updated.
13. Beyond the Basics: Creative Uses for Your HP Laptop Camera
Your camera is not just for video calls! Think beyond your desk.
- Creative Applications: Use your camera for live streaming, recording video tutorials, or creating stop-motion animations.
- Have Fun: Experiment with different angles, lighting, and effects. Be creative!
14. Troubleshooting and Maintenance
Think of your camera like a car. You need to stay on top of it so you don't get caught out.
- Regular Checkups: Clean your camera lens regularly, update your drivers, and delete unwanted apps.
- Backup Your Essential Files: If your camera breaks, you can easily retrieve the data on it.
15. Embracing the Future: Emerging Technology and HP Cameras
Technology never stands still. The future of HP laptop cameras is bright.
- AI-Powered Features: Expect to see AI-powered features like facial recognition, improved auto-focus, and smarter auto-framing.
- Enhanced Resolution: We’re talking higher resolutions and improved low-light performance. Consider a dedicated studio camera and a studio setting.
Wrapping Up: Your HP Laptop Camera Transformation!
And there you have it! We've covered everything from the basics to advanced techniques. We've explored ways to make your camera run smoothly. Remember, it's a journey of discovery. Practice, experiment, and have fun! Your HP laptop camera is ready and capable. Now go forth and create!
FAQs: Your Burning Questions Answered
1. My camera isn't working after an update. What should I do?
First, roll back the driver if you suspect it’s the latest driver. If that doesn't work, check your camera access permissions (Settings > Privacy > Camera). Finally, restart your laptop.
2. How can I improve my video call quality?
Prioritize good lighting (natural light), ensure a stable internet connection, and use an external microphone for better audio quality. Consider adjusting the video settings.
3. Is it safe to use a camera cover?
Yes! Camera covers are a great privacy measure, just make sure to remove them when using the camera.
4. My camera image is too dark. How do I fix it?
Make sure that your settings are not set to
Surface Laptop 2 Camera Dead? FIX This NOW!How To Fix HP Laptop Camera Not Working In Windows 10
By Cap Trong Nam - How To How To Fix HP Laptop Camera Not Working In Windows 10 by Cap Trong Nam - How To
How to turn on webcam and camera in Windows 10 Simple
By Feb28 How to turn on webcam and camera in Windows 10 Simple by Feb28
How to quickly repair HP Pavilion x360 Model 15 webcam not working.
By Tech Services How to quickly repair HP Pavilion x360 Model 15 webcam not working. by Tech Services

Title: How to Use External Camera on Laptop Windows 1011 Web Camera PC Setup Secret Settings Revealed
Channel: Digita Skills
How to Use External Camera on Laptop Windows 1011 Web Camera PC Setup Secret Settings Revealed by Digita Skills
Change Wifi Settings
HP Laptop Camera Secrets: The Ultimate Guide!
We've all been there: staring into the cold, unblinking eye of our HP laptop's camera, hoping for a clean and presentable video feed. Whether it's a critical work meeting, a catch-up with family across the miles, or simply recording a quick video, the quality of our laptop's camera significantly impacts the experience. This comprehensive guide unveils the hidden potential within your HP laptop's camera, transforming your video presence from passable to professional. We'll delve into the specifics, providing actionable advice and uncovering secrets that will elevate your virtual interactions.
Understanding Your HP Laptop Camera: A Foundation for Excellence
Before we dive into optimization, let's establish a clear understanding of the hardware at our disposal. Most modern HP laptops come equipped with integrated webcams, varying in resolution and capabilities depending on the model. While premium models may boast 1080p or even higher resolution, the average HP laptop camera typically offers 720p or a slightly higher resolution. Regardless of the specific resolution, understanding the limitations of your camera is the first step towards maximizing its performance.
Crucially, recognize the importance of the lens. The lens is the gateway for light, and its quality significantly influences the final image. Even a high-resolution sensor can be hampered by a subpar lens. Similarly, the camera's aperture (the opening that allows light to enter) directly impacts how well your camera performs in low-light scenarios. Unfortunately, specific aperture details often aren't readily available, making understanding the overall design imperative.
Another essential element is the camera's sensor. The sensor converts light into digital signals. Different sensor technologies exist (CMOS being the most common in laptops), each with its strengths and weaknesses regarding image quality, color accuracy, and dynamic range (the range of light and dark tones it can capture). While we cannot directly swap out or upgrade the sensor, understanding its basic capabilities helps us tailor our settings and environment for optimal results.
Then, there's the software that controls the camera and processes the captured images. This software is often integrated with the operating system, and HP often provides its own software or drivers that can fine-tune your camera's settings. We'll explore these settings in detail later.
Conquering Lighting: The Cornerstone of Superior Video
Lighting is, without a doubt, the single most crucial factor in producing impressive video quality. No matter how advanced your camera, poor lighting will always result in a lackluster image. Fortunately, we can master lighting without breaking the bank.
The ideal lighting scenario is natural light. Position your HP laptop facing a window, avoiding direct sunlight streaming directly onto the lens, as this can cause harsh shadows and overexposure. Soft, diffused light is key. If your window faces the sun, consider using sheer curtains or blinds to soften the light.
When natural light is unavailable or inconsistent, artificial lighting is a must. Invest in a simple ring light or softbox. These lighting solutions provide a consistent light source, dramatically reducing shadows and improving overall brightness and clarity. Position the light source directly in front of you, slightly elevated, to eliminate under-eye shadows and provide a more flattering appearance.
Avoid backlighting, where the light source is behind you. This will cause you to appear as a silhouette. Instead, position your light source (natural or artificial) in front of you, illuminating your face evenly.
Experiment with the intensity of the light. Overly bright lights can be just as detrimental as insufficient lighting. Adjust the brightness of your light source to achieve a balanced and natural look. If using multiple light sources, experiment with their positioning and diffusion to create the desired effect.
Optimizing Camera Settings: Unlocking Hidden Potential
Most HP laptops, like those running Windows, have built-in camera settings accessible through the Camera app or through the system's settings. However, HP often provides additional software, such as HP Camera, to enhance or manage the camera’s functions. Here's how to optimize these settings for superior video:
Accessing Camera Settings:
- Open the Camera app (search for "Camera" in the Windows search bar).
- If you have HP Camera or a similar utility, open that as well.
- In the Camera app, you'll typically find settings accessible by clicking on an icon that looks like a gear or cogwheel. You might also find these settings in the system's settings under "Devices > Camera".
Adjusting Image Settings:
- Brightness: Adjust the brightness level to ensure your face is adequately illuminated without being washed out. If you are in well-lit surroundings, reduce the brightness.
- Contrast: Fine-tune the contrast to improve the differentiation between light and dark areas. Reduce this if the image appears overly stark.
- Saturation: Increase the saturation to enhance color vibrancy. Too much saturation can make colors appear unnatural.
- White Balance: Adjust the white balance to ensure accurate color representation. Select a preset appropriate for your lighting conditions (e.g., "cloudy," "sunny," "fluorescent," or "automatic").
- Resolution: Select the highest resolution supported by your camera.
- Frame Rate: If possible, choose a frame rate of 30 frames per second (fps) for smooth video playback.
- Video quality: Many laptops and software allow for adjustment of the video quality. Choose the highest setting available.
Utilizing Advanced Features (If Available):
- Many HP laptops and their accompanying camera software offer advanced features.
- Face Tracking: Enables the camera to automatically track your face, keeping it centered in the frame.
- Beautification/Enhancement: Use these features sparingly, as they can often make your appearance look artificial.
- Video Effects: Some software may include various effects such as filters or backgrounds.
Driver Updates:
- Keep your camera drivers up-to-date. Outdated drivers can limit performance and cause problems.
- Go to the HP support website, enter your laptop model, and download the latest camera drivers. Or, use Windows Update to seek the latest drivers.
Conquering Audio: The Second Key to a Professional Presentation
While your HP laptop camera captures the visual aspects, the built-in microphone handles audio. It's important to remember that the quality of your audio is just as crucial as the quality of your video. Bad audio can ruin a professional appearance.
The built-in microphone in your HP laptop might suffice in certain situations, but we can dramatically improve audio quality with minimal investment.
External Microphone: Invest in an external microphone. A USB microphone is a convenient and affordable option. Look for a microphone with a cardioid polar pattern, which focuses on capturing sound directly in front of it and minimizes background noise.
Microphone Placement: Position your microphone close to your mouth, but not directly in front. Experiment with different angles to achieve the best sound.
Background Noise: Minimize background noise. Close windows, turn off noisy appliances (fans, air conditioners), and inform other people to avoid making sudden noises while you are recording.
Audio Settings: In your video conferencing software (Zoom, Microsoft Teams, etc.) or in the Windows or HP settings, adjust the microphone input level. Speak at a normal volume and adjust the level until the audio is clear without clipping (distortion).
Headphones: Consider using headphones, especially in noisy environments. This can help you hear the other participants clearly and minimize the chances of feedback.
Software Solutions: Elevating Your Virtual Presence
Beyond the built-in camera app and settings, several software solutions can further enhance your video quality and overall virtual presence.
Video Conferencing Software Settings: Within your video conferencing applications (Zoom, Microsoft Teams, Google Meet, etc.), explore their camera and audio settings. These applications often offer built-in noise cancellation, low-light adjustments, and virtual background options.
Virtual Camera Software: Software such as OBS Studio (Open Broadcaster Software) or ManyCam allow you to feed your HP laptop camera into other applications. This opens a world of possibilities, including:
- Applying sophisticated video effects.
- Adding custom backgrounds.
- Integrating overlays and text.
- Switching between multiple cameras.
Video Editing Software: If you are recording videos for pre-recorded content, use video editing software (e.g., Adobe Premiere Pro, DaVinci Resolve, or free alternatives) to enhance the video and audio.
Fine-Tuning Your Presentation: Polishing Your Performance
Beyond the technical aspects, refining your on-screen presentation is key to conveying professionalism and engaging your audience.
- Framing: Frame yourself properly within the shot. Ensure your head and shoulders are visible, leaving some headroom above your head.
- Eye Contact: Maintain eye contact with the camera lens. This simulates direct eye contact, making you appear more engaging.
- Posture: Sit up straight and adopt good posture. This will improve your appearance and convey confidence.
- Wardrobe: Dress appropriately for the occasion. Opt for solid colors that complement your skin tone and avoid distracting patterns.
- Practice: Practice your presentation or talking points beforehand. This will help you speak more clearly and confidently.
Troubleshooting Common HP Laptop Camera Issues
Even with all the best preparations, problems may arise. Here what you can do to troubleshoot common issues:
- **
