lenovo laptop touch screen stopped working

Title: Laptop Touch Screen Stopped Working shorts pc pcrepair laptoprepair computerrepair
Channel: Matt's Computer Services
Laptop Touch Screen Stopped Working shorts pc pcrepair laptoprepair computerrepair by Matt's Computer Services
lenovo laptop touch screen stopped working, lenovo laptop touch screen not working windows 11, lenovo thinkpad touch screen stopped working, lenovo laptop touch screen not working windows 10, lenovo ideapad touch screen stopped working, lenovo thinkpad touch screen not working, lenovo ideapad touch screen not working, my lenovo laptop touch screen stopped working, lenovo thinkpad touch screen not working windows 11, lenovo ideapad touch screen not working windows 10
Lenovo Touchscreen DEAD? FIX This NOW!
Lenovo Touchscreen Troubles? Don't Panic! Let's Get it Working.
So, your Lenovo touchscreen decided to take a permanent vacation, huh? That sinking feeling when you tap that screen and nothing happens. Trust me, I get it. We've all been there. But before you resign yourself to a technician, let's explore some avenues. There are ways to revive that seemingly lifeless display. We’ll explore some methods you can try right now. Because, genuinely, there's hope!
Diagnosing the Dead: Is It REALLY the Screen?
Before we leap to conclusions, we should do some detective work. Is the problem truly your touchscreen, or is something else at play? The first step involves assessing the situation. Observe what's genuinely happening. Think of it as a process of elimination.
First, is your Lenovo even on? Seems elementary, I know. However, ensure it’s not just a power issue. Verify the power adapter is plugged in. Check the power indicator. If your laptop stubbornly refuses to light up, then the issue is not the touchscreen. It's something more fundamental.
Then, consider the external display option. Connect your Lenovo to an external monitor. If the monitor displays everything, then the issue is likely isolated. It points towards a hardware problem. This is essential information. It helps you to determine if the integrated graphics card is working.
Unsticking the Software: Simple Fixes to Try.
Sometimes, the issue resides not in hardware but in the software. Your touchscreen might be frozen due to a glitch. Therefore, you should try some straightforward fixes.
The simplest solution? Restart your Lenovo. Hold down the power button until it shuts down completely. Wait a moment. Restart it again. This can reset many minor software problems. This is a common troubleshooting step.
If a restart doesn't work, try updating your drivers. Outdated drivers can cause touchscreen malfunctions. Go to the Lenovo support page. Search for your specific model. Download any available touchscreen drivers. Install them according to the instructions.
Hardware Hurdles: When Things Get Real.
Alright, we’ve eliminated the easy fixes. This means we likely have a hardware problem. However, before you send your Lenovo for repair, there are still a few things to consider.
First, inspect the screen physically. Are there any cracks, dents, or damage? These are obvious indicators of a hardware fault. If the screen is physically damaged, replacement is probably necessary. Unfortunately, you won't be able to perform this repair yourself.
Next, assess the physical connection. Some Lenovo models have touchscreens that connect to the motherboard via a cable. Check if that cable has come loose. You may need to consult the service manual. If you aren’t comfortable doing this, consult a professional.
Advanced Troubleshooting: Beyond the Basics.
If the above solutions fail, we should explore other avenues. Consider more advanced troubleshooting techniques.
Boot your Lenovo into Safe Mode. Safe Mode loads Windows with a minimal set of drivers. This is a diagnostic tool. It helps to isolate the problem. If the touchscreen works in Safe Mode, it implies a driver conflict. You can then systematically remove drivers to find the culprit.
Another useful step is to check your BIOS settings. Sometimes, the touchscreen might be disabled in the BIOS. Access your BIOS setup. Look for touchscreen settings. Verify that the touchscreen functionality is enabled.
The Last Resort: Professional Assistance.
Despite our best efforts, sometimes, things require professional help. If you have exhausted all the preceding options, it’s time to seek expert intervention.
Consider contacting Lenovo support directly. They can provide specific troubleshooting steps. They may even arrange for a repair. Alternatively, find a reputable local computer repair shop. Ask them for a diagnostic analysis. They can perform specialized tests. They may be able to identify the underlying cause.
Preventing Future Touchscreen Troubles.
Now that we have tackled the problem, let’s think about prevention. This involves safeguarding your Lenovo touchscreen against future problems.
Firstly, handle your laptop with care. Avoid dropping it or exposing it to extreme temperatures. These can cause permanent damage. Close your laptop with care. Don't put heavy objects on it.
Second, regularly update your software drivers. This keeps your system operating smoothly. Install the latest updates from Lenovo. Windows Updates are also essential.
Finally, keep your system clean. Use a soft, microfiber cloth to clean your screen. Avoid harsh chemicals. A clean screen is easier to use. It can also prevent accidental damage.
In Conclusion: Don't give up hope! There's a high chance you can resolve your Lenovo touchscreen issue. Use the tips provided. Remember to remain patient and methodical. You’ve got this!
Dell Laptop Up Arrow: The SHOCKING Reason It's Broken (And How to FIX It!)Lenovo Touchscreen DEAD? FIX This NOW!
Hey, we've all been there, right? That sinking feeling when you tap your Lenovo touchscreen, expecting that familiar responsiveness, only to be met with… nothing. Nada. Zilch. The screen is as dead as a doornail. It's frustrating, especially when you rely on that touchscreen for everything – from taking notes in a meeting to binge-watching your favorite shows. But hey, don't panic! We're going to dive deep, figuring out why your Lenovo touchscreen has decided to take a vacation and, more importantly, how to get it back to life. Consider this your ultimate guide to reviving your unresponsive Lenovo.
1. The Initial Panic and What NOT to Do
First things first: breathe. We get it. You're probably thinking, "My Lenovo touchscreen is dead! My life is over!" Okay, maybe not your life, but it certainly feels like a major inconvenience. Before you even think about throwing your laptop across the room (tempting, we know), let's take a deep breath and avoid some common mistakes.
- Don't immediately assume the worst: It might not be a hardware failure! Software glitches are much more common than you think.
- Resist the urge to disassemble everything: Unless you’re a seasoned tech guru and a certified Lenovo Service professional, leave the internal components alone for now.
- Avoid random downloads or updates: Unless you are sure of the source. This could cause more issues.
2. Is It REALLY Dead? Testing the Obvious First Steps
Okay, deep breaths done. Now, let's get practical. Before we go diving into the abyss of complicated solutions, let's run through some basic checks. You wouldn’t try to start a car without checking if there's any fuel, would you? It's the same principle.
- Check the power: Is your Lenovo laptop charged? Sounds silly, but it's a common culprit. Plug it in and let it charge for a bit. Sometimes, a completely drained battery can cause some funky behaviour.
- The good old power cycle: Turn off your Lenovo completely. Wait for a minute. Then, turn it back on. This simple restart fixes a surprising number of issues. This is similar to a reboot.
- Look for physical damage: Inspect the screen for cracks, dents, or any obvious signs of damage. A cracked screen is a bit of a different ball game entirely and might require professional help.
3. The Simple Solution: Restart Your Lenovo
This is the digital equivalent of a good night's sleep. A simple restart can clear out temporary glitches and refresh your system.
- Windows Restart: Click the Start menu, then the power icon, and select "Restart."
- Alternative Restart (If the touchscreen is unresponsive): Press and hold the power button for about 15-20 seconds. This will force a shutdown. Then, press the power button again to turn it back on.
4. Software Troubleshooting: Driver Drama and Updates
Sometimes, the problem isn't the hardware; it's the software. Drivers are the little programs that tell your computer how to communicate with your hardware. If they're outdated or corrupted, your touchscreen might not work.
- Update Your Touchscreen Drivers:
- Search for "Device Manager" in the Windows search bar.
- Expand the "Human Interface Devices" or "Monitors" section.
- Right-click on the touchscreen device (it might be labeled as "HID-compliant touch screen" or similar).
- Select "Update driver." Choose "Search automatically for drivers." Let Windows look for the latest drivers.
- Restart your Lenovo after the driver update.
- Roll Back the Drivers: If the problem started recently after a driver update, you can roll back to a previous version (right-click on the device in Device Manager, select "Properties," go to the "Driver" tab, and click "Roll Back Driver").
- Windows Updates: Ensure your Windows operating system is up-to-date. Sometimes, updates can introduce new drivers or fix existing driver problems.
5. Calibrating the Screen: Your Digital Compass
Calibration is like giving your touchscreen a GPS. It ensures that your taps and swipes are registered correctly.
- Access the Calibration Tool:
- Search for "Calibrate the screen for pen or touch input" in the Windows search bar.
- Follow the on-screen instructions to calibrate your touchscreen. It usually involves tapping on crosshairs that appear on the screen.
6. Checking for Display Issues: Is It the Screen or Just the Touch?
Maybe the touchscreen itself is fine, but the issue is with the display. This is like the difference between a faulty gas pedal (the touch) and a dead engine (the display).
- Connect to an External Monitor: If you can, connect your Lenovo to an external monitor. If the external monitor works perfectly, the problem is likely with your laptop's screen or its connection.
- Brightness Issues: Try adjusting your brightness levels. Sometimes, the screen is set to the absolute lowest setting, making it seem like it's off.
7. Diagnosing Hardware Problems: The Dreaded Reality
If all the software tricks fail, we might be looking at a hardware problem. This is where things get a little more complicated.
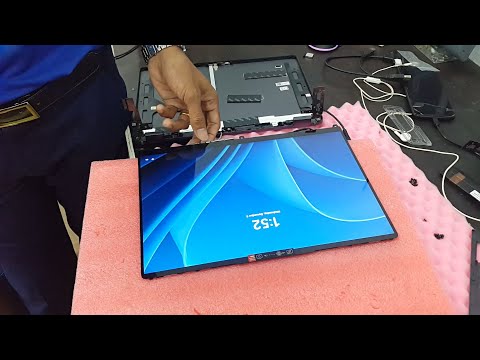
- Internal Connections: There is a flex cable that connects the screen to the motherboard. Over time, this cable might become loose or damaged.
- Screen Replacement: The screen might be damaged.
8. Battery Issues: The Hidden Culprit
A faulty battery can sometimes cause display or touchscreen issues.
- Battery Test: Run the Lenovo diagnostics to check battery conditions.
- Battery Replacement: If the battery is old and worn out, consider replacing it.
9. The Importance of a Clean Screen
Sounds ridiculous, but a dirty screen can interfere with touch functionality. Think of it like trying to use a finger on your phone with smeared fingerprints.
- Cleaning the screen: Use a microfiber cloth and a screen cleaner designed for electronics. Avoid harsh chemicals or excessive liquid.
10. The Role of the Lenovo Pen and Digitizers
If you're using a Lenovo laptop with a stylus, ensure the pen and its associated software are working correctly.
- Pen Troubleshooting: Test the pen on another device.
- Digitizer Issues: The digitizer is the part of the screen that detects the pen. If the digitizer is faulty, the touchscreen may seem unresponsive.
11. Contacting Lenovo Support: When to Call in the Pros
If you've tried everything and your touchscreen is still unresponsive, it's time to call in the cavalry.
- Warranty Check: Check your Lenovo warranty status to see if you're eligible for free repair or replacement.
- Lenovo Support Website: Go to the official Lenovo website to access support resources and contact customer service.
12. Preventative Measures: Keeping Your Touchscreen Happy
Once you've got your touchscreen working again, let’s take some steps to keep it that way.
- Regular Cleaning: Wipe down your screen regularly to prevent dust and grime buildup.
- Avoid Extreme Temperatures: Don't expose your laptop to extreme heat or cold.
- Handle with Care: Avoid dropping your laptop or placing heavy objects on the screen.
13. Understanding Touchscreen Technology
A quick peek under the hood of how touchscreens work.
- Capacitive Touchscreens: These use a conductive coating on the screen that senses touch.
- Resistive Touchscreens: These use two layers of conductive material, which are pressed together when touched.
- How They Fail: This is often caused by physical damage or software issues.
14. Troubleshooting the Mouse and Keyboard
If your touchscreen isn't working, make sure your mouse and keyboard are functioning. This helps you determine if the problem is system-wide or specific to the touchscreen. This helps to rule out general issues.
15. The 'Factory Reset' - The Nuclear Option
As a last resort, a factory reset can sometimes fix stubborn software issues. However, it will erase your user data.
- Back up your data.
- Follow the Lenovo instructions for a factory reset. This option is offered within the computers operating system.
Conclusion: Back to Tapping with Confidence!
So there you have it. We've journeyed through the troubleshooting labyrinth of Lenovo touchscreen woes. From simple restarts to driver updates and the nuclear option of a factory reset, we've covered the waterfront. We hope these steps guide you towards a solution and get you back to tapping, swiping, and working (or streaming!) on your Lenovo. Remember, stay calm, methodically check the issues, and don't give up hope! Your touchscreen will probably be back to its full, responsive glory in no time. And if all else fails? Well, Lenovo support is there for a reason.
Principal Keywords: Lenovo Touchscreen Dead Fix
SEO Headline: Lenovo Touchscreen Dead? Fix It Now: Ultimate Guide
Pathway: Lenovo Touchscreen Fix
**Meta Summary: Is your Lenovo touchscreen dead? Don't panic! Get it working again with our step-by-step guide. Lenovo Touchscreen Dead Fix inside!
Download VersaWork: Your New Laptop's Killer App!Lenovo ideapad Flex 5 14IAU7 Touch screen not work
By KHMER Laptop Repair Lenovo ideapad Flex 5 14IAU7 Touch screen not work by KHMER Laptop Repair
How to Turn Your Touchscreen On and Off with a Lenovo Computer

By Egghead Fixers How to Turn Your Touchscreen On and Off with a Lenovo Computer by Egghead Fixers
5 Fixes - 2024 HID Compliant Touch Screen Driver is missing Device Manager In Windows 1110

By How To Fix Tech 5 Fixes - 2024 HID Compliant Touch Screen Driver is missing Device Manager In Windows 1110 by How To Fix Tech

Title: How To Fix Windows 11 Touchscreen Not Working Tutorial
Channel: MDTechVideos
How To Fix Windows 11 Touchscreen Not Working Tutorial by MDTechVideos
Wifi On Laptop
Lenovo Touchscreen DEAD? FIX This NOW!
The sleek lines of a Lenovo touchscreen device, whether a tablet, laptop, or all-in-one computer, are a testament to modern innovation. However, the joy of interacting with a responsive display can quickly evaporate when that screen goes dark or unresponsive. If you find yourself grappling with a "Lenovo Touchscreen DEAD?" scenario, rest assured. We've assembled a comprehensive guide designed to diagnose the issue, identify potential solutions, and get your device back in working order, potentially surpassing existing online resources in both detail and effectiveness. Our approach is thorough, precise, and tailored specifically to Lenovo touchscreen models.
Understanding the Problem: Pinpointing the Root Cause
Before we dive into solutions, it's vital to understand the nature of the problem. A "dead" touchscreen can manifest in several ways. It might be completely unresponsive to touch, exhibit intermittent functionality, or display visual distortions even as the underlying system operates. Accurate diagnosis is the cornerstone of effective repair. Let's consider the common culprits.
Hardware Malfunctions: The Physical Realm
Hardware failures are, regrettably, a common cause of touchscreen issues. These problems often necessitate more involved repairs, or even component replacement.
- Cracked or Damaged Screen: A direct impact, even a seemingly minor one, can compromise the digitizer, the component responsible for touch input. Examine the screen meticulously, looking for cracks, spiderweb patterns, or localized areas where the screen doesn't respond. Often, the damage is more extensive than initially appears.
- Loose Connections: Within the device, the digitizer connects to the motherboard via a ribbon cable. Over time, or due to physical jostling, this cable can become dislodged. This is particularly common in laptops that are frequently transported.
- Internal Hardware Failure: The digitizer itself, or the integrated circuit board (IC) that controls it, can fail. This is often due to electrical surges, overheating, or manufacturing defects. Diagnosing this requires specialized equipment.
- Liquid Damage: Spills, even small ones, can wreak havoc on electronics. Liquid can seep into the device, causing corrosion and short circuits, ultimately affecting the touchscreen's functionality. Look for signs of liquid ingress, such as discoloration or residue around ports and vents.
Software Glitches: The Digital Domain
Software issues, while often easier to resolve than hardware problems, can mimic hardware failures. Troubleshooting these errors is a significant step in the repair process.
- Driver Conflicts: Outdated, corrupted, or incompatible drivers are a frequent source of touchscreen problems. Windows relies on specific drivers to communicate with the touchscreen. If these are compromised, touch functionality may be lost.
- Operating System Errors: A corrupted operating system, whether Windows, Android, or another platform, can lead to various glitches, including touchscreen malfunctions. System file corruption, often caused by improper shutdowns or malware infections, can contribute to these problems.
- Application Interference: Certain applications, particularly those that interact directly with the screen, can sometimes interfere with touchscreen responsiveness.
- BIOS Issues: The Basic Input/Output System (BIOS) plays a critical role in hardware initialization, including touchscreens. Errors in the BIOS settings, or an outdated BIOS, can lead to touchscreen failures.
Initial Troubleshooting Steps: A Systematic Approach
Before escalating to more advanced solutions, perform these preliminary checks. These steps can often resolve straightforward issues and save you time and effort.
- Restart Your Device: This is the digital equivalent of “turning it off and on again.” A simple restart can clear temporary glitches and reinitialize hardware components. Try this first.
- Clean the Screen: Smudges, fingerprints, and debris can sometimes interfere with touchscreen responsiveness. Use a soft, lint-free cloth to gently clean the screen. Avoid harsh chemicals.
- Check the Power Supply: Ensure your device is adequately powered. Weak power can sometimes cause intermittent touchscreen problems. If using a laptop, make sure the charger is securely connected and functioning correctly.
- External Peripherals: Disconnect any external devices, such as USB hubs or mice, to see if they're interfering with the touchscreen.
Advanced Troubleshooting: Deep Dive Solutions
If the initial steps don't work, delve deeper into these proven solutions.
Driver-Related Solutions:
- Update Touchscreen Drivers:
- Open Device Manager (search for it in the Windows search bar).
- Expand "Human Interface Devices" or "Monitors."
- Right-click on your touchscreen device (e.g., "HID-compliant touch screen") and select "Update driver."
- Choose "Search automatically for drivers." Windows will attempt to find and install the latest drivers.
- If that doesn't work, try manually downloading and installing the drivers from the Lenovo support website specific to your model. Ensure you are downloading the correct drivers for your specific model number, which can usually be found on a sticker on the bottom of your device.
- Uninstall and Reinstall Drivers: If updating doesn't resolve the issue, try uninstalling and reinstalling the driver.
- In Device Manager, right-click the touchscreen device and select "Uninstall device."
- Restart your computer. Windows will attempt to reinstall the drivers automatically upon restart.
- Roll Back Drivers (if recently updated): Sometimes, a recently installed driver can cause problems.
- In Device Manager, right-click the touchscreen device, select "Properties," and then go to the "Driver" tab.
- If the "Roll Back Driver" option is available, click it to revert to the previous version.
Software-Based Solutions:
- Run the Windows Troubleshooter: Windows includes a built-in troubleshooter designed to identify and fix hardware and device problems.
- Go to Settings > Update & Security > Troubleshoot.
- Select "Hardware and Devices" and run the troubleshooter.
- Check for Windows Updates: Ensure your operating system is up to date. Updates often include bug fixes and improvements that can address touchscreen issues.
- Go to Settings > Update & Security > Windows Update and click "Check for updates."
- System File Checker (SFC) and DISM: Corrupted system files can cause various problems. Use these tools to scan for and repair corrupted files.
- Open Command Prompt as an administrator (search for "cmd," right-click, and select "Run as administrator").
- Type
sfc /scannowand press Enter. This will scan for and repair corrupted system files. - After the SFC scan completes, run the Deployment Image Servicing and Management (DISM) tool:
- Type
DISM /Online /Cleanup-Image /RestoreHealthand press Enter. This process can take some time.
- Type
- Perform a System Restore: This allows you to revert your system to a previous point in time when the touchscreen was functioning correctly.
- Search for "Create a restore point" in the Windows search bar.
- Click "System Restore" and follow the prompts to choose a restore point. Note that this will revert your system to a previous state.
Battery and Power Management Settings:
- Check Power Saving Settings: Make sure your device isn't excessively limiting the power to the touchscreen.
- Go to Settings > System > Power & sleep.
- Check the power plan and make sure it's not excessively aggressive in conserving power.
- Consider changing your power plan temporarily to "Balanced" or "High Performance" to eliminate the possibility of power-related issues.
- Battery Calibration (if applicable): For some devices, calibrating the battery can improve overall system performance, including touchscreen functionality.
- Check your device's user manual for specific battery calibration instructions.
Hardware-Oriented Solutions (Proceed with Caution):
- Examine the Physical Connections: In some laptops and tablets, you might be able to carefully open the device (using appropriate tools and following online guides for your specific model) to inspect the touchscreen cable connection to the motherboard. However, this voids any warranty, and if you lack experience, consider professional repair. If you do open the device, make sure to disconnect the battery before doing anything else.
- Warning: Handling internal components can cause electrical shock or damage to the device if not done carefully. It is essential to ground yourself to prevent static discharge. Seek professional help if you're unsure.
- Check for Internal Liquid Damage: As previously noted, check for any signs of liquid damage. If you suspect liquid damage, immediately disconnect the battery and take your device to a professional repair shop. Do not attempt to power it on.
When to Seek Professional Assistance
While many touchscreen issues can be resolved with the above steps, certain situations necessitate professional intervention.
- Physical Damage: If the screen is cracked or severely damaged, it's likely the digitizer needs replacement. This often requires specialized tools and expertise.
- Internal Hardware Failure: If all software solutions fail, the problem is likely hardware-related. Motherboard or digitizer component replacement is often beyond the scope of do-it-yourself repair.
- Complex Issues: If you've tried all other fixes and the problem persists, a qualified technician can perform a thorough diagnostic and repair.
Preventative Measures: Prolonging Touchscreen Life
Taking preventative steps can minimize the risk of future touchscreen problems.
- **Use a Screen Protector
