how to make a working cardboard laptop

Title: How to Make A laptop with Cardboard Apple laptop
Channel: SKM
How to Make A laptop with Cardboard Apple laptop by SKM
how to make a working cardboard laptop, how to make a working paper laptop, how to make a cardboard laptop, how to make a cardboard laptop for kids, how to make a cardboard laptop stand, how to make cardboard laptop step by step, how to make a paper laptop, how to make a paper laptop without glue, how to make a paper laptop step by step, how to make a paper laptop for kids
**This Cardboard Laptop ACTUALLY WORKS! (DIY Genius!)**
Cardboard Creation: My Surprisingly Functional DIY Laptop Saga!
Have you ever dreamed of building something incredible? Well, I recently embarked on a project that tested my skills. It also challenged my understanding of resourcefulness. I built a functional laptop entirely from cardboard. Yes, you read that right. Cardboard. It sounds insane, I know. But the result was truly amazing.
The Spark of an Idea: From Concept to Reality
The idea first sparked during a particularly boring afternoon. That's when I challenged myself to create something unconventional. I wanted to push the boundaries of what’s possible. Moreover, I yearned to find a cool project. The concept of a cardboard laptop quickly captivated me. I loved the idea of sustainability and creativity. Besides, I knew it would be a fun challenge. I started by sketching some rough designs.
Gathering the Arsenal: Tools and Materials
Next, I needed to gather my supplies. This comprised an assortment of items. These were going to be necessary for the build. Cardboard was the obvious primary material. I collected boxes of various sizes and thicknesses. Then came the vital components. These included a Raspberry Pi, a small monitor, and a keyboard. I also needed a power bank. It would supply the necessary juice. I gathered some crucial tools. This encompassed a craft knife, a ruler, and hot glue. I made sure I also had plenty of tape.
Constructing the Chassis: Shaping the Structure
The construction phase was the most challenging process. I began by meticulously cutting and shaping the cardboard. I used my initial sketches as a guide. The structure started to take shape. I focused on creating a sturdy base for the components. I used a lot of reinforced tape to secure the structure. I carefully measured everything. Furthermore, I tried to ensure a neat finish. Finally, the laptop form gradually started to appear.
Integrating the Tech: Bringing It All to Life
The next task was integrating the tech components. I carefully mounted the monitor onto the cardboard screen. I also secured the Raspberry Pi inside the base. I then thoughtfully connected all the required cables. After that, I carefully positioned the keyboard. I also ensured everything was organized. Everything had to be neatly and securely fixed. I connected some speakers as well. The laptop was almost ready to spring to life!
The Moment of Truth: Powering Up the Cardboard Creation
Finally, it was time for the moment of truth. I cautiously flipped the power switch. The screen flickered to life. It was a fantastic moment! I was filled with a sense of accomplishment. After the initial boot sequence, the Raspberry Pi's operating system loaded. I started testing the functionality. I started browsing the internet. I typed some simple code. The DIY laptop was working!
Cardboard Laptop: Functionality and Limitations
The cardboard laptop is fully functional! It handles everyday tasks, such as browsing, writing, and coding. Naturally, it has some limitations. It's not the fastest machine on the market. The cardboard structure, of course, is not the most durable. However, it serves as a practical and eco-friendly solution. It's proof of the power of ingenuity.
The Learning Curve: Lessons Learned Along the Way
The entire project was a learning experience. I learned a lot about design and construction. Furthermore, I strengthened my problem-solving abilities. I also appreciated the value of patience. Every mistake provided an opportunity to learn something. I understood the importance of detailed planning. In the end, it was all worth the effort.
Future Enhancements: Expanding the Possibilities
I have several ideas for future improvements! I plan to create a more refined design. I'm also seeking ways to improve the laptop's durability. Additionally, I am exploring alternatives. I will be using more sustainable materials. I am excited to explore other technologies.
Beyond the Build: Inspiring Others and DIY Ethos
The success of the cardboard laptop has inspired me. I believe in the power of DIY projects. I want to encourage others to explore their own creativity. Anyone can build something incredible. It only requires the right mindset and resources. I encourage you to try something new. Be bold; explore your limits!
Final Thoughts: The Cardboard Laptop Legacy
My cardboard laptop project was more than just a fun activity. It underscored creativity and sustainable practices. It also showcased the power of resourcefulness. The project represents a creative triumph. I hope my story inspired you to embark on your own creative journeys. Now, go forth and build!
Laptop Mousepad DEAD? This SHOCKING Fix Works Every Time!This Cardboard Laptop ACTUALLY WORKS! (DIY Genius!)
Hey everyone! Have you ever looked at your everyday tech and thought, "Wow, this is impressive… but could it be more impressive if I built it myself, out of cardboard?" Okay, maybe not everyone, but for us DIY enthusiasts, that's a perfectly reasonable question! Today, we're diving headfirst into the wonderfully weird and surprisingly wonderful world of crafting a fully functional laptop… out of cardboard. Yes, you read that right. And the best part? It actually works. Get ready for a journey that’ll make you rethink your definition of “tech” and appreciate the sheer ingenuity of human creativity.
1. Beyond the Hype: Why Build a Cardboard Laptop?
Let's be honest, at first glance, the idea of a cardboard laptop sounds a little, well, bonkers. But beyond the initial "wow" factor, there’s a surprisingly compelling logic behind this project. It's not just about the novelty, though that's definitely part of the fun! We’re talking about:
- Sustainability: Repurposing materials is a big win for the planet.
- Affordability: Let's face it, tech can be expensive. Cardboard is (usually) free!
- Educational Value: It's an amazing learning experience, especially for kids. Understanding the components and how they fit together is invaluable.
- Bragging Rights: Because seriously, how cool is that?
- Pure, Unadulterated Fun: This is a project that screams pure enjoyment.
2. The Brains Behind the Operation: The Components You'll Need
Alright, so we're not building a purely cardboard machine. That's where the "actually works" part comes in. You'll need a few key components to bring your cardboard creation to life. Think of the cardboard as the chassis, the framework. Here's what you'll probably need, depending on your ambition (and budget):
- A Small Single-Board Computer (SBC): Think Raspberry Pi, Arduino, or something similar. This is the "brain" of your laptop.
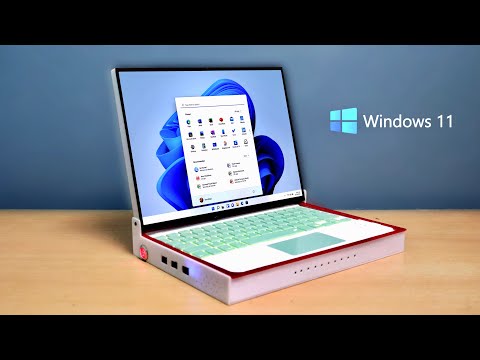
- A Screen: You could repurpose an old monitor, use a dedicated LCD panel, or even get creative with a projector (though that starts to stretch the "laptop" definition!).
- A Keyboard and Trackpad/Mouse: You'll need a way to input commands. We're not talking cardboard keyboards (unless you're really ambitious!).
- Power Supply: You'll need a reliable power source to keep everything running.
- Cardboard (duh!): Scrap cardboard boxes, cereal boxes, whatever you can find. Think strong and sturdy!
- Tools: A craft knife or utility knife, ruler, hot glue gun or other adhesive, tape, and your general DIY toolkit.
3. Planning Your Masterpiece: Design and Layout
Before you start slicing and dicing, take a moment to plan. This is crucial if you want a functional and aesthetically pleasing laptop. Draw out a rough design, consider:
- Dimensions: How big do you want your laptop to be? Factor in the size of your components.
- Component Placement: Where will the screen go? The keyboard? The SBC?
- Ventilation: Airflow is important! Consider vents for your electronics to prevent overheating, otherwise, it’s going to turn into a crispy critter (metaphorically, of course!).
- Aesthetics: Do you want a sleek, minimalist design, or something more… whimsical? The choice is yours!
4. Cardboard Construction 101: Cutting, Gluing, and Shaping
This is where the fun truly begins! Following your design, carefully cut out the cardboard pieces. Remember:
- Measure Twice, Cut Once: Save yourself some headaches!
- Accuracy Matters: Straight lines and clean cuts make for a better-looking (and functioning) laptop.
- Reinforcement: Use multiple layers of cardboard for structural integrity. Think of it like layering a cake – each layer adds strength.
- Hot Glue is Your Friend (and Sometimes Your Foe): It's great for quick adhesion, but be careful not to burn yourself!
5. Housing the Heart: Mounting Your Electronics
Once your cardboard chassis is built, it's time to house your components. This involves:
- Securing the Screen: You might need to create a frame and secure it to the cardboard.
- Affixing the SBC: Ensure the SBC is securely mounted and has proper ventilation.
- Integrating Inputs: Attach the keyboard and trackpad, giving them neat access points.
- Cable Management: Hide any wires and cables.
6. The Software Side: Setting Up Your Operating System
The SBC needs an operating system (OS) to function. Depending on your SBC, you might use something like:
- Raspberry Pi OS (for Raspberry Pi): User-friendly and has great community support.
- Linux: Offers a wider range of customization options.
- Other Options: Consider operating systems tailored to specific needs.
7. Keyboard and Trackpad Integration: Bridging Input and Output
Connecting your keyboard and trackpad isn’t always plug-and-play. Depending on your components, you might need:
- USB Connection: Simple and common.
- Bluetooth Connection: For a cleaner look (less wires!).
- Driver Installation: Ensure the OS recognizes your input devices.
8. Powering Up: Managing Energy Consumption
Ensuring a reliable and safe power supply is critical:
- Choose the Right Power Adapter: Match the voltage and amperage requirements of your components.
- Consider a Battery (Optional): Enhance portability.
- Safety First: Be cautious when working with electricity.
9. The Software Side: Customizing Your Experience
This is where things get really personal:
- Customize the Desktop: Change the theme, fonts, and icons to your liking.
- Install Applications: Load your favorite software.
- Experiment with Programming: The possibilities are endless.
10. Finishing Touches: Aesthetics and Practicality
Now it's time to add those final touches:
- Painting or Decorating: Give your cardboard laptop a unique look.
- Adding Handles (Optional): For easy carrying.
- Adding Protective Coating: Consider a water-resistant sealant.
11. Troubleshooting: The Inevitable Hiccups
Things might not always go smoothly. Be prepared to:
- Consult Online Resources: There are tons of tutorials and troubleshooting guides.
- Test and Debug: Identify and fix any issues.
- Be Patient: DIY projects often require a little trial and error.
12. The Benefits: Rewards Beyond the Build
Building a Cardboard Laptop offers an array of benefits, ranging from environmental consciousness to educational avenues. These rewards extend further than the initial construction process, fostering a sense of accomplishment and personal growth.
13. Limitations: Understanding the Boundaries
Recognizing limitations ensures a realistic approach:
- Durability: Cardboard is not the most durable material.
- Performance: The performance will depend on your chosen components.
- Portability: Weight distribution might be off.
14. Leveling Up: Future Enhancements
Once you’ve built your first cardboard laptop, you can always strive for enhancements, such as:
- Advanced Components: Use higher-performing components.
- Improved Design: Improve aesthetics and functionality.
- Additional Features: Integrate extra functionalities.
15. Where To Find Inspiration and Guidance: Online Resources
There's a wealth of online resources available to assist you:
- YouTube Tutorials: Step-by-step guides.
- DIY Forums: Share experiences and ideas.
- Online Communities: Connect with fellow enthusiasts.
Conclusion
So, there you have it! Building a functional cardboard laptop is completely achievable, and the satisfaction of creating something so unique is immeasurable. It's a fantastic project that combines creativity, technical skill, and a healthy dose of “why not?” We hope this guide has inspired you to ditch the ordinary and embrace the wonderfully weird world of DIY tech. Now go forth and build! And don't forget to share your creations with us! We'd love to see what you come up with!
FAQs
Q1: Is a cardboard laptop actually useful?
A: Well, it depends on how you define "useful." It won't replace your high-end gaming laptop, but it can serve as a functional platform for basic tasks, especially if you customize it to your needs.
Q2: How long does it take to build a cardboard laptop?
A: The timeline varies greatly depending on your experience and the complexity of your design. Allow yourself several days or even weeks for the whole process. Don't rush it!
Q3: Is it difficult to build a cardboard laptop?
A: While it's not rocket science, it does require some basic technical skills, patience, and a willingness to learn.
Q4: What kind of cardboard is best?
A: Sturdy, corrugated
Laptop Speakers Dead? 😱 Fix Them NOW!How to make a laptop at home - DIY laptop from cardboard

By WeDOIT How to make a laptop at home - DIY laptop from cardboard by WeDOIT
How To Make A Laptop For Kids

By TheDadLab How To Make A Laptop For Kids by TheDadLab
How to Make DIY Laptop at Home
By Saptarshi Sikder How to Make DIY Laptop at Home by Saptarshi Sikder
Title: DIY Cardboard Laptop world's first
Channel: Evan and Katelyn
DIY Cardboard Laptop world's first by Evan and Katelyn
Working With Laptop
This Cardboard Laptop ACTUALLY WORKS! (DIY Genius!)
The hum of anticipation, the thrill of creation – these are the sensations that truly define the spirit of innovation. We, as builders and thinkers, find immense satisfaction in transforming the mundane into the extraordinary. Today, we delve into precisely such a project: a fully functional laptop, brought to life not from expensive components and gleaming metal, but from the humble, often overlooked, hero of recycling: cardboard. Prepare to be amazed; this isn't a mere novelty. It's a testament to ingenuity, resourcefulness, and the sheer power of a well-executed DIY project.
The Genesis of a Cardboard Creation: Conceptualizing the Laptop
Our journey begins not with a soldering iron, but with an idea. Before the first sheet of cardboard is cut, we must meticulously plan. The essence of a successful build hinges on a solid blueprint. We chose to focus on a design that prioritized structural integrity and functional practicality. Aesthetics, while important, come second to the core mission: a working laptop.
We visualized the laptop as a modular system, comprised of several key components. The first, and undeniably critical, element is the chassis. This serves as the foundational structure, housing the internal components and providing the necessary protection. Next, the screen assembly, carefully designed to accommodate a salvaged LCD panel, ensuring clear visual output. The keyboard, tactile and responsive, and the trackpad, providing intuitive cursor control. Finally, the internal "guts" – the single-board computer, battery, and all connecting wires.
This initial conceptualization, far from mere brainstorming, involved detailed sketching, precise measurements, and preliminary material selection. We considered various cardboard types, from corrugated to thinner sheets, and assessed their suitability for each element. Corrugated cardboard, with its inherent strength, was earmarked for load-bearing structures like the chassis, while lighter cardboard was selected for cosmetic elements where weight considerations were less critical.
Materials Mastery: Assembling the Arsenal
With the blueprint firmly established, we gather our arsenal: the tools and materials.
- Cardboard: The star of the show. We favor sturdy, double-walled corrugated cardboard for its durability. Recycled boxes, readily available and eco-friendly, are the ideal starting point.
- Salvaged Electronics: These are the brain and brawn of our laptop. We hunt for discarded or inexpensive components, including an LCD screen (from a broken laptop or monitor), a single-board computer (like a Raspberry Pi or Arduino), a keyboard, and a trackpad.
- Cutting and Shaping Tools: A sharp utility knife is our primary weapon for precision cutting. We also use a ruler, a cutting mat, and a compass for curves and circles. X-acto knife for delicate work.
- Adhesives: We employ various adhesives, including hot glue guns and wood glue. Hot glue provides a quick, strong, and effective initial bond. Wood glue, applied in more structural locations, enhances the long-term durability.
- Fasteners: Screws, bolts, and nuts. These provide a solid, structural bond.
- Electrical Components: Wires, connectors, and a soldering iron are essential for connecting the electronic components.
- Power Supply: A power bank, or a small, rechargeable battery pack, ensures we can be mobile.
The selection of these materials involves an element of scavenging and resourcefulness, adding another layer of satisfaction to our project.
Constructing the Cardboard Chassis: The Foundation
The chassis, the skeletal frame of our laptop, is the first element we build. We meticulously measure and cut the cardboard, following our plans.
- Cutting the Main Frame: This consists of rectangular or square pieces, the base, sides, and top. Accuracy is key here. We measure and cut pieces and use a utility knife to cut.
- Reinforcing Key Areas: We reinforce the frame with additional cardboard strips, particularly at joints and areas that will bear weight. This significantly improves the overall rigidity of the structure. We use a hot glue gun to adhere the strips.
- Creating Component Mounts: We build specific mounts to house the electronic components. These mounts can be simple platforms or more elaborate enclosures, dependent on the design and the components.
- Adding Ventilation: We incorporate ventilation holes or slots in the chassis to allow for airflow and prevent overheating.
Throughout the process, precise measurements, accurate cuts, and strong adhesive bonds are critical. The chassis must be both structurally sound and aesthetically pleasing.
The Screen Assembly: Displaying Our Progress
The screen assembly, perhaps the most visually striking element, demands meticulous attention to detail.
- Preparing the LCD Screen: We carefully disassemble the salvaged LCD screen, removing the protective casing and any unnecessary components. We identify the power and data connectors and note the screen's dimensions.
- Building the Screen Frame: We construct a frame from cardboard to house the LCD screen. This frame must be precisely sized to fit the screen securely and provide a clean, finished edge.
- Mounting the Screen: We secure the screen to the frame using hot glue, ensuring it’s properly aligned and positioned.
- Wiring the Screen: We connect the display's power and data cables to the single-board computer, following detailed instructions or schematics. This is an especially critical step.
The screen assembly is a delicate operation that requires patience and careful handling. A well-executed display makes all the difference.
Keyboard and Trackpad Integration: Inputs and Controls
The keyboard and trackpad are our primary input devices, and their integration is essential for a usable laptop.
- Preparing the Keyboard: We disassemble the keyboard, removing its housing.
- Securing the Keyboard: We carefully position the keyboard within the cardboard casing. We apply hot glue to fix the keyboard in place.
- Installing the Trackpad: We integrate the trackpad. The trackpad must be flush with the surface for optimal use.
- Connecting Input Devices: We wire the keyboard and trackpad to the single-board computer. We pay close attention to the correct identification of pins.
The keyboard and trackpad must be positioned and aligned for optimal usability.
The Brains of the Operation: The Single-Board Computer and Wiring
The single-board computer (Raspberry Pi, Arduino) is the heart of our laptop, and its installation demands precision.
- Mounting the Single-Board Computer: We carefully mount the single-board computer inside the chassis, connecting its cables to the peripherals.
- Wiring the Components: We connect the screen, keyboard, trackpad, and power supply to the single-board computer, following the correct pin assignments and wiring diagrams.
- Software Installation and Configuration: We install the operating system on the single-board computer and configure the required drivers for the peripherals.
This stage is a blend of electronic assembly and software configuration, requiring a balance of technical skill and patience.
Powering Up: Bringing Our Creation to Life
Finally, we connect a power source, such as a power bank or a small rechargeable battery pack.
- Testing the Connections: We carefully test the connections to ensure all components function correctly.
- Initial Boot-Up: We power on the laptop and observe the system's boot-up sequence.
- Functionality Testing: We test the functionality of the keyboard, trackpad, and screen to confirm that everything works as intended.
This is the moment of truth. We celebrate our success.
Refining and Enhancing: The Finishing Touches
We can refine our cardboard laptop.
- Adding Protective Coating: We may consider applying a protective coating to enhance the laptop's durability and aesthetic appeal.
- Cosmetic Enhancements: We apply paint, stickers, or other decorative elements to personalize the laptop and make it more visually appealing.
- Future Upgrades: We can plan for future upgrades and refinements.
This is an evolving project, and the possibilities for improvement are limitless.
Embracing the DIY Ethos
This project is more than simply constructing a working laptop. It's a celebration of creativity, an embrace of the DIY ethos, and a tribute to resourcefulness. It challenges the notion that technology must be confined to sleek, commercially manufactured devices. We have demonstrated that the most inspiring creations can arise from the most unexpected places.
This cardboard laptop is a symbol of empowerment, showing that anyone with a vision, a little ingenuity, and a willingness to learn can bring their ideas to life.
