why screenshot is not working in laptop
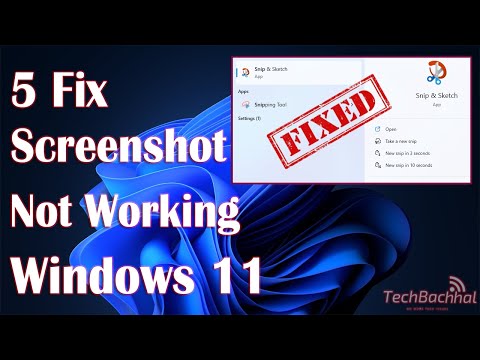
Title: Screenshot Not Working Windows 11 - 5 Fix
Channel: Tech Bachhal
Screenshot Not Working Windows 11 - 5 Fix by Tech Bachhal
why screenshot is not working in laptop, why screenshot is not working in dell laptop, what to do if screenshot is not working on laptop, why is screenshot not working windows 10, why isn't my laptop taking screenshots
Laptop Screenshot Nightmare? FIX IT NOW!
Laptop Screenshot SOS: Conquer Your Digital Demons!
Have you ever encountered that heart-stopping moment? It’s when your laptop screen throws a digital tantrum. Images freeze, and your cursor vanishes. A screenshot fiasco is what you’ve got. Don't panic! Instead, breathe deeply. We're here to help you troubleshoot this situation.
The Screenshot Sabotage: Unmasking the Culprit!
First, figure out what's going sideways. Is this a recurring issue or a one-time glitch? Observe the problem. Is it specific to applications, or does it happen universally? Consider the recent changes that might have triggered this. Updated drivers or new software could be to blame. Let’s systematically eliminate the causes. That is the first step to fixing it. For now, don't fret; there's a solution for every problem.
Decoding the Digital Panic: What to Try First
Sometimes, the simplest solutions work wonders. Before launching into complex fixes, try these:
- Restart Your Laptop: This is often the digital equivalent of a reset button. Restarting can clear temporary glitches, and it frequently resolves the issue. Shut down your laptop completely. Then, turn it back on.
- Check Your Keyboard: A sticky key could be the culprit. Or perhaps a stuck screenshot key. Examine your keyboard. Make sure no keys are jammed down. Clean around the keys.
- Update Your Display Drivers: Outdated drivers cause problems. They can create chaos for your graphics processing. Go to your device manager. Update your display drivers there.
Beyond the Basics: Deeper Dive into Solutions
If the simple fixes didn't do the trick, let's move on. We'll delve deeper into some more advanced troubleshooting methods.
- Run a Malware Scan: Malware can wreak havoc. It can corrupt files, hindering the normal function of your device. Run a full scan with your preferred antivirus software. Remove any identified threats.
- Check for Software Conflicts: Sometimes, incompatible software causes conflicts. Do you have newly installed programs? Try uninstalling recent installations to see if it helps. This can provide a clue.
- System File Checker (SFC) Scan: Windows has a built-in utility to find errors. It can repair corrupt system files. Search for "Command Prompt" as an administrator. Then, type "sfc /scannow." Wait patiently for the scan to complete.
Taking the Offensive: Advanced Troubleshooting Techniques
If we haven't cracked the code yet, let's explore some very strategic options.
- Clean Boot Your Laptop: Doing this starts Windows with a minimal set of drivers. This will help isolate the source of the problem. Type "msconfig" in the search bar. Go to the "Services" tab. Check "Hide all Microsoft services." Then, click "Disable all." Restart your computer.
- Reinstall Graphics Drivers: Sometimes, a clean reinstall is required. This is an effective way to get rid of lingering driver issues. Boot into Safe Mode. Remove the current display drivers. Then, download and install the latest display drivers from the manufacturer's website.
Prevention is Key: Maintaining a Healthy Digital Life
The best offense is a good defense. After you solve the problem, implement these preventive measures.
- Keep Your Software Updated: Regular updates contain bug fixes. They also enhance security. Update your operating system and applications regularly.
- Back Up Your Data: Data loss is a common consequence of system failure. Back up your important files. Consider cloud storage or external hard drives.
- Be Mindful of Downloads: Download from trusted sources. Avoid clicking on suspicious links. These can introduce malware.
The Ultimate Screenshot Victory!
By following these steps, you should have fixed your laptop screenshot nightmare. Remember, computers are complicated. Things can sometimes go wrong. Patience and systematic troubleshooting are essential. Therefore, don't give up hope! You're now equipped to handle any future digital emergencies.
Asus Laptop Camera Nightmare? FIX IT NOW!Laptop Screenshot Nightmare? FIX IT NOW!
Ever felt that primal scream bubbling up when you try to capture something on your laptop screen, but it turns into a blurry mess, a cropped disaster, or a complete no-show? We've all been there. It's the laptop screenshot nightmare: that frustrating moment when you need a quick grab of information, a visual reminder, or proof of something, and technology decides to play hard to get. Fear not, fellow digital travelers! We're diving deep into the murky waters of laptop screenshots and emerging victorious. We're here to banish the screenshot blues and make your digital life a whole lot easier, faster, and less rage-inducing.
1. The Great Screenshot Struggle: Why Does This Happen?
Let's be honest, sometimes the issue isn't you; it's the laptop. Or rather, the software, drivers, and settings that govern the way your screen interacts with the "Print Screen" button (or its equivalents). Maybe you have conflicting software, outdated drivers, or simply haven't tweaked the right keyboard shortcuts. Whatever the cause, we're going to dissect the usual suspects and arm you with the knowledge to troubleshoot efficiently. Think of it like this: your laptop is a stage, and your screenshot is trying to become the star of the show. But the stage lights aren't working right, or the cameraman is asleep. We're fixing the lighting, waking up the cameraman, and ensuring a flawless performance.
2. Windows Warriors: Conquering Screenshot Complications in Windows
Windows users, rejoice! We're starting with you because, well, statistically, a lot of us are rocking Microsoft's operating system. Windows offers a plethora of screenshot options, each with its quirks and potential stumbling blocks.
- The Classic Print Screen Key: This ancient button (usually labeled “PrtScn,” “Prnt Scrn,” or something similar) is the OG of screenshots. Pressing it copies the entire screen to your clipboard.
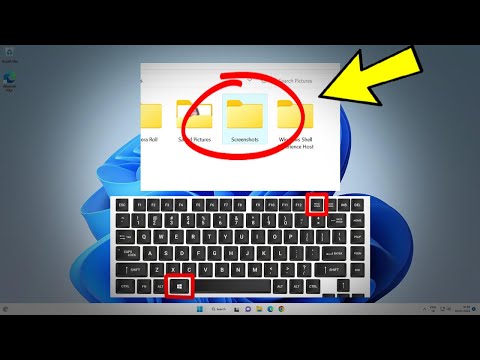
- Windows Key + Print Screen: This handy combo instantly saves a screenshot of your entire screen to your "Pictures" folder, inside a "Screenshots" subfolder. It's quick, it's easy – perfect for those "gotta have it now" moments.
- Alt + Print Screen: This one captures only the active window. Super useful when you only need a specific window and don't want to crop.
- The Snipping Tool (or Snip & Sketch): Ah, the Snipping Tool! A loyal companion for many Windows users. This little app allows you to capture rectangular, free-form, window, or full-screen snips and even annotate them. It has evolved over time, turning into Snip & Sketch, and now it's a cornerstone.
- Windows Key + Shift + S: This is the ultimate modern key combination for Snip & Sketch. It allows you to instantly activate the snipping tools without needing to open the app. You can choose a rectangular snip, free-form snip, window snip, or full-screen snip.
Troubleshooting Tips for Windows:
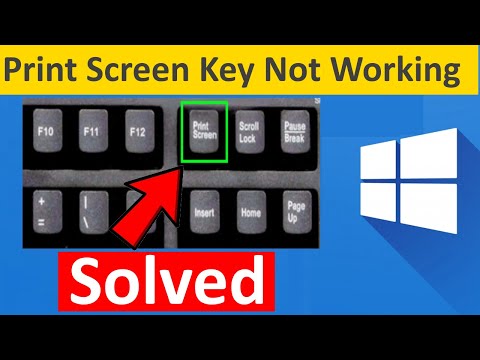
- Check Your Print Screen Key: Sometimes, it’s a hardware issue. Try another keyboard, or check if the key needs a good cleaning.
- Update Your Graphics Drivers: Outdated drivers can mess with display interactions. Go to Device Manager (search for it in the Start menu), expand "Display adapters," right-click your graphics card, choose "Update driver," and follow the prompts.
- Third-Party Software Conflicts: Sometimes, other screen capture or editing apps can interfere. Temporarily disable them to see if that resolves the issue.
3. macOS Mavericks: Mastering Mac Screenshot Madness
Mac users, you're not forgotten! Apple's operating system brings its own set of screenshot commands and potential pitfalls. The simplicity of macOS is often a blessing, but screenshot issues can still strike.
- Shift + Command + 3: Captures the entire screen and saves it as a PNG file on your desktop. The default file names are "Screenshot [date] at [time].png"
- Shift + Command + 4: Allows you to select a specific area of the screen to capture. You'll get a crosshair cursor; click and drag to select your desired area. Once selected, release the mouse button and the screenshot will save to the desktop.
- Shift + Command + 4, then Spacebar: This handy trick lets you capture a specific window. Move your mouse over the window you want to capture, and click.
- Shift + Command + 5: Brings up the Screenshot toolbar. This provides even more options, including screen recording.
Troubleshooting Tips for macOS:
- Disk Space: Make sure you have enough free space on your hard drive. Screenshots need a place to live!
- Keyboard Issues: Similar to Windows, a faulty keyboard can be the culprit. Try an external keyboard or check your keyboard settings.
- Third-Party Apps: Again, conflicting apps can cause problems. Test by temporarily disabling any screen capture or editing software you have installed.
- Accessibility Settings: Sometimes, accessibility settings can interfere. Check your System Preferences > Accessibility panel.
4. Beyond the Buttons: Exploring Advanced Screenshot Techniques
We've covered the basics, but there's more! Let's level up your screenshot game.
- Command-Line Screenshots (Advanced): Did you know you can take screenshots using the command line? On both Windows and macOS (using the Terminal), are options to take automated captures. This is incredibly powerful for scripting and automation.
- Using Screen Capture Software (Advanced): Dedicated screenshot programs are a gem. Applications like Snagit, Lightshot, or ShareX offer a huge array of features, including image editing, annotation tools, and cloud storage.
- Mobile Integration: With many laptops, you may be able to screenshot on your mobile device and import it to your laptop easily.
5. That Blurry Screenshot Blues: Fixing Poor Image Quality
One of the major frustrations is poor image quality. Here's how to combat blurriness, pixelation, and other visual woes.
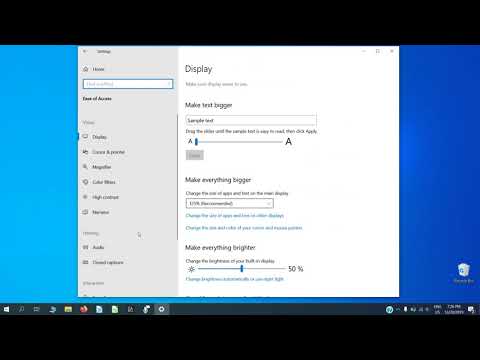
- Check Your Display Resolution: Make sure your display resolution is set correctly. A low resolution can result in a blurry screenshot.
- Zoom In Before You Snip: If you're trying to capture something small (like text), zoom in on the area before taking the screenshot. This helps maintain clarity.
- Use the Right File Format: PNG is generally best for screenshots, especially if you need to preserve image quality. JPG is good for photos, but it can introduce artifacts in screenshots.
6. Cropping and Editing: Turning Screenshots into Works of Art (or at least, Useful Information)
A screenshot is just the beginning. Now comes the editing!
- Built-in Editors: Windows has Paint, and macOS has Preview – both free and easy to use. Crop, resize, annotate, and add basic effects.
- Free Online Editors: Many websites offer free, browser-based image editors.
- Advanced Editing Software: For more complex tasks, explore professional software like Adobe Photoshop or GIMP (the free, open-source alternative).
7. Troubleshooting Common Screenshot Nightmares: Blanks, Blurs, and No-Shows
Let's address some of the most common frustrations when your screenshot fails.
- Why Is My Screenshot Blank? This is often due to an app with elevated permissions (running as Administrator). Try taking the screenshot with a different app.
- Why Is My Screenshot Cropped? Check the selected area, make sure it's not overlapping the edges, or that an active window isn't obscuring it.
- Why Can't I Find My Screenshot? Double-check the default save location (Pictures > Screenshots on Windows, Desktop on macOS).
8. The Great Save Location Debate: Where Do Your Screenshots Go?
Where your screenshots get automatically saved depends on your operating system and settings. This can be a source of confusion.
- Windows: By default, screenshots taken with the Windows Key+Print Screen are saved in Pictures > Screenshots. Snipping Tool captures are often saved to your clipboard, which you can then paste into another application.
- macOS: Screenshots typically land on your desktop.
9. Screenshot Annotation Nation: Adding Arrows, Text, and More!
Annotation tools are your friends. They allow you to add context to your screenshots.
- Use the Built-In Tools: The Snipping Tool on Windows and Preview on macOS have built-in annotation features.
- Explore Dedicated Software: Snagit, Lightshot, and others offer advanced annotation capabilities (arrows, text, highlighting, blurring, etc.).
10. Screenshot Shortcuts: Memorize and Master!
Keyboard shortcuts are your key to efficient screen capture.
- Windows: Windows Key + Print Screen (save to Pictures), Alt + Print Screen (capture active window), Windows Key + Shift + S (Snip & Sketch)
- macOS: Shift + Command + 3 (full screen), Shift + Command + 4 (select area), Shift + Command + 4, then Spacebar (capture window), Shift + Command + 5 (screenshot toolbar)
11. Cloud Storage and Screenshots: Syncing Your Captures for Maximum Convenience
Cloud storage makes your screenshots available across all your devices.
- **
Fix Screenshots Not Saving in Pictures Folder on Windows 11 10 Screenshots Are Not Being Saved
By Victor Explains Fix Screenshots Not Saving in Pictures Folder on Windows 11 10 Screenshots Are Not Being Saved by Victor Explains
Windows 10 - How to enable print screen key
By JazzDev Corner Windows 10 - How to enable print screen key by JazzDev Corner
How to solve Print Screen Not Working in Windows 1011
By The Geek Page How to solve Print Screen Not Working in Windows 1011 by The Geek Page

Title: Fix Screenshots Not Saving in Pictures Folder on Windows 11 Screenshots Are Not Being Saved
Channel: Nam Anh Cap
Fix Screenshots Not Saving in Pictures Folder on Windows 11 Screenshots Are Not Being Saved by Nam Anh Cap
Laptop Wifi Hotspot
Laptop Screenshot Nightmare? FIX IT NOW!
Have you ever stared, exasperated, at a laptop screen, trying to capture that crucial piece of information, only to be met with a frustratingly flawed screenshot? The wrong area selected, crucial details cropped out, or an image that’s just… messy. We understand. In today's digital world, clear, concise, and effective screenshots are not just a convenience; they're a necessity. From troubleshooting technical issues to sharing important data with colleagues, a well-executed screenshot can save time, prevent misunderstandings, and ultimately, make your life easier. We've all been there, grappling with the digital tools at our disposal, and often, the humble screenshot is the first line of defense. This guide is dedicated to transforming your screenshot struggles into a smooth, seamless experience. We'll delve into the intricacies of capturing, editing, and utilizing screenshots, so you can say goodbye to blurry, incomplete images and hello to a world of perfectly captured information.
Decoding the Screenshot Landscape: Understanding Your Options
Before we dive into the "how," it's crucial to understand the "what." The method for taking a screenshot varies depending on your laptop’s operating system. The most common platforms are Windows and macOS, and each boasts its own distinct set of tools and shortcuts. To start your journey towards screenshot mastery, let's explore the fundamental functions:
Windows: Your Screenshot Arsenal
Windows provides several powerful, built-in tools for capturing your screen. They're well-integrated, readily available, and capable of handling most of your screenshot needs.
- Print Screen (PrtScn) Key: This is your workhorse. Pressing the
PrtScnkey (often found on the upper right side of your keyboard) copies the entire screen to your clipboard. You can then paste it into a program like Paint, Photoshop, or a document. - Windows Key + PrtScn: This combination captures the entire screen and saves it as a screenshot in your Pictures folder, typically under a "Screenshots" subfolder. This is an effortless way to immediately save the image.
- Alt + PrtScn: This shortcut captures only the active window, providing a focused snapshot of the specific window you are working in. This is excellent for highlighting particular applications or information.
- Snipping Tool: A classic Windows tool, the Snipping Tool allows for precise screen captures. You can select a rectangular, free-form, window, or full-screen snip. It also includes basic editing features like drawing, highlighting, and adding notes. To access it, simply search for "Snipping Tool" in the Windows search bar.
- Snip & Sketch: The Snipping Tool’s modern sibling, Snip & Sketch, offers a more streamlined and enhanced experience. It offers similar capabilities to the Snipping Tool but with improved editing features and sharing options. It’s also easier to access using the
Windows Key + Shift + Sshortcut. This brings up a selection bar allowing you to choose the capture mode.
macOS: Mastering the Apple Screen Capture
macOS provides a sleek and intuitive approach to screenshots, leveraging a combination of keyboard shortcuts and integrated tools.
- Shift + Command + 3: This captures the entire screen and saves it as a PNG file on your desktop.
- Shift + Command + 4: This activates the selection tool. Click and drag to select a specific rectangular area, which is saved as a PNG file on your desktop once released.
- Shift + Command + 4, then Spacebar: This allows you to capture a specific window. The cursor changes to a camera icon; simply click on the desired window to capture it. This is also saved as a PNG file on your desktop.
- Shift + Command + 5: This opens the Screenshot toolbar, offering options for capturing the entire screen, a selected window, or a portion of the screen. It also includes options for recording the screen. From the toolbar, you can also access settings and control the location where screenshots are saved.
Beyond the Basics: Advanced Screenshot Techniques
Once you've mastered the fundamentals, it’s time to elevate your screenshot game. These advanced techniques will help you capture images that are clearer, more informative, and more visually appealing.
- Capturing Menus and Tooltips: A challenge many face is capturing a menu that disappears before you can screenshot it. Here's the solution: open the menu or tooltip, then, before it automatically closes, press
PrtScn(Windows) orShift + Command + 3(macOS) and then quickly open the application you will paste into and paste the image. (for example, into Paint, or Microsoft Word). The menu or tooltip will be captured. - Using Third-Party Screenshot Software: While Windows and macOS offer excellent built-in tools, third-party software often provides enhanced functionality. Consider options such as Snagit, Lightshot, or Greenshot. These often have advanced features like scrolling capture (capturing a long webpage), annotation tools, and cloud storage integration.
- Scrolling Screenshots: Capturing an entire webpage, or a document that extends past your screen's visible portion, can be tricky with standard tools. Many third-party applications, and some built-in features in newer operating systems, offer scrolling capture functionality. This stitches together multiple screen captures to create a single, complete image. This is extremely valuable for long articles or documentations.
- Delayed Screenshots: Sometimes, you need to capture something that appears after a brief delay, such as a popup notification. Most screenshot tools provide a delayed capture option, giving you time to set up the desired scenario.
Editing Your Screenshots: Refining Your Visuals
Taking a screenshot is only the first step. Editing it is where you can truly refine your message and make your visuals more compelling.
- Cropping and Resizing: Eliminate unnecessary elements and focus on what matters. Crop the image to highlight the most important information and resize it to fit presentation or document needs.
- Annotation and Highlighting: Add arrows, text boxes, and highlighting to draw attention to specific areas. This is crucial for guiding viewers' eyes and emphasizing key points.
- Blurring Sensitive Information: To protect privacy or conceal confidential data, use the blur tool to obscure sensitive information like usernames, passwords, or personal details.
- Adding Text and Callouts: Provide context and clarification by adding text labels and callouts directly to your screenshots. This helps viewers understand the image more quickly and effectively.
- Saving in the Right Format: Choose the correct file format for your needs. JPEG is suitable for images with many colors, while PNG is better for images with text and sharp lines. Consider the file size and image quality.
Troubleshooting Common Screenshot Blunders
Even after mastering the techniques, you may occasionally encounter issues. Here's how to address common problems:
- Blank Screenshots: If you get a blank screen, ensure your graphics drivers are up to date. Also, some applications may not allow screenshots for security reasons.
- Incorrect Area Captured: Double-check your selection before capturing. If using the selection tool, drag the cursor to properly frame the desired area.
- Poor Image Quality: Ensure your display settings are set to the correct resolution. Screenshots will only be as clear as your screen resolution.
- Screenshot Location: Sometimes, you may have forgotten where you saved the screenshot! Check your default screenshot folder location. (Pictures/Screenshots on Windows, and Desktop on macOS, by default).
Leveraging Screenshots for Maximum Impact: Practical Applications
Knowing how to take and edit screenshots is valuable, but knowing when and how to apply them is where real value lies. Here are some common applications:
- Technical Support and Troubleshooting: Screenshots are invaluable for explaining or documenting technical issues. They allow you to show exactly what you're seeing, making it easier for others to diagnose and resolve problems.
- Training and Tutorials: Screenshots are the building blocks of effective tutorials. They visually guide users through processes, steps, or software features.
- Presentations and Reports: Screenshots can greatly enhance presentations by providing visual support to your data.
- Social Media and Content Creation: Create engaging content by sharing screenshots of interesting applications, or sharing your own experiences.
- Documentation: Whether you're documenting software, processes, or other information, screenshots can simplify and clarify complex instructions. They save time and eliminate the need for lengthy, descriptive text.
- Communication with Colleagues and Clients: Screenshots provide a shared, visual language that instantly clarifies your meaning, leading to more efficient and effective communication.
Conclusion: Becoming a Screenshot Pro
Mastering the art of screenshotting is a skill that pays dividends in many areas of life. By understanding the tools available to you, practicing the techniques, and refining your editing skills, you can transform your laptop screenshot experiences from frustrating to fantastic. Embrace the power of the visual, and you'll find yourself communicating more effectively, saving time, and making your digital life easier. Go forth, capture with confidence, and never again suffer from a laptop screenshot nightmare! Embrace these strategies, and you'll find yourself well-equipped to tackle any screen-capture challenge. The ability to capture and clearly communicate information via screenshots is an indispensable skill for navigating the digital landscape.
