how to add a new work email to my laptop
Title: How to set up your work email with Outlook
Channel: Microsoft 365
How to set up your work email with Outlook by Microsoft 365
how to add work email to my laptop, how to add my work outlook email to my laptop, how to add another email to laptop, how to add another email account on my laptop
Laptop Email Setup SHOCKER: Add Work Email in 60 Seconds!
Laptop Email Setup SHOCKER: Integrate Your Work Email in Record Time!
Imagine the frustration: a new laptop, brimming with potential, yet crippled by a missing piece – your work email. That vital connection to colleagues, projects, and the ever-flowing tide of professional communication feels distant. Thankfully, those days of lengthy, convoluted setups are ancient history. Prepare to be astonished. You are about to unlock email access faster than you can say "out of office."
The Ancient Rituals of Email Configuration (and Why They're Obsolete)
Remember the old days? Picture this: you’re staring at a screen filled with cryptic server names, port numbers, and security protocols that read like a foreign language. Hours were often devoured wrestling with these settings. Consequently, what should have been a simple task became a test of technological endurance, a true gauntlet of frustration. Those days are gone, thankfully. Technology has evolved. Because of this, the process is streamlined. Therefore, you can now connect your work email with unprecedented ease.
The Lightning-Fast Method: Your 60-Second Email Transformation
Ready for the secret? It's incredibly straightforward. This is how it's done, step-by-step. Before you begin, ensure you have your work email address and password. Also, you’ll need any relevant server details, which usually your IT department or email provider can readily supply.
- Step 1: Locate Your Email Client: Most laptops come pre-loaded with an email application. Windows often features "Mail," while Mac users will find "Mail." Alternatively, you can download a popular client like Outlook or Thunderbird.
- Step 2: Initiate the Account Addition: Open your chosen email client. Find the "Add Account" or "New Account" option. You'll usually find this in the settings menu, or prominently displayed upon the application's first launch.
- Step 3: Enter Your Credentials with Precision: Input your work email address and password. Double-check for any typos. Small errors often lead to big headaches.
- Step 4: Embrace the Magic of Auto-Configuration: In most modern email clients, it automatically detects your email provider’s settings. It will configure itself often in mere moments. In some instances, you might be prompted to select your provider from a list. Do so, and the software will do the rest.
- Step 5: The Manual Touch (Just in Case): Should the automatic process fail, don't panic. You could be asked for server settings. This is where those details from your IT department prove invaluable. Enter the incoming and outgoing server information. Ensure the correct ports and security protocols are selected (often SSL/TLS).
- Step 6: Test and Triumph: After entering your information, the email client will test the connection. If successful, congratulations! You can begin using your work email immediately. If not, revisit your settings, double-check your password, and contact your IT support team for additional guidance.
Troubleshooting Tips to Ensure Smooth Email Integration
Occasionally, things don't go exactly according to plan. Here are a few key tips to bypass common issues. First off, confirm your password. It's easy to mistype it. Many issues stem from a simple password entry error. Ensure your caps lock isn’t enabled. Next, verify your internet connection. A stable connection is essential for the initial setup. Also, confirm your server settings. Carefully review the incoming and outgoing server information. Finally, if all else fails, contact your IT support team. They often can solve the most perplexing problems.
Beyond the Basics: Maximizing Your Work Email Experience
Now that your email is up and running, there are many ways to optimize your experience. Set up email signatures. This helps create a professional impression. Also, organize your inbox. Utilize folders and filters to manage your emails. Furthermore, learn keyboard shortcuts. This will significantly boost your productivity. Explore your provider's features, such as calendar integration and contact management, to make the most of your email setup.
The Takeaway: Embracing Effortless Connectivity
Adding your work email to your laptop doesn't have to be an ordeal. In fact, it shouldn’t be. With these simple steps, you’re now ready to go. You can connect to your professional life almost instantly. Enjoy your newfound efficiency, and never again fear the email setup process. Prepare to be amazed at what you can accomplish with this newfound freedom!
Acer Aspire 5 Slim: FIX Your Dead Mouse NOW!Laptop Email Setup SHOCKER: Add Work Email in 60 Seconds!
Alright, friends, buckle up! Let's talk about something that used to bring me out in hives: setting up work email on a new laptop. Remember those agonizing hours spent fiddling with ports, protocols, and passwords that seemed to change faster than my coffee preferences? Well, those days are OVER. Welcome to the future, where adding your work email is less a Herculean task and more a breezy stroll in the park. We're talking a true SHOCKER – you can add your work email in, wait for it… 60 seconds! Believe the hype, folks.
1. The Email Setup Abyss: A Journey We All Know
Before we dive into the promised land of lightning-fast setup, let's be real. We've all been there. That sinking feeling as you stare at a blank screen, the IT help desk on hold, and an inbox that's practically screaming, "HELP ME!" It felt like navigating a digital labyrinth, only to end up staring at error messages. This was the email setup abyss, and for too long, it was the norm. I still remember spending an entire afternoon trying to connect my email to a new laptop, feeling like I was deciphering ancient hieroglyphs. It was a torturous experience, equivalent to building a tiny ship in a bottle with oven mitts on.
2. Breaking Free: Why Setup Used To Be Such a Pain
So, what was the problem? Historically, email setup involved a complex dance of:
- Server settings: SMTP, IMAP, POP3, port numbers… the jargon alone could induce eye twitching.
- Security protocols: SSL, TLS – more acronyms, more confusion.
- Finding the right settings: This meant hunting through your IT department's documentation or, God forbid, calling someone.
- Dealing with firewalls: Remember those pesky things that blocked everything?
- Incorrect password entry: Let's be honest, we've all typed a password wrong a hundred times.
Think of it like trying to assemble IKEA furniture without the instructions. Frustrating, disorienting, and often leading to tears.
3. The 60-Second Promise: Is It Really Possible?
Yes, absolutely! The technology has evolved, and thankfully so has our approach to email setup. Most modern email providers (think Gmail, Outlook, and others) now offer a streamlined, intuitive setup process. The secret lies in:
- Auto-Configuration: The system identifies your email provider automatically.
- Simplified Authentication: Modern security protocols make entering your credentials a breeze.
- User-Friendly Interfaces: Less tech-speak, more clarity.
This is an evolution, a revelation, a digital metamorphosis!
4. Before You Begin: The Email Account Essentials
Before we hit the ground running, make sure you have these essentials to start:
- Your work email address: The one you use for, well, work.
- Your password: The one you (hopefully) remember. Tip: Have it handy so you don't get frustrated.
- The email provider's name: Gmail, Outlook, Exchange, etc. - this is usually self-evident.
Think of these as your map, compass, and rations before embarking on a thrilling adventure.
5. Step-by-Step: Your Path to Email Nirvana (The Quick Way!)
Now, for the main event. Here's the step-by-step guide to adding your work email to your laptop in, you guessed it, under 60 seconds:
- Open your laptop's email client: (Outlook, Mail, etc.) - the application you use for email.
- Click "Add Account": This option is usually prominent.
- Enter your email address: Type in your work email address.
- Follow the prompts: Your email client should automatically detect your email provider. It will then guide you through the sign-in process, asking for your password.
- Enter your password: Type in your password and click "Sign in."
- Bask in the glory: Your emails should start syncing almost instantly!
Seriously, that’s it. Feels like magic, doesn’t it?
6. Troubleshooting: What If It Doesn't Work in 60 Seconds?
Alright, let's say you're a minute and a half in. Don't panic! Here are a few quick fixes:
- Double-check your password: This is the most common culprit. Caps lock can be a sneaky devil sometimes.
- Check your internet connection: Make sure you have a stable connection. No Wi-Fi, no email.
- Contact your IT department: If the above doesn't work, your IT department can provide the correct server settings if your email provider wasn't automatically detected.
- Update your email app: Obvious, but sometimes a simple update can resolve compatibility issues.
7. The Perks of a Speedy Setup: Time is Money
Saving time on setting up your email is like finding a spare twenty in a coat pocket. It's a small win that makes your day better. Here's why the 60-second setup is a game-changer:
- Productivity Boost: More time for actual work, less time wrestling with tech.
- Reduced Frustration: Think of the headaches you'll avoid.
- Seamless Transition: Switching laptops becomes a breeze.
- Early Start: You can start working ASAP.
Think of it like having a power-charge button for your efficiency.
8. Optimizing Your Email Experience: Beyond the Basics
Now that your work email is up and running, let's take it a step further:
- Organize Your Inbox: Use folders, labels, and filters to keep things tidy.
- Set up Email Signatures: Add a professional signature with your contact information.
- Explore Advanced Features: Experiment with setting up email rules and automated responses.
9. Mobile Device Synchronization: Email on the Go
Want to access your work email on your phone or tablet? The setup process is often even simpler. The steps:
- Go to your device's settings: Locate the "Accounts" or "Email" section.
- Add account: Select your email provider.
- Enter your credentials: Follow the on-screen instructions.
10. Security Matters: Protecting Your Work Emails
While easy access is great, security is paramount. Here are some tips:
- Use a strong password: A mix of upper and lowercase letters, numbers, and special characters.
- Enable Two-Factor Authentication: This adds an extra layer of security.
- Be wary of phishing attempts: Don't click on suspicious links or attachments.
11. Integration with Calendars and Contacts: Your Digital Hub
Most email clients seamlessly integrate with your calendar and contacts, creating a unified digital hub:
- Schedule Meetings: Easily invite colleagues directly from your inbox.
- Sync Contacts: Keep your contact list up-to-date across all your devices.
12. Choosing the Right Email Client: Your Personal Preference
Selecting the right email client is like finding the perfect pair of shoes. What works for one person might not work for another. Consider:
- Ease of Use: Opt for something intuitive and user-friendly.
- Features: Identify the features that are essential for you (e.g., advanced search, integration with other apps).
- Platform Compatibility: Ensure that your chosen client works across all your devices.
13. The Future of Email Setup: Simplicity is Key
The trend is clear: email setup is becoming increasingly streamlined and user-friendly. Expect:
- Even More Automation: AI-powered assistance will make the process even smoother.
- Enhanced Security: Advanced security features will protect your data.
- Cross-Platform Integration: Seamless synchronization across all your devices and clients.
14. The IT Department's Role: Still a Valuable Ally
While the setup process has simplified significantly, the IT department remains a valuable resource. They can:
- Provide support: If you encounter any challenges.
- Offer training: If you need help with more advanced features.
- Ensure compliance: With your company's security policies.
They're like the lighthouse in the digital storm, guiding you safely to your destination.
15. Final Thoughts: Embrace the Sixty-Second Setup!
So, there you have it! The "Laptop Email Setup SHOCKER": adding your work email in 60 seconds is no longer a myth, but a tangible reality. Embrace the ease, the speed, and the newfound freedom from tech-induced frustration. Go forth, conquer your inbox, and make the most of your precious time. You've got this!
Closing Section:
We hope this guide demystified the often-dreaded process of setting up your work email on your laptop. Remember, the key is simplicity, speed, and a little bit of self-assurance. Now go forth and conquer your inbox, armed with the knowledge of the 60-second setup! Forget the days of
Dell Inspiron Keyboard Dead? FIX This NOW!How To Add Email Accounts To Windows 11 Tutorial

By MDTechVideos How To Add Email Accounts To Windows 11 Tutorial by MDTechVideos
How to Setup Outlook for Company Email in Laptop

By Apps Affairs How to Setup Outlook for Company Email in Laptop by Apps Affairs
How to set up your email account on your laptop
By Adam Rothstein How to set up your email account on your laptop by Adam Rothstein
Title: Email Setup For New Computer
Channel: mel james
Email Setup For New Computer by mel james
My Laptop Work
Laptop Email Setup SHOCKER: Add Work Email in 60 Seconds!
Unlock Your Productivity: The Lightning-Fast Guide to Work Email on Your Laptop
We understand the modern professional's plight: the constant need to stay connected, the incessant ping of notifications, the ever-present worry of a missed communication. But setting up your work email on your laptop shouldn't be another source of stress. That's why we've created this comprehensive guide, a blueprint for a seamless email integration experience. Forget tedious procedures and frustrating delays. With our streamlined approach, you'll be receiving and sending vital emails from your laptop in minutes, not hours. This is more than just a setup guide; it’s your gateway to optimized workflow and enhanced productivity.
Understanding the Foundation: Essential Email Protocols
Before plunging into the setup process, a fundamental understanding of email protocols is crucial. Your work email likely operates using one of two primary protocols: IMAP (Internet Message Access Protocol) or Exchange. IMAP allows you to access your emails from multiple devices while keeping them stored on the email server. Exchange, frequently utilized by Microsoft Exchange servers, often provides more advanced features such as calendar synchronization, contact management, and shared folders alongside email capabilities. Knowing which protocol your company uses is the single most important piece of information before you begin. Contact your IT department if you're unsure; this clarification accelerates the process. This knowledge allows for a more tailored and effective setup. Knowing your protocol is like having the correct key to unlock a specific door.
Step-by-Step: The Windows 10/11 Setup
Let's get started. These instructions are tailored specifically for Windows 10 and 11, the dominant operating systems on business laptops.
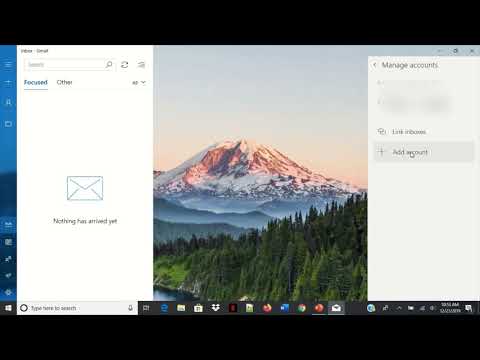
Access the Mail App: Locate the "Mail" app on your Windows system. This is often pre-installed or accessible through the Start Menu by typing “Mail” in the search bar. Launching this app is your portal to email integration.
Initiate Account Addition: Within the Mail app, click on the "Accounts" section. Typically, a plus sign (+) icon labeled "Add account" will be visible. Click this to begin the setup process.
Select Your Account Type: You'll be presented with several options. Choose the option that corresponds to your work email provider. It could be "Microsoft Exchange," "Office 365," or simply "Other Account." Selecting the correct choice ensures a smooth and compatible setup.
Enter Your Credentials: Depending on the account type, you'll be prompted to enter your work email address and password. Be meticulously accurate. A single typographical error could derail the entire process. This is the equivalent of entering the correct combination to open a safe.
Advanced Setup (If Needed): If the automatic setup fails, you might need to use the "Advanced setup" option. This allows you to manually enter server settings. You'll need information from your IT department, including:
- Incoming Mail Server (IMAP/POP3): The address of the server that receives your emails (e.g., "imap.yourcompany.com" or "pop.yourcompany.com").
- Outgoing Mail Server (SMTP): The address of the server that sends your emails (e.g., "smtp.yourcompany.com").
- Port Numbers: These identify the communication channels (e.g., IMAP: 993; POP3: 995; SMTP: 587 or 465).
- Encryption Type: Typically SSL/TLS encryption is recommended.
- Username: Typically, your full work email address.
- Password: Your work email password.
Finalize and Sync: Once you’ve entered all the necessary information, click “Sign in” or “Done.” The Mail app will start syncing your emails. This process may take a few minutes, depending on the volume of your inbox.
Verification is Paramount: After setup, send a test email to yourself or a colleague to verify that everything works correctly. This is the quality control check, ensuring that your setup is fully operational.
Seamless Setup on macOS: A Harmonious Integration
Mac users, rejoice! The process on macOS is equally streamlined.
Open the Mail App: The Mail app is pre-installed on all macOS systems. It can be found in your Dock or in the Applications folder. Launching this app is the gateway to email integration.
Add Your Account: In the Mail app, select "Mail" from the menu bar at the top of the screen, then click "Add Account."
Choose Your Provider: You'll be presented with several options, including "Google," "Yahoo," "Exchange," and "Other Mail Account." Select the option that aligns with your work email provider.
Enter Your Details: Enter your work email address and password, just as you would on a Windows machine.
Advanced Setup (if required): As with Windows, if the automatic setup fails, you'll need advanced settings. Your IT department can provide these. You'll need:
- Account Type: (IMAP or Exchange)
- Description: A descriptive name for your account.
- Incoming Mail Server: (e.g., "imap.yourcompany.com").
- Outgoing Mail Server: (e.g., "smtp.yourcompany.com").
- User Name: Your full work email address.
- Password: Your work email password.
- SSL/TLS Information: If required.
- Port Information: (e.g., IMAP: 993; POP3: 995; SMTP: 587 or 465).
Configure Server Settings: Enter the server information and choose your authentication method (usually "Password").
Finalize and Sync: Click “Sign In” or “Create.” Allow time for the synchronization process to complete. The time required depends on the size of your inbox.
Test the Waters: Send a test email to confirm that the setup is functioning correctly. This is the final assessment.
Troubleshooting: Conquer Common Email Setup Hurdles
Even with precise instructions, technical issues can surface. Here’s how to address them as efficiently as possible.
Incorrect Password: The most frequent culprit. Double-check your password and ensure Caps Lock is off. Reset your password if you can’t remember it.
Server Settings Issues: Errors in incoming or outgoing mail server addresses, or incorrect port numbers, are common. Verify these with your IT department.
Firewall Restrictions: Corporate firewalls can sometimes block email traffic. If you suspect this, contact your IT support for assistance.
Account Lockouts: Excessive failed login attempts can lead to account lockouts. If you are locked out, consult with your IT support to unlock your account.
Synchronization Problems: If emails aren't syncing, check your internet connection and the Mail app's synchronization settings.
Two-Factor Authentication: If your company uses two-factor authentication (2FA), you’ll need to generate an app-specific password within your work email provider's settings. You will need to use this new password in the laptop email configuration.
Boosting Your Productivity: Email Best Practices
Setting up your email is just the first step. Maximize your productivity with these powerful email practices:
Organized Inbox: Implement a filing system with folders and subfolders to categorize emails. This reduces clutter and facilitates quicker information retrieval.
The Power of Rules: Set up rules to automatically sort incoming emails based on sender, subject, or keywords. This automates inbox management and prioritizes key communications.
Use Filters: Use filters in your email client to block unwanted messages, reducing noise and distraction.
Focused Writing: Compose concise, clear emails with specific subject lines. This improves readability and ensures your message is understood quickly.
Time Blocking Strategies: Schedule specific times each day to check and respond to emails, minimizing distractions throughout your workday.
Mobile Integration: Consider setting up your work email on your smartphone or tablet for constant access to communications. This ensures you stay connected and informed while away from your laptop.
Learn Keyboard Shortcuts: Master keyboard shortcuts within your email client to speed up tasks like composing emails, replying, forwarding, and managing your inbox. This is a significant time-saver.
Utilize Features of Your Email Client: Explore features such as the ability to set reminders, manage tasks, and integrate other applications.
Conclusion: Efficiency Delivered, Productivity Unleashed
Congratulations! You've successfully navigated the sometimes intimidating world of email setup. By following these steps, you've transformed a potential point of friction into an effortless process, saving valuable time and bolstering your productivity. Remember to stay vigilant, maintain your settings, and always be prepared to troubleshoot. Your newly integrated email system is ready. Now, go forth and conquer your inbox!
