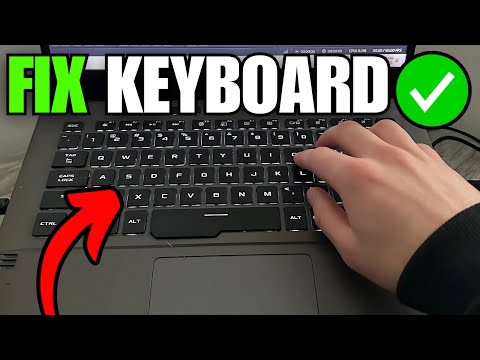
keyboard suddenly not working on laptop

Title: Your laptop keyboard or touchpad stopped working That's how you fix it
Channel: Electronics Repair School
Your laptop keyboard or touchpad stopped working That's how you fix it by Electronics Repair School
keyboard suddenly not working on laptop, laptop keyboard suddenly not working windows 10, laptop keyboard suddenly not working reddit, laptop keyboard suddenly not working windows 11, why is my keyboard laptop not working, why does my laptop keyboard suddenly stopped working, why has my keyboard on my laptop stopped working, why my laptop keyboard suddenly stopped working
Laptop Keyboard Dead? FIX IT NOW! (Emergency Guide)
Laptop Keyboard Catastrophe? Don't Panic! (A Rapid Response Guide)
Suddenly, your laptop keyboard has gone silent. The once familiar click-clack of your fingers is now replaced by frustrating emptiness. You're staring at a blank screen, deadlines looming, and a surge of panic bubbling up. Relax. You're not alone, and more importantly, solutions exist! We'll navigate this together.
Troubleshooting Time: Initial Checks to Get You Started
Before you resign yourself to replacing your keyboard, or worse, your laptop, let's perform some quick diagnostic checks. First, and perhaps the simplest, is a restart. This fixes a multitude of tech gremlins, so restart your laptop. If that fails, try a second vital step. Check the external keyboard, if any exists. Does it work? That single data point provides a vital clue.
Software Stumbles: Ruling Out the Digital Culprit
If the external keyboard works, then the problem likely resides within your operating system. However, if your external keyboard still fails—perhaps the issue stems from a physical problem. The next sensible step is navigating the operating system. Boot into safe mode. This mode loads the bare necessities, minimizing software conflicts. How do you boot in safe mode? It varies slightly depending on your operating system (Windows or Mac). A quick internet search will guide you.
Cleanliness is Key: Dust and Debris Demystified
Dust, crumbs, and other debris are the keyboard's archenemies. Over time, gunk accumulates under keys. This often leads to intermittent or complete key failure. Grab a can of compressed air. Carefully angle the nozzle and thoroughly blow underneath each key. Then, gently wipe the keys with a microfiber cloth.
Driver Dilemmas: The Silent Software Saboteurs
Sometimes, incompatible or corrupted keyboard drivers are the source of the problem. Then, you must update or reinstall your keyboard drivers. This is easily managed through your operating system's device manager (Windows) or system preferences (Mac). First, right-click on the Windows start button. Select "Device Manager." Search for "Keyboards". Then, right-click on your keyboard device and select "Update driver." If that fails, try uninstalling and reinstalling the driver.
Sticky Keys: Adhesive Adversaries and Solutions
Spilled liquid is a keyboard's ultimate downfall. Even a seemingly minor spill can cause sticky keys or complete keyboard failure. Immediately shut down your laptop, and disconnect the power adapter. Turn the laptop upside down to allow any remaining liquid to drain. Next, use a slightly damp cloth to clean the affected keys. However, be extremely cautious.
Hardware Hurdles: When Physical Problems Surface
If software solutions prove futile, it is time to examine potential hardware issues. First, assess the keyboard cable. Many laptops have an internal cable connecting the keyboard to the motherboard. If this cable is loose or damaged, the keyboard won't work. Disassembling your laptop can be tricky. You will need a screwdriver set. Consult your laptop's manual or search online for specific disassembly instructions. Carefully detach the keyboard cable from the motherboard, then reseat it.
Keyboard Replacement: The Ultimate Resort
If you've exhausted all troubleshooting steps, then keyboard replacement remains your final option. This can be a cost-effective solution, particularly if you're comfortable with DIY repairs. Otherwise, consult a professional repair service. Research the cost of a replacement keyboard. Then, research the labor costs. Choose the most cost-effective option.
Preventative Measures: Protecting Your Precious Keyboard
Once your keyboard is functional again, you'll want to avoid a repeat performance. Invest in a keyboard cover. These are shields against dust, spills, and other keyboard hazards. Consider keeping food and drinks away from your workspace. Regular cleaning prevents problematic debris. These proactive steps will extend your keyboard's lifespan, keeping you productive for longer.
Beyond the Keyboard: Contingency Planning
A dead keyboard is an inconvenience, not a disaster. Have a plan B for the future. Keep an external keyboard on hand. Many laptops have touchscreens. Lastly, learn keyboard shortcuts. They can be lifesavers in a pinch.
Conclusion: Back in Action
You've now armed yourself with knowledge and practical steps. Whether it's a simple software glitch or a more complex hardware issue, you're ready to troubleshoot. By following this guide, you've taken the first step toward a functional keyboard! Your productivity awaits.
HP 650 Laptop Wi-Fi DEAD? Fix It NOW! (Easy Steps!)Laptop Keyboard Dead? FIX IT NOW! (Emergency Guide)
Hey everyone, let's be real, there's nothing more frustrating than your laptop keyboard deciding to take a permanent vacation when you need it most. You're staring down a deadline, prepping for a Zoom call, or just trying to binge-watch your favorite show, and BAM! Your keys go silent. Frustrations mount like a skyscraper on a windy day. Don't worry, though. We've all been there. And that's why we're here today – to help you troubleshoot and, fingers crossed, get you back to typing in no time. This isn't your average dry, technical manual. Think of it as a friendly guide, a digital shoulder to lean on when your keyboard betrays you. Let's dive in!
1. The Silent Treatment: Recognizing the Symptoms of a Dead Keyboard
Before we start wielding digital screwdrivers, let's make sure our patient (your keyboard) is actually, well, dead and not just suffering a minor inconvenience. Sometimes, the symptoms can be sneaky.
- Complete Unresponsiveness: Nothing. Absolutely nothing. Pressing keys is like shouting into the void. No letters, numbers, or symbols will appear, no matter how furiously you jab at the keys.
- Partial Failures: Some keys work, others don't. Maybe the "A" key is on strike, or the "spacebar" has developed a sudden case of selective amnesia.
- Ghost Inputs: You're typing, but random letters or commands pop up without you even touching the keys. This could be a sign of a stuck key or some other mischievous gremlins at work.
- Inconsistent Behavior: The keyboard might work sporadically, then fail again. Like a moody teenager, it's hard to predict.
If you're experiencing any of these issues, chances are we've got a keyboard problem. Let's move on and get ready to troubleshoot.
2. Rule Number One: The Reboot – Your Computer's Equivalent of a Good Night's Sleep
Before you start tearing things apart (and trust me, we'll get to that!), the first step in virtually any tech crisis is the good old-fashioned reboot. Think of it as giving your laptop a fresh start, like wiping the slate clean.
- The Simple Way: Click the start/power button, and select "Restart." That's it!
- The Forced Reboot (If Your Computer is Completely Frozen): Hold down the power button until the laptop shuts down. Then, turn it back on.
Why reboot? Well, sometimes, a software glitch or a temporary hiccup can cause the keyboard to malfunction. Restarting can clear these issues. It’s the equivalent of shaking a snow globe – hopefully, the problem will settle.
3. Is It a Software Issue? Let's Check Those Drivers!
Okay, the reboot didn't work. Now, we need to investigate if the problem lies with your computer's understanding of your keyboard. That understanding is facilitated by something called "drivers." These are essentially the software that tells your laptop how to communicate with your keyboard.
- Accessing Device Manager:
- Windows: Type "Device Manager" in the Windows search bar and click on it.
- Mac: Go to "System Preferences" > "Keyboard".
- Locate Your Keyboard: In Device Manager (Windows), look for "Keyboards." Expand that section. If you see a yellow exclamation mark next to your keyboard, it indicates a driver issue.
- Update or Reinstall Drivers: Right-click on your keyboard in Device Manager and select "Update driver" or "Uninstall device." If you uninstall, restart your computer, and Windows should attempt to reinstall the driver automatically.
Think of drivers as the translators in a multilingual room. If the translator (driver) is misbehaving, communication (between the keyboard and the laptop) breaks down.
4. The External Keyboard Test: Is It Your Laptop's Problem, Or Just the Keyboard?
Here's a crucial diagnostic step. If you have an external USB keyboard, plug it into your laptop. Does it work?
- External Keyboard Works: Yay! This strongly suggests that the issue lies with your laptop's internal keyboard. We can focus our efforts there directly.
- External Keyboard Doesn't Work: Hum. This indicates a more systemic problem, which could potentially involve the USB ports or the operating system itself. We'll have to explore those possibilities.
This is our primary “stress test” for your laptop’s keyboard!
5. Cleaning Time! Dust Bunnies are Keyboard Killers
Sometimes, the simplest solutions are the best. Dust, crumbs, and general gunk can wreak havoc on a keyboard. Think of your laptop keyboard like a tiny, complex, but delicate machine. Let's go ahead and clean your keyboard.
- Turn Off and Unplug: Safety first! Shut down your laptop and unplug the power adapter.
- Air Duster to the Rescue: Use a can of compressed air (available at most tech stores) to blow out the debris. Hold the can at an angle and direct the air between the keys.
- The Gentle Wipe Down: Use a soft, lint-free cloth (like a microfiber cloth) dampened with a bit of isopropyl alcohol to clean the keycaps. Be gentle!
We're essentially giving your keyboard a spa day. A clean keyboard is a happy keyboard.
6. Checking for Sticky Keys: The Enemy of Proper Typing
Do any keys feel sticky or stuck? This is a common issue, often caused by spilled drinks, sugary residue, or just general grime. It's like having a tiny, uncooperative key-shaped monster living inside your keyboard.
- Identify Sticky Keys: Carefully examine your keyboard, pressing each key. Pay attention to those that feel unresponsive or slow to return to their original position.
- Isolate and Clean: If you can safely remove the keycap (some are designed to pop off easily), do so. Clean the area underneath the keycap with a cotton swab dipped in isopropyl alcohol.
- The Toothpick Trick (Caution Required!): For stubborn stickiness, you can carefully use a toothpick to try to dislodge the debris. Be extremely gentle to avoid damaging the keyboard.
If you don’t want to remove the keycap, insert the air with compressed air to remove the debris around the keyboard space.
7. Physical Damage Assessment: A Visual Inspection
Time for a closer look. Is there any visible damage to the keyboard?
- Look for Cracks or Breaks: Inspect the keycaps and the surrounding area for any physical damage.
- Check for Loose Connections: Open your laptop (following your laptop's manual) to see if the keyboard cable is loose. This is risky but you are essentially looking under the hood.
Sometimes, a dropped laptop or a sharp blow can physically damage the keyboard, requiring a replacement.
8. Liquid Spill Emergency: Immediate Action is Crucial
If you've spilled liquid on your keyboard (it happens to the best of us!), time is of the essence. The clock is ticking! The faster you act, the better your chances of saving your keyboard.
- Power Down Immediately: Shut down your laptop immediately and unplug the power adapter. Don't delay!
- Invert and Drain: Carefully turn your laptop upside down to allow any liquid to drain out.
- Remove the Battery (If Possible): If you can safely remove the battery, do so.
- Dry Thoroughly: Let your laptop dry out completely, ideally for several days, before attempting to turn it back on. You can use a fan to speed up the drying process.
- Professional Help: Consider taking your laptop to a professional for cleaning and assessment. Liquid damage can be insidious, causing corrosion over time.
Liquid spills are the most damaging of all the keyboard mishaps.
9. The BIOS/UEFI Check: A Test Outside the Operating System
The BIOS/UEFI is the low-level software that controls your computer before the operating system even loads. If the keyboard doesn't work in BIOS/UEFI, it suggests a hardware issue.
- Accessing BIOS/UEFI: Restart your laptop and repeatedly press a specific key (usually Del, F2, F12, or Esc – check your laptop's manual) during startup.
- Test the Keyboard: Once in BIOS/UEFI, try using the keyboard to navigate the menus.
- Keyboard Works in BIOS/UEFI: This suggests the problem is likely software or driver-related.
- Keyboard Doesn't Work in BIOS/UEFI: This points strongly to a hardware failure.
This test helps us pinpoint whether the keyboard problem is confined to the software environment.
10. External Keyboard Software and Settings: A Quick Check
While a dead keyboard is usually a hardware issue, let's not rule out a software conflict. If you've recently installed external keyboard software, it could be causing problems.
- Uninstall Recent Software: Uninstall any keyboard-related software you’ve recently installed.
- Check Keyboard Settings in the OS: In Windows, go to Settings > Devices > Typing (Windows 10/11) or Control Panel > Keyboard. Check the settings to make sure nothing is configured incorrectly.
How to Fix Keyboard Not Working Issue in Windows 108.1 Easy

By MJ Tube How to Fix Keyboard Not Working Issue in Windows 108.1 Easy by MJ Tube
How to Fix Some Keys Not Working on Laptop Keyboard Keyboard Not Working

By Tech White How to Fix Some Keys Not Working on Laptop Keyboard Keyboard Not Working by Tech White
How To Fix Keyboard Not Working on Asus Laptop
By Your Fix Guide How To Fix Keyboard Not Working on Asus Laptop by Your Fix Guide

Title: How to Fix Keyboard not Typing in Windows 11 PC or Laptop keyboard keyboardtroubleshooting
Channel: Discover You
How to Fix Keyboard not Typing in Windows 11 PC or Laptop keyboard keyboardtroubleshooting by Discover You
Working With Laptop
Laptop Keyboard Dead? FIX IT NOW! (Emergency Guide)
A dead laptop keyboard can feel like a digital prison. Suddenly, the familiar rhythm of keystrokes vanishes, replaced by a frustrating inability to communicate with your machine. Whether you’re facing a deadline, immersed in a crucial task, or simply trying to browse the web, a non-functional keyboard brings everything to a grinding halt. This emergency guide is meticulously crafted to help you diagnose and, most importantly, fix a dead laptop keyboard, getting you back on track with minimal downtime. We'll navigate potential causes, offer step-by-step solutions, and provide preventative maintenance tips to keep your keys clicking.
Initial Troubleshooting: Assessing the Situation
Before diving into complex solutions, a methodical approach to diagnosing the problem is critical. The first step involves determining the scope of the issue. Is the entire keyboard unresponsive, or are only certain keys affected? Does this happen consistently, or does the keyboard function intermittently? These observations will significantly narrow down the possibilities and guide your troubleshooting efforts.
External Keyboard Testing: A Quick Diagnostic
The easiest first step is to connect an external USB keyboard to your laptop. This quick test helps determine whether the issue lies with the laptop's internal keyboard or with the operating system or hardware in general. If the external keyboard works flawlessly, you can confidently focus your efforts on the laptop's built-in keyboard. However, if the external keyboard also fails to function, the problem might stem from a driver issue, operating system glitch, or a more general hardware malfunction.
Software-Related Solutions: Reboot and Driver Updates
Often, a seemingly dead keyboard is the victim of a minor software glitch. Here are some common software-related fixes:
Simple Restart: The First Line of Defense
The most basic solution, and often the most effective, is a simple system reboot. Restarting your laptop can often resolve temporary software conflicts or glitches that might be interfering with keyboard functionality. Save any open work, close all applications, and initiate a restart. Once the system boots up, test the keyboard immediately.
Driver Examination and Reinstallation
Keyboard drivers are the software that allows the operating system to communicate with the keyboard. Corrupted or outdated drivers can easily lead to keyboard issues. To check and update your keyboard drivers:
- Access Device Manager: Right-click the Start button (or press Windows key + X) and select "Device Manager."
- Locate the Keyboard: In the Device Manager window, expand the "Keyboards" section. You should see your laptop's keyboard listed (e.g., "Standard PS/2 Keyboard" or a more specific model name).
- Driver Actions: Right-click on your keyboard and choose "Update driver." You can choose to have Windows search for drivers automatically, or you can manually browse for drivers if you have them pre-downloaded.
- Reinstall if Necessary: If updating doesn't work, try uninstalling the keyboard driver (right-click, choose "Uninstall device") and then restarting your laptop. Windows will automatically attempt to reinstall the driver upon reboot.
Sticky Keys and Filter Keys: Toggling Off Accessibility Features
Windows offers accessibility features like Sticky Keys and Filter Keys that can sometimes interfere with normal keyboard operation. Sticky Keys allows users to press modifier keys (Shift, Ctrl, Alt, Win) one at a time, while Filter Keys filters out brief or repeated keystrokes. To disable these features:
- Access Ease of Access Settings: Press the Windows key, type "Ease of Access settings," and select it.
- Keyboard Settings: Click on "Keyboard."
- Disable Unnecessary Features: Ensure both "Sticky Keys" and "Filter Keys" are toggled off. If they were enabled, test your keyboard after disabling them.
Hardware Troubleshooting: The Physical Keyboard
If software solutions fail, you'll need to investigate the physical hardware of your laptop's keyboard. This involves some level of disassembly, so proceed with caution and ensure you're comfortable with the process.
Power Cycle: A Simple Hardware Reset
Sometimes, a complete power cycle can resolve minor hardware glitches:
- Shutdown: Completely shut down your laptop.
- Disconnect Power: Unplug the power adapter.
- Remove the Battery (If Possible): If your laptop's battery is removable, take it out.
- Hold Power Button: Press and hold the power button for at least 30 seconds. This discharges any residual electricity.
- Reassemble and Test: Reinsert the battery (if removed), plug in the power adapter, and boot up your laptop. Test the keyboard.
Cleaning the Keyboard: Removing Debris
Dust, crumbs, and other debris can accumulate under the keys, interfering with their function. Cleaning is a simple, relatively safe, and often effective solution:
- Turn Off and Unplug: Shut down your laptop and unplug the power adapter.
- Invert and Shake: Gently turn your laptop upside down and shake it to dislodge loose debris.
- Compressed Air: Use a can of compressed air to blow out any remaining debris, aiming between the keys and around the edges.
- Gentle Wiping: Use a soft, lint-free cloth (slightly dampened with isopropyl alcohol if necessary) to wipe the keys.
Keyboard Disassembly and Inspection: Advanced Solutions
This is where things become more technically involved. Only proceed with disassembly if you are comfortable doing so. Consult your laptop's service manual (search online for your laptop's model and "service manual") for specific instructions. The steps below are general guidelines:
- Prepare Your Workspace: Work on a clean, well-lit surface. Gather the necessary tools: a small Phillips head screwdriver, a plastic pry tool (or a thin, non-abrasive object like a guitar pick), and a container for screws.
- Power Down and Unplug: Again, shut down your laptop and disconnect the power.
- Locate Screws: Most laptop keyboards are held in place by screws. Remove these screws, often located along the top edge of the keyboard or on the bottom of the laptop.
- Prying the Keyboard: Carefully use a pry tool to lift the keyboard from the laptop chassis. Be gentle. There might be clips and tabs holding the keyboard in place.
- Disconnect the Keyboard Cable: The keyboard is connected to the motherboard via a ribbon cable. Carefully disconnect this cable. There is usually a small locking mechanism on the connector that you will need to lift. Do not force it.
- Inspect the Keyboard: Examine the keyboard for any visible damage, such as a broken key, damaged keys, or signs of liquid spills.
- Cable Check: Inspect the ribbon cable for any kinks, tears, or damage. Re-seat the cable into the connector on the motherboard.
- Reassembly and Testing: Carefully reassemble the keyboard, following the disassembly steps in reverse. Test the keyboard before fully reassembling the laptop.
Liquid Spills: Immediate Action is Crucial
Liquid spills are a common keyboard killer and can cause permanent damage if not addressed immediately:
- Immediate Shutdown: The instant a liquid spill occurs, shut down your laptop immediately. Do not attempt to save any work.
- Disconnect Power: unplug the power adapter.
- Invert and Drain: Turn the laptop upside down and allow any liquid to drain out.
- Disassembly and Cleaning: Disassemble the keyboard and clean all affected components with isopropyl alcohol. Allow everything to dry completely before reassembly (this can take several days).
Keyboard Replacement: When All Else Fails
If all troubleshooting steps fail, the keyboard itself may be faulty and require replacement.
Finding a Replacement Keyboard:
- Identify Your Laptop Model: Accurately identify your laptop's make and model. This information is typically found on a sticker on the bottom of the laptop, under the battery, or in the system information.
- Online Retailers: Search online retailers (e.g., Amazon, eBay, specialized laptop parts suppliers) using your laptop's model number and "keyboard replacement."
- Verify Compatibility: Carefully verify that the replacement keyboard is compatible with your specific laptop model.
- Consider the Fit: Make sure the replacement keyboard includes the correct layout: American English, UK English, etc.
Keyboard Installation: The installation process typically involves disassembling the old keyboard and connecting the new keyboard, following the steps discussed in the Keyboard Disassembly and Inspection section. If you are not comfortable doing this, seek a professional.
Preventative Maintenance: Protecting Your Keyboard
Preventing keyboard issues is often easier than fixing them. Here are some tips:
- Regular Cleaning: Clean your keyboard regularly to prevent debris buildup.
- Protective Cover: Consider using a silicone keyboard cover to protect against spills and dust.
- Avoid Consuming Food and Drinks Near the Laptop: This significantly reduces the risk of spills.
- Gentle Use: Avoid excessive force when typing.
- Handle Carefully: Transport your laptop with care to minimize the risk of physical damage.
Conclusion: Reclaiming Your Productivity
A dead laptop keyboard needn't be a permanent predicament. By systematically working through the troubleshooting steps outlined in this guide, you can diagnose the issue, implement effective solutions, and get your keyboard—and your productivity
