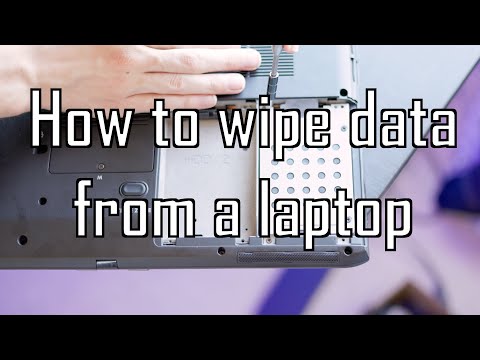
how to wipe work laptop

Title: How to wipe PC before selling Secure Erase PC The ENTIRE process Windows 10 & 11
Channel: Jason Bagnell
How to wipe PC before selling Secure Erase PC The ENTIRE process Windows 10 & 11 by Jason Bagnell
how to wipe work laptop, how to wipe work laptop before returning, how to wipe work laptop reddit, how to clear work laptop before returning, how to reset work laptop without password, how to reset work laptop password, how to clean up work laptop, how to reset company laptop for personal use mac, how to.wipe a laptop, how to wipe my work laptop clean
Wipe Your Work Laptop CLEAN: The Ultimate Guide (Before IT Notices!)
The Great Office Laptop Purge: Your Pre-IT Intervention Survival Manual
Alright, listen up! You've been there, right? That sinking feeling. The one that creeps in when you realize your work laptop is a digital minefield. It's packed with potentially incriminating data. Maybe it's personal emails you shouldn't have, or half-finished projects you’d rather leave in the digital ether. Perhaps you were just goofing off on company time. Before IT sends you a friendly (or not-so-friendly) email, you need a plan. This isn’t a drill. It's a digital life-or-death situation. So, let's get started.
Phase 1: The Pre-emptive Strike – Assessing the Damage
First things first, you need intel. Think of your work laptop as a battlefield. You need to survey the terrain before engaging. This involves some digital archaeology. Where did you travel? What programs did you installed? Take inventory of everything. Start with the obvious culprits: the Downloads folder, the Documents folder. Examine your desktop. It's a digital crime scene. Furthermore, investigate the cloud storage. This is crucial. Look at your browser history. It's a revealing log of your activities.
Now, give your system a thorough once-over. Consider what you need to eliminate. Then, make a list. This list is your roadmap to freedom. Once you have this list, you have the upper hand, maybe. Because, in the absence of thorough inspection, there is no victory.
Phase 2: The Art of Digital Deletion – The Gentle Approach
Next, it's time to start the cleanup. We're aiming for a surgical strike, not a scorched-earth policy. Don't just randomly delete everything. That screams guilt, and also invites scrutiny. Begin with the easy targets: temporary files, cached data, and anything obviously unnecessary. After all, these are the Low Hanging Fruits.
Consider these tips moving forward. First, use the "Shift + Delete" key combination. This ensures files bypass the Recycle Bin. Therefore, it avoids a paper trail. Second, Empty your Recycle Bin immediately after you have deleted items. Make sure you have cleared any relevant caches accumulated on your computer. Then, delete everything from the cloud storage. Finally, do not forget to review your emails.
But remember, be strategic. Don’t indiscriminately wipe out things. Instead, aim for a focused cleaning.
Phase 3: The Covert Operation – Beyond the Basics
At this point, you are ready to go deeper. We're entering the realm of advanced tactics. This is where things get interesting. Consider software designed for permanent file destruction. Many tools overwrite data multiple times. These tools render it unrecoverable. In fact, they are akin to a digital cremation.
Next, investigate the hidden corners of your operating system. Consider the file indexes and temporary files that are left behind. For instance, these include your system logs. You can find them in the System Folder. Also, there are cookies in your browsers which could contain suspicious information. Furthermore, temporary files may exist in obscure locations.
This step is crucial for complete erasure. It is often overlooked.
Phase 4: The Firewall – Protecting Your Tracks
Now, let's talk about your online footprint. You need to erase every piece of evidence online. To protect yourself, you must use a privacy-focused browser. Consider using a secure search engine. Next, clear your browser history. It's essential.
Moreover, consider using a Virtual Private Network (VPN) before you start deleting. VPN’s hide your IP address. Therefore, they mask your activity. Also, use incognito mode. This is important.
Remember, digital privacy is a constant game of catch-up. So, keep your eyes open and always learn new tricks.
Phase 5: The Ultimate Test – The Final Inspection
You have done your work. You have performed a massive cleanup. Take a moment to do your final check. You must make sure all your work is complete. Double-check your work. Review everything.
Then, run a system scan. Then, a malware and virus scan. Ensure your system is in good condition. At this point, you are ready to close the book. Therefore, you can relax and enjoy your peace of mind.
Phase 6: The Ongoing Vigil – Maintaining Digital Hygiene
Wiping your laptop is only one part of the story. Digital hygiene is about a lifestyle. You must constantly be vigilant. Do regular cleanups. Also, be aware of your digital habits.
Remember, never leave digital evidence unattended. Then, stay informed about the latest threats. Do this by reading security blogs. Then, sign up for cybersecurity newsletters. Always be one step ahead of the game.
So, go forth, and be free. Your work laptop is now a clean slate. Your secrets are (presumably) safe. Now you will be equipped.
Airtel Hotspot Nightmare? Fix Your Laptop Connection NOW!Wipe Your Work Laptop CLEAN: The Ultimate Guide (Before IT Notices!)
Alright, let's be real. We've all been there. That work laptop, a faithful (or sometimes not-so-faithful) companion, holds enough digital baggage to make your hard drive groan. Think of it as a digital filing cabinet crammed with sensitive documents, questionable internet searches, and maybe, just maybe, a few personal files you'd rather keep private. And then, the dreaded notification arrives: "IT will be updating your laptop." Cue the internal panic! Before you know what's what, your carefully curated digital life could be under scrutiny. Fear not, friends! We're diving deep into the art of the digital cleanse, specifically focusing on how to wipe your work laptop clean before IT gets the chance to do it for you – or worse, discovers something embarrassing.
1. The Pre-Wipe Reconnaissance: What's Lurking in the Shadows?
Before you even think about hitting the reset button, you need a strategy. Think of it like planning a stealth mission. We need to know what we're up against. Start by taking inventory. What kind of digital debris are we talking about?
- The Obvious: This includes work documents (obviously!), emails, browser history, downloads folder, and anything on your desktop. Anything labeled “Project Zenith Final Draft” or “Salary Negotiation Plan B” should be considered high-priority removal candidates.
- The Less Obvious: Don’t forget about temporary files, cookies, and cached data. These little digital breadcrumbs can reveal a surprising amount about your online activities. Think of them as the digital equivalent of dirty footprints left behind after a heist.
- The "Oh Crap!" Files: These are the ones that really make you sweat. Personal photos, videos, financial documents, your illicit gaming habit… you get the picture. Time to channel your inner digital detective.
2. Back It Up (But Strategically!): The Art of Selective Preservation
This is crucial. Before anything else, determine what absolutely needs saving. Don’t just blindly copy everything to a flash drive. That defeats the purpose! This is where selective preservation comes in.
- Work-Related Essentials: Your essential work files are a must. However, make sure you're not secretly transferring company intellectual property to your personal storage devices! Consider cloud storage like OneDrive or SharePoint (assuming your IT department allows it!) for authorized document backups.
- Personal Gems (Carefully): If you have personal files you'd like to save, carefully consider which ones are worth the risk. Think of it as choosing between a delicious, but potentially poisoned, apple. If you must save personal files, consider encrypting them (more on that later).
- What to Leave Behind: Resist the urge to back up everything. The goal is a clean slate, not a recreation of your digital hoard.
3. The Great Uninstall: Purging the Programs
Often overlooked, the software installed on your laptop is a window into your soul (or at least, your habits). Before wiping, it’s time to banish the unwanted.
- The Suspects: Games you've been quietly playing during lunch breaks, any software you installed for a "temporary" project, and anything that screams "personal use."
- The Professional Approach: Uninstall everything properly through the Control Panel or Settings menu. Avoid simply dragging and dropping programs into the trash. This leaves behind lingering files and registry entries.
- Special Attention: Be especially mindful of any programs that could raise red flags. Think: Virtual Private Networks (VPNs), file-sharing programs, or anything that allows you to access the internet anonymously.
4. Browser History Blackout: Erasing the Digital Footprints
Your browser history is basically a digital diary. It chronicles your every click, search, and website visit. Time to erase!
- The Manual Approach: Go into your browser settings and clear your browsing history, cookies, and cached images and files. Most browsers allow you to select a time range (last hour, last day, etc.).
- The Incognito/Private Mode Illusion: While incognito mode can help, it’s not a magic bullet. It doesn't protect you from your company's network monitoring, so don’t rely on it entirely.
- Consider Password Managers: While convenient, password managers can become a security liability. If you have stored personal passwords, consider backing them up and deleting the associated accounts.
5. The Download Folder Dilemma: What to Keep, What to Chuck?
Your downloads folder is often the digital equivalent of a junk drawer. It's time to declutter.
- The Purge: Delete anything unnecessary. Old installation files, temporary documents, and anything you’ve already used and don’t need anymore should be sent to the digital cemetery.
- The Encryption Option: If you have sensitive personal documents lingering in your downloads, consider encrypting them before backing them up (if you're backing them up at all!).
6. Encryption: The Digital Fortress
If you're really serious about protecting your personal files, encryption is your friend. Think of it as building a digital vault.
- Built-in Tools: Windows and macOS have built-in encryption tools like BitLocker and FileVault. They encrypt your entire hard drive, making your data unreadable without the decryption key.
- Third-Party Options: There are also numerous third-party encryption software options available.
- The Key is Key: Never forget your encryption key or password! If you do, you could permanently lose access to your files.
7. Disk Cleanup: Eliminating the Leftovers
Before the big wipe, run a disk cleanup utility. It scavenges for temporary files, cached data, and other digital flotsam and jetsam.
- Windows: Type "Disk Cleanup" in the search bar and run the tool. Select your hard drive and check all the boxes.
- macOS: macOS typically handles disk cleanup automatically, but you can also use the "Storage" section in System Preferences to manage storage space.
8. The Factory Reset: The Nuclear Option
This is the big one. It’s like hitting the 'reset' button on life – a clean slate!
- Windows Reset: Go to Settings > Update & Security > Recovery. Choose "Reset this PC." You'll be given the option to keep your files or remove everything. Choose the latter.
- macOS Erase: Restart your Mac, hold down Command + R during startup, and select "Disk Utility" from the Recovery Mode options. Then, select your startup disk and click "Erase."
- Be Patient: A factory reset can be time-consuming, so be prepared to leave your laptop alone for a while.
9. Secure Data Erase: Going the Extra Mile
If you're extra paranoid (and there's nothing wrong with that!), consider using a secure data erase tool. These tools overwrite the data on your hard drive multiple times, making it much more difficult (or impossible) to recover the data.
- Software Options: There are various secure data erase software options available.
- Hardware Considerations: If your laptop has a solid-state drive (SSD), secure erase methods can be slightly different. Consult the manufacturer's instructions.
10. Check Your Work: A Post-Wipe Inspection
Once the wipe is complete, do a final inspection.
- Browse the File System: Look through the file system to confirm nothing sensitive remains.
- Test Applications: Try opening a few default applications to make sure everything functions correctly.
- Think IT is Watching: Realistically, IT may still have access to some metadata. If something is a security risk, the best option may be to simply not have it on your work laptop.
11. The Cloud Conundrum: Account Hygiene
Don’t forget about the cloud! Your online accounts can store a wealth of personal information.
- Review Your Cloud Accounts: Check your cloud storage accounts (Google Drive, Dropbox, etc.) for any personal files you may have inadvertently uploaded.
- Clear Cache and Cookies: Clear the cache and cookies for all your cloud accounts.
- Consider Password Reset: If you're concerned about security, consider changing your password for all affected accounts.
12. The Digital Footprint: Beyond the Laptop
Remember, your digital footprint extends beyond your work laptop. Consider these additional steps:
- Social Media Accounts: Review your social media accounts for any embarrassing or compromising posts.
- Email Accounts: Clean up your personal email accounts, especially if you've used them on your work laptop.
- Online Accounts: Review your online accounts (banking, shopping, etc.) for any sensitive information.
13. The Timing is Everything: When to Pounce
Timing is everything. Avoid wiping your laptop right before a major project deadline or critical presentation.
- The Proactive Approach: The best time to wipe your laptop is before you need to. Don't wait until IT announces a surprise update.
- The "Suspicious Activity" Warning: If you sense a change in the atmosphere or receive any unusual communications from IT, it’s time to act immediately.
- Weekends are Your Friend: Weekends provide a good opportunity to clean without disrupting your
How to wipe all data from a old Laptop
By ElectronicsWizardry How to wipe all data from a old Laptop by ElectronicsWizardry
How to EASILY Factory Reset ANY WINDOWS School Laptop - no password

By Theboys2 How to EASILY Factory Reset ANY WINDOWS School Laptop - no password by Theboys2
Factory Reset Any HP Laptop Easy Method - Windows 11 Factory reset Without Microsoft Account

By Digital world Factory Reset Any HP Laptop Easy Method - Windows 11 Factory reset Without Microsoft Account by Digital world
Title: FACTORY RESET HP ACER DELL LENOVO or ANY LaptopNetbook w WINDOWS 8 or 10 wo the user password
Channel: David Frank
FACTORY RESET HP ACER DELL LENOVO or ANY LaptopNetbook w WINDOWS 8 or 10 wo the user password by David Frank
Laptop Working
Wipe Your Work Laptop CLEAN: The Ultimate Guide (Before IT Notices!)
The hum of your work laptop. It’s more than just a machine; it's a portal to your professional life, a repository of countless files, applications, and digital breadcrumbs that chronicle your workday. But what happens when that professional life shifts? Perhaps it's a career change, a new opportunity beckoning, or simply the end of a project. Before you hand over your work laptop, it’s imperative to ensure your digital footprint is not only tidy but, more importantly, clean. This guide is your comprehensive roadmap to achieving that, ensuring your transition is smooth, secure, and leaves no lingering traces.
Understanding the Stakes: Why Cleaning Matters
Think of your work laptop as a shared space. Just as you wouldn't leave personal belongings scattered in a communal area, you shouldn't leave sensitive information on a device that will soon be accessed by others. The stakes are significant. At best, leaving personal data could lead to embarrassment. The worst-case scenario could involve data breaches, identity theft, or even legal complications. Beyond the personal risks, consider the implications for your former employer. Data leaks and compromised systems can lead to significant financial losses and reputational damage. Your diligence in cleaning the laptop protects both yourself and the organization. A clean laptop signals professionalism and responsibility, leaving a positive impression even after your departure.
Phase One: The Inventory – Identifying What to Protect
Before you even touch a button, a methodical assessment is crucial. This is not the time for haste; this is the foundation upon which your entire cleaning process rests. Begin by identifying all the digital assets you’ve created, accessed, or stored on your work laptop. Categorize these assets to streamline the subsequent steps.
- Personal Files: Documents, photos, videos, music – anything unrelated to your work duties.
- Sensitive Data: Financial records, personal communications (emails, chats), passwords, and anything that could compromise your privacy.
- Work-Related Data (Potentially Sensitive): Client lists, project proposals, internal memos. Evaluate each item; if it contains any proprietary information, it needs special attention.
- Software Licenses and Accounts: Identify any software you use with a personal license or account tied to your email address or personal information.
- Browsing History and Cache: Websites visited, passwords saved, and downloaded files.
- Locate Encryption Keys: Determine whether the laptop utilizes encryption and identify the method used to access the data.
Create a detailed list or spreadsheet. Consider this your blueprint for the cleaning process. Cross items off as you address them.
Phase Two: Data Sanitization – Secure Deletion Strategies
Deleting files by simply dragging them to the recycle bin is insufficient. These files can often be recovered using data recovery software. You need to employ methods that render your data unrecoverable. Several options exist, each with a different level of thoroughness and complexity.
- File Shredding Software: Dedicated software designed to overwrite files multiple times, rendering them unrecoverable. Popular options include CCleaner (with its drive wiping capabilities), Eraser, and BleachBit.
- Drive Wiping Utilities: Some operating systems, like Windows, offer built-in drive-wiping tools. They overwrite the entire hard drive, ensuring all data is erased. These tools overwrite the data with random data, effectively scrambling the original information. Locate the secure erase option in your system's settings.
- Secure Deletion within Applications: Many applications, such as email clients and browsers, offer secure deletion options for individual files or data points. Make sure to thoroughly clean up accounts that are saved within the laptop.
- Formatting the Hard Drive: A format alone is typically insufficient for secure deletion. It is important to ensure the format process overwrites the data with multiple passes to sanitize the digital footprint.
Phase Three: Account Management – Protecting Your Digital Identity
Your digital accounts are key entry points. Securing those accounts ensures that no sensitive data can be exposed. This includes email accounts, cloud storage services, social media accounts, and any other platforms you used on your work laptop.
- Password Changes: Change the passwords for all personal accounts that you have accessed on the laptop. Use strong, unique passwords for each account.
- Sign-Out and Logout: Ensure you're logged out of all personal accounts. This includes webmail, social media, cloud storage, and any other accounts you may have left open.
- Two-Factor Authentication: Enable two-factor authentication (2FA) wherever possible. This adds an extra layer of security by requiring a second verification method beyond your password.
- Revoke Access to Third-Party Applications: Review the "connected apps" or "authorized applications" sections of each account and revoke access to any apps or services you no longer need.
- Clear Browsing Data and Cache: Clean up any saved passwords, cached data, and browsing history. Use the browser's built-in tools to clear this information.
- Account Deletion (If Appropriate): Consider deleting personal accounts if you will no longer use them and there is no need to preserve the account data.
Phase Four: Software De-Installation – Removing Unnecessary Programs
Uninstalling software, particularly programs with associated files or data, is a critical step. Simply deleting the application's icon does not remove it. It is imperative to uninstall the application from the Control Panel or Settings menu.
- Identify Unnecessary Software: Compile a list of all software installed on the laptop. Consider the purpose of each application. If the software is personal or unrelated to work, uninstall it.
- Use the Appropriate Uninstall Method: Avoid simply deleting application files. Instead, use the operating system's built-in uninstall feature (or the application's own uninstall program) to remove the software completely.
- Check for Associated Files: After uninstalling, search for any leftover files or folders associated with the software. You may need to manually delete these files.
Phase Five: Email and Communication Management – Securing Your Correspondence
Email and communication records are a crucial area of concern. Your digital communication records often contain sensitive personal data.
- Download and Save Important Emails: Before deleting any emails, download and archive any emails or attachments you wish to keep. Consider saving them to a secure, external storage device.
- Delete Personal Emails: Delete all personal emails from the laptop. Be sure to clear the "Deleted Items" or "Trash" folder as well.
- Secure Your Email Client: If you use an email client (like Outlook or Thunderbird), clear the cache and any offline data stored locally.
Phase Six: The Final Checklist and Handover Preparation – Ensuring a Clean Slate
With all these steps completed, it is time for a final review. This is the last inspection of all of your work to ensure that no data remains.
- Double-Check Your Inventory: Go back to your original list. Ensure every item you identified has been addressed.
- Run a Final Scan: Use a file shredder or drive-wiping utility to scan the entire system for residual files.
- Consult Your IT Department: Before handing over the laptop, communicate with your IT department. They might have specific instructions or procedures for data sanitization.
- Factory Reset (If Allowed): If IT approves, consider performing a factory reset of the laptop. This returns the device to its original state.
- Document Your Actions: Keep a record of the steps you took to clean the laptop. This documentation will be helpful for record-keeping, if questions come up later.
- Handover and Confirmation: Hand over the cleaned laptop and obtain confirmation it's been received.
By meticulously following this guide, you can confidently wipe your work laptop clean. This proactive approach not only protects your personal data but also demonstrates professionalism and respect for your former employer. Remember, the best way to ensure a clean transition is to start the process well in advance and to leave no trace behind.
