microphone in dell laptop not working
Title: How To Fix Microphone Not Working on Dell Laptop
Channel: Your Fix Guide
How To Fix Microphone Not Working on Dell Laptop by Your Fix Guide
microphone in dell laptop not working, mic on dell laptop not working, dell laptop microphone not working windows 11, internal microphone on dell laptop not working, dell laptop microphone not working on teams, dell laptop microphone not working properly, dell laptop mic not working windows 11, microphone problem in dell laptop
Dell Laptop Mic Dead? This ONE Trick Fixes It!
Dell Laptop Microphone Not Working? Don't Panic! A Simple Solution Awaits!
Let's face it. Technology can be a fickle beast. One minute, your Dell laptop mic is working perfectly, and the next? Dead silence. You're probably staring blankly at your screen with that sinking feeling. That's completely understandable. Fortunately, before you start pricing new headsets, there's a straightforward trick. It could just be the key to reviving your dormant microphone.
Troubleshooting the Silent Dell Microphone: A Deep Dive
First, breathe. Troubleshooting doesn't have to be a nightmare. We will explore the potential culprits behind your microphone's demise. We will also reveal the fix. Consider this your quick guide to getting back in the audio game. The issue might seem complex. However, the solution might be surprisingly simple. Many factors can cause a microphone to fail. From software glitches to physical issues, the possibilities exist. Consequently, a methodical approach is critical.
Check the Obvious: Basic Microphone Sanity Checks
Before we delve into technical territory, check the basics. It might sound simple, but it's surprising how often these steps are overlooked. Firstly, ensure your microphone is enabled. Double-check the mute button. Is it accidentally pressed? Secondly, look at the physical connections. If using an external microphone, is it properly plugged in? Sometimes, the simplest solutions are the best. So, before you begin any advanced troubleshooting, cover these basics. In the event that these initial checks fail to resolve the problem, proceed onward.
Software Interference: The Usual Suspect
Software glitches can wreak havoc on your audio. Audio drivers are essential. They are the unsung heroes that allow your operating system to communicate. Outdated or corrupted drivers are often the root cause of microphone problems. So, how do we fix it? Update them! Head to Dell's support website. Then, download the latest audio drivers for your specific Dell laptop model. Install them. Afterwards, restart your computer to apply the changes.
The "Secret" Fix: Microphone Privacy Settings
Here's the trick that sometimes saves the day. Windows 10 and 11 have privacy settings. These settings control app access to your microphone. It's possible that you inadvertently disabled microphone access for the apps you're using. To check. Go to your Windows settings. Navigate to "Privacy". Then, click on "Microphone". Ensure that "Microphone access for this device" is turned on. Also, verify that apps have permission to access your microphone. Then, test your microphone afterwards.
Testing Your Microphone: Confirming Success
Once you've implemented the potential fixes, it’s time for testing. There are several methods to do this. One easy way is to use the built-in "Voice Recorder" app. Simply record a short audio clip. Then, play it back to see if your voice is audible. Alternatively, you can test your microphone within the applications you regularly use. Programs like Zoom, Microsoft Teams, or Skype all have microphone testing options. You can verify that everything is functioning as it should. If you can clearly hear yourself, congratulations!
Hardware Considerations: When It's a Physical Problem
Sometimes, the problem isn't software. It could be a hardware issue. If you’ve tried all of the software-based solutions, consider this. Examine the physical microphone itself. Is it damaged? If you use an external microphone, test it on another device. This quickly confirms whether the mic is the problem. For built-in laptop microphones, hardware repair may be necessary. Therefore, consider contacting Dell support. Or, consult a qualified technician.
Beyond the Basics: Advanced Troubleshooting Steps
Even with all the above steps, the problem may persist. Don't fret! There are more steps to consider. Try running the Windows Troubleshooter. It's designed to detect and fix common hardware and software problems. Furthermore, consider a system restore. This takes you back to an earlier point in time. Ideally, before your microphone stopped working. As a result, this can revert corrupted software. Finally, there's always the option of a clean Windows install. This can often resolve deep-seated software conflicts. It's a more drastic measure. But, it's sometimes the only solution.
Prevention is Key: Keeping Your Microphone Healthy
Once you get your microphone working, take steps to prevent future issues. Update your drivers regularly. This minimizes compatibility problems. Also, monitor your system's performance. Pay attention to any unusual behavior. Another critical step is to practice good online habits. Avoid downloading suspicious software. Doing so can help protect your system from malware. In conclusion, doing this helps prevent potential audio issues.
Conclusion: Get Your Microphone Up and Running!
Losing your microphone can be frustrating. But often, a simple fix is all that's needed. By following these steps, you can quickly resolve the issue. You will then be back to video calls, voice chats, or recording in no time. So don't despair! Start with the basic checks. Proceed through the software adjustments. Remember that a little patience and troubleshooting can go a long way. You will eventually conquer your microphone woes. Now go forth and make some noise!
Dell Latitude Speaker Silence? SHOCKING Fix You NEED!Dell Laptop Mic Dead? This ONE Trick Fixes It!
Let's be honest, there's nothing quite as frustrating as a seemingly dead microphone on your Dell laptop. You’re prepping for a crucial video call, ready to lay down some killer vocal tracks, or simply trying to be heard during an online game, and… crickets. Silence. Nada. It's like your laptop has suddenly decided to take a vow of audio silence. But before you start tearing your hair out or, worse, consider buying a new laptop (we've all been there!), take a deep breath. We're here to tell you a little secret, a single, surprisingly effective trick that might just bring your Dell's microphone back from the digital graveyard.
1. The Silent Symphony: Why Your Dell Mic Might Betray You
Think of your laptop's microphone as a tiny, invisible conductor, orchestrating the sounds you make. When it goes silent, it's like the orchestra has gone on strike, leaving you in a frustrating silence. But what causes this digital mutiny? Well, the reasons range from the obvious to the obscure. It could be a simple software glitch, a driver issue, or even a physical problem. Sometimes, it's just a setting that's been inadvertently switched off. Whatever the reason, the initial feeling is always the same: a wave of annoyance washing over you.
2. The Usual Suspects: Before You Panic (and the ONE trick)
Before we leap into the magic fix, let's quickly rule out the usual suspects. Because, sometimes, the solution is staring you right in the face.
- Hardware Check: Make sure the microphone isn't physically damaged. Is the port plugged in securely (if applicable)?
- Mute Button: This might seem silly, but are you sure your microphone isn't muted? Check your laptop's function keys (usually F4, F5, or a microphone symbol) and the software you're using (Zoom, Skype, etc.).
- Software Conflicts: Sometimes, another program might be hogging the microphone. Close any other apps that might be trying to use it.
And then, the moment you've been waiting for… the ONE trick! This is where we get to the heart of the matter, the fix that, in our experience, works more often than you'd expect.
3. The ONE Trick That Saves the Day: Driver Shenanigans!
This is it, folks: Uninstall and Reinstall Your Audio Drivers. Sounds simple, right? Well, it is simple, but the power lies in its elegant simplicity. Think of your audio drivers as the communication channel between your Dell's hardware and software. Sometimes, these channels get congested, corrupted, or simply lose their way. Uninstalling and reinstalling them is like hitting the reset button, clearing the digital debris and setting things back on track.
Here's how to do it:
- Go to Device Manager: You can access this by typing "Device Manager" into the Windows search bar.
- Expand "Audio inputs and outputs" and "Sound, video and game controllers": You should see your microphone listed here, almost certainly under "Audio inputs and outputs".
- Right-Click Your Microphone: Right click on the microphone you want to restore.
- Uninstall Device: In the menu that appears, select "Uninstall device." Confirm the uninstallation when prompted. Don't worry; we'll get it back!
- Restart Your Laptop: This is crucial. Restarting allows Windows to recognize the missing drivers and attempt to reinstall them.
- Let Windows Do Its Thing: After restarting, Windows should automatically detect your audio devices and reinstall the drivers. If the prompt doesn't appear, go back to Device Manager, right-click any space, and select "Scan for hardware changes."
4. Troubleshooting After the Trick: When the Magic Doesn't (Instantly) Work
Sometimes, even the most reliable tricks need a bit of extra attention. If the driver reinstall doesn't immediately fix your Dell laptop's microphone, don't despair! Here are a few more things to try:
- Check Your Microphone Settings: Ensure that your microphone is selected as the default recording device in your Windows sound settings.
- Update Your Drivers: Even after reinstalling, drivers can be outdated. Return to the Device Manager, right-click on your microphone, and select "Update driver." Choose "Search automatically for drivers."
- Test Your Microphone: Use the Windows Sound Recorder app (or any other recording software) to test if the microphone is working.
- Consider Third-Party Driver Software: Sometimes, Windows' native drivers are insufficient. Programs like Driver Booster or Driver Easy can help locate and install the latest drivers. Be cautious about the sources, of course, and always back up your system before installing unfamiliar software.
5. Diving Deeper: Common Causes and Their Quirks
Let's explore some of the more insidious reasons why your Dell mic might misbehave.
- Software Conflicts: As mentioned before, various programs can interfere with your microphone. These include other video conferencing apps, voice assistants, or even background recording software. Close any unnecessary applications for the best results.
- Privacy Settings: Windows has privacy settings that control microphone access for different apps. Navigate to 'Privacy' > 'Microphone' to ensure that the app you're using has permission to access your microphone.
- Dust and Debris: Yes, even dust can be a culprit! Though rare, dust can accumulate in the physical microphone port, though more likely with a separate microphone plugged into the port than the built-in microphone. Use a can of compressed air (gently!) to remove any potential obstructions.
6. The Settings Safari: Unearthing Hidden Configuration Traps
The settings labyrinth in Windows can sometimes be more confusing than navigating a maze. Let's decode key areas, ensuring your microphone is properly configured.
- Sound Settings Panel: Search 'Sound Settings' in Windows and open the panel. Here, you can select your default input and output devices, test your microphone, and adjust the volume levels.
- App-Specific Settings: Many applications (Zoom, Skype, etc.) have their own audio settings. Ensure your Dell's microphone is selected within each app.
- Volume Mixer: Found in the Sound Settings, the Volume Mixer allows you to control individual app volumes. Check that the app using your microphone isn't muted or turned down.
7. Is Your Mic the Problem? Hardware vs. Software
How do you determine if it's a hardware problem versus software? It can be tricky, but here are a few clues.
- External Microphone Test: If possible, plug in an external microphone. If it works while your built-in mic doesn't, it points to a hardware issue with the internal microphone.
- Boot Into Safe Mode: Booting your laptop into Safe Mode (which loads a minimal set of drivers) can help you identify whether a driver is causing the conflicts. If mic works in Safe Mode, it's likely a software issue.
- Listen for Faint Sounds: Even if the microphone cannot fully transmit sounds, listen for faint noises or feedback. If you hear anything at all, it means that the microphone is at least partially registering sound, which could point to software problems.
8. The Power of Prevention: Keeping Your Mic Happy
The best way to avoid microphone woes is to be proactive. Here's how to keep your Dell mic singing along:
- Regular Driver Updates: Enable automatic driver updates in Windows or check for updates periodically.
- Antivirus Scans: Run regular antivirus scans to catch malware that could be interfering with your audio.
- Mind the Volume: Avoid blasting your microphone volume too high. It can cause distortion and damage the microphone.
- Cleanliness: Keep the microphone port clean!
9. Dell's Support Ecosystem: When You Need Backup
If all else fails, it might be time to consult the experts. Dell's website offers extensive support resources, including:
- Online Knowledge Base: Search for articles and troubleshooting tips based on your specific model.
- Customer Support: Contact Dell's customer support team. They can guide you through more advanced troubleshooting steps or arrange for repairs.
- Warranty Information: Check your warranty status to see if your laptop is still covered.
10. External Microphones: A Quick Fix (and a Potential Upgrade!)
If your built-in microphone is beyond repair, an external microphone is a quick and reliable solution. Here's what to consider:
- USB Microphones: Easy to use; Plug-and-play. They're a great choice.
- Headset Microphones: Ideal for online calls and gaming.
- Lapel Microphones: Perfect for recording audio on the go.
- Microphone Quality: Don't break the bank, but ensure you invest in a decent-quality microphone for the clarity you need.
11. The Future of Audio: Innovations to Expect
The world of audio is constantly evolving. Here are some trends to watch out for:
- Improved Noise Cancellation: Expect more sophisticated algorithms to isolate your voice from background noise.
- Directional Microphones: Microphones that focus on your voice and ignore sounds from other directions.
- AI-Powered Audio Enhancement: Technologies that can automatically improve audio quality
Fix Microphone Not Working on Windows 10

By The Geek Page Fix Microphone Not Working on Windows 10 by The Geek Page
How to Fix Microphone Isnt Working on Dell Laptop & How to Get Back Dell Audio Windows 11 & 10
By Tech Tales How to Fix Microphone Isnt Working on Dell Laptop & How to Get Back Dell Audio Windows 11 & 10 by Tech Tales
windows 11 microphone not working microphone not working windows 11-Problem Solved

By JP Tech News windows 11 microphone not working microphone not working windows 11-Problem Solved by JP Tech News

Title: Falls Church School Board Regular Meeting - May 13, 2025
Channel: Falls Church City Public Schools
Falls Church School Board Regular Meeting - May 13, 2025 by Falls Church City Public Schools
Wifi Not Found
Dell Laptop Mic Dead? This ONE Trick Fixes It!
We've all been there, staring blankly at our screens, desperately trying to participate in a crucial online meeting or a fun virtual get-together, only to be met with the agonizing silence of a non-functional microphone. For Dell laptop users, this frustrating predicament is, unfortunately, not uncommon. The good news? Often, the solution is surprisingly simple, and we’re here to guide you through the single most effective fix – a fix that could revive your dead microphone and bring your Dell laptop back to life.
Diagnosing the Microphone Malfunction: Beyond the Obvious
Before we dive into the ultimate solution, it's crucial to rule out the obvious. Ensure the hardware basics are covered. First, is the microphone physically plugged in if you are using an external microphone? If so, is it securely connected? If utilizing a built-in microphone, check for any obstructions, such as dust or debris, blocking the microphone’s intake. These seem simple, yet they're frequently overlooked culprits. Also, make sure the mute button, both on the laptop itself and within any conferencing software you're using, is not inadvertently engaged. Sometimes technology can be defeated by the simplest of mistakes.
Next, examine your operating system’s sound settings. Access your sound settings through the system tray (usually the speaker icon in the bottom right corner) or through the Control Panel (or Settings app, depending on your Windows version). Within these settings, verify that your microphone is selected as the default recording device. If multiple microphones are connected – an external mic and the internal laptop mic, for instance – make sure the correct one is chosen. Check the input levels to confirm the microphone is receiving a signal. If the level is zero, it's a sign that the operating system isn't picking up any input. Increase the input level gradually and test if the microphone is picking up sound.
The Ultimate Fix: The Driver Reset
Now, let's address the most common cause of a non-functional microphone: a corrupted or outdated audio driver. This is where that "ONE Trick" comes into play. This simple, yet powerful technique generally rectifies the problem.
Here's how to do it:
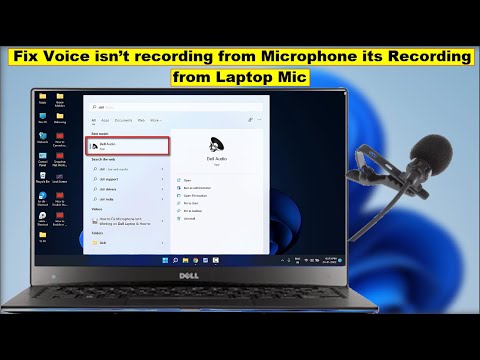
Access Device Manager: The heart of managing your system's hardware lies within the Device Manager. There are several ways to access it. One quick method is to right-click the Start button (Windows icon in the bottom-left corner) and select "Device Manager" from the context menu. Alternatively, you can search for "Device Manager" in the Windows search bar.
Locate the Audio Input and Output Devices: Within the Device Manager, navigate to the "Sound, video and game controllers" section. Click the small arrow to expand this section. You should see a list of all the audio devices connected to your Dell laptop, including your microphone (which may be listed under a variety of names depending on your model).
Identify Your Microphone: Carefully examine the list for your microphone. It might be named as "Microphone," "Internal Microphone," "Realtek Audio" or something similar, depending on the specific hardware and software installed on your Dell laptop. If an external microphone isn't working it should also appear in the device list.
Uninstall the Driver: Right-click on your microphone device. In the context menu, select "Uninstall device." A confirmation window will likely appear. Check the box that says "Attempt to remove the driver for this device." This is a vital step. Removing the driver completely will ensure a clean reinstall. Click "Uninstall."
Reinstall the Driver: Immediately after uninstalling the driver, your Dell laptop should attempt to automatically reinstall the driver. If it doesn’t, or if after a reasonable amount of time the microphone is still unresponsive, proceed to Step 6.
Scan for Hardware Changes: At the top of the Device Manager window, you'll find a toolbar. Click on the icon that depicts a monitor with a magnifying glass (it might also have the label "Scan for hardware changes"). This will prompt Windows to rescan your system for newly connected hardware and attempt to reinstall the appropriate drivers.
Restart Your Laptop: After the driver reinstall (either automatically or after the hardware scan), it is imperative to restart your Dell laptop. This ensures that the new driver is fully integrated into the operating system and allows the changes to take effect.
Test the Microphone: Once your laptop has restarted, test your microphone again. Open a voice recorder application within Windows, or participate in a test call on your favorite online conferencing platform. Speak into the microphone and verify if your voice is being recorded or transmitted.
Advanced Troubleshooting: Diving Deeper
If the driver reset doesn't solve the problem, we can explore a few more advanced troubleshooting techniques. They help to ensure the success of the fix:
1. Update the Drivers, not just Reinstall Them: Sometimes, reinstalling the same driver might not resolve the issue if the driver itself is outdated or corrupted. Instead of just reinstalling it, try updating the driver. In the Device Manager, right-click on the microphone device and select "Update driver." Choose the option to "Search automatically for drivers." Windows will search for the latest driver available online and install it. Conversely a driver update might have caused the problem. You can try "browsing my computer for drivers". This will allow you to roll back the driver to a previous version.
2. Check for Conflicts: Although rare, conflicts between different audio drivers can sometimes cause problems. If you have multiple audio devices or software installed, try disabling any that you aren’t currently using to see if it resolves the issue. Right-click each device, select "Disable device," and then test your microphone again. It's useful to also uninstall any unnecessary audio applications such as software bundles that did not come already installed with the laptop.
3. Dell's Support Tools: Dell often provides proprietary tools designed to diagnose and resolve hardware issues. These tools can be found on Dell’s support website, where you can provide your service tag (usually located on the bottom of your laptop). Dell SupportAssist, for example, incorporates diagnostic tests that can identify microphone problems and suggest solutions. Download and run any diagnostic tools provided by Dell to help you troubleshoot.
4. BIOS Updates: In some cases, an outdated BIOS (Basic Input/Output System) might be the root cause of hardware problems. Dell regularly releases BIOS updates to improve hardware compatibility and resolve issues. To update your BIOS, visit the Dell support website, enter your service tag, and locate the BIOS update section. Follow the instructions carefully, as a BIOS update can be a complex process. Be mindful about the process, as it will cause your laptop to restart.
5. Physical Inspection (If Necessary): If all else fails, it may be a hardware problem. Check the microphone port (if using an external microphone) for any physical damage or debris. If you're comfortable, you can open the laptop and inspect the internal microphone connections (though this voids your warranty and is generally only recommend for experienced users).
Verifying the Microphone's Functionality after the Fix
After implementing the "ONE Trick" or any of the advanced troubleshooting steps, it’s essential to rigorously test your microphone to confirm that it's functioning correctly. Here’s an effective testing methodology:
Use the Windows Sound Recorder: This built-in application provides a simple and direct method for testing your microphone. Search for "Sound Recorder" in the Windows search bar, launch the application, and click the record button. Speak into the microphone and then play back the recording to ascertain if your voice is clearly audible.
Test with Online Conferencing Tools: The most practical form of testing is to test your microphone in the application you intend to use it in. Join a test meeting on a popular platform. This will give you critical insight into whether the fix worked.
Adjust Microphone Settings: It is important to revisit the sound settings and adjust the microphone's input level and any noise cancellation options to find the optimal configuration for your environment. Fine-tuning these settings can significantly enhance the audio quality. Increase the microphone’s volume if it’s too low and adjust any noise reduction features to balance crystal clear audio levels.
Maintaining Microphone Functionality: Preventive Measures
Once you’ve successfully revived your Dell laptop’s microphone it's wise to implement some preventative measures to prevent future problems.
Keep Your Drivers Updated: Regularly check for and install driver updates for your audio devices. The Windows operating system often prompts you to install updates, but it's good practice to occasionally check, manually.
Run Regular System Scans: Perform regular virus scans and malware scans to protect your system from software that can affect hardware functionality.
Handle Your Laptop with Care: Avoid physical damage to your Dell laptop. Mishandling or dropping your device can dislodge internal components, including the delicate microphone assembly.
Clean Your Laptop Regularly: Dust and debris can accumulate, potentially interfering with the microphone input. Clean the laptop regularly, paying attention to the microphone area.
By following these steps, you should be able to resolve most microphone issues on your Dell laptop and enjoy crystal-clear audio for your online sessions. While this is an exhaustive guide, remember that the "ONE Trick" of uninstalling and reinstalling the audio driver is often the most effective and straightforward solution.
