how hdmi from dvr work on laptop hdmi pc screen
Title: How to setup Laptop as a Monitor
Channel: NETVN82
How to setup Laptop as a Monitor by NETVN82
DVR to Laptop HDMI: The SHOCKINGLY Easy Setup Guide!
Unlocking Your DVR's Secrets: A Surprisingly Simple HDMI Connection to Your Laptop!
Ever felt frustrated, wanting to watch those DVR recordings on a bigger screen? Indeed, it can seem complex. However, connecting your DVR to your laptop is surprisingly straightforward. Don't worry. You absolutely can do it. Preparing for this adventure is key to success. Let's begin!
Decoding the Digital Divide: HDMI and Your Devices
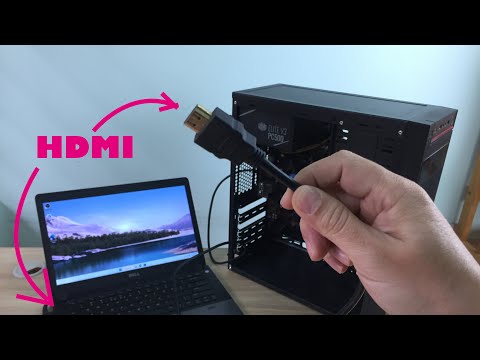
First, let’s understand the players. Your DVR likely has an HDMI output. This is fantastic. HDMI transmits both audio and video signals. Conversely, most laptops sport an HDMI input or output port. Importantly, the function of these ports differs. An HDMI output sends the signal from your laptop. However, an HDMI input receives a signal. Consequently, you will need to determine which port your laptop has. Furthermore, you might need an HDMI capture card. These cards act as a bridge. Therefore, they allow the laptop to receive the video signal from your DVR.
Essential Gear: What You'll Need to Get Started
Acquiring the right tools is imperative. You will need a few key items. Firstly, ensure you have a working HDMI cable. Secondly, you’ll need a laptop with an HDMI port. Thirdly, an HDMI capture card could be necessary. Lastly, consider a USB-C adapter if your laptop uses that port. Check your laptop's specifications carefully. This will avoid any surprises.
Step-by-Step: The HDMI-DVR-to-Laptop Connection
Now, onto the exciting part! Here’s the uncomplicated process:
- Power Down, Safety First: Before commencing, power down both your DVR and your laptop. This prevents any electrical mishaps. Moreover, it ensures a smooth connection.
- Identify the Ports: Locate the HDMI output port on your DVR. Next, identify the HDMI input port on your capture card.
- Connect the Cable: Plug one end of your HDMI cable into your DVR. Then, connect the other end to your capture card.
- Install the Capture Card: If your laptop uses USB, plug the capture card into your laptop’s USB port. Otherwise, connect the capture card utilizing a USB-C adapter.
- Software Setup: Install the capture card’s software on your laptop. This software is usually included with the capture card. Alternatively, download the most recent version from the manufacturer's website.
- Power Up: Now, power on your DVR and your laptop. The capture card software should recognize the incoming signal.
- Configure Viewing: Open the capture card software. Select the input source as "HDMI." You should see the DVR's output on your laptop screen.
Software Secrets: Optimizing Your Viewing Experience
The capture card software offers various functionalities. Consequently, you can greatly enhance your viewing experience. Adjust the video resolution. Furthermore, experiment with the audio settings. Many programs offer recording features. This is very useful if you want to save your DVR content to your laptop. Explore all available options.
Troubleshooting Time: Fixing Common Hurdles
Encountering problems is normal, but do not worry! Here are some common issues and their solutions:
- No Signal: Double-check all cable connections. Ensure the correct input source is selected in your capture software. Confirm your DVR is on and sending a signal.
- Blank Screen: Verify the HDMI cable is working correctly. Test with another device if possible. Your capture card might not be compatible with your laptop's HDMI input.
- Audio Issues: Check the audio settings. Ensure your capture software has the correct audio input selected. Verify the volume levels on your DVR and laptop.
- Recording Errors: Ensure enough storage space. Ensure the software is correctly configured for recording.
Beyond the Basics: Exploring Advanced Options
Once you have mastered the simple setup, consider some advanced techniques. Investigate higher-quality capture cards for superior results. Explore different recording formats. Experiment with video editing software. Furthermore, learn about copyright laws and fair use before saving content. This boosts your understanding and use case.
Final Thoughts: Enjoy Your DVR Content, Anywhere!
Connecting your DVR to your laptop is within reach. Accordingly, follow these instructions. Now, you can watch your recorded programs on a larger screen. You are now empowered. Go forth and enjoy your content! You've earned it.
Gaming & Work Beast: The Laptop That SLAYS!DVR to Laptop HDMI: The SHOCKINGLY Easy Setup Guide!
Hey there, tech enthusiasts and cord-cutters! Ever wanted to watch your DVR recordings on your laptop? Tired of squinting at that tiny TV screen or missing your shows when you're away from home? You're in luck! We're diving headfirst into the wonderful world of connecting your DVR to your laptop via HDMI. And trust me, it's shockingly easier than you think! We're talking a setup process that's less stressful than trying to assemble IKEA furniture and far more rewarding. Let's get started, shall we?
Why Connect Your DVR to Your Laptop? The Perks!
Before we jump into the nitty-gritty, let's talk about why this is even worth your time. Consider this your little nudge to embrace the future of flexible viewing.
- Portability Perfection: Watch your recorded shows anywhere you go! Coffee shop, train, grandma's house - Sky's the limit!
- Screen Size Serenity: Finally, ditch that cramped TV screen and enjoy your shows on a larger (and often higher-resolution) laptop display.
- Backup Bonanza: Create digital backups of your precious recordings. Think of it as insurance for your entertainment library. What if your DVR dies? This is your safety net.
- Streaming Freedom: Stream your DVR content to other devices in your home network, making it accessible on your tablet or even another TV (with the right software).
Understanding the HDMI Handshake: The Basics
Okay, let's get a little technical, but don't worry, we'll keep it simple. HDMI (High-Definition Multimedia Interface) is the magic cable we'll be using. It transmits both audio and video, so you get the full experience. The "handshake" is just the digital agreement between your DVR and laptop, ensuring they can "talk" to each other. If the handshake isn't successful, you won't see anything on your laptop. Now, don't envision stuffy handshakes here. It's more like a virtual high-five.
What You'll Need: Your Arsenal
Let's gather our supplies. It's time to prepare our arsenal to conquer viewing freedom!
- Your DVR: Obviously! The heart of the operation.
- Your Laptop: Gotta have somewhere to watch the magic happen.
- An HDMI Cable: This is your conduit, the connection, the link.
- An HDMI Capture Card (Potentially): This is where things can get a little tricky. Not all laptops accept HDMI input. This device allows your laptop to "see" the HDMI signal from your DVR. It's like a translator! We'll get into the details later.
- Software: You might need some software on your laptop to capture and display the DVR content.
Checking Your Laptop's HDMI Capabilities: The First Hurdle
Ah, the first checkpoint! Does your laptop actually accept HDMI input? This is the big question. Most laptops have an output HDMI port for connecting to external displays. But input? Not so common.
- Look for an HDMI Input Port: On your laptop, look for an HDMI port labeled with "IN" or a small HDMI symbol with an arrow pointing into the port. If you see this, congratulations! You're halfway there.
- If No Input Port: If you only see an HDMI output port (labeled "OUT" or just the HDMI symbol), you'll need an HDMI capture card. Think of it like a USB dongle that allows you to get HDMI video into your laptop.
HDMI Capture Cards: Your Knight in Shining Armor (If Needed)
If your laptop lacks an HDMI input, an HDMI capture card is your best friend.
- Types of Capture Cards: There are external and internal cards. External cards connect via USB, making them easy to install. Internal cards slot directly into your laptop's motherboard (if your laptop is desktop-style).
- Research is Key: Read reviews and do some research. Different cards have different features and compatibility.
- Compatibility Check: Ensure the capture card is compatible with your laptop's operating system (Windows, macOS, etc.).
Connecting Your DVR to the Capture Card (If Applicable)
If you're using a capture card, connect your DVR to the card's HDMI input using an HDMI cable. This is pretty straightforward.
- Plug it in: Simply plug one end of the HDMI cable into your DVR's HDMI output port and the other end into the HDMI input port on your capture card.
- Power Up: Make sure both your DVR and capture card (if external) are powered on.
Connecting Your Capture Card to Your Laptop (If Applicable)
Now it's time to connect the capture card to your laptop.
- USB Connection: For external capture cards, connect the USB cable from the card to your laptop's USB port.
- Install Drivers: Your capture card might require driver installation. Follow the card's instructions. It's often a simple process of downloading and installing software.
Software Setup: The Digital Canvas
Whether you're using an HDMI input port or a capture card, you'll need software on your laptop to display the DVR's video.
- Capture Software: Popular choices include OBS Studio (Open Broadcaster Software), which is free and versatile. Others include EasyCap, and more.
- Installation and Configuration: Install your chosen software. Follow the software's instructions to select your HDMI input (or capture card) as the video source.
- Experiment: Don’t be afraid to tweak settings like resolution and audio input to get the best picture and sound.
Connecting Directly (If Your Laptop Has an HDMI Input)
If your laptop has an HDMI input, this step is beautifully simple.
- Cable Connection: Plug one end of the HDMI cable into your DVR's HDMI output port and the other end into your laptop's HDMI input port.
- Software is Still Key: You'll still need capture software (like OBS Studio) to view the video. Select your HDMI input as the video source.
Troubleshooting: When Things Go a Little… Wonky
Sometimes, things don't go as planned. Don't panic! Here's a troubleshooting guide.
- No Signal: Check all connections (HDMI cables, power cords). Ensure both devices are turned on. Double-check your software settings and select the correct HDMI input.
- Black Screen: Ensure the DVR is outputting a signal (e.g., playing a recorded show). Sometimes, a reboot fixes the issue! Seriously, try turning it off and back on, both the laptop and the DVR.
- No Sound: Check the audio settings in your capture software and on your laptop. Make sure the correct audio input is selected.
- Picture is Distorted/Low Quality: Experiment with the resolution settings in your capture software. Ensure your HDMI cable is of good quality.
- Copyright Protection Issues: Some DVRs might employ copyright protection measures that prevent recording or mirroring. This is a cat and mouse game that is not always solvable.
Recording Your DVR Content (Optional, But Cool!)
Want to record your shows to your laptop's hard drive? This is a bonus!
- Capture Software Capabilities: Many capture programs (like OBS Studio) allow you to record directly to your hard drive.
- File Format: Choose your recording format. MP4 is a good general-purpose choice.
- Storage Space: Make sure you have enough storage space on your laptop's hard drive. HD video files can be large!
Alternative Methods (If HDMI Doesn't Work)
If HDMI refuses to cooperate, there are alternative methods.
- Component Cables: Some older DVRs use component cables (red, green, and blue video cables, plus red and white audio cables). You'll need a capture card that accepts component inputs. This is a step down in quality.
- RCA Cables: Even Older DVRs might only have RCA cables (red, yellow, white). You’ll need a capture card that accepts RCA inputs. Again, quality is not fantastic.
Legal Considerations: The Fine Print
A quick note on legality. You are generally allowed to record your own content for personal use. However, be aware of copyright restrictions when sharing or distributing your recordings. Always be sure to act within the law.
Final Touches: Optimizing Your Viewing Experience
Let's put a cherry on top of the cake!
- Screen Calibration: Adjust your laptop's display settings for the best picture quality.
- Audio Settings: Fine-tune your audio output for optimal sound.
- Comfort: Kick back, relax, and enjoy your shows!
Conclusion: Embrace the Freedom!
Congratulations! You've successfully navigated the world of connecting your DVR to your laptop via HDMI (or a capture card). You are now free to enjoy your recorded content on your terms, anytime, anywhere. It's like giving your entertainment library a massive upgrade. It's a tech win! Enjoy your newfound viewing freedom and don't be afraid to experiment. The world of possibilities is at your fingertips!
#
Laptop Mousepad DEAD? FIX This NOW!how to watch dvr on laptop without monitor Laptop Screen as LCD monitor HDMI VIDEO CAPTURE

By IMTIAZ ENTERPRISES CCTV & ELECTRIC SERVICES how to watch dvr on laptop without monitor Laptop Screen as LCD monitor HDMI VIDEO CAPTURE by IMTIAZ ENTERPRISES CCTV & ELECTRIC SERVICES
MONITOR LAPTOP JADI DISPLAY LAYAR CCTV ATAU DVR I HDMI VIDEO CAPTURE

By RISMAKOM CCTV ONLINE MONITOR LAPTOP JADI DISPLAY LAYAR CCTV ATAU DVR I HDMI VIDEO CAPTURE by RISMAKOM CCTV ONLINE
How to Connect HDMI to VGA Monitor HDMI to VGA converter Reuse your old VGA moniter under Rs 200

By idle Tech VIBES How to Connect HDMI to VGA Monitor HDMI to VGA converter Reuse your old VGA moniter under Rs 200 by idle Tech VIBES

Title: How to Watch Dvr On Mobile with HDMI without Monitor Video Capture HDMI to USB Skill Mumbai
Channel: SKILL MUMBAI
How to Watch Dvr On Mobile with HDMI without Monitor Video Capture HDMI to USB Skill Mumbai by SKILL MUMBAI
Laptop Camera Nightmare! Solved in 60 Seconds (or Less!)
DVR to Laptop HDMI: Unlock Your Content with This Seamless Guide
The digital video recorder (DVR) has become a cornerstone of modern entertainment, allowing us to record and replay our favorite shows at our convenience. However, transferring those recordings to a laptop—allowing for portable viewing, editing, or simply archiving—can feel like navigating a technological labyrinth. Fear not! This guide provides a straightforward, user-friendly approach, ensuring you can seamlessly connect your DVR to your laptop via HDMI and experience your content like never before.
Understanding the HDMI Connection: The Bridge to Your Content
HDMI (High-Definition Multimedia Interface) stands as the gold standard for transmitting high-quality audio and video signals. It's the preferred connection method for modern DVRs and laptops, offering a crisp, clear picture and immersive sound. However, simply plugging in an HDMI cable isn't always enough. We must understand the nuances of this connection to achieve optimal results. The key lies in the signal direction, the necessary hardware, and the software required to capture and display the signal effectively.
Essential Hardware: Assembling Your Arsenal
Before you begin, gather the following essential components:
HDMI Cable: A high-quality HDMI cable is crucial for reliable signal transmission. Opt for a cable certified for the latest HDMI specifications to ensure compatibility with your devices. The length of the cable will depend on the physical distance between your DVR and laptop.
Laptop with HDMI Input (or Capture Card): This is the crux of the operation. Modern laptops frequently include HDMI output ports (for connecting to an external display), but it's less common to find HDMI input ports. If your laptop lacks an HDMI input, you'll need a solution. This is where a capture card comes in. A capture card, either internal (installed within your laptop, if possible) or external (connecting via USB), acts as the intermediary, converting the HDMI signal into a format your laptop can recognize and record.
Power Adapters: Ensure both your DVR and laptop are adequately powered. Have the appropriate power supplies readily accessible.
Deciphering Your DVR's Output: Knowing Your Device
Familiarize yourself with your DVR’s output options. Locate the HDMI port on your DVR. If you have an older model, consider the possibility of other output options, such as component cables, which would necessitate a different approach (and possibly a different guide). Most modern DVRs output video in one of several resolutions, including 720p, 1080i, and 1080p. Your capture card or laptop’s input capabilities will determine the maximum resolution you can record.
HDMI Input on Your Laptop: The Ideal Scenario
If you're fortunate enough to possess a laptop with an HDMI input port, the connection is relatively straightforward:
- Power Down: Turn off both your DVR and your laptop.
- Connect the Cable: Plug one end of the HDMI cable into the HDMI output port on your DVR and the other end into the HDMI input port on your laptop.
- Power On: Turn on your DVR and then your laptop.
- Configure Display Settings: Access your laptop's display settings. You may need to select the HDMI input as your display source. This is often accessible via the function keys (e.g., Fn + F4, F5, etc.) or through the system settings menu.
- Software Setup: Launch a video capture or recording software program. Several free and paid options are available (more on this later). Select the HDMI input as your video source.
The Capture Card Solution: When Input is Absent
If your laptop lacks an HDMI input, a capture card becomes your indispensable tool:
- Installation (External Capture Card): Connect the external capture card to your laptop via USB. Follow the manufacturer's instructions for driver installation and software setup.
- Connect the Cable: Plug the HDMI cable from your DVR's HDMI output port into the HDMI input port on your capture card.
- Software Configuration: Launch the capture card's software (provided by the manufacturer) or your preferred recording software. Select the capture card as your video and audio input source.
Software Options: Capturing and Recording Your Content
Selecting the right software is crucial for capturing and recording the HDMI signal. Several excellent options exist:
OBS Studio (Open Broadcaster Software): A free, open-source, and incredibly versatile software that offers extensive customization options for video capture and recording. It supports various capture devices, including capture cards.
Streamlabs Desktop: Streamlabs is known for its user-friendly interface, which simplifies the setup process. It offers a variety of streaming and recording features, including screen capture, webcam integration, and more.
Elgato Game Capture HD: Often used for capture cards, this software is designed specifically for capturing gameplay and other HDMI input. It offers advanced features like live commentary and editing capabilities.
PotPlayer: A free software program with a simple interface. This software can be used to capture and record your display.
When selecting your recording software, be sure to configure the following:
- Video Source: Ensure the software recognizes your HDMI input or capture card as the video source.
- Audio Source: Select the audio source (typically the HDMI) to capture sound.
- Resolution and Frame Rate: Match the resolution and frame rate of your DVR output for the best quality.
- Recording Destination: Choose a folder on your laptop to save your recorded videos.
Troubleshooting Common Challenges
Even with the best intentions, you might encounter a few hurdles. Here's how to overcome some frequent problems:
No Signal/Black Screen:
- Verify Connections: Double-check that all HDMI cables are securely connected.
- Input Selection: Confirm the correct HDMI input is selected on your laptop or capture card software.
- Resolution Compatibility: Try different resolutions on your DVR output. Your capture card or laptop may not support all formats.
- Restart Devices: Power cycle both your DVR and laptop/capture card.
Audio Issues:
- Audio Input Selection: In your recording software, ensure that the correct audio input (from the HDMI connection) is selected.
- Volume Levels: Adjust the volume levels on both your DVR and in your software.
- Driver Problems: In rare cases, audio drivers may need updating.
Copyright Protection (HDCP): Some DVRs and content providers may use HDCP (High-bandwidth Digital Content Protection) to prevent unauthorized copying. This can sometimes interfere with recording. While not always the case, circumventing HDCP is often illegal, so keep in mind that the best solution to this is to contact your service provider.
Optimizing Your Recording: Refining Your Process
To achieve the best possible results, consider these optimization strategies:
- Storage Space: Video files can be large, especially at higher resolutions. Ensure your laptop has sufficient storage space for the length of your recordings.
- File Formats: Choose a recording format compatible with your video editing software or playback device. MP4 is a widely compatible choice.
- Bitrate: Adjust the bitrate settings in your recording software. Higher bitrates result in better quality but larger file sizes. Experiment to find the right balance.
- Test Recordings: Perform short test recordings to evaluate the video and audio quality before capturing lengthy content.
- Editing and Post-Production: Once recorded, consider using video editing software to trim unwanted sections, add titles, and enhance the visual appeal of your content.
Beyond Recording: Unleashing Your Media's Potential
You have successfully transferred your DVR content to your laptop. What next?
- Portable Viewing: Enjoy your recordings on the go by transferring the files to a smartphone or tablet.
- Archiving: Create a digital archive of your favorite shows and movies for future access.
- Video Editing: Unleash your creativity by editing your recordings to create trailers, highlight reels, or personal video compilations.
- Content Sharing (Respect Copyright): Share content responsibly, adhering to all copyright and licensing requirements. Remember that distributing copyrighted content without authorization can result in both legal and ethical consequences.
Final Thoughts: Your Passport to Digital Freedom
Connecting your DVR to your laptop via HDMI opens a wealth of possibilities. By following this detailed guide, you've equipped yourself with the knowledge and tools to record your content, manage your media more efficiently, and broaden your entertainment horizons. Enjoy unlocking the full potential of your DVR and laptop, and revel in the newfound freedom to watch and share your favorite content, anytime, anywhere.
