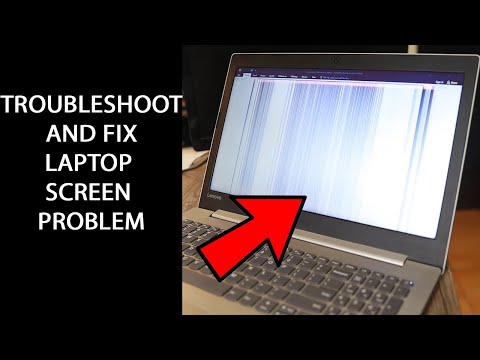
screen not working on laptop

Title: All Laptop Screen Black Problem Fix 100 Laptop Screen Blank Problem
Channel: Tuto2Info Videos
All Laptop Screen Black Problem Fix 100 Laptop Screen Blank Problem by Tuto2Info Videos
screen not working on laptop, screen not working on laptop hp, screen not working on laptop lenovo, screen not showing on laptop, screen stopped working on laptop, monitor not working on laptop, screen not turning on on laptop, touch screen not working on laptop, print screen not working on laptop, screen not working on dell laptop
Laptop Screen Dead? FIX IT NOW! (Easy Steps)
Laptop Screen Blackout? Don't Panic! Resurrect Your Display
Have you experienced the dreaded black screen of death on your laptop? It's frustrating, isn't it? Your heart sinks, and you picture all your lost files. But don't despair! A dead laptop screen doesn't automatically mean the end. Therefore, before you rush out to buy a new machine, hold on. We'll explore some simple fixes. These steps could breathe life back into your beloved device.
Step 1: The Power Check - Is It Really Dead?
First things first: rule out the obvious. Is your laptop truly on? Check the power button. Does it light up? Listen for fan noise. Consequently, a seemingly dead screen doesn’t always equate to a broken screen. Perhaps your laptop is functioning just fine. Try connecting an external monitor. Doing so can help you determine the problem's source. If the external display shows your desktop, then the issue lies with your laptop's internal screen.
Step 2: The Restart Ritual - The Classic Cure
Sometimes, a simple reboot works wonders. So, force a shutdown. Press and hold your laptop's power button until it turns off. Wait thirty seconds. Now, power it back on. This action often clears minor software glitches. As a result, your screen might magically reappear. Moreover, it's a simple step many overlook. It's often the easiest solution.
Step 3: The Brightness Blues - Turning Up the Lights
Is your screen dim, rather than completely black? Consequently, you might have accidentally adjusted the brightness. Check your keyboard for brightness controls. They are usually function keys (Fn + a sun icon, for instance). Alternatively, locate the brightness controls in your operating system's settings. In fact, try repeatedly increasing the brightness. You might have simply turned it down too low.
Step 4: The External Monitor Test - Pinpointing the Culprit
We did mention this earlier, didn't we? Connecting to an external monitor is critical. This step helps you isolate the problem. Connect an external monitor. If the external monitor displays your desktop, your laptop screen is the issue. On the other hand, if the external monitor also remains black, the problem is likely more extensive. Possibly, it’s a graphics card or system issue.
Step 5: The Backlight Investigation - Shining a Little Light
Laptop screens have a backlight. This light illuminates the display. If the backlight fails, you will see a black screen. However, you might still see a faint image if you shine a strong light at an angle. For example, use a flashlight. If you can barely make out the desktop, then the backlight is likely the culprit. Thankfully, replacing a backlight is often possible.
Step 6: The Cable Connection Chaos - Checking Internal Wires
The internal ribbon cable connects the screen to the motherboard. This cable can become loose over time. Therefore, carefully open your laptop (if you are comfortable doing so). Disconnect and reconnect this cable. Make sure it is firmly in place. This is a more advanced fix. So, consult a repair guide or professional if needed.
Step 7: The Driver Dilemma - Updating Your Graphics
Outdated or corrupted graphics drivers cause screen issues. So, boot your laptop into safe mode. You can then update your graphics drivers. Safe mode loads a minimal operating system. It can help you troubleshoot display problems. Once safe mode is activated, go to Device Manager (search for it in the Windows search bar). Expand "Display adapters" and right-click your graphics card. Select "Update driver." Follow the prompts.
Step 8: The Hardware Hurdle - When It’s Beyond Repair
Finally, if none of these steps work, you might have a hardware failure. This is where the problem gets tricky. The screen itself or the graphics card could be damaged. In that case, you have two options: repair or replacement. Research local computer repair shops. Get a quote for a screen replacement. Alternatively, weigh the cost against buying a new laptop.
Step 9: Prevention is Key - Protecting Your Investment
You can prevent screen issues. Take precautions. Avoid dropping or damaging your laptop. Keep it away from moisture. Also, install a screen protector. This helps protect the screen from scratches. Regularly back up your data. Consequently, you won't lose important files. Keep your laptop's drivers up-to-date. Consequently, you minimize the risk of software conflicts.
Step 10: Seek Professional Help! - When in Doubt, Call the Experts
Sometimes, the problem is beyond DIY repair. Don't hesitate to seek professional help. A qualified technician can diagnose the issue. They possess the tools and skills required for repairs. Repairs from professionals can give your laptop a completely new life. In conclusion, fixing a dead laptop screen can be challenging. However, with these steps, you can hopefully resurrect your display. Good luck, and happy computing!
iPhone Headset Laptop Disaster? FIX IT NOW!Laptop Screen Dead? FIX IT NOW! (Easy Steps)
Hey there, tech warriors and laptop lifesavers! Ever stared blankly at your laptop screen, only to be met with an equally blank, black void? That sinking feeling when you realize your window to the digital world has… well, died? Fear not! We've all been there. It’s like your trusty sidekick went offline without warning. But before you start panicking and envisioning a world without Netflix, let’s take a deep breath and dive into the wonderful world of fixing a dead laptop screen. We’re going to unravel the mystery, troubleshoot the issues, and hopefully, breathe life back into your beloved machine. Think of this as your personal tech rescue team.
1. The Dreaded Black Screen: What’s REALLY Going On?
First things first, let’s understand what’s happening. A black screen on your laptop could be a simple software glitch or a hardware malfunction. It's like your car, sometimes the engine won't start because of a dead battery, and sometimes it's a blown engine. Is it a total blackout, or do you see faint images if you shine a flashlight on the screen? This will give us vital clues. This initial diagnosis is crucial—it's the foundation upon which we build our repair strategy.
2. Quick & Dirty: The Instant Reboot Ritual
Before we get into the nitty-gritty, let’s try the equivalent of giving your laptop a good shake. The age-old, universally-loved reboot.
- Unplug and Wait: Unplug your laptop from the power source. Let it sit for a minute. Give it a moment to think.
- The Battery Drain: If possible (and if you can access the battery), remove the battery for a few minutes. This forces a complete power cycle.
- Power Up Again: Plug it back in or insert the battery and power on. See if the screen gods have been appeased!
Think of this as a digital reset, like hitting the "undo" button on a bad day. Sometimes, that’s all it takes.
3. The External Monitor Test: Is It Really the Screen?
This is a crucial detective step. Connect your laptop to an external monitor or TV.
- HDMI or VGA to the Rescue: Use an HDMI or VGA cable to physically connect your laptop to the external display.
- Function Key Magic: Look for a key, usually labeled with a monitor icon (often the F4, F5, F6, or F8 key), and press it. You might need to hold down the "Fn" (Function) key at the same time. This cycles through display options (laptop only, external only, or both).
- Success! If your display appears on the external monitor, it’s highly likely your laptop screen itself is the culprit. If it doesn't appear, the problem may be more extensive (graphics card/ motherboard).
This test helps us isolate the issue. Is it the screen or something deeper? Like, are you having a problem, or is it your keyboard?
4. Brightness Blues: The Dim Screen Dilemma
Sometimes, the screen isn't dead; it's just dimmed into oblivion.
- The Brightness Keys: Locate the brightness keys on your keyboard (they usually have sun icons). Try increasing the brightness.
- Function Key Combinations: These keys are often paired with the "Fn" key. Experiment.
- Check System Settings: Access your display settings through the Windows or Mac interface. Make sure brightness isn’t set too low.
A screen that's too dark is like a secret, it hides what it can.
5. The Driver Debacle: Software Sabotage?
Faulty display drivers can cause black screens.
- Safe Mode Access: Restart your laptop and repeatedly press the F8 key (Windows) or hold Shift while restarting (Mac) to enter Safe Mode.
- Driver Rollback: In Safe Mode, go to Device Manager (search for it). Under "Display Adapters," right-click on your graphics card and try "Roll Back Driver."
- Update Drivers: If rolling back doesn't work, or isn't an option, try updating your drivers. Go to the manufacturer's website (Nvidia, AMD, Intel) and download the latest drivers for your model.
These steps are like giving your computer a vital checkup.
6. The Screen’s Connection: A Cable Catastrophe?
Sometimes, the connection between the screen and the motherboard is loose.
- DIY (At Your Own Risk): If you’re confident and comfortable, you could open your laptop (after consulting online guides for your specific model). Disconnect and reconnect the screen cable to the motherboard. Be incredibly careful.
- Professional Help: If you're not technologically inclined, it may be best to let a professional handle this step.
Like a loose wire in a socket, this connection helps your computer functions properly.
7. The Inverter’s Role: The Backlight Blues
Many laptop screens use an inverter to power the backlight.
- Inverter Failure: A failed inverter can cause a black screen.
- Replacement: Replacing an inverter is usually a job for a tech professional, but the part is often relatively inexpensive.
The inverter is like the engine of a car, when it breaks, you can't move.
8. The LCD Panel: The Screen’s Heartbeat
The LCD panel itself can fail.
- Complete Replacement: A damaged or faulty LCD panel is the screen equivalent of a heart attack – usually requiring complete replacement.
- Professional Repair: This is almost always a job for a professional.
Consider this the final frontier.
9. The Graphics Card/Motherboard: The Core Problem?
Sadly, the problem may lie deeper than the screen.
- Graphics Card Issues: A failing graphics card can lead to a black screen.
- Motherboard Woes: A motherboard problem (like a power issue) can also cause this.
- Professional Diagnosis: These are complex and costly repairs, often requiring professional diagnostics.
Like the brain of a computer, the graphics card helps the function that makes it work.
10. Data Rescue: Saving Your Digital Life
Before delving into more complex repairs, think about your data. If you suspect a hardware issue, prioritize data backup.
- External Hard Drive: Use an external USB hard drive to back up your important files.
- Cloud Storage: Utilize cloud services like Google Drive or Dropbox.
- Remove the Hard Drive (If Necessary): In extreme cases you might need a professional to retrieve the hard drive and copy the data.
Your data is very important.
11. Laptop Screen Replacement: Weighing Your Options
If the screen is truly dead, you have a few paths.
- DIY Replacement (If You’re Brave): Some people are comfortable buying a replacement screen and swapping it out themselves. You can find guides online, but it requires a steady hand.
- Professional Repair: This is often the safest option. A qualified technician can source the correct screen and ensure a proper installation.
- The Cost Factor: Carefully weigh the cost of repair versus the cost of a new laptop.
Your final decision is what you want to do.
12. Preventing Future Black Screens: A Proactive Approach
Prevention is key!
- Gentle Handling: Treat your laptop with care. Avoid drops and impacts.
- Power Surge Protection: Use a surge protector to shield your laptop from electrical anomalies.
- Proper Ventilation: Ensure your laptop has adequate ventilation to prevent overheating.
- Regular Cleaning: Keep your laptop clean.
Be sure to maintain your laptop.
13. When to Call in the Experts: Recognizing Your Limits
There’s no shame in admitting when you need help.
- Complex Issues: If you’ve tried basic troubleshooting and are still facing a black screen, it’s time for professional help.
- Hardware Damage: If the laptop has experienced a drop, impact, or water damage, don’t try to fix it yourself.
- Lack of Confidence: If you’re uncomfortable opening your laptop or dealing with internal components, seek professional repair.
Consider it as important as a Doctor.
14. The Cost of Repair: Budgeting for Success
Repair costs vary widely.
- DIY Costs: DIY repairs involve the cost of the replacement screen.
- Professional Repair Costs: Professional repair costs vary based on the type of problem, the laptop model, and the technician's rates. Get a quote before committing to a repair.
- Replacement vs. Repair: In some cases, a new laptop might be a more cost-effective solution.
Make sure to budget carefully.
15. The Final Test: Success! (Or Not)
After any repair, test, test, test!
Full Functionality: Ensure the screen is fully functional. Check for any dead pixels.
Software Check: Test all your favorite apps and ensure everything works with all functions.
Long-Term Monitoring: Keep an eye on your laptop for any recurring issues.
Good luck.
Closing Thoughts: Light Up Your Digital World
So
2020's BEST Work Laptops: The SHOCKING Winner Will Leave You SPEECHLESS!How to Fix Laptop Turn On Black Screen Problem All Solutions in Tamil

By The Tech Rider How to Fix Laptop Turn On Black Screen Problem All Solutions in Tamil by The Tech Rider
Do this If your Computer is Freezing, Crashing or Black Screen

By OGTech Do this If your Computer is Freezing, Crashing or Black Screen by OGTech
How To Fix Any Laptop Black Screen - Computer Turns On But No Display

By PC Monkey How To Fix Any Laptop Black Screen - Computer Turns On But No Display by PC Monkey
Title: Laptop Display Screen Problem How to troubleshoot and repair it yourself
Channel: Torogi Pro
Laptop Display Screen Problem How to troubleshoot and repair it yourself by Torogi Pro
This Work Laptop Bag Will SHOCK You!
Laptop Screen Dead? FIX IT NOW! (Easy Steps)
Is your laptop screen stubbornly refusing to illuminate? The sudden plunge into digital darkness can be jarring, leaving you feeling disconnected and unproductive. Fear not! Before you resign yourself to expensive repairs or premature hardware replacement, explore these straightforward, user-friendly troubleshooting steps. Often, the solution is simpler than you think. Let’s get your screen back to vibrant life.
Initial Assessment: What's Really Going On?
Before diving into solutions, accurately diagnosing the problem is critical. A "dead" laptop screen might indicate various underlying issues, not just a faulty display panel. Consider these fundamental questions:
- Does the Laptop Power On? Observe the power indicator lights, listen for fan noise, or pay attention to hard drive activity. If the laptop seems completely unresponsive, the problem might lie elsewhere, such as a dead battery or a motherboard malfunction.
- Is the Screen Completely Blank? Or does it show faint images, lines, or flickering before going dark? These clues point towards specific problem areas.
- External Monitor Test: This is the gold standard diagnostic. Connect your laptop to an external monitor (TV, another display, etc.) using a compatible cable (HDMI, VGA, or DisplayPort). If the external monitor displays the laptop's content, the issue is almost certainly related to the laptop's internal display or its connection. If the external monitor also shows nothing, the problem is more complex and likely involves the graphics card or motherboard.
Step 1: The Power Cycle: The First Line of Defense
This simple procedure often resolves minor software glitches that can lead to a black screen.
- Shut Down Completely: Ensure your laptop is fully powered off. Do not simply close the lid or put it to sleep. Perform a complete shutdown through the operating system's shutdown menu.
- Unplug Everything: Disconnect the power adapter and remove all external devices (USB drives, printers, external hard drives, etc.).
- Remove the Battery (if possible): This step is critical for a thorough power cycle. Most laptops allow for easily removing the battery; consult your laptop's manual if you're unsure.
- Hold the Power Button: Press and hold the power button for at least 30 seconds. This drains any residual power from the components.
- Reassemble and Power On: Reinsert the battery (if removed), plug in the power adapter, and attempt to power on the laptop.
Step 2: Brightness Control: Reaching for the Light
Sometimes, a seemingly "dead" screen is simply a screen set to its minimum brightness.
- Locate the Brightness Keys: Look for function keys (labeled "F1", "F2", etc.) with a sun icon or up/down arrow symbols. These are usually located near the top of your keyboard.
- Adjust Brightness: Press the appropriate function key in combination with the "Fn" (Function) key (usually located near the lower-left corner of the keyboard). Repeatedly press the brightness-up key to increase the screen’s brightness.
- Check for Automatic Adjustment: Some laptops have ambient light sensors that automatically adjust screen brightness. Disable this feature in your operating system's settings to prevent accidental dimming.
Step 3: External Display: A Window to Reality
As mentioned earlier, connecting an external monitor is crucial for pinpointing the problem.
- Connect the External Display: Use the correct cable (HDMI, VGA, or DisplayPort) to connect the external monitor to your laptop. Make sure the cable is securely plugged into both devices.
- Power On and Detect: Power on both the laptop and the external monitor. Your laptop should ideally automatically detect the external display.
- Cycle Through Display Modes: If the external monitor doesn't instantly display anything, try pressing the "Windows Key + P" (on Windows) or using a function key (usually labeled with a monitor icon) to cycle through different display modes:
- PC Screen Only: Laptop screen only (if it's working at all).
- Duplicate: Both laptop and external monitor display the same content.
- Extend: The external monitor acts as a second screen, extending your desktop.
- Second Screen Only: The external monitor displays the content, while the laptop screen remains off.
If the external monitor works, the issue resides within your laptop's screen, its connection, or less likely, the graphics card (which would affect both displays). If the external monitor remains blank, the problem could be with the graphics card or motherboard.
Step 4: Inspecting the Backlight (If Applicable): Illuminating the Inner Workings
Many laptop screens use an LED backlight to illuminate the display. A failure of the backlight can result in a dark screen, even if the rest of the laptop is functioning normally. This is more common in older laptops using CCFL (Cold Cathode Fluorescent Lamp) backlights.
- Shine a Light: In a darkened room, shine a flashlight at an angle onto the laptop screen. If you can faintly see images, and everything else suggests the laptop is running, then the backlight is likely the culprit.
- Identify the Backlight Assembly: The backlight is usually mounted behind the LCD panel itself. On some laptops, it is integrated into the screen bezel assembly.
- Professional Assistance: Backlight repair often involves disassembling the laptop’s screen, which is a technically demanding task. This is something best left to a qualified technician if you are unsure.
Step 5: The Connection Check: Wiggle and Inspect
A loose connection between the laptop's motherboard and the LCD screen can cause display problems. This is particularly common after physical impacts or rough handling.
- Warning: This step may involve disassembling your laptop, which in some cases could void your warranty.
- Research Your Laptop: Before disassembling, research your laptop model online to find detailed instructions and diagrams.
- Disconnect the Power: Always unplug the power adapter and remove the battery before opening your laptop.
- LCD Cable Inspection: Locate the LCD cable that connects to the motherboard. Carefully unplug and replug the cable, ensuring it is firmly seated. Inspect the connector for any damage or corrosion.
- Professional Help: If you are uncomfortable with this process, or if you notice any damaged components, it's best to seek professional laptop repair services.
Step 6: Software Solutions: Reboot and Reset
Sometimes, software issues can cause display problems.
- Safe Mode Boot (Windows): Booting your laptop into Safe Mode (usually by pressing F8 or Shift+F8 repeatedly during startup) can help eliminate conflicting drivers or software that might be interfering with the display. If the screen functions in Safe Mode, it suggests a software problem.
- Driver Updates: If the screen works in Safe Mode, update or reinstall your graphics card drivers. Visit the website of your graphics card manufacturer (Nvidia, AMD, or Intel) and download the latest drivers for your laptop model.
- System Restore (Windows): If the problem started recently, try restoring your system to a previous point when the screen was working correctly. This can undo recent software installations or driver updates.
- Operating System Reinstallation (Last Resort): If all other methods fail, a clean reinstallation of the operating system might be necessary. This will erase all data on your hard drive, so back up important files beforehand. Consult your laptop’s manual or the operating system’s documentation for instructions.
Step 7: Hardware Troubleshooting: When to Call a Professional
If you've tried all the above steps and your laptop screen remains stubbornly black, it's likely a hardware problem. Do not despair.
- LCD Panel Failure: The most common hardware issue is a failed LCD panel. Replacing the screen is usually the solution.
- Graphics Card Issues: While less frequent, the graphics card (integrated or dedicated) could be faulty.
- Motherboard Problems: In some cases, a malfunctioning motherboard can cause display issues.
- Professional Repair: Consult a qualified laptop repair technician. They can diagnose the exact problem and provide solutions, including screen replacement, graphics card repair, or motherboard repair.
Preventative Measures: Guarding Against Future Problems
- Handle with Care: Avoid dropping or placing heavy objects on your laptop.
- Clean Properly: Use a soft, dry cloth to clean your screen. Avoid using liquids or harsh chemicals.
- Temperature Control: Avoid extreme temperatures. Do not leave your laptop in direct sunlight or a hot car.
- Regular Maintenance: Keep your laptop's operating system and drivers up to date.
By following these steps, you’ll significantly increase your chances of getting your laptop screen working again. Remember to be patient, methodical, and don’t be afraid to seek professional help when necessary. You are now equipped to troubleshoot and potentially fix your dead laptop screen!
