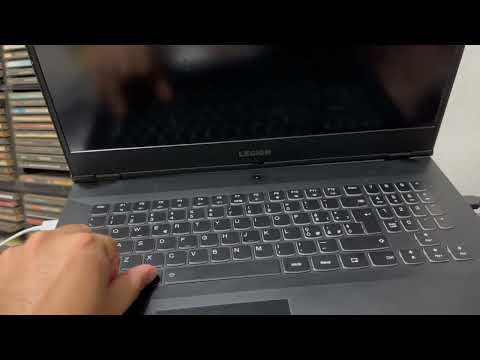
keyboard wont work on lenovo laptop

Title: How To Fix Lenovo Keyboard Not Working Windows 10
Channel: Cap Trong Nam - How To
How To Fix Lenovo Keyboard Not Working Windows 10 by Cap Trong Nam - How To
keyboard won't work on lenovo laptop, keyboard not working on lenovo laptop, keyboard not working on lenovo laptop windows 11, keyboard not working on lenovo laptop windows 10, keypad not working on lenovo laptop, keyboard not working on lenovo ideapad flex 5, keyboard not working on lenovo ideapad 330, keyboard not working on my lenovo laptop, keyboard not working on lenovo thinkpad laptop, keyboard not working on lenovo legion laptop
Lenovo Laptop Keyboard Disaster: FIX IT NOW!
Lenovo Keyboard Carnage: Rescuing Your Typing Experience
Let's face it; we've all been there. You're in the zone, fingers flying across the keyboard, lost in a creative flurry. Then, disaster strikes. Suddenly, your trusted Lenovo laptop keyboard betrays you. The keys stick, the response is sluggish, or worse, they simply refuse to cooperate. The frustration is palpable, isn't it? Don't panic, though. We're here to help you navigate the treacherous world of keyboard woes.
The Keyboard Calamity: Recognizing the Red Flags
First, let's identify the enemy. What exactly constitutes a "Lenovo laptop keyboard disaster?" It's a broad term, to be sure, but it encompasses a range of issues. Perhaps your "E" key consistently produces "EEEEE" instead of a single letter. Maybe the spacebar feels like a stubborn mule, refusing to budge. Moreover, is your keyboard entirely unresponsive? These are all classic symptoms. Beyond these obvious problems, subtler signs can also indicate a problem. In other words, you might experience intermittent key failures. Consequently, you could notice liquid damage. And consider the fact that your keyboard may be suffering from physical damage. Regardless of the manifestation, the key takeaway is this: your typing experience has suffered.
Decoding the Damage: Potential Culprits Behind the Chaos
So, what’s causing this keyboard uprising? Several factors are at play. Firstly, dust and debris are notorious keyboard saboteurs. Crumbs, pet hair, and general grime can sneak their way under the keys. They then interfere with the delicate mechanisms. Secondly, liquid spills are a keyboard’s worst nightmare. A spilled coffee, tea, or soda can corrode internal components. That can lead to permanent damage. Third, mechanical wear and tear can definitely take its toll. Over time, the keys and their underlying mechanisms can simply break down from overuse. After all, constant typing certainly contributes to this wear. Finally, software glitches and driver conflicts can also contribute to the problem. These glitches might cause unexpected behavior.
DIY Rescue Mission: Simple Solutions You Can Try
Before you resort to technical support, try some straightforward fixes. First, carefully power down your laptop and disconnect it from its power source. Next, grab a can of compressed air. Gently blow air between and under your keys. This can dislodge dust and debris. After that, use a soft, lint-free cloth dampened with isopropyl alcohol. Lightly clean the keycaps. Be extra cautious to avoid getting moisture inside the machine. Similarly, if liquid damage is suspected, immediately turn off the laptop. Then, carefully flip it over. Allow it to drain and dry thoroughly for at least 24 hours. Finally, ensure your keyboard drivers are up-to-date. You can find the option in your device manager.
When to Call in the Cavalry: Seeking Professional Help
If the DIY methods fail, it's time to consider professional assistance. If you suspect liquid damage, seek professional intervention with confidence. Continuing to use a compromised keyboard can lead to further, more extensive damage. Moreover, if the keys are physically broken or damaged beyond repair, replacement is necessary. In this case, a technician can replace the entire keyboard assembly. Similarly, if you're not comfortable disassembling your laptop, let a professional handle it. They have the tools and expertise to diagnose and fix the problem.
Preventative Measures: Protecting Your Keyboard from Future Trouble
Prevention, as they say, is better than cure. Investing in a few simple precautions can safeguard your Lenovo keyboard. First, consider using a keyboard cover. These covers shield your keyboard from dust, spills, and crumbs. Second, practice good typing hygiene. Wash your hands frequently. This reduces the amount of dirt and oil transferred to your keys. Third, avoid eating or drinking over your laptop. Even small spills can cause big problems. Fourth, learn the art of gentle key presses. Avoid hammering unnecessarily on your keyboard!. After all, there is no need to pound the keys. Finally, update your software regularly. Software updates can include driver updates.
The Typing Triumph: Reclaiming Your Productivity
A malfunctioning keyboard can be incredibly disruptive. It hinders your productivity, frustrates your workflow, and generally makes using your laptop a chore. But with a bit of detective work and the right approach, you can conquer any Lenovo keyboard disaster. So, whether you're a student, a professional, or a casual user, don't let a faulty keyboard slow you down. Employ the tips and insights provided in this guide. You'll be back to typing at lightning speed. You'll once again experience the satisfaction of a responsive, reliable keyboard. You'll restore the joy of effortlessly navigating the digital world.
Laptop Keys Dying? This SHOCKING Fix Will Save You $$$!Lenovo Laptop Keyboard Disaster: FIX IT NOW!
Hey everyone, let's be honest, we've all been there. That sinking feeling when your beloved Lenovo laptop keyboard throws a tantrum. One minute you're typing away, crafting the next great novel, the next you're staring at a screen full of gibberish or, even worse, a complete lack of response. It's a Lenovo laptop keyboard disaster alright, and believe me, we understand the frustration. We're here to help you navigate this tech tempest and get you back to tapping away like a pro. So, grab a coffee, settle in, and let’s dive into the world of fixes, troubleshooting, and ultimately, getting your keyboard back to its former glory.
1. The Keyboard Kerfuffle: An Introduction to the Lenovo Nightmare
Let's face it, a malfunctioning keyboard is like a rusty gate on a luxurious mansion. It's the first thing that spoils the whole experience. Lenovo laptops, despite their many strengths, are not immune to keyboard issues. From sticky keys to complete non-responsiveness, the problems can range from a minor inconvenience to a major productivity killer. We're talking about everything from a rogue "m" key repeating itself a thousand times to a complete blackout, leaving you staring blankly at your screen.
2. Common Culprits: Unmasking the Keyboard’s Enemies
Before we jump into solutions, let's talk about the usual suspects. Understanding the root cause of your keyboard woes is half the battle. The most common issues we see include:
- Dust and Debris: This is the number one enemy. Crumbs, hair, and general grime can get lodged under the keys, causing all sorts of problems. Think of it as tiny little roadblocks causing chaos.
- Software Glitches: Sometimes, it's not a hardware issue at all. Corrupted drivers, conflicts with other software, or even simple bugs can wreak havoc.
- Hardware Failures: Unfortunately, sometimes things break. Key switches can fail, internal connections can come loose, or the keyboard itself might have reached the end of its lifespan.
- Liquid Spill (The Ultimate Nemesis): Ah, the dreaded liquid spill. Coffee, soda, water – they all have the potential to turn your keyboard into a paperweight. This is often the most devastating for your machine.
Think of it like this: your keyboard is your laptop’s gatekeeper. And with those culprits wandering around, you're in for a world of trouble.
3. First Steps: The Basic Troubleshooting Tango
Before you start tearing things apart, let’s try some simple fixes. This is like checking the fuse before calling an electrician.
- Restart Your Laptop: Seriously, this works surprisingly often. It's the digital equivalent of "turning it off and on again."
- Check Your Keyboard Settings: Make sure your keyboard layout is set correctly in your operating system. A misconfigured keyboard is like trying to speak French with a Spanish dictionary.
- Clean Your Keyboard (Gently): Use compressed air to blow out debris, and consider a soft cloth lightly dampened with isopropyl alcohol for cleaning the keycaps. Don't pour anything directly onto the keyboard surface!
- Run a System Scan: Check for malware. Sometimes viruses can interfere with your keyboard’s functionality.
4. Driver Dilemmas: Updating or Reinstalling Drivers
Drivers are the translators between your keyboard and your operating system. When they’re corrupted or outdated, communication breaks down.
- Updating Drivers: Go to the Device Manager (search for it in the Windows search bar), find your keyboard, right-click, and select "Update driver."
- Reinstalling Drivers: If updating doesn't work, try uninstalling the keyboard driver in Device Manager and then restarting your laptop. Windows should automatically reinstall the driver.
5. The Sticky Key Situation: Tackling Tactical Tactics
Sticky keys are the bane of a typist's existence! What can you do?
- Deep Cleaning: Turn off your laptop. Use a toothpick or a small, soft brush to carefully dislodge debris from under the keycaps. Be gentle!
- Key Removal (With Caution): If deep cleaning doesn't work and you feel confident, you can try carefully removing the keycap to clean underneath. Use plastic pry tools.
- Compressed Air is Your Friend: Blast the key’s under-compartments for quick action.
6. Hardware Headaches: What to Do When You've Got An Issue
Sometimes, the problem is physical.
- External Keyboard Test: Plug in an external keyboard. If it works perfectly, the issue is definitely with your laptop's internal keyboard.
- Damage Inspection: Take a look on the board, look for visual damage.
- Professional Help: If you're not comfortable with these steps, or are unsure, it’s time to seek professional help. A qualified technician can diagnose the problem accurately and perform necessary repairs.
7. The Warranty Wrangle: Navigating Lenovo Support
If your laptop is still under warranty, this is the best-case scenario.
- Check Your Warranty Status: Visit the Lenovo website and enter your serial number to check your warranty coverage.
- Contact Lenovo Support: Explain the problem clearly and concisely. They'll guide you through the next steps.
8. Aftermarket Alternatives: Exploring Repair and Replacement
If your warranty has expired, or the damage is severe.
- Local Repair Shops: This can be a faster and often more cost-effective solution than sending your laptop off for repair.
- Keyboard Replacement: Replacing the keyboard is often a viable option and can breathe new life into your laptop. You can find replacement keyboards online. (YouTube is your best friend here!)
9. The Liquid Spill Legacy: Damage Assessment
You spilled liquid? Let's assess the damage.
- Immediate Action: Turn off your laptop immediately and unplug it.
- Dry It Out: Don't turn it on until it is thoroughly dry.
- Professional Intervention Liquid damage often requires professional cleaning and assessment.
10. Preventing Future Keyboard Catastrophes
Prevention is always better than cure.
- Protective Covers: Invest in a keyboard cover.
- Eat and Drink Responsibly: Avoid eating or drinking near your laptop.
- Regular Cleaning: Preventative cleaning, regular use of compressed air.
11. The Keyboard's Best Friend: Keeping it Clean
Now, let’s talk about key cleanliness.
- Compressed Air: This is your daily weapon.
- Microfiber Cloth: Gently wipe down keycaps.
- Professional Cleaners: Using specialized cleaners can reduce the work needed.
12. Software Solutions: Tweaking Your Settings
Even the software might cause issues.
- Test the Accessibility:
- Driver Updates: Regular driver updates.
- System Restore.
13. The Power of a Good Keyboard Cover.
Keyboard covers are the unsung heroes of laptop protection. They act as a barrier against dirt, spills, and general wear and tear.
- Protection is Key:
- Types of Covers:
- Maintenance:
- Comfortability:
14. Step-by-Step Keyboard Replacement: (If You're Brave!)
This is for you, DIY enthusiasts.
- Research and Prep:
- The Dismantling Process:
- The Installation:
- The Finale:
15. From Frustration to Functionality: Reclaiming Your Keyboard!
We've covered a lot of ground. We know the Lenovo laptop keyboard disaster can be incredibly frustrating, disrupting your workflow and causing unnecessary stress. But, armed with the knowledge and strategies we've discussed, you're now well-equipped to tackle the problem head-on. Remember to be patient, methodical, and don't be afraid to seek professional help if needed. With a little bit of effort, you can reclaim your keyboard and get back to doing what you do best!
Closing Thoughts:
So there you have it! We hope this guide empowers you to conquer your Lenovo laptop keyboard woes. Remember, you’re not alone in this battle, and with the right approach, you can get your keyboard back in tip-top shape.
FAQs:
1. My keyboard is completely unresponsive. What should I do first?
Restart your laptop. If the problem persists, try an external keyboard to determine if the issue is hardware or software related.
2. My keys are sticking. How can I fix this?
Start with a thorough cleaning using compressed air. If that doesn't work, carefully remove the keycap and clean underneath with a soft brush or toothpick.
3. Is it safe to use a liquid cleaner on my keyboard?
Use a cloth that is lightly dampened with isopropyl alcohol. Never pour liquid directly onto the keyboard.
4. My laptop is under warranty. What should I do?
Contact Lenovo support immediately. They will guide you through the warranty process and determine the necessary steps for repair or replacement.
5. I spilled liquid on my keyboard. Is my laptop doomed?
Not necessarily. Act quickly. Turn off your laptop immediately, unplug it, and allow it to dry thoroughly. Then, consult a professional technician.
Principal Keywords: Lenovo Keyboard Repair Fix Disaster.
TV Audio Dead? Laptop to TV Sound Fix (Solved!)Lenovo Keyboard Not Working - 6 Fix

By Tech Bachhal Lenovo Keyboard Not Working - 6 Fix by Tech Bachhal
Fix Lenovo Keyboard NOT Working in Windows 1011 2024

By Tech Reda Fix Lenovo Keyboard NOT Working in Windows 1011 2024 by Tech Reda
Lenovo laptop keyboard stop work, fix solution tested yoga y540 15 17
By Henrique Lima Lenovo laptop keyboard stop work, fix solution tested yoga y540 15 17 by Henrique Lima

Title: FIX Lenovo Keyboard Not Working Windows 10 Lenovo IdeaPad 3 14IML05
Channel: Cap Trong Nam - How To
FIX Lenovo Keyboard Not Working Windows 10 Lenovo IdeaPad 3 14IML05 by Cap Trong Nam - How To
Wifi Not Found
Lenovo Laptop Keyboard Disaster: A Comprehensive Guide to Resolution
The modern world hinges on the seamless functionality of its digital tools. Among these, the laptop reigns supreme, serving as our primary portal to information, communication, and creativity. When the keyboard – the very interface through which we interact with this digital world – malfunctions, the experience descends into frustration and, at worst, crippling disruption. This guide offers detailed solutions to common Lenovo laptop keyboard problems, equipping you with the knowledge and tools to reclaim your productivity.
Identifying the Keyboard Crisis: Symptoms and Diagnosis
Before plunging into solutions, it is crucial to accurately diagnose the specific keyboard ailment plaguing your Lenovo laptop. Misdiagnosis can lead to wasted time and potentially exacerbate the issue. Let’s dissect the common symptoms and their potential underlying causes:
Non-Responsive Keys: This is arguably the most common keyboard complaint. A key, or several keys, simply refuses to register your input. Possible causes include: debris lodged beneath the keycaps, software conflicts, driver issues, a faulty keyboard connection (if applicable), or, in the worst-case scenario, hardware failure.
Sticky Keys: Keys that stick, repeat characters, or fail to return to their original position after being pressed are indicative of physical obstruction. Crumbs, liquid spills (a keyboard's sworn enemy), or even a manufacturing defect could be to blame.
Incorrect Character Output: The "Q" key types "a," the "Y" key types "z" – this is a frustrating but often resolvable problem. This behavior often stems from incorrect language settings, accidental key combinations (such as the Num Lock), or potentially, a corrupted driver.
Intermittent Functionality: A keyboard that works sporadically, sometimes registering input and other times not, is often a sign of a loose connection, a driver problem, or hardware degradation. This unpredictable behavior requires careful investigation.
Keyboard Backlight Failure (If Applicable): For laptops with backlit keyboards, the inability of the lighting to function, or the partial illumination of keys, can signal either a software issue, a driver problem, or a hardware fault within the backlight itself.
Software Solutions: Taming the Digital Demons
Before dismantling your laptop, explore the realm of software solutions. These are often the easiest and most efficient fixes.
Restart Your Lenovo Laptop: This seemingly simple step resolves a surprising number of issues. A restart clears temporary files, reloads drivers, and refreshes the operating system, often eliminating minor software glitches that can cause keyboard problems.
Run the Keyboard Troubleshooter: Windows (and sometimes the BIOS) includes built-in troubleshooting tools. Navigate to Settings > Update & Security > Troubleshoot, and then select the Keyboard Troubleshooter. This tool automatically detects and attempts to fix common keyboard issues. Let the tool do its work.
Update or Reinstall Keyboard Drivers: Outdated or corrupted drivers are frequent culprits. Access Device Manager (search for it in the Windows search bar), expand the "Keyboards" section, right-click on your Lenovo laptop keyboard, and select "Update driver." Choose "Search automatically for drivers." If updating fails, try uninstalling the driver and restarting your laptop; Windows will usually reinstall the driver automatically. Alternatively, visit the Lenovo support website, download the correct keyboard drivers for your specific model, and install them manually.
Check Language and Input Settings: Ensure your keyboard layout is set to the correct language and that the correct input method is selected. Go to Settings > Time & Language > Language. Verify that your preferred language is listed and that the keyboard layout matches your physical keyboard. If necessary, add your language and select the correct keyboard layout. Incorrect language settings can cause characters to appear incorrectly.
Disable Filter Keys, Sticky Keys, and Toggle Keys: These accessibility features, designed to assist users with motor skill challenges, can sometimes interfere with keyboard functionality. Go to Settings > Ease of Access > Keyboard and ensure that "Filter Keys," "Sticky Keys," and "Toggle Keys" are all disabled.
System Restore (As a Last Resort): If the keyboard problem began recently, consider performing a system restore. This rolls back your system to a previous point in time when the keyboard was functioning correctly. Be aware that this action will remove any software installed after the restore point.
Hardware Remedies: Diving into the Physical Realm
If software solutions fail, it's time to address the physical aspects of your Lenovo keyboard. Proceed with caution and, if you are uncomfortable, consult a qualified technician.
External Keyboard Test: Before disassembling anything, connect an external USB or Bluetooth keyboard to your Lenovo laptop. If the external keyboard works flawlessly, this confirms that the problem lies within your laptop's built-in keyboard, narrowing the scope of the investigation.
Power Down and Disconnect: Safety first. Shut down your Lenovo laptop completely. Disconnect the power adapter and (if your laptop has one) the battery. This minimizes the risk of electrical damage during the repair process.
Cleaning the Keyboard (Carefully): Debris is a keyboard's arch-enemy. Use compressed air (available at most electronics stores) to carefully blow out any dust, crumbs, or other particles that might be trapped beneath the keycaps. Turn the laptop upside down and gently tap to dislodge any remaining debris. If necessary, use a keyboard cleaner or a soft brush. Avoid using excessive liquid cleaners.
Keycap Removal: If specific keys are malfunctioning, you may attempt to remove the keycaps for deeper cleaning. Use a small, flat-edged tool (a plastic spudger or even a small screwdriver wrapped in tape to prevent scratches) to gently pry up the keycap. Be extremely careful not to damage the keycap stem or the scissor mechanism beneath. Once removed, clean the keycap and the area beneath it thoroughly with compressed air or a cotton swab dipped in isopropyl alcohol. Before re-inserting the keycap, ensure the scissor mechanism is correctly aligned.
Keyboard Cable Check (If Possible): Many Lenovo laptops have a keyboard cable that connects the keyboard to the motherboard. Accessing this cable often requires removing the bottom panel of the laptop. Consult your laptop's service manual (available from Lenovo's website) for instructions. Carefully unplug and re-plug the keyboard cable, ensuring a secure connection.
Keyboard Replacement (As a Last Resort): If all else fails, the keyboard itself may be faulty. Replacing the keyboard is often the most effective, albeit potentially more expensive, solution. Again, consult your laptop's service manual for disassembly instructions. Purchase a replacement keyboard specifically designed for your Lenovo laptop model. Carefully remove the old keyboard and install the new one, paying close attention to the cable connections and screw positions.
Preventative Measures: Guarding Against Future Keyboard Troubles
Maintaining your Lenovo laptop keyboard is crucial in preventing future malfunctions.
Regular Cleaning: Make keyboard cleaning a routine task, aiming for at least once a month, or more frequently if you eat or drink near your laptop.
Avoid Liquids: Keep liquids away from your laptop. Spills are a keyboard's worst nightmare.
Gentle Typing: Avoid excessive force when typing. Gentle key presses prolong the lifespan of your keyboard.
Protective Covers: Consider using a silicone keyboard cover to protect your keyboard from dust, spills, and wear and tear. Ensure the cover fits your keyboard model.
Software Updates: Keep your operating system and keyboard drivers up to date. Software updates frequently include bug fixes and performance enhancements.
The information provided herein contains essential guidance in mitigating and resolving problems within your Lenovo laptop's keyboard. If you are not confident in your skills, we recommend you seek professional help. With careful application of these strategies, you can restore your Lenovo laptop's keyboard functionality and regain your productivity.
