how to get your camera to work on lenovo laptop

Title: Solve Lenovo Laptop Camera not working Lenovo Yoga camera not working Camera issue in window10
Channel: Tech DD Twins
Solve Lenovo Laptop Camera not working Lenovo Yoga camera not working Camera issue in window10 by Tech DD Twins
how to get your camera to work on lenovo laptop, how to get my camera to work on lenovo laptop, how do i get my camera to work on my lenovo laptop
Lenovo Laptop Camera Nightmare? FIX IT NOW!
Lenovo Laptop Camera Troubles? Don't Panic! A Speedy Fix is Possible
Hey there, tech traveler! Are you wrestling with a Lenovo laptop camera that's decided to stage a disappearing act? You aren't alone. Many users find themselves in this frustrating predicament. It is truly annoying when that webcam refuses to cooperate. Thankfully, we're diving in to help you conquer the camera chaos.
Is Your Camera Even On? The Obvious, But Necessary, Check
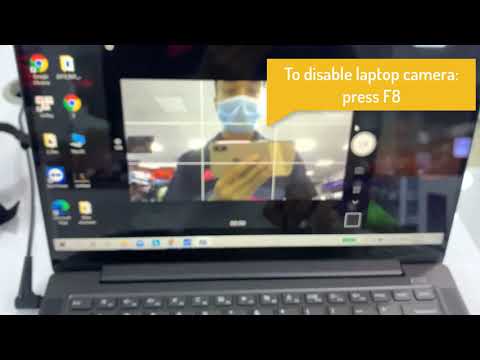
Before we embark on a tech odyssey, let's start with the essentials. Make sure your camera is actually activated. Seriously, it might sound a little silly. However, it's always an excellent starting point. Physically, there is usually a camera shutter or a tiny slider. Check this. The switch could be blocking the lens. Also, check the keyboard. Most Lenovo laptops have a function key. It usually has a camera icon alongside another key. For instance, consider Fn + F8. Press this combo to toggle the camera on or off. Once you do, observe the camera indicator light. That light should illuminate. If not, proceed to the next troubleshooting step.
Software Hiccups: Getting Your Drivers in Order
Perhaps the issue isn't the hardware. It may be a simple driver glitch. Drivers are essential because they are software components. They permit your operating system to "talk" to the hardware components like your camera. Therefore, an outdated or corrupted driver is the likely culprit. Let's tackle this hurdle head-on.
First, you should access the Device Manager. You can search for "Device Manager" in the Windows search bar to find it quickly. Then inside Device Manager, scan for "Cameras" or "Imaging devices". Expand the section. You should then see your integrated camera listed. If it has a yellow exclamation mark, or any other error sign, it demands immediate attention. Now, right-click on the camera and select "Update driver." Choose "Search automatically for drivers." Windows will meticulously seek the latest driver updates for you.
If the search yields nothing, you could then try manually updating. You can visit the Lenovo support website. Identify your specific laptop model. Then download the latest camera driver specifically for your machine. A fresh driver could breathe new life into your camera. Sometimes, the best option is to uninstall the camera driver. Afterward, restart your laptop. Windows should then reinstall the driver automatically. This can frequently resolve glitches.
Privacy Settings: Unleashing Your Camera's Potential
Windows has robust privacy settings. They protect your privacy. These settings can sometimes inadvertently block your camera. Therefore, carefully scrutinize the settings.
First, access the Windows settings. Click on "Privacy." Then, choose "Camera." You'll find a switch. Ensure "Allow apps to access your camera" is enabled. Scroll down. Check the list of apps. Make sure the apps that usually access your camera have permission. If an app is blocked, it cannot use your camera.
It’s also important to check the specific app settings. For example, inside the app, ensure camera access is enabled. Some apps have their own dedicated permissions. This can be the final puzzle piece for camera functionality.
Third-Party Interference: The Culprits in the Shadows
Sometimes, outside applications meddle with the camera's operation. Antivirus software, for instance, often interferes. These programs attempt to protect your system. However, they can, occasionally, block camera access. Temporarily disable your antivirus. Test your camera. If it suddenly works, then the antivirus is to blame. You can then adjust your antivirus settings to permit camera access.
Consider other applications. Virtual camera software, or video conferencing tools, might be fighting for control. Close down any background programs. Test the camera again. Narrowing down the root cause requires some experimentation.
Hardware Hardships: When All Else Fails
If you’ve tried everything, it's possible the issue is hardware-related. Let’s not panic. Let’s methodically explore further. You can check the camera's physical connection. Is there any visible damage? Open your laptop. Inspect the camera cable connection to the motherboard. This task can be tricky. If you’re no expert, it’s best to seek professional help.
Sometimes, the camera itself might be faulty. The camera's internal components may have failed. In that case, repair is sometimes possible. However, replacing the entire laptop camera assembly might be necessary. Contact Lenovo support. Give them the specifics of your laptop model. They can guide you to repair services. You could also explore authorized repair shops.
Final Thoughts: Camera Clarity Awaits!
Camera troubles are genuinely frustrating. However, remember to approach this with patience. By systematically working through these steps, you boost your chances. Also, be sure to document each step. That is essential when troubleshooting issues. You'll soon witness your Lenovo laptop camera working. You will then connect with the world once more. Happy troubleshooting!
Laptop to Monitor? This SHOCKING Trick Works!Lenovo Laptop Camera Nightmare? FIX IT NOW!
Hey there, fellow tech travelers! Let's be honest, we've all been there. You're in a crucial Zoom meeting, about to nail that virtual presentation, or just trying to catch up with family, and… bam… your Lenovo laptop camera decides to stage a disappearing act. The dreaded black screen, the frustrating error messages, the feeling that you're somehow connected to the matrix and they've just pulled your plug. Trust me, we feel your pain! This article is your survival guide, your digital first-aid kit, and your ultimate weapon against the Lenovo laptop camera woes. We're going to dive deep, dismantle the problem, and rebuild your webcam experience from the ground up. Prepare to reclaim your video calls!
1. The Camera Conundrum: Why Is My Lenovo Camera Failing?
First things first, let's get to the bottom of this digital drama. Why is your Lenovo camera acting like a prima donna? The reasons are as varied as the faces you see on your screen. Here are a few common troublemakers:
- Driver Disasters: Outdated, corrupted, or missing drivers are the most frequent culprits. It's like having a broken wire connecting your camera to your laptop's brain.
- Software Sabotage: Applications using your camera can sometimes lock it down. Think of it as a competition for the camera's attention.
- Hardware Headaches: Unfortunately, sometimes it's physical. A loose connection, a faulty camera module, or even physical damage can be the root cause.
- Privacy Pitfalls: Maybe your camera is simply… disabled! Lenovo laptops often have a physical privacy shutter or software settings that can intentionally block the camera.
- Operating System Omissions: Sometimes, your operating system (Windows, primarily) isn’t playing nicely with your camera. Updates, conflicts, you name it.
Think of it like this: Your camera is a tiny stage, your operating system the theater, and the drivers are the backstage crew. Everything needs to be in sync for the show to go on.
2. Basic Troubleshooting Steps: Before You Panic!
Before you start imagining complex repairs, let's run through some quick and easy fixes. These are the digital equivalent of checking if your car is plugged in before calling the mechanic.
- Restart Your Laptop: The classic "turn it off and on again" works surprisingly often. It clears out temporary glitches and restarts processes.
- Check the Physical Privacy Shutter: Many Lenovo laptops have a physical slider or switch that covers the camera lens. Triple-check it's open!
- Close Other Applications: If you have multiple apps that might be using the camera (Zoom, Skype, etc.), close them and see if the camera works in one app at a time.
- Update Your Windows: Sometimes, the solution is as simple as installing the latest Windows updates. Just go to Settings > Update & Security > Windows Update and click "Check for updates."
We've all been there, right? That moment of sheer panic when technology fails? It’s like the computer is mocking us. Thankfully, we can often fix it ourselves!
3. Driver Detective: Diagnosing Driver Issues
Drivers are the language your laptop uses to talk to its hardware. When they go rogue, your camera goes silent. Here’s how to investigate:
- Device Manager is Your Friend: Press the Windows key, type "Device Manager," and hit Enter.
- Find Your Camera: Look for "Cameras," "Imaging devices," or something similar. Click the arrow to expand the section. Your camera should be listed there (it might just be labeled "Integrated Webcam" or similar).
- Check for Problems:
- Yellow Exclamation Mark: This means there's a driver issue.
- Grayed-out Camera: The camera might be disabled.
- Driver Solutions:
- Update Driver: Right-click on your camera and choose "Update driver." Select "Search automatically for drivers."
- Roll Back Driver: If a recent update caused the problem, right-click and select "Properties." Go to the "Driver" tab and "Roll Back Driver" if available.
- Uninstall and Reinstall: Right-click and choose "Uninstall device." Restart your laptop, and Windows should try to reinstall the driver automatically.
Remember, think of drivers as the interpreters translating the operating system’s instructions to the camera. Without the right translation, pictures and videos don’t happen.
4. The Great Privacy Debate: Camera Permissions and Settings
Let’s be honest, privacy matters. But sometimes, our overly cautious settings can block our own camera!
- App Permissions: Go to Settings > Privacy > Camera. Make sure the toggle switch is "On" for "Let apps access your camera." Individually check that the apps you want to use (Zoom, Teams, etc.) have permission to access the camera.
- Windows Security: In the same Privacy settings, under "Camera access," ensure that "Camera access for this device" is "On."
It's like giving the programs permission to access your camera, like handing a key to your house to your best friend.
5. Software Showdown: App Conflicts and Compatibility
Is another app hogging the spotlight? Sometimes, other programs vying for your camera's attention can cause issues:
- Close Unnecessary Apps: Shut down any other apps that might be using your camera (video editors, other conferencing tools).
- Check System Tray: Look for any camera-related background processes that might be running.
- Application Updates: Ensure the apps you use are up to date. Updates often include bug fixes and compatibility improvements.
It's like a movie premiere, where several stars are vying for screen time!
6. Lenovo Vantage: A Helping Hand (Maybe!)
Lenovo's own software, Lenovo Vantage, can sometimes assist. This app offers driver updates and hardware diagnostics, so give it a try:
- Open Lenovo Vantage: Find it in your programs or search for it in the Start menu.
- Check for Updates: Look for "Hardware Scan" or "System Update" and follow the prompts to update your drivers.
- Run Diagnostics: Vantage might have camera-specific diagnostics that can identify issues.
Think of it as your Lenovo laptop's personal assistant, constantly keeping things in check.
7. Anti-Virus Alert: Could Your Security Be Blocking You?
Your antivirus software is designed to protect you, but sometimes, it can be a little too protective.
- Check Antivirus Settings: Review your antivirus software's settings to see if it's blocking camera access. You might need to add specific apps (Zoom, etc.) to its "allowed" list.
- Temporary Disable: As a test, temporarily disable your antivirus (but be sure to re-enable it afterward!) and see if your camera starts working.
It’s like a security guard; sometimes, the security is too tight.
8. Hardware Hysteria: What If It's Broken?
If software fixes fail, it could be a hardware issue, meaning the physical camera is malfunctioning.
- Check for Physical Damage: Is the camera lens cracked or damaged?
- External Webcam (If Applicable): If you have an external webcam, try using it as a quick workaround to eliminate the problem with your internal webcam.
- Contact Lenovo Support: If all else fails, you may need to contact Lenovo support or take your laptop to a professional repair shop.
Imagine the camera as the eye of your laptop. Sometimes, the eye needs professional help.
9. Windows Troubleshooting Tool: The Hidden Detective
Windows comes with built-in troubleshooters to automatically fix many common problems.
- Run the Camera Troubleshooter: Go to Settings > System > Troubleshoot > Other troubleshooters. Find "Camera" and click "Run." Follow the prompts.
- Network Adapter Troubleshooter: Although not directly camera-related, problems with network connections can sometimes affect video calls. Run the network adapter troubleshooter as well.
It’s like a magical magnifying glass to find the hidden culprit.
10. The BIOS Battle: Resetting Your System
Sometimes, your BIOS (Basic Input/Output System) settings might be interfering.
- Access the BIOS: You’ll need to restart your laptop and press a specific key (usually Del, F2, F12, or Escape - check your Lenovo laptop's manual) to enter the BIOS.
- Restore Defaults: Look for an option to "Load Defaults" or "Reset to Factory Settings."
- Caution: Be careful when navigating the BIOS, as incorrect settings can cause problems.
Think of the BIOS as the command center of your laptop.
11. Fresh Start: Reinstalling Your Operating System
As a last resort, if nothing else works, you might consider reinstalling Windows.
- Back Up Your Data: This will erase everything on your hard drive. Back up all important files beforehand!
- Use Windows Recovery or Installation Media: You can reinstall Windows using the recovery partition on your laptop (if available) or by creating a bootable USB drive with the Windows installation files.
This is like a digital spring cleaning, starting with a clean slate.
12. The Camera Driver
DELL Laptop Speakers DEAD? Fix Realtek Audio NOW!PC Camera not working simple solution 100

By REVTHINKing PC Camera not working simple solution 100 by REVTHINKing
How to open laptop camera in Lenovo
By Cap Trong Nam - How To How to open laptop camera in Lenovo by Cap Trong Nam - How To
How To Fix Camera Not Working in Lenovo Laptop Windows 11

By The Techno Mennder How To Fix Camera Not Working in Lenovo Laptop Windows 11 by The Techno Mennder

Title: Quickly Fix Lenovo Laptop Camera Issue - Lock Icon in Grey screen Camera issue
Channel: Aakash Sharma
Quickly Fix Lenovo Laptop Camera Issue - Lock Icon in Grey screen Camera issue by Aakash Sharma
My Laptop Work
Lenovo Laptop Camera Nightmare? FIX IT NOW!
We've all been there. You're in the middle of a crucial video conference, a virtual family gathering, or maybe even a job interview, and suddenly, the dreaded black screen appears. The camera, that essential portal to the digital world, has betrayed you. If you're a Lenovo laptop owner, you might be intimately familiar with this frustration, often accompanied by the chilling question: "Why isn't my Lenovo laptop camera working?" Fear not! This guide will provide you with a detailed roadmap to troubleshoot and resolve those infuriating Lenovo laptop camera issues, transforming your video call woes into a distant memory.
Understanding the Common Culprits: Why Your Lenovo Camera Fails
Before we delve into specific solutions, let's understand the primary reasons why your Lenovo laptop camera might be malfunctioning. This preemptive knowledge can sometimes prevent the issue from recurring.
- Driver Dilemmas: Outdated, corrupted, or missing camera drivers are consistently the leading cause of Lenovo camera problems. Think of drivers as the translator between your camera hardware and your operating system. If the translation is faulty, the camera simply won't function.
- Privacy Paradox: The Camera Kill Switch: Many Lenovo laptops come equipped with a physical or software-based privacy shutter or kill switch. Accidentally engaging this feature is a frequent cause of camera failure.
- Software Shenanigans: Conflicting applications, or the application you are trying to use the camera, might be monopolizing the camera's resources, preventing its use by other programs.
- Operating System Oddities: Sometimes, the operating system itself has a glitch. Problems with the OS can sometimes interfere with device functionality.
- Hardware Hindrances: In rarer cases, the camera itself might be physically damaged. This is less common but always a possibility.
Step-by-Step Solutions: Resurrecting Your Lenovo Laptop Camera
Now, let's get down to the practicalities. We will guide you through a comprehensive troubleshooting process, covering the most common solutions.
1. The Physical Check: Is The Shutter Engaged?
Many Lenovo laptops feature a physical privacy shutter that physically blocks the camera lens. Locate the shutter and ensure it is open. This is often a small slider located above the camera lens, and if it's closed, move it to the "open" position, and the camera should function. Examine the physical camera lens for any obstructions, such as smudges or debris. Gently wipe the lens with a soft, lint-free cloth.
2. Driver Diagnostics: Updating, Reinstalling, and Troubleshooting
Driver issues are the prime suspects, so let's tackle them head-on.
Update Your Drivers:
- Right-click on the Start button and select "Device Manager".
- Expand the "Cameras" or "Imaging devices" section.
- Right-click on your integrated camera (often labeled "Integrated Webcam" or similar) and select "Update driver".
- Choose "Search automatically for drivers." Windows will attempt to find and install the latest drivers. Follow the prompts.
- Restart your laptop to ensure the driver updates are applied.
Reinstalling Drivers (If updating fails):
- Follow the steps above to reach "Device Manager".
- Right-click on your camera and select "Uninstall device".
- In the confirmation prompt, check the box to "Delete the driver software for this device". Important.
- Restart your laptop. Windows should automatically attempt to reinstall the driver. If not, you can repeat the "Update Driver" process detailed above.
Manually Download Drivers (If the automatic updates fail):
- Visit the Lenovo support website (support.lenovo.com).
- Enter your laptop's serial number or model number.
- Navigate to the "Drivers & Software" section.
- Locate and download the camera driver for your specific laptop model and operating system.
- Run the downloaded installer and follow the on-screen instructions.
- Restart your laptop.
3. Application Access Permissions: Ensuring Your Camera is Accessible
Your operating system's privacy settings might be the reason your camera is not working.
- Windows Settings:
- Go to "Settings" (accessed by pressing the Windows key + I).
- Click on "Privacy & Security".
- Select "Camera" from the left-hand menu.
- Ensure that "Camera access" is turned "On."
- Check the list below to see if the specific application you're attempting to use the camera with is enabled and has camera access. If not, toggle the switch to "On."
4. Conflicts With Other Applications: Closing Potential Interferers
Sometimes, another application is the culprit.
- Identify Potential Conflicts: Close all other applications that might be using the camera, especially video conferencing software (Zoom, Microsoft Teams, Skype, etc.) and any applications that utilize the camera for other purposes.
- Task Manager Inspection: Open Task Manager (Ctrl + Shift + Esc) to check if any applications are actively using the camera. If you see an app listed with a significant amount of camera usage, close the program.
5. Operating System Integrity: System Updates as a Solution
Operating system updates often contain essential driver updates, bug fixes, and security patches that can resolve camera issues.
- Windows Update:
- Go to "Settings" > "Windows Update".
- Click on "Check for updates".
- Install any available updates, including optional driver updates.
- Restart your laptop after the updates are installed.
6. BIOS Configuration: Examining the Starting Point
In rare cases, the camera might be disabled in the BIOS settings.
- Accessing the BIOS: Restart your laptop and repeatedly press the BIOS access key (usually F2, F12, Delete, or Esc – consult your laptop's manual or online resources for your specific model).
- Locate Camera Settings: Navigate through the BIOS menus (the exact location varies by model) until you find the "Integrated Webcam," "Camera," or a similar setting.
- Enable the Camera: Ensure the camera is "Enabled". Save the BIOS settings and exit.
- Restart your laptop.
7. Hardware Assessment: When All Else Fails
If you have exhausted all the software and configuration troubleshooting steps, it is sadly possible that a hardware issue is at play.
- Run Hardware Diagnostics: Some Lenovo laptops have built-in hardware diagnostic tools. Consult your laptop's manual or the Lenovo support website for instructions on how to run a hardware diagnostics test on the camera.
- Contact Lenovo Support: If the hardware diagnostics confirm a problem or if you suspect a hardware failure, the next step is to contact Lenovo support for assistance. They can provide further troubleshooting steps, repair options, or warranty information.
8. Troubleshooting Specific Error Messages and Codes
If your Lenovo laptop displays an error code, take note of it. This can help provide a clearer indication of the problem.
- Research Error Codes: Search online for the specific error code along with "Lenovo camera" to find targeted troubleshooting advice and solutions. Lenovo's support website or tech forums are often beneficial resources.
Preventative Measures: Keeping Your Camera Running Smoothly
Once your camera is back in action, consider these preventative steps to minimize future problems.
- Regular Driver Updates: Make it a habit to regularly check for and install driver updates, either through Windows Update or the Lenovo support website.
- Protect Your Hardware: Be careful not to damage your laptop and the camera lens. Regularly apply a soft cloth to keep dirt and dust away.
- Privacy Settings Review: Periodically review and adjust your privacy settings to ensure your camera settings are as you want them.
- Virus Protection: Ensure you running and keep your operating system up-to-date with antivirus software. Malware can sometimes interfere with your camera’s functionality.
Wrapping Up: Your Lenovo Camera, Resolved!
Navigating Lenovo laptop camera issues can be frustrating, but by following this detailed guide, you're equipped with the knowledge and tools to diagnose and resolve the majority of common problems. From simple driver updates to more in-depth troubleshooting techniques, we've covered the gamut. Remember to methodically work through each step, from the quick checks to the advanced settings, and you'll be back to enjoying seamless video calls, meetings, and online interactions in no time. If issues continue, reach out to Lenovo Support for expert assistance. Your camera woes are now behind you.
