laptop fan not working

Title: Laptop Computer PC Fan Not Spinning Not Turning Overheat Overheating Grease Lubricate Repair Fix
Channel: It's Binh Been Repaired & Everything Reviewed
Laptop Computer PC Fan Not Spinning Not Turning Overheat Overheating Grease Lubricate Repair Fix by It's Binh Been Repaired & Everything Reviewed
laptop fan not working, laptop fan not working after cleaning, laptop fan not working hp, laptop fan not working dell, laptop fan not working lenovo, laptop fan not working how to fix, laptop fan not working asus, laptop fan not working error, laptop fan not working solution, laptop fan not working and no display
Laptop Fan DEAD? 😱 This FIX Will SHOCK You!
Laptop Fan Failure: The Unexpected Savior You NEED to Know!
My friend, has your laptop’s fan coughed its last breath? Are you staring at a screen, slowly melting under the digital sun? You're in luck. You've stumbled upon a solution that could completely transform your tech troubles. It's a fix that's often overlooked. But, let's deal with this head-on. Your laptop fan, it’s crucial. It’s responsible for keeping things cool. A dead fan means a hot laptop. This can lead to slower performance. It might even bring total system failure.
Understanding the Silent Assassin: Why Fans Fail
First, let's consider the enemy. Why do laptop fans die in the first place? Several suspects are usually the culprits. Dust accumulation is number one. Over time, dust and debris become lodged in the fan blades. Consequently, they impede their rotation. This causes friction. This friction degrades the fan motor. Another common issue is wear and tear. Fans are mechanical components. They wear down with use. The bearings can fail. This is especially true with intensive use. Excessive heat can also be a factor. If your laptop runs hot consistently, this can reduce fan lifespan. Finally, poor manufacturing can lead to early failure. Therefore, always purchase from reputable brands.
The DIY Resurrection: Your Laptop’s Second Chance
Now for the thrilling rescue mission! You can often revive a dead laptop fan. This is especially true if the problem is dust. This fix won’t require a degree in engineering. It may require some patience. Before you begin, back up your data. Then, disconnect your laptop from the power source. You need to ensure your safety.
Start by locating the fan. Consult your laptop's manual. This varies by model. Usually, you'll need to remove the bottom panel. Use a small Phillips head screwdriver. Take your time. Remove the screws carefully. Once you have access, you can usually see the fan. However, sometimes, it is located under the heatsink.
The Cleaning Crusade: Banishing the Dust Devils
Next, it’s time for a cleaning crusade! Gentle cleaning is paramount. Grab a can of compressed air. Direct the air into the fan blades. Rotate the fan manually as you go. Be careful not to over-rotate it rapidly. This can damage the motor. You can also use a soft brush. A toothbrush works great for this. Carefully remove any visible dust particles. Make sure to clean both the fan and the surrounding heat sink fins. This will optimize cooling.
Lubrication Liberation: Restoring Smooth Rotation
Sometimes, cleaning isn’t enough. The fan may need lubrication. This requires a little more expertise. Most laptop fans have a small sticker. This covers the bearing access point. Peel off the sticker. You will likely see a small hole. Apply a drop or two of light machine oil. Be very careful not to over-lubricate. This can cause more harm than good. Reapply and replace the sticker.
The Reassembly Ritual: Bringing it Back to Life
Now, it's time to put everything back together. Carefully reattach the fan. Replace the bottom panel. Screw everything back together. Make sure no screws are left over.
Testing the Revival: The Moment of Truth
Plug the charger in. Power on your laptop. Listen carefully. Does the fan spin up? If so, you have succeeded! Observe your laptop's temperature. Monitor the fan’s performance. If it still struggles, further investigation is needed. Also, consider professional repair.
Beyond the Band-Aid: Preventative Measures
Preventing future fan failures is key. Here are some proactive steps. Regularly clean your laptop. Use compressed air every few months. Keep your laptop on a hard, flat surface. This allows for better airflow. Avoid using your laptop on soft surfaces. Examples include beds and blankets. Consider a cooling pad for extra protection. Also, monitor your laptop's temperature. Use software tools to track the CPU and GPU temperatures.
When to Wave the White Flag: Knowing When to Seek Help
Sometimes, a DIY solution isn't enough. If the fan is completely unresponsive, replacement may be necessary. If you're uncomfortable with disassembly, seek professional help. If you hear grinding noises from the fan, replacement is required. If the laptop keeps overheating, it’s time for a professional assessment. Do not hesitate to get help.
The Final Word: Embrace the Cool
Hopefully, this guide has been helpful. You can often bring your laptop back to life. You've learned to tackle a common tech problem. You now have the power to fight the heat. You’re now ready to face the digital world, armed with knowledge. So, embrace the cool. Keep your laptop running smoothly. You've got this.
Laptop Dead? Charge It WITHOUT the Cable! (Genius Trick!)Laptop Fan DEAD? 😱 This FIX Will SHOCK You!
Hey everyone! Ever felt that heart-stopping moment when your laptop suddenly sounds like a jet engine taking off, and then… silence? Followed by a growing warmth that hints at impending doom? Yeah, we've all been there. That, my friends, is often the telltale sign of a laptop fan gone kaput. But before you start preparing your eulogy for your trusty digital sidekick, breathe. Because, guess what? You might just be able to resurrect it from the dead (or at least, give it a fighting chance!). This isn't just about fixing a fan; it's about reclaiming your peace of mind and saving some cold, hard cash. Let’s dive in!
1. The Silent Scream: Recognizing the Symptoms of a Failing Laptop Fan
Before we jump into solutions, let’s make sure we’re diagnosing the right problem. A dead laptop fan usually makes its misery known in a few distinct ways. Think of it like a silent scream for help.
- Overheating: This is the big one. Your laptop starts feeling toasty, especially around the vents and the keyboard. It’s like it’s slowly baking itself alive.
- Sudden Shutdowns: The most dramatic symptom. Your laptop, sensing its own demise, might abruptly shut down to prevent total meltdown. Think of it as a built-in self-preservation mechanism.
- Performance Drops: Everything slows down. Games lag, videos stutter, and your once-zippy machine suddenly feels like it’s wading through molasses.
- That Awful Smell: Sometimes, a burning smell emanates from the chassis. This is never a good sign, indicating potentially serious internal damage.
- No Sound at All (Where There Should Be): The fan should be making some noise usually, at least occasionally, especially under load. A complete absence of whirring, especially when your laptop is working hard, is a red flag.
If any of these ring a bell, chances are, your fan needs some attention.
2. Why Did My Laptop Fan Give Up the Ghost? The Usual Suspects
Okay, so the fan's gone. What's the culprit? Sadly, there's no single, simple answer, but here are the most common reasons why these little whirligigs bite the dust.
- Dust Bunnies, Assembly Required: Dust is the enemy of all electronics. It clogs up the fan blades, hindering their spin and causing the motor to work harder – or stop altogether. Think of it like a clogged exhaust pipe on a car.
- Overwork and Hard Use: Pushing your laptop to its limits – running resource-intensive applications, gaming for hours – can take its toll. Your fan has to work overtime to keep things cool.
- Age and Wear and Tear: Like anything mechanical, laptop fans have a lifespan. Over time, the bearings can wear out, leading to noise and eventual failure.
- Physical Damage: A bump, a drop, or even just rough handling can damage the fan's delicate components.
- Manufacturing Defects: Sadly, sometimes a fan is just poorly made. These kinds of issues are rare but do occur.
3. Before You Panic: Basic Troubleshooting Steps You MUST Try
Before we break out the tools, let’s try some easy fixes. These are like the first line of defense, the digital equivalent of checking the fuse before calling the electrician.
- Give it a Break: Sometimes, all your laptop needs is a breather. Close down any resource-hungry programs, let your laptop cool down, and see if the fan starts working again.
- Check Your Power Settings: Make sure your power settings aren’t putting your laptop in a perpetual high-performance mode, which can cause the fan to run constantly. Switching to a "Balanced" or "Power Saver" profile can often help.
- Software Conflicts: Occasionally, a rogue application can hog processing power, overloading the system and causing the fan to work harder. Close unnecessary programs and see if that helps.
- Run a Diagnostic: Many laptops have built-in diagnostic tools that can help identify hardware problems, including fan failures. Check your manufacturer's website for instructions.
4. The Great Dust Bunny Massacre: Deep Cleaning Your Laptop
This is often the easiest and most effective fix. Dust is the number one reason for fan failure. Get ready to wage war on those pesky dust bunnies!
- Gather Your Supplies: You’ll need a can of compressed air (essential!), a small Phillips head screwdriver, and possibly a soft-bristled brush.
- Power Down and Unplug: Safety first! Turn off your laptop and disconnect the power adapter. Remove the battery (if possible).
- Open 'er Up (Carefully!): Consult your laptop's manual or search online for a teardown guide for your specific model. Locate the access panel for the fan. Sometimes, it's as simple as removing a few screws on the bottom. Other times, you may need to remove the entire bottom case.
- The Air Attack: Use the compressed air to blast away dust from the fan blades, vents, and heat sink. Hold the can upright and use short bursts of air. Don't spin the fan blades with the air; hold them in place with a toothpick or similar object if necessary.
- Brush Away the Remnants: Use the soft-bristled brush to gently loosen any remaining dust.
- Reassemble and Revive: Put everything back together, plug in your laptop, and power it up. Hopefully, the fan will be spinning properly again.
5. The Replacement Game: When a New Fan Is Your Only Option
If the cleaning didn’t do the trick, you’re left with one choice: a new fan.
- Identify Your Laptop Model: This is crucial! Look for the model number on the bottom of your laptop or in the system information. This will help you find the right replacement fan.
- Shop Around: Search online retailers like Amazon, eBay, or specialized computer parts stores.
- The Disassembly Dance (Again!): You’ll need to open up your laptop again, this time to remove the old fan. Take pictures as you go, to help with reassembly.
- Gentle Removal: Carefully disconnect any wires connected to the old fan. Unscrew the mounting screws.
- New Fan Installation: Install the new fan in the same way you removed the old one. Connect the wires and screw it into place.
- The Moment of Truth: Close your laptop and power it up. Listen for that sweet, sweet whirring sound.
6. DIY vs. Professional Help: Know Your Limits
Look, we’re all about empowering you to fix things yourself. But let’s be realistic.
- DIY Pros: This will potentially save money, provide a sense of accomplishment, and gives you in-depth knowledge of your laptop.
- DIY Cons: It can be time-consuming and, if you’re not careful, risky. You could damage your laptop or make things worse.
- Professional Help Pros: Professionals have the experience, tools, and knowledge to diagnose and fix the problem efficiently. They can often source parts quickly and offer warranties.
- Professional Help Cons: It can be expensive.
Consider your skill level, the cost of parts, and the potential risks before deciding which route to take.
7. The Heat Sink's Role: Don't Overlook Cooling Efficiency
The fan isn’t the only player in the cooling game. The heat sink is the unsung hero, dissipating heat from your CPU and GPU. Make sure it’s clean and properly installed.
8. Thermal Paste: A Secret Weapon
Thermal paste, applied between the CPU/GPU and the heat sink, is like the glue that holds everything together. It helps transfer heat. If you replace the fan or heat sink, always reapply thermal paste.
9. Preventative Measures: Keeping Your Fan Happy Long-Term
Once you've fixed the problem, you want to prevent a repeat performance.
- Regular Cleaning: Make it a routine – clean your laptop’s vents every month or two (depending on your environment).
- Use a Laptop Cooling Pad: Especially if you're a gamer or work with demanding applications.
- Avoid Overheating Environments: Don’t use your laptop on soft surfaces like beds or blankets.
- Monitor Temperatures: Use software to keep an eye on your CPU and GPU temperatures.
10. Laptop Fan Noise: When a Little Whir is Too Much
Sometimes, the fan works, but it's loud. The sound can be annoying, but it might also indicate a problem.
- Bearing Problems: A scratchy or grinding sound often means the fan bearings are failing.
- Loose Blades: Imbalance can create noise.
- Dust Buildup: Again, a cleaning is in order.
11. Replacing the Laptop Fan: Step-by-Step Guide (Simplified)
Let's break it down to the basics:
- Power Down: Unplug the laptop and remove the battery.
- Open the Case: Find the access panel or tear down the entire case (refer to your model's service manual!).
Laptop Cooling Fan not working - How to clean and fix

By RedMan Laptop Cooling Fan not working - How to clean and fix by RedMan
How to Check if Laptop Fan is Working Properly in Windows WAK

By InnoRative How to Check if Laptop Fan is Working Properly in Windows WAK by InnoRative
How to solve a overheating issue when the fan is good but not spinning
By Electronics Repair School How to solve a overheating issue when the fan is good but not spinning by Electronics Repair School
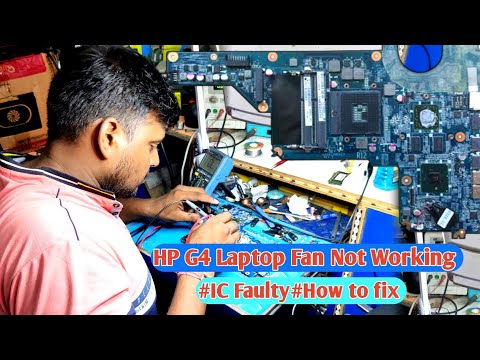
Title: HP Laptop Fan Not Working IC FaultyHow to fix
Channel: HiTech Repairing Gzp
HP Laptop Fan Not Working IC FaultyHow to fix by HiTech Repairing Gzp
Laptop Working
Here's the title: The Complete Guide to Fermenting Vegetables: From Beginner to Pro
The Complete Guide to Fermenting Vegetables: From Beginner to Pro
Embark on a thrilling culinary journey into the ancient art of vegetable fermentation. Discover a world bursting with vibrant flavors, probiotic power, and a satisfying crunch. This comprehensive guide serves as your trusted companion, leading you from the basics to advanced techniques, ensuring your fermented vegetables become a staple in your kitchen.
Understanding the Magic of Fermentation
Fermentation, at its core, is a dance orchestrated by beneficial bacteria. These microscopic allies, primarily lactic acid bacteria (LAB), thrive in an anaerobic environment, transforming sugars present in vegetables into lactic acid. This process not only preserves the vegetables, but also enhances their nutritional profile, creates unique flavors, and promotes gut health. Unlike vinegar-based pickling, fermentation doesn’t require heat, preserving more of the original nutrients and enzymes. The result is a living food brimming with probiotics, the good bacteria that support a healthy digestive system.
Essential Tools of the Fermenting Trade
Building your fermentation toolkit is a straightforward endeavor. You don't need fancy equipment to get started. Here’s what you'll need:
- Glass Jars: Opt for wide-mouth glass jars, available in various sizes. Quart-sized jars are ideal for beginners. Ensure they are clean and sterilized before use.
- Canning Lids and Bands: While regular canning lids and bands work, consider airlocks for optimal gas release. Airlocks prevent pressure buildup, which can cause jars to explode, and provide a barrier against mold and unwanted bacteria.
- Weight: A small glass weight, a clean rock, or a zip-top bag filled with water can be used to keep vegetables submerged below the brine. Submersion is crucial to prevent mold.
- Cutting Board and Knife: A sturdy cutting board and a sharp knife are essential for preparing your vegetables.
- Scale: A kitchen scale is helpful for accurately measuring salt, which is a critical ingredient for successful fermentation.
- Food Processor (Optional): While not essential, a food processor can significantly speed up the shredding process for items like cabbage for sauerkraut.
- Wooden or Plastic Utensils: Metal utensils can sometimes react with the brine, so it's best to use wooden or plastic alternatives for stirring and packing vegetables.
Choosing Your Vegetables: A World of Possibilities
Almost any vegetable can be fermented, offering you a vast palette of flavors and textures. Here are some popular choices, along with tips for selecting and preparing them:
- Cabbage: The star of sauerkraut, choose firm, crisp heads of cabbage. Remove the outer leaves, rinse well, and shred or slice finely.
- Cucumbers: Opt for fresh, firm cucumbers. Smaller pickling cucumbers are often preferred.
- Carrots: Select vibrant, firm carrots. Peel and slice, dice, or shred them.
- Beets: These earthy gems add a lovely color and sweetness. Peel and slice or dice them.
- Radishes: Choose crisp radishes and slice them thinly.
- Onions: Red onions are particularly good for fermenting, adding a sharp bite.
- Garlic: Essential for flavor, add whole cloves or mince them.
- Cauliflower: Break into florets or slice.
- Green Beans: Trim the ends.
- Bell Peppers: Cut into strips or dice.
- Tomatoes: Small, firm cherry tomatoes work well.
The Cornerstone: The Salt Brine
Salt is the unsung hero of fermentation. It performs several vital roles:
- Preservation: Salt inhibits the growth of undesirable bacteria that cause spoilage.
- Flavor: Salt enhances the natural flavors of the vegetables.
- Texture: Salt helps to maintain the crispness of the vegetables.
The standard ratio for a salt brine is typically 1.5-2.5% salt by weight of the water and vegetables combined. Using too little salt can lead to spoilage, while too much can hinder fermentation. For most vegetables, a 2% salt brine is an excellent starting point. For instance, if you have 1000 grams of vegetables, you'll need 20 grams of salt. Use non-iodized salt, as iodine can inhibit fermentation. Kosher salt or sea salt are excellent choices.
Step-by-Step Guide to Fermenting Vegetables
Now, let's bring it all together:
- Prepare Your Veggies: Thoroughly wash and prepare your chosen vegetables. Chop, slice, or shred them according to your recipe.
- The Salting Process: In a large bowl, combine your prepared vegetables with the appropriate amount of salt. Mix well, massaging the vegetables with your hands to help release some of their natural juices. This process also helps to soften the vegetables and kickstart the fermentation process.
- Pack the Jars: Pack the salted vegetables tightly into your clean glass jars, leaving about an inch of headspace at the top.
- Submerge the Vegetables: Pour any remaining brine over the vegetables, ensuring they are completely submerged. If there isn't enough liquid, you can add a small amount of salt water (2% salt solution). This is where the weight comes in. Place the weight on top of the vegetables to keep them submerged.
- Seal and Wait: If using a standard lid and band, tighten the band loosely to allow for gas release. If using an airlock, follow the manufacturer's instructions.
- Temperature and Time: Ferment your vegetables at room temperature, ideally between 60-75°F (15-24°C). The fermentation time will vary depending on the vegetable, temperature, and your personal preference. Tasting the vegetables periodically is the best way to gauge when they are ready. For most vegetables, this will be between 3 days to several weeks.
- Storage: Once the vegetables have reached your desired level of sourness, transfer the jars to the refrigerator to slow down the fermentation process. Refrigerated fermented vegetables can last for several months.
Mastering Sauerkraut: A Fermented Cabbage Classic
Sauerkraut, perhaps the most well-known fermented vegetable, is remarkably simple to make. Here's a step-by-step guide:
- Prep the Cabbage: Remove any tough outer leaves from a head of cabbage. Rinse the cabbage thoroughly.
- Shred the Cabbage: Using a sharp knife or a food processor, shred the cabbage finely.
- Salt and Massage: In a large bowl, combine the shredded cabbage with 1.5-2.5% salt by weight. Use your hands to massage the cabbage for about 5-10 minutes, until it starts exuding liquid.
- Pack and Weigh: Pack the salted cabbage tightly into a clean glass jar, pressing down firmly to release more liquid. Ensure the cabbage is completely submerged in its own juices. If necessary, add a little more salt water (2% solution) to cover the cabbage. Place a weight on top to keep the cabbage submerged.
- Fermentation: Seal the jar with a lid and band (loosely tightened) or an airlock. Ferment at room temperature for 1-4 weeks, tasting periodically. The longer it ferments, the more sour it will become.
- Refrigerate: Once your sauerkraut reaches your desired level of sourness, transfer the jar to the refrigerator to slow down the fermentation process.
Flavor Enhancements: Spicing Up Your Ferments
Experimenting with spices and herbs can elevate your fermented creations. Here are a few ideas:
- Garlic: Add whole cloves or minced garlic to your ferments.
- Onions: Thinly slice or dice them.
- Dill: Fresh or dried dill adds a classic flavor.
- Caraway Seeds: A traditional addition to sauerkraut.
- Mustard Seeds: Add a little pop to your ferments.
- Bay Leaves: Add a subtle, aromatic flavor.
- Ginger: Adds a spicy kick.
- Chili Flakes: For a spicy kick.
Feel free to experiment with your favorite flavor combinations.
Troubleshooting: Common Fermentation Challenges
Even with the best practices, you might encounter a few challenges. Here are some common issues and how to address them:
- Mold: White, fuzzy mold on the surface of the vegetables usually indicates a lack of submersion. Remove the mold, make sure the vegetables are fully submerged, and monitor the fermentation closely. In more serious cases, discard the batch.
- Soft Vegetables: This can be caused by using too little salt or not enough oxygen. Ensure you're using the correct salt percentage and that vegetables are submerged.
- Off-Flavors: If your ferment tastes unpleasant, it might be due to unwanted bacteria. Discard the batch.
- Pressure Buildup/Exploding Jar: If using standard lids, tighten the band loosely. With airlocks, ensure they are functioning correctly. Very rarely, jars can explode, especially if stored in direct sunlight or warm temperatures, as it can cause excessive pressure.
Beyond the Basic Recipe: Exploring Advanced Techniques
Once you've mastered the basics, consider these advanced techniques:
- **
