laptop keyboard half keys not working

Title: How to Fix Some Keys Not Working on Laptop Keyboard Keyboard Not Working
Channel: Tech White
How to Fix Some Keys Not Working on Laptop Keyboard Keyboard Not Working by Tech White
laptop keyboard half keys not working, laptop keyboard most keys not working, laptop keyboard keys not working, how do you fix unresponsive keys on a laptop keyboard, laptop keyboard 3 keys not working
Laptop Keyboard Half-Dead? FIX This NOW!
My Laptop Keyboard is Acting Up! (Don't Panic, Here's How To Fix It!)
Let's face it. We've all been there. Your fingers are flying across the keyboard, ready to conquer the digital world, when bam! Suddenly, a few keys decide to take an unscheduled vacation. Your laptop keyboard is half-dead. Now, before you chuck your beloved machine out the window, take a deep breath. You're not alone, and thankfully, there's a good chance you can revive those rebellious keys.
Why Did My Keyboard Quit? Decoding the Digital Drama
Understanding the potential culprits behind your keyboard's woes is the first step. These aren't always straightforward, so bear with me. Perhaps a rogue crumb, a sneaky spill, or even just plain old dust has infiltrated the inner workings. Alternatively, software glitches or driver conflicts could be the villains. Furthermore, outdated drivers can wreak havoc. However, sometimes, it might be a more serious hardware issue. Because your keyboard is the primary interface, it might suffer from damage.
Troubleshooting Time: Your Keyboard's Resuscitation Plan
Firstly, let’s start with the obvious. A simple restart is often the magic cure-all. Indeed, it's amazing how many tech problems vanish after a reboot. Moreover, check for any obvious obstructions. Look carefully for anything lodged between the keys. A tiny piece of food or dust can be the silent saboteur. So, grab a can of compressed air, that’s your best friend in this situation. Direct the air around and under the affected keys.
Software Solutions: Outsmarting the Tech Gremlins
The problem could be software-related. Then, let's explore some software-based solutions. First, you should verify your keyboard drivers are updated. Go to your device manager and look for keyboard entries. Right-click and select "Update driver." Also, Windows will try to automatically find the newest drivers for you. Consider uninstalling then reinstalling your keyboard driver. Sometimes, a fresh start is all it takes.
Cleaning Crew: Rescuing Your Keyboard From Digital Dirt
Regular cleaning is crucial for longevity. Dust, crumbs, and spills are enemies. Gently cleaning your keys is essential. First, switch off your laptop. Then, take a soft, lint-free cloth that is slightly damp. Wipe each key carefully. Be extra cautious around the edges. However, do not use excessive moisture. Moreover, avoid harsh chemicals.
The Deep Dive: When Simple Solutions Aren't Enough
When the simple solutions fail, it's time to get a bit more intense. So, if the problem persists, consider removing the keycaps. However, this is a delicate operation. You can use a keycap puller specifically designed for this purpose. Be careful, however, not to break anything. Once removed, clean underneath the keycaps. After you clean thoroughly, replace them.
Hardware Hurdles: Identifying the Serious Culprits
If cleaning and software tweaks are fruitless, there's a possibility of hardware issues. First, examine the keyboard cable. If you own a desktop, ensure the cable is fully connected. If you own a laptop, then open up the bottom panel of the laptop. The connection could be loose or damaged. If you aren't comfortable opening up your laptop, seek professional help.
External Keyboard: A Temporary Lifeline
While you’re working on the fix, an external keyboard is your saving grace. This will allow you to continue working. Connect an external keyboard via USB or Bluetooth. This provides a temporary solution. Therefore, you can keep your productivity flowing.
Preventative Measures: Keeping Your Keyboard Happy
Preventing future keyboard issues is much better. Also, small habits can make a huge difference. For example, eat away from your laptop. Also, consider a keyboard cover. Regularly clean your keyboard to prevent dust buildup. Moreover, always ensure your hands are clean. These simple steps can extend the life of your keys.
When to Call in the Cavalry: Professional Help is On The Way
If you've tried everything, don’t despair. Contact a professional technician. They have the expertise to diagnose complex issues. Repairing a laptop keyboard can be intricate, thus sometimes requiring specialized tools. Ignoring persistent problems may lead to more damage. Consider professional help to avoid further issues.
Laptop Touchpad Dead? This SHOCKING Trick Will Fix It!Laptop Keyboard Half-Dead? FIX This NOW!
Hey everyone! Ever stared at your laptop screen, fingers itching to type, only to be met with a frustrating half-responsive keyboard? You know, the kind where some keys work, others don't, and the whole experience feels like wading through molasses? Ugh, it’s the worst! Trust me, we've all been there. I've lost count of the number of times I’ve wanted to chuck my laptop across the room when the 'e' key decided to go on permanent vacation just when I was trying to email my boss (awkward!). But before you channel your inner Hulk, let’s take a deep breath. In this article, we're going to dive deep – like, really deep – into the mysteries (and solutions!) of a malfunctioning laptop keyboard. We’ll troubleshoot those sticky keys, unresponsive buttons, and phantom characters, and get you back to typing at the speed of thought. So, buckle up, buttercups, because we're about to bring your keyboard back to life!
1. The Silent Killer: Why Did My Keyboard Quit?
Think of your keyboard as a delicate ecosystem. Several things can throw it off balance, causing keys to malfunction. It's like a little city run by electrical signals and mechanical components. Dust bunnies, spilled coffee (we’ve all been there!), and even the sheer wear and tear of daily use can wreak havoc. Understanding the root causes is the first step toward a cure. Is it hardware or software? Is it something you did or something that happened organically? Pinpointing the problem is half the battle!
2. The Dust Devil: Cleaning Your Keyboard Like a Pro
Let's start with the obvious culprit: dust, crumbs, and all manner of tiny invaders. Think of your keyboard as a delicious buffet for microscopic creatures. Now, how do you clean this digital buffet? Simple! Grab some tools: a can of compressed air (essential!), a soft-bristled brush (a toothbrush works wonders!), and maybe some isopropyl alcohol (for the brave).
Here’s your cleaning game plan:
- Power Down: Always, always shut down your laptop and unplug it before you start cleaning. Safety first!
- Air Blast: Hold the can of compressed air at a slight angle and blast between the keys. Focus on the areas where the problems are most prevalent.
- Gentle Brush: Use the brush to dislodge any stubborn debris. Be gentle! We want to clean, not damage.
- Alcohol Wipe (Optional): For sticky keys, dip a cotton swab or a very small amount of isopropyl alcohol. Wipe each key carefully, but don't oversaturate.
- Patience: Let everything dry completely before you power it back on. Drying is critical!
3. The Sticky Situation: Tackling Stuck Keys
Sticky keys are a common annoyance. They're like mischievous little gremlins, causing your typing to be a stuttered, chaotic mess. Usually, this is due to a sugary drink or a food crumb that has seeped into the keyboard’s internal mechanisms.
What can you do?
- Repeat the Cleaning Ritual: Often, a good cleaning with compressed air can solve the problem.
- Key Removal (If You Dare): Some keyboards allow you to gently pry off individual keycaps. Be careful! Take a picture before you start so you know how to replace them. Clean the area beneath the keycap and reassemble.
- Alcohol-Soaked Swabs: If cleaning alone doesn't work, try using a cotton swab dipped in isopropyl alcohol, but be very careful not to get too much liquid inside the keyboard.
4. Check Your Settings: The Software Side of Things
Sometimes, the problem isn't hardware at all; it’s software. Your keyboard layout might be set incorrectly, or you might have accidentally activated some accessibility features.
Here's how to investigate:
- Keyboard Layout: Go to your operating system settings and make sure your keyboard layout is set to the correct language and configuration (e.g., US English).
- Sticky Keys and Filter Keys: Disable accidental activation of these functions. They can sometimes interfere with normal typing.
- Driver Issues: Outdated or corrupted keyboard drivers can cause all sorts of problems.
5. Driver's License Needed: Updating Your Keyboard Drivers
Drivers are the translators that allow your operating system to "talk" to your keyboard. Sometimes, these translators need an update.
Here’s how to update or reinstall keyboard drivers:
- Device Manager: Go to your computer's Device Manager (search for it in your operating system’s search bar).
- Find Your Keyboard: Look for "Keyboards" or "Keyboard devices" in the list.
- Update or Reinstall: Right-click on your keyboard and choose "Update driver" or "Uninstall device," then restart your computer. Your system will automatically try to reinstall the correct drivers.
6. The External Keyboard Test: Is It the Laptop's Fault?
This is a simple but effective diagnostic test. Plug in an external USB keyboard. If the external keyboard works perfectly, you know the problem lies within your laptop's keyboard. If the external keyboard also malfunctions, you may have a more complex system issue.
7. Software Conflicts: The Culprits Hiding in the Background
Sometimes, other software can interfere with your keyboard's functionality. Antivirus programs, keyboard mapping software, or other utilities can clash with your keyboard's drivers or internal commands.
Here’s what to do:
- Close Suspicious Programs: Close any programs that might be interfering with your keyboard, especially those designed to modify keyboard behavior.
- Check for Compatibility Issues: Research any recently installed software and see if it’s known to cause keyboard problems.
8. The Ghost in the Machine: Troubleshooting Ghost Typing
"Ghost typing" is when your keyboard types characters on its own, as if possessed by a mischievous spirit. This can be incredibly annoying!
Here’s how to banish the ghost:
- Run a Virus Scan: Malware can sometimes cause ghost typing. Run a thorough scan with your antivirus software.
- Check for Stuck Keys: Make sure no keys are physically stuck, even if it's subtly.
- Reinstall Drivers: Reinstalling your keyboard drivers might correct this issue.
9. Hardware Hiccups: When to Call in the Cavalry
If all else fails, it’s time to face the music. Sometimes, the keyboard itself is physically damaged. This could be due to liquid spills, impact damage, or general wear and tear.
- Physical Inspection: If the keyboard is visibly damaged (e.g., the keys are cracked or broken), it may need to be replaced.
- Professional Help: Take your laptop to a qualified repair technician. They can diagnose the problem and tell you if a keyboard replacement is needed.
10. The DIY Repair: Replacing Your Laptop Keyboard (If You're Feeling Brave)
Replacing a laptop keyboard isn’t for the faint of heart! It often involves removing the entire top of the laptop, which might be intimidating for some. However, if you’re tech-savvy, this is a viable option.
- Watch a Tutorial: Before you start, watch a step-by-step video by a computer repair expert. There are tons of tutorials on YouTube.
- Gather Your Tools: You’ll need a small screwdriver set and patience.
- Follow the Instructions Carefully: Be extremely meticulous, and take your time. Label all screws and parts so you can reassemble them correctly.
- Be Prepared To Fail: Recognize that it might not go as planned. If you’re not comfortable, seek professional assistance:
11. The Cost of Repair: Budgeting for Key Fixes
The cost of repairing a half-dead keyboard varies. It depends on whether your repair is DIY or professional. Is the problem just cleaning? Or is it a complete keyboard replacement?
Here's a breakdown:
- DIY Cleaning: Essentially free (unless you need to buy compressed air).
- External Keyboard Replacement: $20-50.
- Professional Repair: Keyboard replacement can cost anywhere from $50 to $200 or more, including parts and labor.
- Cost Considerations: Always weigh the cost of repair against the age and value of your laptop.
12. Keyboard Alternatives: What If it's Beyond Repair?
Sometimes, the best solution is simply to move on. If your keyboard is beyond repair, or if the cost of repair outweighs the value of your laptop, you have options.
- External Keyboard: This is a simple and inexpensive solution. Plug in a USB or Bluetooth external keyboard and keep using your laptop.
- On-Screen Keyboard: The operating system has a built-in on-screen keyboard you can use.
- Laptop Replacement: If your laptop is nearing the end of its life, a keyboard issue could be an opportunity to upgrade.
13. Prevention is Key: Protecting Your Precious Keyboard
Once you've fixed your keyboard, you want to keep it in tip-top shape. Prevention is always better than cure!
- Keyboard Cover: Use a silicone keyboard cover to protect against spills and dust. They’re like a cozy blanket for your keys.
- **Eat and Drink
SOLUTION Some Keys Not Working on Laptop Keyboard

By Tech Express SOLUTION Some Keys Not Working on Laptop Keyboard by Tech Express
Fix Windows 11 Keyboard Keys not Working

By Ground Zero Fix Windows 11 Keyboard Keys not Working by Ground Zero
How to Repair a Broken Keyboard , Unresponsive Keys, Broken films inside
By DOT Electronics How to Repair a Broken Keyboard , Unresponsive Keys, Broken films inside by DOT Electronics

Title: How to Fix Some Keys Not Working on Laptop Keyboard Keyboard Not Working on Windows 10 & 11
Channel: Real Insight
How to Fix Some Keys Not Working on Laptop Keyboard Keyboard Not Working on Windows 10 & 11 by Real Insight
Laptop Wifi Hotspot
Laptop Keyboard Half-Dead? FIX This NOW!
If your laptop keyboard has suddenly decided to stage a partial rebellion, leaving you with missing letters, erratic keystrokes, or a general sense of technological frustration, you're in the right place. We've all been there – staring at a blinking cursor while the words we desperately want to type remain stubbornly unwritten. Fear not! Your keyboard's demise isn't necessarily a death sentence for your laptop. Let’s dive into the potential culprits, walk through diagnostic steps, and explore solutions that will get you back to typing with speed and confidence.
Pinpointing the Problem: A Keyboard Detective's Guide
Before we unleash the digital repair toolkit, we need to understand what we're up against. A "half-dead" keyboard can manifest in a variety of ways. Identifying the specific symptoms will dictate the path to recovery.
- Missing or Non-Responsive Keys: This is perhaps the most common complaint. A key that consistently fails to register your presses is a clear sign of trouble. It might be a single key, a cluster, or even an entire row or column.
- Sticky Keys or Ghost Typing: Do keys feel sluggish or stick after being pressed? Are other keys seemingly activated without any keystrokes? This points to potential physical or software issues.
- Intermittent Problems: The keyboard sometimes works perfectly, other times not at all. This erratic behavior can be incredibly frustrating and often indicates a more complex underlying issue.
- Physical Damage: Obvious cracks, liquid spills, or physical deformities are clear indicators of external damage.
- Software Conflicts: Unusual keystrokes can occur if the keyboard isn’t configured correctly, or if the drivers are not up to date.
Initial Troubleshooting: The Quick Fixes First
Before we delve into the more involved solutions, let's try some basic troubleshooting steps. These often resolve simpler problems and are a great starting point.
- Restart Your Laptop: This might sound cliché, but a simple reboot can often resolve temporary software glitches or driver conflicts that are causing keyboard problems.
- Check the Keyboard Cable (If Applicable): If you're using an external keyboard, ensure the cable is securely connected to the USB port or Bluetooth receiver. If it's a USB keyboard, try plugging it into a different USB port.
- Clean the Keyboard: Dust, crumbs, and other debris can accumulate under the keys, causing them to malfunction. Use a can of compressed air or a soft brush to remove any visible debris. If you are comfortable removing the keys, do so, and be sure to clean the areas underneath.
- Update Keyboard Drivers: Outdated or corrupted drivers can lead to keyboard issues. To update drivers, go to Device Manager (search for it in the Windows search bar), expand the "Keyboards" section, right-click on your keyboard, and select "Update driver." Choose the option to search automatically for updated driver software.
- Check for Sticky Keys/Filter Keys: These accessibility features may be enabled and interfering with keyboard functionality. Search in settings for "Sticky Keys" or "Filter Keys" and ensure they are disabled unless you intentionally want to use them.
- Run the Windows Troubleshooter: Windows has built-in troubleshooters designed to resolve common hardware problems. In Settings, go to "Update & Security" then "Troubleshoot." Look for the keyboard troubleshooter and run it.
Deeper Dive: Investigating Internal Keyboard Issues
If the preliminary steps haven't resolved the issue, we need to investigate further. The nature of your laptop's keyboard often determines the repair approach.
- Examining the Keyboard's Flex Cable: Laptop keyboards connect to the motherboard via a thin, flexible cable. This cable is fragile and prone to damage. To assess the cable, you'll need to carefully disassemble your laptop, which can be a delicate operation. Consult your laptop's manual or research online tutorials specific to your model. Once you access the keyboard, carefully disconnect the cable from the motherboard, check for any visible damage, and then reconnect it, ensuring it’s firmly seated.
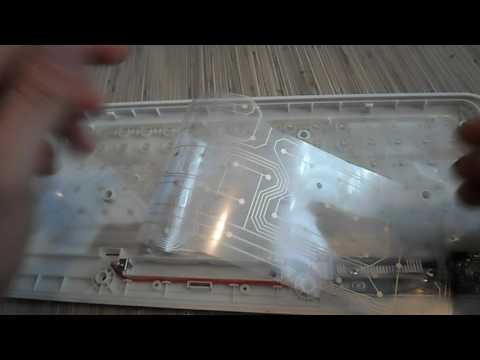
- Cleaning the Keyboard Circuitry: In extreme cases, the circuitry beneath the keys may be affected. This usually involves liquid spills but can also be caused by dust accumulation. After disconnecting the keyboard from the laptop, carefully take the keyboard apart. After the keys are removed, you can use isopropyl alcohol and a cotton swab to clean the circuit board. The alcohol should evaporate, and the keyboard can be reassembled.
- Testing the Keyboard’s Circuitry with a Multimeter: If you have some experience with electronics, you can use a multimeter to test the continuity of the keyboard's circuits. This involves checking the traces on the keyboard's circuit board to see if there are any breaks. This requires specific knowledge of electronics and familiarity with your laptop's keyboard layout. Be very careful with this approach, as you can easily cause more damage if you aren’t well-versed.
Software Solutions and Configuration Adjustments
Sometimes, the issue isn't hardware-related but stems from software conflicts or incorrect settings.
- Boot into Safe Mode: Safe Mode loads Windows with a minimal set of drivers and programs. If your keyboard functions correctly in Safe Mode, it suggests a software conflict is to blame.
- Uninstall Recent Software Installations: If your keyboard problems started after installing a new program or driver, try uninstalling that software to see if it resolves the issue.
- Check for Malware: Malware can sometimes interfere with keyboard functionality. Run a full system scan with your antivirus software to check for any infections.
- Reinstall Keyboard Drivers: Sometimes, a driver update can introduce a new problem. Try uninstalling and reinstalling the keyboard drivers. In Device Manager, right-click on your keyboard, select "Uninstall device," and then restart your laptop. Windows should automatically reinstall the drivers upon restart.
When to Consider Replacement
Unfortunately, not every keyboard can be salvaged. Here's when replacement becomes the most practical and potentially most efficient solution:
Severe Physical Damage: If the keyboard has suffered extensive liquid damage, severe cracks, or other significant physical damage, repair may not be feasible.
Extensive Key Failures: If a large number of keys are unresponsive, replacing the keyboard is often more cost-effective than attempting individual repairs.
Persistent Problems: Despite trying all troubleshooting steps, the keyboard continues to malfunction.
Replacing the Keyboard: Laptop keyboard replacement can be a straightforward DIY task for some models, while others require more technical expertise. Search online for tutorials matching your laptop's model. Some laptops often have replacement keyboard options, which include full keyboards or keycaps. Purchase a compatible replacement keyboard from a reputable source. Follow online tutorials precisely, taking note of the screws, cables, and any other components. You’ll need a small Phillips head screwdriver, and potentially other tools like a plastic pry tool for removing the old keyboard. Once replaced, make sure the cable is properly connected and that the keyboard is working before you reassemble the rest of the laptop.
Preventative Measures: Extending Your Keyboard's Life
Taking some simple precautions can help extend the life of your laptop keyboard and minimize future problems.
- Regular Cleaning: Clean your keyboard regularly with compressed air or a soft brush to remove dust and debris.
- Avoid Food and Drinks: Keep food and liquids away from your laptop to prevent spills and sticky keys.
- Use a Keyboard Cover: Consider a keyboard cover for added protection against spills and dust.
- Handle Your Laptop Carefully: Avoid dropping or putting excessive pressure on your laptop, as this can damage the keyboard.
- Gentle Typing: Excessive force while typing can stress the keys and potentially cause damage over time.
Conclusion: Back to Typing Bliss
Dealing with a half-dead laptop keyboard can be incredibly frustrating, but you're now equipped with the knowledge and resources to diagnose and address the problem. By carefully following the troubleshooting steps outlined in this guide, you have an excellent chance of restoring your keyboard to full functionality. If all else fails, replacement is always an option. With patience, persistence, and a little technical know-how, you can reclaim your laptop's keyboard and get back to your work, studies, or creative endeavors with ease. Good luck, and type on!
