disc drive not working on laptop

Title: CDDVD Drive Is Not Detected in Windows 10
Channel: TechFixIT
CDDVD Drive Is Not Detected in Windows 10 by TechFixIT
cd drive not working on laptop, cd drive not opening laptop, cd drive not working in hp laptop, dvd drive not opening in laptop, cd drive not opening hp laptop, laptop disc drive not working
Laptop Disc Drive Dead? This SHOCKING Fix Works!
Laptop Disc Drive Woes? Don't Panic! (This Might Actually Save You)
Let's be honest: that sinking feeling. The one that hits when your laptop's disc drive decides to take a permanent vacation. It’s a digital dagger to the heart, isn’t it? You're staring at a machine that seems perfectly happy yet utterly incapable. Suddenly, you’re locked out of precious files, unable to install software, and generally feeling quite helpless. But what if I told you there’s a secret weapon, a potential lifesaver? Well, there might be.
The Dreaded Click of Death: Recognizing the Signs
First, let’s pinpoint the problem. Is your disc drive truly dead? Is it just a temporary glitch? Because, before we leap into action, assess the situation. The most obvious symptom? Your laptop failing to recognize the drive. You'll see error messages or just… nothing. Secondly, listen carefully. Have you heard the dreaded "click of death"? This ominous sound, often a series of clicks, is a common indicator of imminent drive failure. Finally, consider the context. Did anything happen recently? Did you drop your laptop? Were you downloading a dodgy file? These clues matter. At the same time, don't assume the worst immediately.
Troubleshooting 101: Simple Steps Before the Big Guns
Before resorting to drastic measures, attempt a few basic troubleshooting steps. Because sometimes, the fix is remarkably simple.
- Restart Your Laptop: It sounds cliché, but it genuinely works. A simple restart often resolves minor software hiccups that might be interfering with the drive's functionality. Moreover, reboot your laptop again to see if it works.
- Check Your Connection (If Applicable): If you're using an external disc drive, verify the cable connection. Ensure the cable is securely plugged into both the drive and your laptop. Sometimes, a loose connection is the culprit.
- Run a Hardware Troubleshooter: Windows and macOS have built-in troubleshooters. These tools scan for hardware issues and attempt automated repairs. By all means, give them a try.
- Update Drivers: Outdated or corrupted drivers can cause all sorts of problems. Therefore, check your system for driver updates, specifically those related to your disc drive.
The Secret Weapon: A Potential Lifesaver (If You’re Lucky)
Now, if the above steps fail, let's explore a more (potentially) effective solution. This fix is not a guaranteed miracle, but it's worked for many. In my experience, it's worth the attempt before you start replacing the drive.
- Data Recovery Software: This software is your best bet!
- Download Your Free Trial: Search for data recovery software online and download the free trial.
- Scan Your Drive: Use the installed software to scan your disc drive.
- Select your Files: Once the software has scanned, you need to select the files you want to recover.
- Save Your Files: Save those files to a working drive.
When to Call in the Professionals:
Sometimes, the problem is beyond DIY repair. In short, there are signs that indicate when you need a professional.
- Physical Damage: If your drive suffered physical trauma.
- Severe Data Loss: If you lost many files.
- You're Uncomfortable: If you're not comfortable with the process.
Preventive Measures: Keeping Your Disc Drive Healthy
Prevention is always better than cure. Thus, there are measures to protect your disc drive:
- Regular Backups: Because, back up your data regularly.
- Handle with Care: Avoid dropping or bumping your laptop.
- Keep it Clean: Keep the laptop clean.
Final Thoughts: Don't Give Up Hope!
Experiencing disc drive failure is frustrating. Yet, don't despair! Because, there are solutions. Consider the options. You might solve it with several steps. Therefore, approach the situation with patience and a strategic mindset. Then, you’ll be well on your way to recovering your data and restoring your laptop's functionality. You’ve got this. Good luck!
HP Laptop Crawl? Fix Your Sluggish Beast NOW!Laptop Disc Drive Dead? This SHOCKING Fix Works!
Hey there, tech adventurers! Ever stared at your laptop screen, heart sinking, as the dreaded "disk drive not found" message pops up? We've all been there. One minute you're happily surfing, the next – kaput – your digital world grinds to a halt. It's like your trusty steed has suddenly refused to move. But before you throw your hands up and declare your laptop as a paperweight, hold on! We’re not just talking about a minor hiccup; we're talking about a seemingly DEAD disc drive. But guess what? Sometimes, the seemingly dead isn't actually dead. This article is your lifeline, your digital CPR, your guide to potentially resurrecting your beloved machine. We're going to dive deep into the problem and, more importantly, unveil a SHOCKING fix that just might bring your laptop back to life!
1. The Dreaded Death Knell: Understanding the Disc Drive Dilemma
So, what exactly is a dead disc drive? Well, it's essentially the part of your laptop responsible for storing all your precious data – your photos, documents, games, everything! When it gives up the ghost, your laptop can’t access any of that information, leading to a whole heap of problems. It's like the hard drive is the library of your digital life, and suddenly, the librarian's gone missing. Your laptop gets lost, confused, and ultimately, useless. This can manifest in various ways: slow boot-up times, frequent crashes, error messages, or, the most disheartening of all, the complete inability to boot up.
2. Initial Diagnosis: Separating Myth from Reality
Before you panic, let's clarify a few things. Often, what seems like a dead disc drive might be a software glitch or a loose cable. Think of it like a car: it might not start because of a dead battery (the disc drive), but it could also be a loose wire or a fuel issue (software problems). Don’t jump to conclusions! We need to do some quick diagnostics.
- The Boot-Up Blues: If your laptop struggles to start, or displays the "no boot device found" error, a dying disc drive is a prime suspect.
- The Blue Screen of Death (BSOD): Frequent BSOD errors, especially with disk-related codes, suggest potential disc drive issues.
- Data Loss Woes: Can’t access your files, or have noticed significant data corruption? Well, this increases the chances something is up with the drive.
3. Software Shenanigans: Bypassing the Hardware Hurdle
Sometimes, the problem isn’t the hardware itself, but rather its interaction with the software. Let’s try some software tricks before we get our hands dirty messing with the physical stuff.
- Safe Mode Sanity: Try booting into safe mode. This runs a minimal version of Windows and can help determine if a driver or software conflict is the issue. If your laptop boots into Safe Mode, it’s a positive sign that the disc drive might not be completely kaput.
- System File Checker (SFC): This built-in Windows tool scans for and repairs corrupted system files. Run this from the command prompt. It's like sending in the digital repair crew to fix the little things.
- Disk Check (CHKDSK): Sometimes, all your drive needs is a good scan and repair. CHKDSK can identify and fix errors on your disc drive’s file system. Access it through the command prompt or from the boot-up recovery options.
4. The Shocking Fix: Resurrecting Your Laptop’s Drive
Now, for the main event – the potential game-changer. This fix involves a slightly more advanced technique, but trust me, it’s often surprisingly effective. We're going to attempt a low-level format of your disc drive. Now, before you panic, a low-level format isn't as scary as it sounds. It’s like giving your hard drive a complete digital reset.
- Backup, Backup, Backup: Crucially before you start, back up your data if possible! If your laptop boots, even intermittently, immediately back up any important files. If it doesn't boot, consider a bootable USB drive to rescue your data.
- The Bootable Lifeboat: You'll need a bootable USB drive. Download a tool like DBAN (Darik's Boot and Nuke). This is the nuclear option for data destruction, but also a powerful tool for low-level formatting.
- Boot from the USB: Insert the USB, boot your laptop from it (you may need to change your boot order in the BIOS – usually accessed by pressing Del, F2, F12, or Esc during startup).
- Execute the Nuke: Follow DBAN’s instructions, selecting the drive you want to wipe. This will perform a low-level format. Warning: This will erase all data on your disc drive.
- Reinstall Windows: Once the format is complete (which can take a long time), reinstall Windows (or your preferred OS) from a bootable installation media.
Why Does This Work?
Often, a low-level format can fix logical errors and corruption that have rendered your disc drive inaccessible. It's like a deep cleaning that sometimes clears away the gunk that prevents your drive from functioning correctly. It's not a guaranteed fix, but it's often a last-ditch effort with a surprisingly high success rate!
5. Hardware Hurdles: When Software Isn't Enough
If the shocking fix doesn't work, it's time to accept the harsh reality: your disc drive might be physically failing. This is where things get a little more involved.
- Listen to Your Drive: Are there clicking or grinding noises? These are often telltale signs of mechanical failure.
- External Enclosure Exploration: Consider taking the drive out and connecting it to another computer using an external enclosure. This allows you to see if the drive is detectable and potentially recover data.
- Professional Help: If your data is critical, consider contacting a data recovery service. They have specialized tools and expertise to retrieve data from failing drives. Expect to pay a premium, but for important data, it might be worth it.
6. Preventative Measures: Shielding Your Disc Drive
Wouldn't it be great if you could prevent this disaster from happening again? Absolutely! Here's how.
- Regular Backups: Backups are your best friend! Use cloud storage, external hard drives, or network-attached storage (NAS) to regularly back up your important files.
- Power Protection: Power surges are disc-drive enemies. Use a surge protector to protect your laptop.
- Cleanliness is Key: Avoid extreme temperatures and physical shocks. Treat your laptop with care.
7. Choosing Your Weapon: SSD vs. HDD
If your drive is beyond repair, you have a decision to make: What drive should you replace it with? The world of storage has changed.
- Solid State Drives (SSDs): These are the new kings. They’re incredibly fast, durable, and boot up your computer in seconds. They're like the sports car compared to the old, clunky car.
- Hard Disk Drives (HDDs): These are more affordable, offering more storage space for the price. They’re like the workhorse and typically a little slower.
8. Laptop Surgery: Replacing the Disc Drive
Replacing a disc drive is a manageable task for most people. Here's a simplified breakdown:
- Research Your Laptop: Find your laptop’s service manual or watch a video tutorial specific to your laptop model.
- Gather Your Tools: You'll need a screwdriver, possibly a spudger, and an anti-static wrist strap.
- Power Down and Disconnect: Unplug your laptop and remove the battery.
- Open It Up: Carefully open the access panel to the disc drive bay.
- Swap and Secure: Replace the old drive with the new one. Secure it with screws
- Close It Up: Close the panel and reinstall the battery.
- Install Your OS: Boot from your installation media and reinstall your operating system.
9. Breathe New Life: Your Laptop's Rebirth
Congratulations! With a new drive installed and your OS reinstalled, your laptop should be back in action. Consider it a phoenix rising from the ashes!
- Test, Test, Test: Ensure your laptop is working smoothly and that the new drive is functioning correctly.
- Software Installation: Reinstall your software and restore your data from your backups.
10. Data Recovery Dilemmas: The Rescue Mission
Even if your disc drive is failing, that doesn't mean your data is gone forever.
- DIY Data Recovery: Software like EaseUS Data Recovery Wizard might help, but results aren't always guaranteed.
- Professional Help: Data recovery services are the experts. They are expensive and have the equipment.
11. The BIOS Battleground: Troubleshooting the Boot
Sometimes the problem isn't the disc drive itself, but the BIOS settings.
- Enter the BIOS: Get into your BIOS (usually by pressing Del, F2, etc., during startup). *
CD DVD Drive Not Reading Discs in Windows 10 11 Fixed

By Tips Howto CD DVD Drive Not Reading Discs in Windows 10 11 Fixed by Tips Howto
How to clean an optical CD DVD drive that is not reading disks anymore

By Ultimate DIY How to clean an optical CD DVD drive that is not reading disks anymore by Ultimate DIY
How to Repair DVD CD Writer how to clean DVD or CD Rom Lens
By PK Expert How to Repair DVD CD Writer how to clean DVD or CD Rom Lens by PK Expert

Title: DVD ROM Repair DVD RW open and repair CD Drive Repair DVD Drive Repair
Channel: Systo Tech
DVD ROM Repair DVD RW open and repair CD Drive Repair DVD Drive Repair by Systo Tech
Laptop Wifi Connect
Laptop Disc Drive Dead? This SHOCKING Fix Works!
We’ve all been there: the dreaded click, the grinding whir, the heart-stopping silence. Your laptop, once a reliable companion, suddenly refuses to boot. The culprit? Often, a deceased disc drive. But before you resign yourself to data loss and a hefty repair bill, take a deep breath. Because, believe it or not, there's a startling possibility that your seemingly irreparable hard drive can be resurrected.
Diagnosing the Grim Reaper: Early Warning Signs
Before diving into potential solutions, accurately pinpointing the problem is crucial. Several telltale indicators signal a failing hard drive, even before complete failure. Recognizing these early warnings can allow for proactive data backup and potentially, an earlier attempt at reviving your drive.
- Unusual Noises: A healthy hard drive operates relatively silently. Any grinding, clicking, or scratching sounds emanating from the laptop are major red flags. These noises often indicate physical damage to the platters or read/write heads.
- Slow Performance: Notice your laptop taking an age to perform basic tasks? Applications loading at a glacial pace and file access times stretching into minutes are symptomatic of hard drive degradation. This lag suggests the drive is struggling to read and write data.
- Frequent Freezing and Crashes: Random freezes, especially during disk-intensive operations, are common symptoms. These issues become more frequent as the drive deteriorates. The system struggles to access necessary files.
- Blue Screen of Death (BSOD) Errors: BSOD errors, often accompanied by error codes referencing disk-related issues, are a strong indicator. These errors are Windows' way of signaling critical problems within the operating system's core functionality, often stemming from inaccessible sectors on the hard drive.
- Data Corruption: Corrupted files, missing files, and unusual file behavior are also signs of trouble. If you open a file and find it garbled or unreadable, or if files suddenly disappear, your hard drive is likely on its last legs.
- Inability to Boot: The ultimate sign of failure is the inability of the laptop to boot up or recognize the hard drive. If the BIOS doesn’t even detect the drive, you probably have a problem.
The First Line of Defense: Data Backup – Your Digital Lifeboat
Before attempting any repair, the single most crucial step is data backup. If your drive is still partially accessible, make it the number-one priority.
- Use External Bootable Media: Create a bootable USB drive or CD/DVD with diagnostic and data recovery tools. These environments often bypass the faulty operating system.
- Clone the Drive (If Possible): If the drive is still somewhat functional, attempt to clone the drive to a new hard drive or SSD. This provides a full and bootable copy of your data and operating system.
- Prioritize Essential Files: If complete cloning is impossible, concentrate on backing up critical files, such as documents, photos, videos, and other essential data.
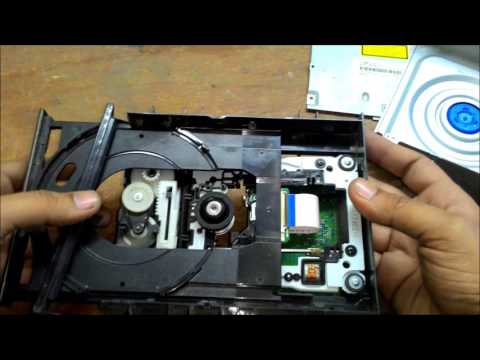
Physical Assessment: Unveiling the Drive's Secrets
Once data backup is secured, the next step is to open up the laptop and physically inspect the hard drive.
- Power Down and Disconnect: Ensure the laptop is completely powered down and unplugged from the power source. Remove the battery to eliminate any lingering power.
- Locate the Hard Drive: Consult your laptop’s manual to determine the location of the hard drive. Typically, it's behind an access panel on the bottom or a side of the laptop; however, some laptops require significantly more disassembly.
- Remove the Hard Drive: Carefully unscrew and remove the hard drive from its bay. Take note of its orientation and any mounting brackets or screws.
- Visual Inspection: Examine the hard drive for any obvious physical damage. Look for signs of liquid damage, burnt components, or loose connections.
The Freezing Method: A Controversial but Potentially Shocking Solution
One of the most widely discussed, yet often debated, methods for attempting hard drive revival is the freezing technique. The principle is simple: the extreme cold can sometimes temporarily allow the components to contract, potentially solving mechanical problems or facilitating data retrieval.
- Seal the Drive: Place the hard drive inside an airtight, sealed bag. This prevents any moisture from entering or condensing on the drive during the freezing process. Condensation is a disaster for electronics.
- Freeze the Drive: Place the sealed hard drive in your freezer for at least several hours, or even overnight. The longer it stays frozen, the better the chances of it working.
- Rapid Thawing: Once you remove the drive from the freezer, immediately install it into the laptop. Avoid giving it a chance to condensate.
- Attempt Data Extraction: With the drive now installed in the laptop, attempt to boot the system. If successful, immediately back up your data.
The Tapping Technique: A Gentle Persuasion
Another controversial method involves gently tapping the hard drive. This is a very risky procedure, and can completely destroy any chance of data recovery.
- Remove the Drive: Take the drive out of your laptop.
- Gently Tap the Drive: While the drive is running, but away from the computer, gently tap the side or bottom of the drive with your hand. This can sometimes move loose read/write heads and can unstick the disks.
- Reinstall and Test: If you hear the drive start spinning again, reinstall the drive in your laptop and attempt to boot.
Software-Based Diagnostics and Repair: Beyond the Hardware
If those steps are unsuccessful, it's time to move to software-based solutions.
- CHDSK Utility: Windows has a built-in CHKDSK utility that can scan and repair errors on the hard drive. Access CHKDSK by opening the Command Prompt as an administrator and typing
chkdsk /f /r X:, where X is the drive letter. - Specialized Diagnostic Tools: Several free and paid diagnostic tools are available, such as Seatools and the Ultimate Boot CD. These tools perform more in-depth scans and tests on the hard drive, and some also allow creating bootable copies.
When to Call in the Professionals: The Limits of DIY
For complex mechanical failures, significant data loss, or if you're uncomfortable with hardware manipulation, professional data recovery services are the safest option. Specialized labs have clean rooms, advanced equipment, and experienced technicians that can often recover data from severely damaged hard drives. Professional assistance will be very expensive, but it may be the last resort.
Preventing Future Headaches: Proactive Measures
Preventative measures can significantly extend the lifespan and data safety of your laptop's hard drive.
- Regular Backups: Implement a regular data backup schedule to minimize potential data loss.
- Defragmenting (For HDDs only): Periodically defragment your hard drive to improve performance and reduce wear and tear on the drive's moving parts.
- Avoid Physical Shocks: Handle your laptop gently, avoiding drops or impacts that can damage the hard drive.
- Proper Cooling: Ensure the laptop has adequate ventilation to prevent overheating.
- Monitor Drive Health: Regularly monitor the health of your hard drive using diagnostic tools.
Conclusion: Hope Remains for Your Drive
While a dead hard drive can be a frustrating experience, the methods and techniques outlined above offer a glimmer of hope for data recovery. Whether by freezing, tapping, or utilizing software, there are ways to revive a seemingly deceased hard drive or, at the very least, retrieve your invaluable data. Remember to prioritize data backup at every turn, proceed cautiously, and don't hesitate to seek professional help when necessary.
