hdmi port on laptop stopped working

Title: 2023 NEW How to Fix HDMI Not Working on Laptop Windows
Channel: Wondershare Recoverit Data Recovery
2023 NEW How to Fix HDMI Not Working on Laptop Windows by Wondershare Recoverit Data Recovery
hdmi port on laptop stopped working, hdmi port on laptop not working windows 11, hdmi port on laptop not working windows 10, hdmi port on laptop not working reddit, hdmi port on laptop suddenly stopped working, hdmi port on lenovo laptop not working, hdmi port on dell laptop not working, hdmi port on hp laptop not working, hdmi port on asus laptop not working, hdmi port on acer laptop not working
Laptop HDMI Port Dead? 😱 FIX This NOW!
Laptop HDMI Port Woes? Don't Panic! Here's Your Rescue Plan!
Oh dear, facing a laptop HDMI port that's decided to take a vacation? It's frustrating, undeniably. But before you start picturing life without your external monitor or projector, breathe! This problem is more common than you think, and, believe it or not, often has a straightforward solution. So, let's roll up our sleeves and troubleshoot this together.
The HDMI Hang-Up: A Breakdown of the Problem
First off, understand you're not alone. HDMI ports, though incredibly useful, can be surprisingly delicate. They're susceptible to a range of issues, from simple software glitches to more complex hardware failures. In essence, the connection between your laptop and that all-important external display breaks. Therefore, pinpointing the exact cause is the key to a quick fix. Fortunately, more often than not, it's something easily remedied.
Initial Checks: The Low-Hanging Fruit
Alright, let’s start with the easy stuff, shall we? Before we go diving into the technical weeds, let’s eliminate the obvious. Firstly, double-check the HDMI cable itself. Is it securely plugged into both the laptop and the external monitor or TV? Secondly, try a different cable. Sometimes, the cable is the culprit. Moreover, try connecting another device—like a DVD player or gaming console—to the external display using the same HDMI cable. Does that work? Consequently, if not, the problem likely lies with the external display, not your laptop.
Powering Up the Resolution: Software Solutions
Assuming the cable isn’t the issue, it’s time to delve into the software side of things. Subsequently, a simple restart of your laptop can often work wonders. It's surprising how frequently a reboot clears up minor software hiccups that interfere with the HDMI connection. Additionally, ensure your laptop's display drivers are up-to-date. Outdated drivers are a common source of display problems. Hence, visit the manufacturer’s website (e.g., Dell, HP, Lenovo) and download the latest drivers. Follow the installation instructions, and restart your laptop afterward. Furthermore, sometimes, the display settings themselves are the problem. Right-click on your desktop, and go to "Display Settings". Make sure the correct display is selected. Look for options like "Detect" or "Identify" to confirm the external display is recognized. Finally, try adjusting the resolution. Sometimes, the resolution setting is incompatible with your external display.
Digging Deeper: Advanced Troubleshooting Techniques
If the basic steps haven't done the trick, it's time to get a little more technical. Consider checking your laptop's BIOS settings. In some cases, the HDMI port might be disabled in the BIOS. Access the BIOS by pressing a specific key during startup (usually Del, F2, or F12—check your laptop's manual for the correct key). Navigate to display or video settings. Ensure the HDMI port is enabled. In the meantime, try running a hardware diagnostic. Many laptops have built-in diagnostic tools. These can help identify potential hardware failures. Consult your laptop's manual on how to run these diagnostics. Moreover, explore advanced display settings in Windows. Access the "Advanced display settings" within the Display Settings menu. Check the refresh rate and color depth. Also, try resetting your laptop's power settings. Sometimes, a wonky power plan can interfere with the HDMI connection. Therefore, go to "Power Options" in the Control Panel and reset the power plan to default settings.
The Hardware Hurdles: When to Seek Professional Help
Okay, so we've walked through all the software and the quick checks. Unfortunately, if the HDMI port still doesn't work, the problem might be hardware-related. This could mean a faulty HDMI port on your laptop or even a problem with the graphics card. Therefore, at this stage, it's generally best to consult a professional. Attempting to repair the hardware yourself can be risky, especially if you lack the necessary technical expertise. However, reputable computer repair shops can diagnose and repair the hardware problem. Moreover, consider the age of your laptop and the cost of repair. In conclusion, sometimes replacing the laptop is a more cost-effective solution.
Prevention is KEY: Keeping Your HDMI Port Healthy
Preventing future HDMI troubles is always better than dealing with the problem. Therefore, always unplug and plug in HDMI cables gently. Avoid applying excessive force. Additionally, protect the HDMI port from physical damage. Don't drop your laptop or expose it to extreme temperatures or humidity. Furthermore, keep the port clean. Use a can of compressed air to remove dust and debris regularly. Finally, update your drivers regularly. As mentioned before, updated drivers contribute to smooth performance.
Wrapping Up: Back to Big Screens!
Fixing a dead HDMI port can feel like a huge headache. However, as you've seen, it's often a solvable problem. By working through these steps, you've dramatically increased your chances of getting your external display working again. Consequently, take it one step at a time, stay patient, and don't be afraid to seek professional help if needed. Ultimately, you'll be back to enjoying your movies, presentations, and gaming on the big screen in no time! Therefore, now go give it a try and let me know how it goes!
WiFi Nightmare? Fix Your Laptop's Connection NOW!Laptop HDMI Port Dead? 😱 FIX This NOW!
Hey everyone! Ever stared at your laptop screen, heart sinking faster than a lead balloon, because your HDMI port has decided to… well, not cooperate? You're not alone! We've all been there. That feeling of utter frustration when you're ready to stream your favorite show on the big screen, give a killer presentation, or just connect to a second monitor for some serious productivity, and poof—no signal. But don't despair! We're diving deep to help you fix that dead HDMI port and get you back in the game. Think of us as your tech-savvy pals, holding your hand through this digital dilemma.
1. The HDMI Port Apocalypse: Recognizing the Symptoms
Before we jump into solutions, let's make sure we're all on the same page. Is your HDMI port really dead? Sometimes, a simple troubleshooting step gets overlooked. Here’s a checklist to confirm your diagnosis:
- No Signal Displayed: This is the big one. You plug in your HDMI cable, and your TV, monitor, or projector remains stubbornly dark, displaying a "No Signal" message.
- Sound But No Picture: You can hear audio, but the screen stays blank. This could indicate a problem with the video signal delivery specifically.
- Intermittent Connection: The connection flickers on and off, or only works sporadically.
- Hardware Compatibility Issues: You have a compatible HDMI cable and display device.
- Suspect HDMI cable: Often, a dead HDMI port can be the effect of a bad cable.
If you’re seeing any of these signs, it’s time to roll up your sleeves and troubleshoot.
2. HDMI Cable Hell: Checking the Obvious Culprit
Ah, the HDMI cable. It's the unsung hero of our digital lives, and also, sometimes, the villain. Before you panic about a faulty port, rule out the simplest solution: the cable itself.
- Swap It Out: Try a different HDMI cable. Seriously, this should be your first step. Borrow one from a friend, family member, or your other laptop.
- Inspect the Ends: Look closely at both ends of your HDMI cable. Are the pins bent or damaged? Any signs of fraying or wear?
- Ensure a Secure Connection: Make sure the cable is fully plugged into both your laptop and the display device. A loose connection can be a common cause.
- Try a Different HDMI Port on Your TV/Monitor: Test your laptop's HDMI output with other HDMI ports on your TV, monitor, or projector. This helps pinpoint if the issue lies on the display side.
Sometimes, it's just a bad cable. Trust me, I've wasted countless hours troubleshooting problems only to find out it was a faulty cable all along. It's the digital equivalent of forgetting your keys!
3. The Power of a Reboot: Simplicity is Key
Okay, so the cable isn't the problem. Let's take a step back and try a little tech magic… a simple reboot. You'd be surprised how often this fixes things. Sometimes, a quick restart can clear out temporary glitches and kickstart the HDMI port back into action.
- Restart Your Laptop: This is the classic IT solution for a reason! Shut down your laptop completely, wait a few seconds, and then power it back on.
- Restart Your Display Device: Unplug your TV, monitor, or projector from the power outlet, wait a minute, and plug it back in. This refreshes the display's internal processes.
- Restart Everything (Synchronized): Try restarting both your laptop AND your display device simultaneously. Sometimes, getting them both on the same page is all it takes.
Think of it like hitting the "reset" button on your brain. Sometimes, all it takes is a fresh start.
4. Driver's License: Updating Your Graphics Drivers
Your graphics drivers are the software that allows your laptop to communicate with your display. Outdated or corrupted drivers can definitely cause HDMI problems. It's like trying to navigate a road without a map!
- Identify Your Graphics Card: Knowing your graphics card (Nvidia, AMD, Intel) is crucial. You can find this information in your laptop's specs or device manager (search for "Device Manager" in your Windows search bar; you'll find your graphics card listed under "Display adapters").
- Update Through Device Manager: Inside the Device Manager, right-click on your graphics card and select "Update driver". Choose the option to search automatically for updated driver software.
- Head to the Source (Manufacturer's Website): For the most reliable drivers, visit the website of your graphics card manufacturer (Nvidia, AMD, or Intel) and download the latest driver for your specific model and operating system. Install it, and reboot your laptop.
- Driver Rollback (If Recent Updates Caused the Issue): If your HDMI port stopped working after a driver update, it's possible the update caused the issue. In Device Manager, right-click your graphics card, select "Properties," go to the "Driver" tab, and look for a "Roll Back Driver" option.
I’ve learned the hard way; keeping your drivers updated is a must! It's like getting your car serviced regularly – it prevents big problems down the road.
5. Display Settings De-Mystified: Configuration is King
Got your drivers sorted? Awesome. Now, let's peek at your display settings. Sometimes, your laptop might be configured to use only its internal display, even when an external one is connected.
- Use the Windows Key + P Shortcut: Pressing this key combination cycles through different display modes: "PC screen only," "Duplicate," "Extend," and "Second screen only." Experiment with each one to see if your external display lights up.
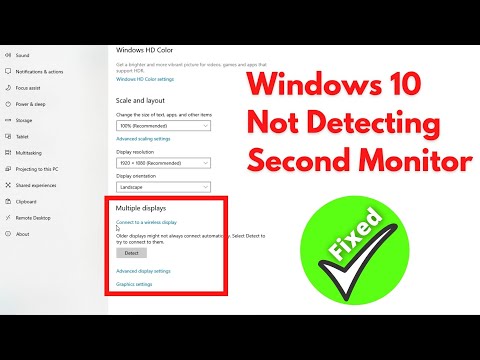
- Windows Display Settings: Right-click on your desktop and select "Display settings." Under "Multiple displays," check if your external monitor is detected. If not, click "Detect." You can also choose how to display your screen here (duplicate, extend, etc.).
- Intel Graphics Command Center/AMD Radeon Software: These are the control panels for Intel and AMD graphics cards, respectively (your graphics card's control panel). They often provide detailed display settings where you can manage multiple displays, adjust resolutions, and configure refresh rates.
It's like adjusting the volume on your TV – sometimes you just need to turn it up a little!
6. Hardware Hiccups: Checking the Physical Port
Let's get a little more hands-on. Though we want to avoid opening the laptop if possible, sometimes the physical port itself is the culprit.
- Inspect the HDMI Port: Visually inspect the HDMI port on your laptop. Is it bent, damaged, or full of dust?
- Gentle Cleaning (If Necessary): If you feel comfortable doing so, and ONLY if you see dust/debris, use a can of compressed air to gently blow out the port. Avoid using sharp objects that could damage the pins.
- The Internal Connection (Advanced): This is where things can get tricky. If the physical port looks okay, the problem could be an internal connection that has come loose. This is generally a job for a professional, as opening your laptop can void your warranty and lead to further damage if you're not careful.
If you're not comfortable with the hardware aspect, it's always best to seek professional help. There are plenty of folks out there who've dealt with all sorts of HDMI disasters.
7. The Big Picture: Troubleshooting External Devices
We've focused on your laptop, but the display device, aka the TV or monitor, can be the issue.
- Test on a Different Display: If possible, connect your laptop to a different TV, monitor, or projector. This isolates whether the problem is with your laptop or the original display.
- Check the Inputs: Make sure the TV/monitor is set to the correct HDMI input. Sounds obvious, but it's often overlooked!
- Try Different HDMI Ports on the Display: Your TV/monitor likely has multiple HDMI ports. Try connecting your laptop to a different one.
- Confirm Display Compatibility: Some older TVs and monitors may not be compatible with the signal being sent through your laptop. Ensure that your devices are compatible with each other's resolution and refresh rate.
- Examine The External Device's Settings: Ensure that your TV/Monitor supports and has the HDMI configuration turned on.
It's a team effort! Both the laptop and the receiving end need to be on the same page.
8. Power Supply Pitfalls: Charging Issues
Believe it or not, a faulty or underpowered power supply can sometimes indirectly affect the HDMI port. If your laptop isn't getting enough juice, it might struggle to output a stable video signal.
- Use Your Original Charger: Always use the power adapter that came with your laptop.
- Test in Different Outlets: Try plugging your charger into a different wall outlet.
- Check the Charger's Connection: Ensure the charger is securely connected to both your laptop and the wall outlet.
- Battery Issues (Indirect Impact): A degraded or faulty battery can sometimes cause power-related problems that may indirectly affect the HDMI port. Consider testing your laptop plugged into the power
How to Fix HDMI Not Working on Laptop Windows 10 5 Methods
By Wondershare Recoverit Data Recovery How to Fix HDMI Not Working on Laptop Windows 10 5 Methods by Wondershare Recoverit Data Recovery
How to Fix HDMI Not Working on Laptop Windows 11

By Ground Zero How to Fix HDMI Not Working on Laptop Windows 11 by Ground Zero
Windows 10 Not Detecting Second Monitor Solution For Connecting Second Monitor In Windows 10
By FIXsage Windows 10 Not Detecting Second Monitor Solution For Connecting Second Monitor In Windows 10 by FIXsage

Title: HDMI Port Not Working Problem Solution How to Fix HDMI Port not Working hdmi section repair
Channel: Rajan kushwaha
HDMI Port Not Working Problem Solution How to Fix HDMI Port not Working hdmi section repair by Rajan kushwaha
Working With Laptop
Laptop HDMI Port Dead? 😱 Revive Your Connection: A Comprehensive Troubleshooting Guide
Losing the ability to connect your laptop to an external display via HDMI is a frustrating experience. Whether you're a student, professional, or avid gamer, the versatility offered by an HDMI connection is invaluable. Don't panic; often, the solution isn't a catastrophic hardware failure. We've compiled a comprehensive guide to diagnose and, crucially, fix potential issues, empowering you to reclaim your visual freedom.
Initial Diagnostics: Pinpointing the Source of the Problem
Before diving into complex solutions, let's eliminate the obvious. A systematic approach is crucial for effective troubleshooting. Begin with these fundamental checks:
Inspect the Physical Connections: Examine both ends of your HDMI cable. Are the connectors securely plugged into both your laptop and the external display? Look for any physical damage to the cable, such as bends, kinks, or exposed wires. Sometimes, a simple cable replacement is the solution.
Test the HDMI Cable: The cable itself might be the culprit. If possible, try a different HDMI cable. If the new cable successfully connects, the issue lies with the original cable.
Assess the External Display: Verify that the external display is functioning correctly. Test it with another device, such as a DVD player, game console, or another laptop. If the external display doesn't work with any device, the problem may be with the display itself.
Laptop Power and Display Settings: Ensure your laptop is powered on and that the external display is also turned on. Many laptops have shortcut keys (often the Fn key combined with another key, like F4 or F8) to cycle through display modes. Experiment with these keys to see if they trigger the external display. Also, within your operating system's display settings, confirm that the external display is detected and enabled.
Software Troubleshooting: Addressing Driver and Configuration Conflicts
If the physical connections are sound, the issue may stem from software-related problems. Navigate these steps:
Driver Updates: The Cornerstone of Compatibility: Outdated or corrupted drivers frequently cause HDMI connectivity problems. Access your device manager (search for it in the Windows search bar) and expand the "Display adapters" section. Right-click on your graphics card (e.g., Intel HD Graphics, NVIDIA GeForce, AMD Radeon) and select "Update driver." Choose the option to search online for the latest drivers.
Clean Driver Installation: A Fresh Start: In some cases, even updated drivers might be problematic. Consider a clean installation. Download the latest drivers from your graphics card manufacturer's website (NVIDIA, AMD, Intel). Uninstall the existing drivers from your device manager. Reboot your laptop and then install the newly downloaded drivers.
Operating System Updates: The Ecosystem of Compatibility: Keep your operating system up to date. Windows Updates or macOS updates often include driver updates and bug fixes crucial for HDMI compatibility. Ensure that your system is running the latest version.
Display Settings: Configuring the Connection: Access your operating system's display settings (search for "display settings" in the Windows search bar). Ensure that the external display is detected. If it isn't, click on "Detect" (or the equivalent option in your operating system).
Multiple Displays: If the external display is detected, select it in the display settings. You will have several display mode options: "Duplicate these displays" (mirrors the content), "Extend these displays" (extends the desktop across both screens), or "Show only on 2" (displays only on the external monitor). Experiment to find the best mode for your needs.
Resolution and Refresh Rate: Verify that the resolution and refresh rate of the external display are compatible with your laptop and the display itself. Incorrect settings can lead to a blank screen or display issues.
Hardware-Related Troubleshooting: Navigating Deeper Concerns
If software solutions fail, more complex hardware-related factors may be relevant. Proceed cautiously with these advanced diagnostic steps:
External Display Compatibility: Though rare with modern standards, verify that your external display and your laptop's HDMI port support the same HDMI standard (HDMI 1.4, HDMI 2.0, HDMI 2.1). Older HDMI ports may not support the features of newer displays.
HDMI Port Inspection: Visual Confirmation: With your laptop powered off, carefully inspect the HDMI port on your laptop. Use a flashlight and look for any bent pins, debris, or damage within the port. A damaged port may require professional repair.
Integrated Graphics vs. Dedicated Graphics (if applicable): Some laptops have both integrated graphics (Intel HD Graphics, etc.) and a dedicated graphics card (NVIDIA GeForce, AMD Radeon). In your display settings or the graphics card's control panel, you might be able to specify which graphics card to use for external displays. Experiment with these settings.
Power Supply: The Silent Guardian: Rarely, insufficient power to the laptop can indirectly affect HDMI output, especially when gaming or using the external display for demanding tasks. Ensure your laptop is plugged into a working power outlet and that the charger is functioning correctly.
BIOS/UEFI Updates: Though less common related to HDMI, outdated BIOS/UEFI firmware can sometimes cause compatibility issues. Access your laptop's BIOS/UEFI settings (typically by pressing a key like Delete, F2, or F12 during startup - consult your laptop's manual) and ensure that the firmware is up to date. However, proceed with caution; updating the BIOS carries inherent risks.
Advanced Techniques and Considerations
External HDMI Hubs/Adapters: If your laptop's HDMI port is consistently problematic, consider using a USB-C to HDMI adapter or an HDMI hub. These devices provide an alternative way to connect to an external display. Ensure that the adapter or hub is compatible with your laptop's USB-C port (if applicable) and that it supports the desired HDMI standard.
Monitor Cables: Try using a different HDMI cable. Different HDMI cables can have different specifications that may have issues.
Professional Assistance: When to Seek Help: If the above steps fail, the problem may be a hardware malfunction beyond your repair capabilities. Contact a qualified laptop repair technician. They can diagnose and, if possible, repair a damaged HDMI port or related components.
Preventative Measures: Maintaining Optimal HDMI Performance
Preventative measures can safeguard your laptop's HDMI port:
Gentle Handling: Avoid excessive force when plugging or unplugging HDMI cables. Handle the cable and port with care to prevent damage.
Dust Prevention: Keep the HDMI port clear from dust and debris. Periodically use compressed air to clean the port gently.
Protective Measures: Consider using a dust cover or a port protector to prevent dust from entering the HDMI port when not in use.
Operating Temperatures: Avoid exposing your laptop to extreme temperatures or humidity, as these conditions could potentially affect the performance of the HDMI port and other components.
Conclusion: Reclaiming Your Visual Experience
By following these steps methodically, you can significantly increase your chances of diagnosing and resolving HDMI connectivity issues on your laptop. From diagnosing simple connection problems to exploring software and hardware solutions, this comprehensive guide offers a path to reclaiming a seamless visual experience. Remember to approach each troubleshooting step with patience and persistence, and don't hesitate to seek professional help when necessary. With diligent effort, you can restore your laptop's HDMI function and unlock the full potential of your external display.
