how to get a projector to work with a laptop
Title: How to connect projector to Windows laptop through HDMI cable
Channel: An Wang
How to connect projector to Windows laptop through HDMI cable by An Wang
how to get projector to work with laptop, how to get my projector to work with my laptop, how to make a projector with a laptop, how to make projector work with laptop, how to set up a projector with a laptop
Laptop to Projector: The SHOCKINGLY Easy Fix (Works EVERY Time!)
From Laptop to Big Screen: The Surprisingly Simple Connection (That Always Works!)
Have you ever wanted to share your laptop screen on a bigger display? Perhaps you want to show off vacation photos. Or maybe present a business proposal. Fear not! Connecting your laptop to a projector is easier than you think. Forget the complicated setups you might have imagined. This guide will walk you through the process. The solution is straightforward, and it works every single time.
Unlocking the Power of Projection: Why Connect?
Think about the possibilities. A projector transforms your small screen into a shared experience. You can watch movies with friends and family. You can also give impressive presentations. Consider displaying data from your laptop for collaborative meetings. So, the reasons for connecting are diverse. The goal is to share information clearly. Also, it's about enhancing your viewing experience.
The Grand Connection: Getting Started
Initially, make sure you have the right equipment. You'll need your laptop, and a projector, of course. Also, you'll need a cable. These typically include VGA, HDMI, or USB-C. Determine what ports your laptop and projector have. Usually, the back of the projector houses all the connection ports. If your laptop and projector use different ports, get an adapter. These are readily available and inexpensive. Now, plug one end of the cable into your laptop. Then, connect the other end to the projector.
Powering Up and Projecting: A Simple Sequence
Next, power up both the laptop and the projector. It’s important to start with the projector first. Allow it to warm up. After that, turn on your laptop. Your computer should automatically detect the projector. However, that isn't always the case. If it doesn’t, don't worry. There’s an easy solution.
The Magical Shortcut: The Windows Key + P
Here's a simple trick. Press the Windows key and the "P" key simultaneously. This key combination is your best friend. It will bring up a projection menu. This menu offers several options. Choosing one will determine how your display works.
- PC Screen Only: This option displays everything on your laptop screen. The projector stays dark.
- Duplicate: This setting mirrors your laptop’s display on the projector. It’s ideal for mirroring your screen. Everything appears on both screens.
- Extend: This option extends your desktop across both screens. Therefore, you get more screen real estate. It is excellent for presentations.
- Second Screen Only: The selected content only appears on the projector. Your laptop screen goes blank.
Resolving Common Projector Problems
Sometimes, things don’t go as planned. Therefore, let's troubleshoot some potential issues. First, check all the connections. Ensure the cable is securely plugged in at both ends. Next, make sure the projector is turned on and selected using the correct input. It's always worth double-checking.
Then, try adjusting the projector's settings. Sometimes, you have to select the correct input source manually. Also, verify the projector's resolution matches your laptop's. It can cause distortion. Consider restarting both your laptop and the projector. Believe it or not, it often works.
Audio Adventures: Sounding it Out
Want to project your audio? That’s typically simple. Most projectors have built-in speakers. But, often, the sound quality isn’t the best. Therefore, you might need to adjust your audio settings. Some laptops allow you to choose which device plays the audio. Therefore, you want to select the projector. To do this, go to your sound settings. Select the projector as your default audio output. If you're using external speakers, connect them directly to the projector. This approach provides the best audio experience.
Optimizing Your Projection: Making it Shine
Now, let's look at a few additional tips. Adjust the projector's focus and keystone correction. The focus ensures a sharp image. Keystone correction straightens the image. It’s especially helpful when the projector isn't directly in front of the screen.
Also, dim the lights in the room. You can maximize the image brightness. Furthermore, close the blinds. This enhances contrast.
Beyond the Basics: Wireless Wonders
Want to ditch the wires? You can do so with a wireless connection. Many projectors now offer Wi-Fi capabilities. You can connect your laptop wirelessly. First, check your projector's manual. Usually, you need to install software on your laptop. This software facilitates the connection. Some projectors work with Miracast or AirPlay. These are built-in wireless display technologies. This feature provides a seamless experience.
Troubleshooting Time: When Things Get Tricky
Still having issues? First, update your laptop’s graphics drivers. Outdated drivers can cause projection problems. Second, consult the projector's manual. It contains specific troubleshooting steps. Also, ensure the cable is in good condition. A damaged cable could prevent the connection. Finally, consider contacting the manufacturer. They can provide technical support.
Conclusion: Projecting with Confidence
Connecting your laptop to a projector is a straightforward process. You can use the right equipment. You will also follow these simple steps. Furthermore, you can transform your small screen into something much, much bigger. Now go forth and project! Share your memories. Present your ideas. The possibilities are endless. You’re ready to bring your content to life on the big screen.
Laptop Cooler MELTDOWN! (Cooler Master Fix Inside!)Laptop to Projector: The SHOCKINGLY Easy Fix (Works EVERY Time!)
So, you've got a presentation, a movie night planned, or maybe you just want to blow up your Instagram feed onto a giant screen. You grab your laptop, reach for the projector, and… nothing. Blank screen. The digital equivalent of staring into the abyss. Don't panic! We've all been there. We, the collective, the tech-challenged optimists, and the "I swear I know how to do this" crowd. But guess what? Connecting your laptop to a projector is usually ridiculously easy. Seriously, it's like the universe is playing a cruel joke on us by making it seem complex. But fear not, because we're about to demystify the process and make it, dare I say, fun.
1. The Big Question: Why Isn't It Working?! (And Why It Matters)
First things first: let's address the elephant in the room (or, if you're lucky, a rather elegant projector in a dimly lit room). Why isn't your laptop and projector playing nice? The reasons range from the incredibly simple (a loose cable) to the slightly more involved (a driver issue, which is, by the way, still fixable by us!). But understanding why it's not working is the first step towards a solution. Think of it like diagnosing a weird noise in your car. Knowing what you're dealing with helps you fix it faster. We want to avoid spending hours troubleshooting, right? Nobody wants to be that person fiddling with cables five minutes before showtime.
2. The Magic Cables: Your First Line of Defense
Before we get into the digital wizardry, let's check the basics. Consider this your "are the batteries in correctly?" checklist.
- HDMI is King: This is, hands down, the easiest and often best method. HDMI (High-Definition Multimedia Interface) transmits both video and audio with a single cable. It's the gold standard. If you have an HDMI port on your laptop and your projector, use it. Seriously, do it.
- VGA: The Grandfather: VGA (Video Graphics Array) is older, but still common. It only transmits video, so you'll need a separate audio cable (often a 3.5mm jack, just like your headphones).
- USB-C to HDMI: If your laptop has USB-C, you might need an adapter. These are readily available and relatively inexpensive. Make sure the adapter you get supports video output!
- Check the Connections: Are the cables firmly plugged into both your laptop and the projector? Sounds simple, but it's the number one culprit for connection issues. I once spent a solid 15 minutes troubleshooting a connection, only to realize the cable wasn't fully plugged in. Don't be me. Check those connections!
3. The Projector's Perspective: Powering Up and Sourcing
Okay, so the cables look good. Next, let's make sure the projector is ready to play.
- Power On: Seems obvious, but always double-check that the projector is turned on. Look for the power light – it should be bright and steady.
- Input Selection: Most projectors have multiple input options (HDMI 1, HDMI 2, VGA, etc.). You need to select the correct input source. There's usually a "Source" or "Input" button on the projector's remote, or sometimes on the projector itself. Press it until the projector displays the output from your laptop. This is often the digital equivalent of "Have you tried turning it off and on again?"
- Consider the Manual: If you're still stuck, consult the projector's manual. It might give you specific instructions for connecting laptops or troubleshooting common problems.
4. Laptop-Side Secrets: The Keyboard Shortcuts (That Actually Work!)
Alright, laptop time. Now, let's unleash some keyboard shortcuts that can work wonders.
- The Windows Key + P (or Function Key + Corresponding Key): This is your best friend on Windows. Press these keys simultaneously, and a menu pops up with display options: "PC screen only," "Duplicate," "Extend," or "Second screen only." Experiment with these options. "Duplicate" mirrors your laptop screen, "Extend" gives you two screens (great for presentations!), and "Second screen only" displays only on the projector.
- macOS Magic: Mirroring or Extending: On a Macbook, you'll often have automatic detection. However, you can access display settings in System Preferences (now System Settings). From here, you can choose to mirror your display or use it as a separate extended screen.
5. Adjusting the Resolution: Making Everything Look Good
Now that you've got a connection, let's make it look good.
- Resolution Mismatch: Sometimes, the laptop and projector might disagree on the ideal resolution. Go to your display settings (search for "display settings" in Windows or access them through System Settings on macOS) and adjust the resolution. Try different resolutions until you find one that looks sharp and displays everything correctly. It's like finding the right size for a pair of jeans.
- Aspect Ratio: Ensure the aspect ratio (e.g., 16:9 or 4:3) matches the content you're displaying. If your video looks squashed or stretched, this is often the culprit.
6. Audio Woes? Don't Worry, We've Got You Covered
Silence is deafening, especially when you are trying to get your information across.
- Audio Output Settings: In your computer's sound settings, select the projector as the audio output device. Sometimes, this might be labeled as "HDMI Output" or something similar.
- Speaker Volume: Make sure the volume on both your laptop and the projector is turned up. I once spent a lot of time trying to get audio to work, only to realize the projector volume was muted. Again, don't be me. Check the volumes!
7. The Driver Debate: Mostly a Thing of the Past, But Just in Case…
Drivers used to be a major source of projector headaches. Thankfully, newer operating systems often handle this automatically.
- Check for Updates: Go to your display adapter settings (search online for your graphics card name and how to update its drivers) and check for updated drivers. This is generally only necessary if you are experiencing specific performance issues.
- Troubleshooting: If you're running into consistent problems, consider reinstalling your graphics drivers.
8. When All Else Fails: The Universal Restart
Ah, the classic "turn it off and on again" solution.
- Restart Everything: Restart your laptop and the projector. Sometimes, this simple step is all it takes to reset the connection.
- Unplug and Plug Again: Sometimes, try unplugging the projector from the power source for a minute, and then replugging it.
9. The "Duplicate" Option: Mirroring Your Screen
This option, as we have discussed, is one of the most common and easiest to implement.
- Perfect for Presentations: Mirroring your screen is ideal for presentations, where the audience needs to see exactly what you are seeing.
- Ensure Clarity: Double-check that the mirrored content is easily visible on the projector.
10. The "Extend" Option: Using Two Screens
This is where things get slightly more advanced but is also super convenient.
- Productivity Powerhouse: The "Extend" option is amazing: You can have different content on your laptop screen and the projector, like a second monitor.
- Avoid Distraction: For presentations, you can have notes on your laptop screen and your slides up for your audience.
11. Troubleshoot Specific Problems
Sometimes, the issue is specific to your setup.
- Research Specific Errors: Search online for the error message or issue you're experiencing. (e.g., "projector no signal windows").
- Try Different Cables/Ports: If you have access to them, try different HDMI, VGA, or USB-C cables and different ports on your laptop/projector.
12. Clean Your Lens! (Seriously, It Matters)
If your image looks dull, blurry, or has spots, it could be a dirty lens.
- Gentle Cleaning: Use a microfiber cloth (the kind you use for glasses or camera lenses) to gently clean the projector lens.
- Safe Products: Avoid harsh chemicals or abrasive cleaners.
13. Check the Projector's Settings
Projectors have their own settings menus, which can address some problems.
- Brightness/Contrast: Adjust the brightness and contrast settings on the projector itself, especially if the image looks washed out or too dark.
- Keystone Correction: Use the keystone correction setting to fix any trapezoid-shaped distortions in the image.
14. Laptop to Projector: The Unexpected Connection - The Wireless Option
We've primarily focused on hard-wired connections, but let's not forget a modern convenience: wireless connections.
- Wireless Projectors: Some projectors have built-in wireless capabilities, allowing you to connect wirelessly via Wi-Fi. Check your projector's manual for specific instructions.
Heres how our projector works with a Laptop

By The MiniCinie Heres how our projector works with a Laptop by The MiniCinie
How To Connect A Laptop To A Projector
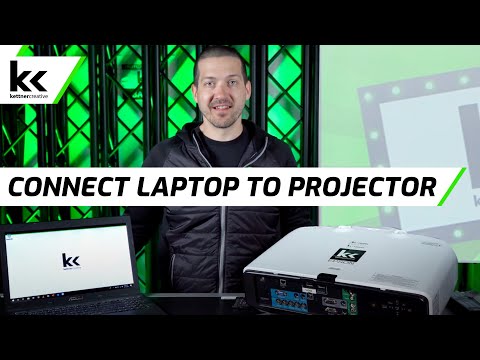
By Kettner Creative How To Connect A Laptop To A Projector by Kettner Creative
How to connect a laptop to a projector
By edtechteachers How to connect a laptop to a projector by edtechteachers
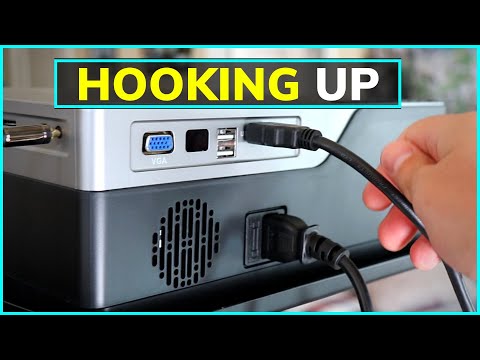
Title: What Can You Hook Up to a Projector Connecting a Laptop and Streaming Devices
Channel: Candid Tech TV
What Can You Hook Up to a Projector Connecting a Laptop and Streaming Devices by Candid Tech TV
My Laptop Work
Laptop to Projector: The Seamless Connection You Crave
We've all been there. The big presentation looms, the anticipation for movie night is palpable, or the desire to share those vacation photos on a grand scale is overwhelming. You have a laptop, a projector, and the yearning to connect them. But what seems like a simple task can quickly transform into a frustrating dance of flickering screens and elusive connections. Fear not! We're here to guide you through the process, ensuring a connection so smooth, it feels like digital magic.
Understanding the Foundation: Ports and Protocols
Before we dive into the how-to, let's clarify the essential building blocks: the ports and protocols that facilitate this beautiful union of laptop and projector. Knowledge is power, and understanding these components will equip you to troubleshoot any minor hiccups that might arise.
HDMI (High-Definition Multimedia Interface): The Gold Standard This is the workhorse, the modern marvel. HDMI transmits both audio and video signals with unparalleled clarity. Most laptops and projectors manufactured in the last decade are equipped with HDMI ports. If both your devices have them, you're in luck. This is typically the easiest and most reliable method.
VGA (Video Graphics Array): The Veteran The older, but still functional, stalwart. VGA transmits only video signals. You'll need a separate audio cable if you want sound. While it's less common on new laptops, it's still frequently found on projectors, especially in educational or business settings.
DisplayPort (and Mini DisplayPort/Thunderbolt): The Versatile Challenger DisplayPort offers performance and compatibility with HDMI, often found on higher-end laptops. Mini DisplayPort and Thunderbolt are variations, often smaller but equally capable. They might require an adapter to connect to your projector, depending on the projector's available ports.
USB-C: The Emerging Powerhouse The newest kid on the block (or rather, on the port). USB-C is a versatile port that can transmit data, power, and video. It can often support DisplayPort alt mode, allowing for direct connection to projectors with the right adapter.
Step-by-Step: The HDMI Connection – The Easiest Path
Let's assume your devices have HDMI ports - which is the most common scenario. Here's your fail-safe guide for an almost effortless connection:
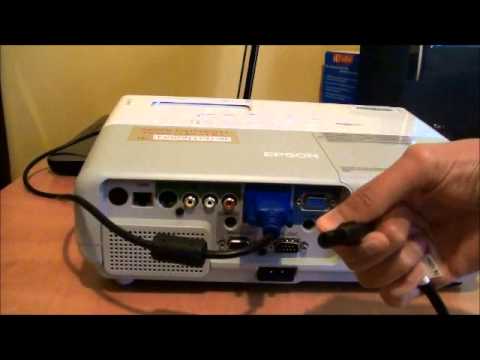
Locate the HDMI ports: These are usually found on the side or back of your laptop and on the back or side of your projector. They are typically rectangular and have a slightly tapered shape.
Gather your HDMI cable: Ensure you have a standard HDMI cable. The length you choose should be sufficient to reach between your laptop and the projector, with some slack for movement.
Connect the cable: Plug one end of the HDMI cable into the HDMI port on your laptop and the other end into the HDMI port on your projector. Make sure the connections are snug.
Power Up: Turn on both your laptop and the projector. Give the projector a moment to warm up.
Select the Right Input Source on the Projector: On most projectors, this is done using the "Input" or "Source" button on the projector's remote control (or on the projector itself). Cycle through the input options until you see the image from your laptop. It is usually labeled HDMI 1, HDMI 2, or something similar.
Adjust Display Settings on Your Laptop: Your laptop might automatically detect the projector and duplicate your display. If not, or if you want to configure the display differently, go to your laptop's display settings.
- Windows: Right-click on your desktop and select "Display settings." Or search "Display settings" in the Windows search bar.
- macOS: Click the Apple menu, select "System Preferences," then "Displays."
Choose Your Display Mode: Within your display settings, you'll find options for:
- Duplicate these displays: Both your laptop screen and the projector will show the same content. Perfect for sharing presentations or movies.
- Extend these displays: You'll have two separate screens. You can drag windows between your laptop screen and the projector, creating a larger workspace. Ideal for presentations with notes visible only to you.
- Show only on 1/2: This deactivates either your laptop's screen or the projector, displaying content on a single screen.
Fine-Tune the Resolution: Within display settings, you can usually adjust the resolution. Experiment to find the optimal balance between clarity and performance. If the image on the projector looks blurry, try a lower resolution. If the image is clipped or cut off, try a higher resolution.
Step-by-Step: The VGA Connection – A Classic Approach
If your laptop and projector employ VGA connections, don't fret. The process is slightly different, but still achievable.
- Locate the VGA ports: On both your laptop and projector, find the 15-pin VGA port. This port is typically blue and has small holes for the pins.
- Gather the VGA cable: Secure a VGA cable.
- Connect the cable: Plug one end of the VGA cable into the VGA port on your laptop and the other end into the VGA port on your projector. Make sure the connections are secure. The screws on the VGA cable connectors are there to help secure the connection. Tighten the screws to avoid a loose connection.
- Connect the Audio cable: Since VGA only carries video, you'll need a separate audio cable. Use a 3.5mm audio cable (the standard headphone jack) to connect the audio output on your laptop (the headphone jack) to the audio input on your projector (usually labeled "Audio In"). If your projector does not have audio input, you can use an external speaker.
- Power Up: Turn on both your laptop and the projector. Allow the projector time to warm up.
- Select the Right Input Source on the Projector: Use the "Input" or "Source" button on the projector's remote control (or on the projector itself) to cycle through input options until you see the image from your laptop. It is usually VGA or PC.
- Adjust Display Settings on Your Laptop: Follow the "Display settings" instructions for Windows or macOS described earlier. The steps and various settings are largely the same (duplicate, extend, choose resolution).
Adapters & Troubleshooting: Navigating the Obstacles
Sometimes, the ideal connection isn't available. Don't panic! Adapters are your friends.
Common Adapter Needs: Adapters allow you to connect the ports on your laptop to those on your projector.
- HDMI to VGA: Converts an HDMI signal to a VGA signal. Useful if the projector only has VGA.
- USB-C to HDMI/VGA: Allows you to connect a USB-C laptop to a projector that uses HDMI or VGA.
- Mini DisplayPort/Thunderbolt to HDMI/VGA: Allows you to connect a laptop with a Mini DisplayPort or Thunderbolt port to a projector with HDMI or VGA.
Troubleshooting Checklist: If things aren't working, run down this checklist:
- Check the Cables: Ensure both ends of your cables are firmly connected. Try a different cable to rule out a faulty cable.
- Power Cycle: Turn off both your laptop and projector, unplug them from the power source, wait a minute, and then plug them back in and restart.
- Restart Your Devices: Sometimes, simply restarting your laptop and projector can resolve connection issues.
- Update Drivers: Ensure your graphics drivers are up to date. Outdated drivers can cause display problems.
- Windows: Search for "Device Manager," expand "Display adapters," right-click on your graphics card, and select "Update driver."
- macOS: Update your macOS to its latest version which will include the latest driver updates.
- Select the Right Input Source: Double-check that you have selected the correct input source (HDMI, VGA, etc.) on your projector.
- Experiment with Display Settings: Play around with the display settings on your laptop (resolution, duplicate/extend) to find the optimal configuration.
- Check the Projector's Manual: If the issue persists, consult the projector's manual for troubleshooting tips specific to your model.
- Test with Another Device: If possible, try connecting a different laptop or device to the projector to see if the problem lies with your laptop or the projector itself.
- Ensure Compatibility: Ensure that your laptop's display output (HDMI, VGA, etc.) is compatible with the associated input of your projector. If not, you'll need an adapter.
Optimizing Your Presentation or Viewing Experience
Once connected, you can tweak settings for the best viewing experience.
- Brightness and Contrast: Adjust the projector's brightness and contrast settings for optimal image quality in your environment. The ideal settings will depend on the ambient light in the room.
- Keystone Correction: This setting on the projector can adjust the image to ensure it's square, even if the projector isn't perfectly aligned with the screen or the display surface.
- Focus: Use the focus ring on the projector lens to sharpen the image.
- Aspect Ratio: Ensure
