webcam stopped working on laptop

Title: Fix Camera Not Working Windows 10 Windows Webcam Not Working Laptop camera not working
Channel: EasyTechGeek
Fix Camera Not Working Windows 10 Windows Webcam Not Working Laptop camera not working by EasyTechGeek
webcam stopped working on laptop, webcam not working on laptop lenovo, webcam isn't working on laptop, webcam not working on dell laptop, webcam not working on asus laptop, webcam not working on hp laptop, external webcam not working on laptop, webcam not working on dell laptop windows 10, webcam not working on samsung laptop, integrated webcam not working on laptop
Laptop Webcam DEAD?! 😱 Fix It NOW!
Laptop Webcam: SOS! How to Revive Your Dead Camera (and Avoid a Digital Disaster!)
That sinking feeling? The one that washes over you when you click the video call button, and… nothing? Your laptop webcam, once a portal to connection, now stares back blankly. It's frustrating, isn't it? Suddenly, you’re cut off, the world shrinks, and the dreaded phrase echoes in your mind: "Laptop Webcam DEAD?!" Don't panic! You're not alone. Moreover, let's get your digital life back on track.
Troubleshooting Your Webcam: A Digital Detective's Guide
First, let’s play detective. The problem could be surprisingly simple. First things first, completely reboot your machine. That's right, give it a full restart. Sometimes, a simple reset is all it takes to wake things up. So, go ahead, give it a try. Subsequently, check these common culprits:
- The Physical Switch: Does your laptop have a physical webcam kill switch?. Many laptops have this function. It’s often a tiny slider or a button. Inspect your laptop’s frame. Consequently, ensure it’s in the "on" position.
- The Webcam Cover: Many users value privacy. They cover their webcams. Thus, ensure there's no physical cover obstructing the lens. This seems obvious, but easy to overlook!
- The Camera App: Open your camera app. It could be your default Camera app. Or, perhaps it's an app like Zoom or Skype. Test it. Try to initiate the webcam. If the app itself struggles, then the problem persists.
Software Solutions: Digital Alchemy for Your Dead Webcam
Assuming the hardware is good, consider software. Let's dive into the digital realm to see if we can revive your webcam.
- Driver Detective: Drivers are essential. They act as the translator between your hardware and software. Outdated or corrupted drivers can cause problems. Therefore, go to Device Manager (search for it in your Windows search bar or access it from the Control Panel). Expand the "Cameras" or "Imaging devices" section. Locate your webcam. Right-click it. Choose "Update driver". Follow the prompts. Ideally, Windows will automatically find and install the latest driver. If that fails, you can try uninstalling the driver and restarting your computer. The system may attempt to reinstall the driver.
- App Permissions Patrol: Your webcam needs permission from apps to function. Head to your operating system’s settings. Find the “Privacy” section. Then, look for "Camera". Make sure the app has permission to use your webcam. Furthermore, ensure the "Allow apps to access your camera" toggle is enabled.
- Software Conflicts: Conflicts between applications can happen. Sometimes a particular program can interfere. Try opening another application that needs your webcam.
- Run a Malware Scan: Malware is bad. It can mess with anything. Run a full malware scan using your antivirus software. This will identify and remove any malicious programs interfering with your webcam.
Advanced Tactics: Reaching for the Digital Rescue Rope
If the preliminary steps fail, then it's time for some advanced solutions. These require slightly more tech-savvy, but are often effective.
- Reinstalling the Webcam Driver Manually: If Windows fails to update your driver automatically, get your hands dirty. Go to the manufacturer’s website. Download the latest driver for your laptop model. Next, go to Device Manager again. Uninstall your existing webcam driver. Disconnect your internet temporarily. Finally, install the driver you downloaded. Restart your laptop.
- BIOS Check-Up: The BIOS (Basic Input/Output System) controls your hardware. Restart your laptop. Access the BIOS setup (the exact key varies by manufacturer – usually Del, F2, F12, or Esc). This is before Windows loads. Look for a setting related to the webcam. Ensure it's enabled. Then save your settings.
- Consider a System Restore: This is a digital time machine. It returns your system to a previous state. It reverts settings to an earlier time. You may lose data. If the problem started recently, a system restore might reverse the issue. Access the System Restore utility (search for it in Windows). Choose a restore point before the webcam issue began.
Hardware Issues: The Grim Reality
Sometimes, the problem is hardware. This is less common but possible. If the webcam is physically damaged, it won't work. In addition, there might be a problem with the webcam's connection inside the laptop.
- External Webcam Solution: Need a fast fix? Use an external webcam. Many are affordable. Connect and use it. This bypasses the internal camera.
- Professional Help: Consult a professional. Take your laptop to a repair technician. They can diagnose hardware issues. They have the experience and tools.
Keeping Your Webcam in Peak Condition: Prevention is Key!
Preventive measures can help avert future issues.
- Regular Driver Updates: Stay ahead of the curve. Check for driver updates periodically. This keeps your system stable.
- Protect Your Laptop: Handle your laptop carefully. Avoid drops and physical damage.
- Anti-Malware Protection: Use a robust antivirus and anti-malware program. Scan regularly. This keeps your system clean.
Embrace the Solution!
Don’t let a dead webcam ruin your video calls. Therefore, use these techniques. Reclaim your digital connection. Most likely, you'll find a solution. So, take control. Don’t let technology intimidate you. Then, you'll be back to video chatting.
Work Laptop: Steal This Secret to Finding the PERFECT One!Laptop Webcam DEAD?! 😱 Fix It NOW!
Alright, friends, let's be honest. We've all been there. You're about to jump on that important video call, maybe a job interview, or you just want to wave hello to Grandma on the other side of the country, and BAM! The dreaded black screen. Your laptop webcam decides to stage a protest, a silent rebellion against your perfectly planned day. Panic sets in, right? Don't sweat it! We're going to become webcam whisperers and resurrect that little digital eye. Think of us as the webcam reanimation squad. Today, we tackle the digital Grim Reaper and bring your webcam back from the dead.
1. The Silent Scream: Understanding the Webcam's Plight
Before we dive in headfirst, let's figure out what's actually going on. Is your webcam truly deceased, or just experiencing a temporary glitch? Sometimes, it’s not a terminal illness, more like a digital cold. Understanding the symptoms is the first step to a swift recovery. It’s like diagnosing a patient before prescribing the medicine. Have you tried turning it off and on again (I know, cliché, but trust me, it works surprisingly often!)? Do you see a black screen, a blurry image, or nothing at all? Any error messages popping up? Jotting these down can help immensely.
2. Is It REALLY Dead? Quick Initial Checks
Before we go full-blown tech support mode, let’s do some quick, easy checks. These are the digital equivalent of checking to see if the lightbulb is actually screwed in. I've personally wasted hours troubleshooting only to realize the power cord wasn't plugged in—don't be me!
- Check the Physical Hardware: Is the camera actually covered? Some laptops have a physical slider you can use to block the camera. Ensure it's not the issue.
- Restart Your Laptop: The classic, the tried and true. Seriously, give your machine a good reboot. It clears out temporary files and might just jolt your webcam back to life.
- Check Your Camera App: Open your pre-installed camera app (usually called "Camera" or something similar). Does it work here? If yes, the problem might be with the specific application you're trying to use (Zoom, Skype, etc.).
3. Software Sabotage: Troubleshooting App Conflicts
If the camera app itself isn’t working, the problem is usually deeper. It’s often a software conflict. Think of it like squabbling siblings – sometimes apps just don't get along.
- Close Other Applications: Close any apps that might be using your webcam. Multiple apps can’t access it simultaneously. If Zoom is running, make sure Skype isn’t also trying to grab it!
- Check App Permissions: Make sure the app actually has permission to use your webcam. Go into your computer’s privacy settings (search for "camera privacy settings" in the start menu) and see if the application has access. You’d be surprised how often this is the culprit!
- Update Your Apps: Outdated software can be a nightmare. Head to your app store or the application's website and update to the latest version.
4. Driver Dilemma: Updating and Reinstalling Your Webcam Driver
Ah, drivers. The often-overlooked backbone of your computer's hardware. Drivers are like the instruction manuals that tell your computer how to communicate with its parts. If the webcam's driver is corrupt or outdated, your camera won't budge.
- Update the Driver: Right-click the Start button and select “Device Manager.” Find "Imaging devices," expand it, and right-click on your webcam. Select "Update driver." Let Windows search automatically.
- Reinstall the Driver: If updating doesn't work, try uninstalling and reinstalling. Right-click on your webcam in Device Manager and select "Uninstall device." Restart your laptop, and Windows should automatically reinstall the driver.
5. The Malware Menace: A Security Check
This is a less common cause, but it's crucial to consider. Malicious software can sometimes disable your webcam or take control of it. It’s like a digital identity thief trying to steal your image.
- Run a Virus Scan: Fire up your antivirus software and run a full system scan. Make sure your system is clean and safe.
- Check for Suspicious Software: Look for any programs you don't recognize in your installed programs list. If you find something fishy, uninstall it.
6. Webcam Won't Turn On: Check Your Operating System Settings.
Sometimes, your computer's operating system has the camera disabled in its settings. This is a simple fix, but it's easy to overlook. Think of it like having the light switch turned off in the room. How do you turn it back on to make your webcam work?
- Check Camera Privacy Settings: As mentioned before, navigate to your operating system’s privacy settings (in Windows, search for “Camera privacy settings”). Make sure everything is enabled properly. The settings should allow apps to access the camera.
- Check Your Browser Settings: If you're having issues with your webcam in a browser (like Chrome or Firefox), check the browser's settings to ensure it has permission.
7. The Hardware Hurdle: When It's a Physical Problem
Sometimes, the problem is truly hardware-related. This is the equivalent of a broken lightbulb. It requires you to replace it. While less common, it's a possibility.
- External Webcam: If you have an external webcam, try a different USB port or a different computer to see if the problem follows the camera.
- Laptop Webcam: For a built-in laptop camera, it could be a hardware issue. In this case, considering a repair or replacement might be needed if all else fails.
8. Consider Windows Troubleshooter: Leverage System Tools
We often forget the power of the built-in tools our computers offer. Windows has a built-in troubleshooter designed to diagnose and fix common hardware issues.
- Run the Hardware Troubleshooter: Type “Troubleshoot settings” in the search bar, select “Hardware and Sound,” and choose "Camera." Follow the on-screen instructions.
9. The Power of a System Restore: Rewind to a Better Time.
If you suspect a recent software update or change caused the problem, consider restoring your system to a previous point in time. This is like hitting the rewind button on your computer.
- Use System Restore: Search for “Create a restore point” and follow the prompts to restore your system to a date when your webcam was working.
10. Check Your BIOS Settings: A Deep Dive
For the tech-savvy, diving into your BIOS (Basic Input/Output System) settings can be an option. This is the system that starts before Windows boots up.
- Access BIOS: Restart your computer and enter the BIOS (usually by pressing Del, F2, F12, or Esc during startup). Check your settings for the webcam, and ensure it's enabled or disabled.
11. Resetting Your Laptop: A Last Resort
If all else fails, consider resetting your laptop to its factory settings. This is a drastic measure, but it will wipe everything and give you a fresh start (akin to a digital heart transplant).
- Back Up Your Data: Before resetting, back up all your important files.
- Reset Your Laptop: In Windows, search for “Reset this PC” and follow the instructions.
12. Cleaning Up Your System: Remove Unnecessary Files
Sometimes a congested system impedes the smooth functioning of the webcam. Clean up your system of files, folders, and any unnecessary applications. This might improve the Webcam performance.
- Run Disk Cleanup: Delete unnecessary cached files
- Uninstall the unnecessary application: Remove applications that may interfere with webcam function.
13. Examine For Corrupted Systems Files
Corrupted system files may render your webcam dysfunctional. Perform a system file scan to address this problem.
- Run SFC Scan: The System File Checker scans and replaces corrupted system files.
- Use System File Repair Tool: If the SFC scan fails, use the DISM tool to repair system image.
14. Checking Compatibility Issues
Sometimes your webcam app might not be compatible with the latest operating system or driver updates. Ensure compatibility.
- Check App Requirements: Check the app compatibility with the OS.
- Update Your Drivers: Older drivers may not be compatible with the latest webcam apps.
15. Professional Help: When to Call in the Cavalry
Sometimes, the problem is beyond our DIY capabilities. Don’t be ashamed to seek professional help when your webcam is dead.
- Local Computer Repair Shop: A local tech shop can diagnose and fix more complex hardware issues.
- Contact Your Laptop Manufacturer: If your laptop is still under warranty, contact the manufacturer for support.
Final Thoughts: Bringing Your Webcam Back to Life!
So, there you have it! We've covered a range of troubleshooting techniques, from basic checks to more advanced maneuvers. Hopefully, your webcam is now resurrected, ready to share your smiling face with the world. Don't let a dead webcam ruin your day. Use these tips, be patient, and remember that with a little bit of detective work, you can conquer this common tech issue. You've
Laptop Dead? This ONE Trick Will SHOCK You!100 SOLVED NEW 2024 - We cant find your camera ERROR CODE 0xA00F4244 in Windows 1011- NEW 2024

By How To Fix Tech 100 SOLVED NEW 2024 - We cant find your camera ERROR CODE 0xA00F4244 in Windows 1011- NEW 2024 by How To Fix Tech
Fix HP Laptop Camera Not Working on Windows windows 11 webcam not working

By Tech with sudhir Fix HP Laptop Camera Not Working on Windows windows 11 webcam not working by Tech with sudhir
How to quickly repair HP Pavilion x360 Model 15 webcam not working.
By Tech Services How to quickly repair HP Pavilion x360 Model 15 webcam not working. by Tech Services

Title: FIXED - Camera Not Working in Windows 11 Laptop or PC
Channel: Techie Leopard
FIXED - Camera Not Working in Windows 11 Laptop or PC by Techie Leopard
Laptop Wifi Hotspot
Laptop Webcam DEAD?! 😱 Fix It NOW!
It’s the digital age, and a functioning webcam is no longer a luxury; it's a necessity. From crucial business meetings and connecting with loved ones across continents to attending virtual classes and live streaming, a non-functional webcam can plunge you into a frustrating world of missed opportunities and isolation. If your laptop webcam has suddenly gone dark, resist the urge to panic. We understand the frustration, and more importantly, we have a comprehensive arsenal of solutions at your disposal. Consider this your ultimate guide to reviving your defunct webcam and reclaiming your digital presence.
1. The Initial Diagnosis: Unveiling the Source of the Problem
Before diving into complex fixes, let’s conduct a methodical assessment. The goal is to pinpoint the root cause of the webcam malfunction. This initial diagnostic step can significantly streamline the troubleshooting process, saving you valuable time and effort.
- Hardware vs. Software: The Crucial Distinctions Consider the possibility of a hardware failure. Is the webcam physically damaged? Check the lens for cracks, scratches, or any signs of impact. If you’ve recently dropped your laptop or subjected it to undue pressure, hardware damage is a strong possibility. Examine the area around the webcam for anything unusual such as dirt, scratches, or anything out of the ordinary. Conversely, the issue might be software-related. Have you recently installed or updated any drivers or applications that could be interfering with webcam functionality? Sometimes, a simple software glitch can manifest as a webcam failure.
- Application-Specific Issues: Testing Beyond the Basics To determine whether the problem is system-wide or specific to a particular application, test your webcam with multiple applications. For example, if your webcam is not working on Zoom, try using it on Microsoft Teams, Skype, or even the built-in Camera app (if your laptop has one). If the webcam works in some applications but not others, the issue is likely within the settings or configuration of the problematic application, not the webcam itself.
- The LED Indicator: Deciphering the Silent Clues Most laptops have an LED indicator next to the webcam. This light is a visual cue to whether the webcam is active or not. Observe the LED and its behavior. If the LED isn't illuminating when the webcam is in use, there may be a hardware problem and that you may have to consult a professional. Its presence indicates the webcam is, at least on a basic level, functional, but not necessarily operating correctly.
2. The Software Side: Troubleshooting Driver Conflicts and Configuration Errors
Software is a common culprit in webcam malfunctions. Driver issues and incorrect settings can render your webcam useless. Here’s how to address these software-related problems:
- Driver Updates: Keeping Your Software Current Outdated or corrupted webcam drivers are a persistent problem. Update your webcam drivers. Go to Device Manager (search for it in the Windows search bar). Locate "Imaging devices" or "Cameras". Right-click on your webcam (it might be listed as "Integrated Webcam," "HD Webcam," or something similar) and select "Update driver." Choose "Search automatically for drivers." Windows will search for the latest drivers online and install them.
- Driver Uninstallation and Reinstallation: The Clean Slate Approach If updating drivers doesn't resolve the problem, a complete reinstallation of your webcam drivers may be necessary. In Device Manager, right-click on your webcam and select "Uninstall device." In the pop-up window, check the box to delete the driver software for this device (if the option is available). Then, restart your laptop. Windows will typically automatically reinstall the default drivers upon restart. If not, go back to Device Manager and select "Scan for hardware changes."
- Privacy Settings: Granting Access to Your Webcam Operating systems have robust privacy controls, including webcam access permissions. Ensure that the apps you want to use the webcam with have permission. Navigate to your system's privacy settings. In Windows 10 and 11, the settings are usually found under "Privacy & security" or simply "Privacy." Look for "Camera" or "App permissions" (the wording might vary). Ensure the toggle switch for your webcam is "On," and that the specific applications you use are permitted to access the webcam.
- Application Settings: Fine-Tuning the Webcam Configuration Many video conferencing applications allow you to select the webcam and configure its settings. Double-check the application settings to be certain that the correct webcam is selected. Verify that the webcam is enabled within the application. Look for options like "Camera," "Video Settings," or a similar tab within the application's preferences. Ensure the webcam is not muted or disabled within the application settings.
3. Hardware Hurdles: Addressing Physical Issues and External Webcam Solutions
While software issues are more common, hardware malfunctions can also arise. These issues can be significantly more difficult to resolve and may require professional assistance.
- External Webcam Tests: Assessing Hardware Reliability If your laptop has a built-in webcam, use an external webcam to determine if the problem is the build-in camera. If another webcam works, that points to an issue with the embedded hardware. If the built-in webcam is not functioning, then you have to check other options.
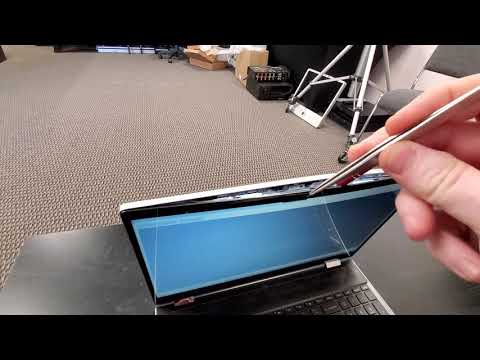
- Hardware Inspections: Examining the Physical Components If comfortable, you can inspect the webcam itself. However, this requires some technical expertise and the risk of damaging your device. Carefully examine the webcam lens for any physical damage. Check the connections. Often, the webcam is connected to the motherboard via a cable. If you feel comfortable, carefully open your laptop (consulting the manufacturer's manual for safety instructions) and check the webcam’s cable connection.
- USB Connection Problems: Addressing External Webcam Issues If you employ an external webcam, ensure the USB connection is secure. Try a different USB port to eliminate the possibility of a faulty port. Also, make sure the USB cable is not damaged. Consider using a different USB cable.
4. Advanced Solutions: Diving Deeper into the Troubleshooting Process
Here are some advanced troubleshooting methods to try.
- BIOS Updates: Ensuring Firmware Compatibility In some cases, outdated BIOS firmware can interfere with your webcam. Check your laptop’s manufacturer’s website for BIOS updates. Updating the BIOS is an advanced procedure and requires following the specific instructions provided with your laptop model. Follow the instructions precisely to avoid damaging your system.
- System Restore: Rolling Back to a Previous State If the webcam suddenly stopped working after a recent change (such as a driver update or software installation), you can try using System Restore to revert your system to a previous state. Search for "Create a restore point" in the Windows search bar. Open it and click "System Restore." Follow the prompts to choose a restore point from a time when your webcam was functioning. Be aware that you will lose any software changes made since that point in time, so ensure you back up any essential data first.
- Factory Reset: The Nuclear Option As a last resort, a factory reset will return your laptop to its original settings. This will erase all data on your hard drive, so back up everything first. Ensure that you have all the necessary software and product keys because you will have to fully reinstall your applications. Then, in the settings, go to "Update & Security," then "Recovery," and select "Reset this PC." It will walk you through the steps.
- Seeking Professional Help: When to Call in the Experts If all else fails, consider professional repair. If you’ve already tried all of the above solutions, it's likely that the hardware is at fault and requires specialist attention.
5. Proactive Measures: Ensuring Future Webcam Reliability
Preventative measures can significantly reduce the chances of future webcam failures.
- Regular Driver Maintenance: Keeping Your System Up-to-Date Make driver updates a regular part of your system maintenance routine. Periodically check for driver updates for your webcam, as well as other hardware components.
- Protecting Your Webcam Lens: Shielding Against Physical Damage Protecting your webcam lens is essential. Be careful and clean the lens regularly with a microfibre cloth. Consider using a webcam cover when not in use. Be particularly cautious when transporting your laptop, to avoid any bumps or scratches.
- Maintaining a Clean System: Avoiding Interference Keep your system free of malware and other unwanted programs. Malware can sometimes interfere with webcam functionality.
- Backup Strategies: Mitigating Data Loss Regularly back up your files. This will help you in case of system failure.
Your webcam is an essential component of your digital life. By employing the methods outline in this guide, you increase your chances of restoring functionality and reclaiming your digital presence.
