beats audio won working on laptop stopped

Title: Beats audio back SOLVED - No BeatsAudio After Updating to Windows 10 UHD 4K
Channel: GSM DIY
Beats audio back SOLVED - No BeatsAudio After Updating to Windows 10 UHD 4K by GSM DIY
Beats Audio DEAD on My Laptop?! (Fixed This!)
My Beats Audio Died! A Laptop Savior's Tale
It happened. One minute, the bass was booming, the next… silence. My Beats Audio, the lifeline to my sonic world, had flatlined on my laptop. Panic, naturally, set in. My go-to for music, podcasts, and late-night movie binges was kaput. But, I'm a problem-solver, so I wasn't about to surrender to audio oblivion easily. Because, let's be honest, that’s a nightmare.
The Initial Frustration: Where Did My Sound Go?
Suddenly, nothing. Absolutely nothing. I fiddled with the volume, cursed the technology gods, and did everything I knew to restore sound. First, I checked the obvious: the volume controls. Then, I double-checked the speaker settings. Next, I rebooted my laptop, because, you know, technology. But, alas, nothing worked. Frustration had reached a boiling point. The silence was deafening, in its own way.
Digging Deeper: Unearthing the Culprit
Determined to find a solution, I started digging. I ventured into the depths of my laptop's settings, starting with the device manager. There, buried amidst the digital clutter, I found it: my Beats Audio drivers. They were either missing or malfunctioning. It was a moment of clarity, I felt like a tech detective. In addition, a quick Google search revealed a shared frustration among fellow Beats enthusiasts. Therefore, I knew I wasn't alone.
The Driver Dilemma: Reinstalling for Salvation
So, the drivers were the prime suspect. The next step: reinstalling them. Therefore, I navigated to my laptop manufacturer's website. I downloaded the latest drivers for my specific model. Furthermore, I uninstalled the existing ones, then I ran the new installation. This process, on its own, seemed simple. However, I was prepared for challenges. After all, tech rarely cooperates perfectly.
A Sudden Breakthrough: Restoring the Rhythms
After the installation, I crossed my fingers and rebooted again. Then, I clicked play. And… music! Triumphantly, the familiar thumping bass and crisp highs filled the room. Likewise, a wave of relief washed over me. The fix was a success. I had resurrected my laptop's audio capabilities. Moreover, the problem was resolved.
Troubleshooting Tactics: Other Potential Solutions
However, the driver reinstall didn't work for everyone. So, what other avenues can you explore? Well, for one, check your audio output settings. Make sure the computer is routing sound to the correct device. Second, sometimes, a simple system restore to a point before the problem arose can solve it. Third, verify that your operating system is updated. Because old software can cause all sorts of issues. Also, run a hardware diagnostics test to ensure your sound card is functioning correctly.
External Devices: A Potential Escape Route
If your internal audio continues to fail, consider external options. Connecting external speakers or headphones can bypass any internal issues. This would make testing easier. It could help you determine if the problem lies within the laptop itself. In addition, a USB audio adapter provides a practical workaround. Therefore, don't let a broken sound system get you down.
Preventative Measures: Keeping the Beat Alive
To prevent future audio woes, a few proactive steps are recommended. First, keep your drivers updated religiously. Second, regularly clean your laptop to prevent overheating. Third, and most importantly, install a reliable antivirus program. Because malware can wreak havoc on your system. Finally, back up your data periodically. This ensures you can restore your system if something goes haywire.
The Final Verdict: Audio Bliss Restored
In conclusion, my Beats Audio crisis, thankfully, had a happy ending. The driver reinstall worked wonders. Thus, demonstrating that even the seemingly catastrophic issues can be resolved. So, next time you're met with silence, don't despair. Therefore, approach the problem methodically. Additionally, explore all your options. Furthermore, your audio bliss may be just a few clicks away. Now, back to my music!
HP Envy Keyboard Dead? FIX This NOW!Beats Audio DEAD on My Laptop?! (Fixed This!)
Alright, folks, let's talk audio. Specifically, let's talk about that sinking feeling when you fire up your laptop, ready to blast your favorite tunes (or maybe just get some focus-boosting white noise going), and… silence. De-af-en-ing, soul-crushing silence. Especially if you're like me, and you’re rocking a laptop with Beats Audio…or, were rocking a laptop with Beats Audio. Because for a while there, mine was dead. Like, officially, tragically, no-sound-coming-out-of-it-at-all dead. And trust me, I know the frustration. So, grab your headphones, settle in, because we're diving deep into how we resurrected the audio on my laptop. This isn't just a fix; it's a journey back to sonic bliss!
1. The Silent Symphony: Recognizing the Problem
The first sign? No sound. Plain and simple. You checked the volume, you checked your headphones, you even tried a reboot (because, let's be honest, reboots solve everything…most of the time). But nope. Crickets. Or, rather, the complete absence of crickets. The Beats Audio hardware, which used to pump out those thumping basslines and clear highs, was doing…nothing. It was like plugging into a black hole for sound. We’ve all been there, staring at a screen, wondering what magical incantation will bring the music back.
2. The Culprit Unmasked: Identifying the Root Cause
Now, the reasons for dead Beats Audio vary like flavors of ice cream. It could be a software glitch, a driver issue, or a rogue update wreaking havoc on your audio settings. Sometimes, it’s something as simple as a disconnected headphone jack (yep, I’ve done that one. More than once.). Other times, it’s more insidious, like a corrupted audio driver that needs a serious overhaul. Think of it like a car – you can’t just assume the engine’s blown; you gotta pop the hood and start checking things, one by one.
3. The Reboot Ritual: The First Line of Defense (and Often, the Simplest)
Before we get our hands dirty with complicated tech mumbo-jumbo, let's try the good old-fashioned reboot. It's the digital equivalent of a reset button, a chance to give your laptop a fresh start. Close all your programs, save your work, and restart your computer. Sometimes, that’s all it takes. It’s like giving your computer a good night's sleep – it wakes up refreshed, ready to tackle the day (and play your music).
4. Volume Check: A Simple, Yet Often Overlooked, Step
This one might seem silly, but I had to include it! Double-check your volume levels. Sounds obvious, right? But you wouldn't believe how many times I've spent ages troubleshooting a "dead" audio system, only to realize the volume was muted or turned down to zero. It's like searching for your glasses when they're perched on top of your head. Make sure your master volume isn't muted or turned down. Also, check the individual volume settings for the specific application you're using.
5. The Headphone Jack Hustle: Ensuring a Proper Connection
Okay, another potentially obvious one, but still worth mentioning. Is your headphone jack plugged in properly? Make sure it's fully inserted. Sometimes, a loose connection can cause audio problems. Try wiggling the jack a bit to see if you can get any sound. If you're using external speakers, double-check those connections too.
6. Diving into Device Manager: Unveiling the Driver's State
If the simple fixes didn't work, it's time to get into the nitty-gritty. Open up your Device Manager. (You can usually find it by typing "Device Manager" into the Windows search bar, or by right clicking on the Windows key and selecting Device Manager). This is where you can see all the hardware connected to your computer. Look for "Sound, video and game controllers." Is there a problem there? Are there any yellow exclamation marks or red X's next to your Beats Audio device? These are telltale signs of driver issues, like the system crying for your attention.
7. The Driver Detective: Updating or Reinstalling the Driver
If you spotted a driver problem, updating or reinstalling is the next step. Right-click on your Beats Audio device in Device Manager and select "Update driver." Windows will then attempt to find and install the latest driver. If that doesn’t work, try uninstalling the driver by right-clicking and selecting "Uninstall device." Then, restart your computer. Windows should automatically reinstall a generic driver upon reboot.
8. The Audio Troubleshooter: Windows to the Rescue?
Windows has a built-in audio troubleshooter. It’s not always a miracle worker, but it can often identify and fix common audio problems. You can usually find it in the sound settings of your computer (search for "Sound settings" in the Windows search bar). Run the troubleshooter and let it work its magic.
9. The Audio Enhancement Adventure: Checking for Conflicting Settings
Sometimes, audio enhancements can cause problems. Right-click on the speaker icon in your system tray (usually in the bottom right corner of your screen), then select "Sounds." Go to the "Playback" tab, right-click on your audio device (your speakers or headphones), and select "Properties." Look for tabs like "Enhancements" or "Dolby." Experiment with disabling these enhancements to see if it fixes the issue.
10. The Uninstall-Reinstall Routine: A More Aggressive Approach
If updating the driver didn't work, a complete uninstall-reinstall often does the trick. Go back to Device Manager, uninstall the Beats Audio driver, and then restart your computer. Windows should automatically reinstall the driver. If it doesn't, you can sometimes download the driver from the manufacturer's website (like the HP support website, if you have an HP laptop). Think of it as a digital surgery - you remove the problematic part and then put in a new one.
11. Clean Boot: Isolating the Source of the Problem
Sometimes, other software on your computer can interfere with your audio. To check if this is the case, perform a clean boot. A clean boot starts Windows with a minimal set of drivers and startup programs. That way, you can figure out which software might be causing the audio woes. You can find instructions on how to perform a clean boot by searching on the internet.
12. The System Restore Card: Rolling Back to a Working State
If all else fails, System Restore could be your saving grace. This feature allows you to revert your computer to a previous state, before the audio problems started. Go to the System Restore utility (search for it in the Windows search bar). Choose a restore point – ideally, one from before you noticed the audio issues. This is like hitting the rewind button on your computer's history and making it well again.
13. The Hardware Check: A Potential Physical Issue
While less common, it's possible there's a hardware issue. The speakers themselves might be faulty. Try connecting external speakers or headphones to see if they work. If they do, the problem might lie with your laptop's internal speakers. This might mean a repair; a hard pill to swallow, but at least you'll know for sure!
14. The Ultimate Fix (For Me!): My Personal Victory
In my case, after trying all the above (and trust me, there was a lot of swearing involved), the winning solution was a driver reinstallation. The previous drivers seemed corrupted. Once I downloaded the newest, working drivers from my manufacturer's website, the Beats Audio roared back to life! It felt like a glorious resurrection.
15. The Sonic Renaissance: Enjoying the Sound Once More
And there you have it! The journey from silence to sound. The feeling of relief when the music starts playing again is truly something special. So crank up the volume, and enjoy your melodious moment of triumph! You fixed it!
Conclusion: The Music Lives On!
So, there you have it, our journey through the treacherous waters of dead Beats Audio. I hope this guide helps you resurrect the sound on your laptop and get you back to enjoying your music or your work – or whatever you use your sound for. Remember, troubleshooting can be a process, but by systematically going through these steps, you'll greatly increase your chances of success. Don't give up! The music is out there, waiting to be heard. Now go forth and listen!
FAQs
- What should I do first if my Beats Audio isn't working? Start with the simple stuff! Check your volume levels, make sure your headphones are plugged in correctly, and then restart your computer. It's the digital equivalent of "have you tried turning it off and on again?".
- Should I update or reinstall my audio driver? Both approaches are valid. Try updating the driver first. If that doesn’t work, uninstall and reinstall it. Think of them as different levels of repair.
- What is Device Manager, and how do I use it? Device Manager is a tool in Windows that allows you to see all the hardware connected to your computer
How to Get Missing Beats Audio Back After Windows Update

By GeekedUp How to Get Missing Beats Audio Back After Windows Update by GeekedUp
Beats Solo 4 Mic Not Working on PC Windows 1011
By HowToDevices Beats Solo 4 Mic Not Working on PC Windows 1011 by HowToDevices
Beats Audio equalizer does not work in HP laptop

By Roel Van de Paar Beats Audio equalizer does not work in HP laptop by Roel Van de Paar

Title: All Laptop Sound Audio Problem HP Elite Book Series Laptop Audio Soundmacniteshkeyboardtricks
Channel: Mac Nitesh
All Laptop Sound Audio Problem HP Elite Book Series Laptop Audio Soundmacniteshkeyboardtricks by Mac Nitesh
Laptop Wifi Hotspot
Beats Audio DEAD on My Laptop?! (Fixed This!)
We've all been there. The familiar pulse of your favorite track, rendered lifeless. The rich bass, the crisp highs – all vanished, replaced by a hollow echo or, worse, complete silence. For those of us who rely on the immersive audio experience provided by Beats Audio, the sudden demise of the sound can be a truly frustrating experience. This isn't just about casual listening; it's about retaining the quality of your audio experience while working, enjoying media, or simply unwinding after a long day. Having invested in the Beats ecosystem, we expect a certain level of performance. When that's compromised, we need solutions. This guide provides a comprehensive walkthrough of the common causes and practical solutions to revive your Beats Audio on your laptop. We will address the likely culprits, from hardware malfunctions to software glitches.
Diagnosing the Silence: Uncovering the Root of the Problem
Before diving into solutions, we must establish the source of the problem. The first step is diagnostic. This starts with the obvious and moves toward the more technical. A systematic approach will save time and ensure you don't overlook anything.
1. The Obvious Checks: Volume and Mute Controls
It sounds simple, but frequently, the most straightforward solutions are overlooked. Start by verifying the volume level on your laptop itself. Is the volume turned down? Are the speakers muted? Look for the mute icon in your system tray (usually a speaker icon with a line through it). Also, check the physical volume buttons on your laptop. These controls can sometimes malfunction or be inadvertently pressed.
2. Software Interference: Examining the Audio Playback Source
Next, assess where the audio is coming from. Is the relevant application (e.g., Spotify, YouTube, your music player) playing audio at all? Ensure the application isn't muted independently of your system volume. Check for muted tracks or silence during playback. Sometimes, a simple refresh of the application or a restart can resolve a minor software conflict.
3. Hardware Verification: Checking the Physical Connections
If you're using external speakers or headphones, ensure they are properly connected. Check the physical connections, are they fully plugged in? Sometimes a loose cable can cut off the audio signal. Test with a different pair of headphones or speakers. This helps isolate whether the problem is with the audio output port on your laptop or with the Beats equipment itself.
4. Drivers: The Gateway to Sound
Drivers are the software that allows your operating system to communicate with your hardware. Outdated, corrupted, or improperly installed audio drivers cause significant audio issues. We will delve deeper into driver-related troubleshooting later.
Diving Deeper: Troubleshooting Specific Beats Audio Issues
Assuming the preliminary inspections have been undertaken and yielded no results, it's time to address the issues head-on. This includes dealing with driver problems, examining software conflicts, and examining potential hardware conflicts.
1. Driver Dilemmas: Updating and Reinstalling Audio Drivers
Outdated or corrupted audio drivers are a frequent cause of audio problems. They dictate how your operating system interacts with your sound card.
- Device Manager: Access the Device Manager (search for it in the Windows search bar). Expand the "Sound, video and game controllers" section. Locate your audio device, often identified by its manufacturer (e.g., Realtek, Intel) or the Beats Audio name.
- Updating Drivers: Right-click on your audio device and select "Update driver." Choose the option to "Search automatically for drivers." Your system will attempt to find and install the latest drivers online.
- Manual Installation: If the automatic update fails, visit the manufacturer's website (e.g., Realtek, Intel, or the laptop manufacturer's support page) and download the latest drivers for your specific laptop model. Install them manually.
- Reinstalling Drivers: If updating doesn't work, right-click on the audio device in Device Manager and select "Uninstall device." Restart your laptop. Windows should automatically attempt to reinstall the drivers. If not, manually install the drivers you downloaded previously.
2. Sound Enhancements: Navigating the Sound Control Panel
Windows has built-in sound enhancement features that sometimes interfere with Beats Audio settings.
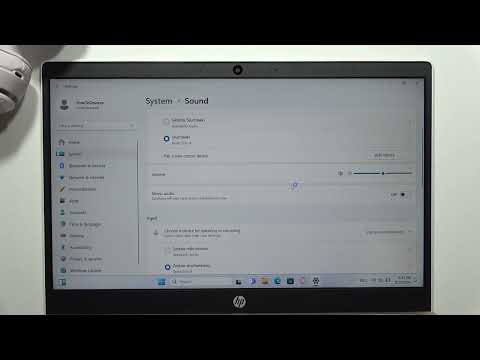
- Access the Sound Control Panel: Search for "Sound" in the Windows search bar and select "Sound settings." Scroll down and click on "Sound Control Panel."
- Playback Tab: In the Sound Control Panel, navigate to the "Playback" tab. Select your default audio device (typically the one associated with your laptop's speakers or headphones).
- Properties: Click "Properties."
- Enhancements Tab: Check the "Enhancements" tab. Disable any enhancements, spatial sound features, or audio effects that might be enabled. These enhancements can sometimes cause compatibility issues with Beats Audio, or cause unwanted sound quality issues. Test the audio after disabling these options.
- Advanced Tab: Investigate the "Advanced" tab. Ensure the audio format (e.g., 16-bit, 44100 Hz) is set to a standard, compatible setting. Experiment with different settings if necessary.
3. Software Conflicts: Identifying and Resolving Conflicts
Occasionally, other software on your laptop can interfere with your audio output. This includes other audio enhancement software, virtualization programs, or even certain games or applications.
- Close Unnecessary Programs: Close all non-essential applications, especially those that might utilize audio (e.g., other music players, streaming services).
- Check Startup Programs: Use the Task Manager (Ctrl+Shift+Esc) to view the processes running on your laptop. Look for any programs that might be related to audio or sound management. If you find any, try temporarily disabling them. Restart your laptop.
- System Restore (Last Resort): If the problem began after installing new software, consider using System Restore (search for it in the Windows search bar). Restore your system to a point before the software was installed.
- Update the Bios: Outdated BIOS settings can malfunction with hardware settings. Be sure that you updated this frequently.
Hardware Considerations: From Speakers to Sound Cards
While Beats Audio is typically associated with software optimizations, hardware issues remain a possibility. Thorough inspections are essential.
1. External Speakers and Headphones: Testing and Diagnosis
If you're using external devices, test them with a different device (e.g., your phone, another laptop). This will determine if the issue lies in the device itself.
- Speaker/Headphone Testing: Once the device is confirmed to be in a fully functioning state, it can be assumed that the laptop is the issue.
- Port Inspection: Inspect the audio jack and USB ports for any physical damage. Dust or debris could be interfering with the connection.
- Connection Verification: Ensure that all the connections are properly connected.
2. Internal Speakers: Diagnosing Laptop Speaker Issues
Laptop speakers can fail over time. Sound hardware damage can be catastrophic for a laptop.
- Listen Closely: Listen for any signs of static, distortion, or crackling sounds, even at low volumes. These can indicate a speaker problem.
- Sound Test: Perform a sound test from the sound control panel.
- Hardware Repair: If you suspect a hardware issue with your laptop’s speakers, consider taking your laptop to a qualified repair technician. Hardware repairs are often best left to professionals.
3. Sound Card Assessment: Evaluating the Audio Processing Unit
The sound card (or integrated audio processor) is the heart of your laptop's audio system.
- Driver Examination: Focus on the drivers. As mentioned, driver issues are a primary cause of sound card problems.
- Conflict Evaluation: Check for any known conflicts between your sound card drivers and other software. This involves checking if your sound card is included in other conflicts.
- Hardware Replacement: If the sound card is faulty, replacing it may be necessary.
Final Steps: Advanced Solutions for Persistent Problems
If the above solutions didn't fix your Beats Audio issues on your laptop, it’s time to explore the more advanced aspects.
1. Operating System Reinstallation: A Fresh Start
If all else fails, reinstalling your operating system can be a drastic but effective solution. However, ensure you have backed up all your important data first.
- Data Backup: Before reinstalling Windows, back up all essential files, documents, and media to an external hard drive or cloud storage.
- Windows Installation: Use the Windows installation media (USB drive or disc) to reinstall the operating system.
- Driver Installation: After Windows is reinstalled, install the latest drivers for all your hardware components, including sound.
2. Professional Assistance: When to Seek Expert Help
Sometimes, the issues are beyond your ability to resolve.
- Hardware Diagnostics: If you suspect a hardware issue (e.g., a faulty sound card, damaged speakers), take your laptop to a qualified repair technician.
- Firmware Issues: Complex or intermittent problems may require the expertise of a professional.
- Cost Comparison: Compare the cost of repair with the possibility of purchasing a new laptop altogether.
By following these steps, we are confident that you will be able to restore your Beats Audio and restore the audio experience you expect from the equipment, and we hope you find value in the guide. Remember, patience and a systematic approach are your allies in troubleshooting audio issues.
