how to wipe your work laptop

Title: How to wipe PC before selling Secure Erase PC The ENTIRE process Windows 10 & 11
Channel: Jason Bagnell
How to wipe PC before selling Secure Erase PC The ENTIRE process Windows 10 & 11 by Jason Bagnell
how to wipe your work laptop, how to wipe a work laptop, how to wipe a work laptop reddit, how to reset your work laptop, how to clear my work laptop, how to wipe a business laptop, how to wipe my work laptop clean, can i wipe my work laptop, can i factory reset my work laptop
Wipe Your Work Laptop CLEAN: The Ultimate Guide (Before IT Notices!)
The Great Laptop Purge: A Pre-emptive Strike (Before Your IT Department Does!)
So, you've decided it’s time. That work laptop, a digital repository of… well, stuff, requires a serious cleansing. Before the inevitable IT audit looms large, let’s talk about a strategic digital detox. Think of it as a pre-emptive strike against potential headaches. Because, let's face it, nobody enjoys the panicked email from IT.
Phase One: Data Inventory – The Reconnaissance Mission
First things first: assess the landscape. You need to know your enemy, or, in this case, your data. Begin with a thorough inventory. Where does all this digital baggage reside? Consider this your initial reconnaissance.
- Unearth the Usual Suspects: Start with the obvious. Delve deep into your Downloads folder. It’s a digital graveyard of forgotten files, temporary documents, and who-knows-what-else. Examine the desktop with a critical eye. Is it a curated workspace or a chaotic mess?
- The Cloud's Hidden Corners: Don't forget your cloud storage accounts. Google Drive, Dropbox, OneDrive – they hold secrets. Are there old project files lurking? Old drafts waiting to resurface? Take stock of what you're actually utilizing.
- Email Archives: The Digital Time Capsule: Your email inbox is another treasure trove. Search for attachments. Look for large files or outdated documents. Maybe even archive a lot. Don't be afraid to unsubscribe from irrelevant newsletters.
Phase Two: The Great Digital Sifting – Separating Wheat from Chaff
Now comes the tough part: the actual deletion. It's time to sort the valuable from the expendable. This phase requires a bit of ruthlessness. However, a clear digital space will be worth your time.
- The Purge Protocol: Start with the easy wins. Delete old drafts, redundant files, and anything you haven't touched in months (or years!). Be honest: will you really need that presentation from 2017 again?
- Tackling the Bloat: Identify large, space-hogging files. Videos, high-resolution images, and hefty spreadsheets often take up significant storage. Consider backing them up externally or moving to the cloud.
- Application Amnesty: Uninstall unused applications. Software clutter can slow down your laptop. Moreover, old programs can pose security risks. Only keep the tools you actively use. After all, unnecessary apps simply take up space.
Phase Three: The Secure Wipe – Erasing Without a Trace
Once you've decluttered, it's time for the heavy artillery: secure wiping. You don't want sensitive data floating around. It's important to be as secure as possible.
- Factory Reset Considerations: A factory reset is the most comprehensive option. Thus, it will wipe your entire drive. Important Note: Back up all essential data before proceeding. This step is crucial.
- Disk Sanitization Tools: Going the Extra Mile: If you have concerns about residual data, explore disk sanitization software. Programs like DBAN (Darik's Boot and Nuke) securely overwrite your hard drive. This makes data recovery virtually impossible.
- Password Protection: A Final Layer: Ensure your laptop is password-protected. Use a strong, complex password. Consequently, this is a crucial step in safeguarding your digital fortress.
Phase Four: The Aftermath – Maintaining Digital Hygiene
You've purged, you've wiped, you've triumphed! But the battle isn't over. The war against digital clutter is constant. It's a marathon, not a sprint.
- Regular Spring Cleaning: Schedule regular digital cleanups. Perhaps once a month, or even quarterly. This way, you'll avoid the build-up. It's easier to maintain than to start from scratch.
- Mindful Downloads: Be selective about what you download. Think before you click. In other words, practice digital mindfulness. This simple habit will save time and effort.
- Cloud Storage: Your Digital Lifeline: Utilize cloud storage effectively. It will keep your data accessible. Consequently, you will also free up space on your local drive.
Phase Five: The IT Department's Perspective (And How to Stay Off Their Radar)
While this guide offers valuable advice, remember your employer's policies always take precedence. So, what about IT?
- Compliance First: Be aware of your company’s data retention policies. Adhere to them meticulously. This helps avoid problems.
- Communicate Where Necessary: If you have any questions about data security or wiping procedures, ask IT. Therefore, being informed is always better. It prevents surprises.
- The Golden Rule: If in doubt, err on the side of caution. When it comes to data security, better safe than sorry. This is always the best approach.
Your work laptop is now lean, mean, and ready for action. You have a cleaner, faster device. Now, you can face your IT audit with confidence. Furthermore, you've accomplished your digital mission. Celebrate your victory!
Laptop Keyboard Nightmare: This One Weird Trick Fixes It!Wipe Your Work Laptop CLEAN: The Ultimate Guide (Before IT Notices!)
Hey everyone, let's talk about something a little…sensitive. We’ve all been there. You’re moving on from a job, maybe getting ready for a new adventure, or perhaps you're just feeling a little too comfortable with the digital footprint you've left on your work laptop. The nagging thought creeps in: "Is my digital life a well-kept garden, or a overgrown jungle that IT is eventually going to hack their way through!" This is where our mission of wiping your work laptop clean comes in. We're not talking a quick "delete history" session; we're talking a deep clean, a digital declutter, a complete reset of your work life. This guide is your friendly, step-by-step roadmap to ensuring that your departure is smooth, your data is secure, and your personal privacy is intact. And let’s be honest, it's a lot less stressful to do this before you get that dreaded email from IT.
1. The "Why" and "When" of Wiping Your Work Laptop
Before we dive into the nitty-gritty, let's address the elephant in the room: Why wipe your laptop? Why now? Think of your work laptop as a shared apartment. Over time, it accumulates clutter – sensitive company data, personal files, browsing history, and maybe even a few embarrassing memes you thought were safely tucked away. Leaving all that mess behind can leave you exposed. It can lead to data breaches, privacy violations and, frankly, just isn't professional.
Consider this: You've resigned, and your laptop is returned. Your former employer is going to review it. Let's create a scenario:
- The "I Didn't Know" Defense: This doesn’t cut it. Ignorance isn't an excuse.
- The "It's Fine" Mindset: Oh, it's fine until it's not. Trust us!
- The "Everything Is Still on My Email" Assumption: Absolutely not. That's not the same as securely removing it from the machine.
The "When" is equally important. Ideally, before you hand over the laptop. The best time is when your employment ends, or when you know your time is limited. Procrastination here is a digital landmine. Waiting until the last minute creates stress and increases the chance of overlooking crucial data wiping steps.
2. Understanding Your Company's Data Policy
Before you touch a single file, you absolutely need to get familiar with your company's data policy regarding company-owned devices. It might be in your employee manual, a separate document (like an IT guide), or available on the company’s intranet. This policy is your bible. It will outline:
- Permitted Use: How your laptop guidelines and restrictions for acceptable use will be specified.
- Data Ownership: Who actually owns the data on the device?
- Data Retention: How long does your company retain data?
- Wiping Procedures: What data your company expects you to remove if you are leaving.
Ignoring the policy is like running a red light; you're asking for trouble. It's essential to see how to proceed legally. Read, understand, and adhere to it. If anything is unclear or ambiguous, ask your IT department or your manager. You want to comply with company policies.
3. Backing Up Your Personal Data (Safely!)
Okay, let's be clear: we're wiping the work laptop, not your life. Before you wipe anything, back up any personal data you want to keep. Think family photos, personal documents, anything you wouldn’t want to lose. But be wise about it. You don't want to back them up onto another company device!
Here’s the smartest strategy:
- Cloud Storage: Services like Google Drive, Dropbox, or OneDrive are your friends. They offer ample free storage.
- External Hard Drive: A reliable hard drive or USB drive is a safe choice.
- Avoid Sensitive Information: Never back up sensitive information like passwords, credit card details, or social security numbers.
Make sure your backups are secure, encrypted if possible, and stored in a location where you are the primary owner.
4. Identify and Remove Work-Related Files and Programs
This is where the actual tidying up begins. Start by identifying everything related to your work. This includes:
- Documents: Spreadsheets, presentations, reports, and PDFs.
- Emails: While email servers usually archive company emails, you might have downloaded copies.
- Software: Any applications or programs installed specifically for your job.
- Browser History: Clear your browser history, cached data, and cookies.
The goal is to create a digital separation.
5. Securely Deleting Files: Beyond the Recycle Bin
Deleting a file and emptying the Recycle Bin isn't enough. It's like tearing up a piece of paper and throwing it in the trash. It can still be reconstructed. You need to shred the data. There are multiple options:
- Built-in Tools: Windows has tools like "File Shredder" that can securely delete files.
- Third-Party Software: Numerous apps and applications like Eraser and CCleaner provide secure file deletion.
- Overwriting Data: The best shredder is to overwrite your data.
The key is the overwriting algorithm. This ensures that the original data is unrecoverable.
6. Unlink Personal Accounts
This step prevents unexpected complications. Make sure you're signed out of all your personal accounts on the work laptop. This includes:
- Email Accounts: Gmail, Yahoo, Outlook (personal versions).
- Social Media: Facebook, Twitter, Instagram, etc.
- Cloud Storage: Dropbox, Google Drive, OneDrive.
- Password Managers: LastPass, 1Password.
The goal is to eliminate possible access so no one can access your personal information.
7. Encrypting Your Hard Drive (If You Haven't Already)
If you haven't already, now is a good time to encrypt your hard drive. Encryption scrambles your data, making it unreadable without the correct decryption key. This is a proactive security measure; it protects your data even if the laptop is lost or stolen.
- Windows: Windows BitLocker is a built-in encryption tool.
- macOS: FileVault is the built-in encryption tool on macOS.
The procedure will take some time, so begin early.
8. Uninstalling Software and Programs
Remove any software from the work laptop that isn't critical to its functioning. This usually includes software you installed yourself, and any tools you were using for personal use.
- Check software policies: Pay special attention to what you are permitted or instructed to remove.
- Utilize Programs in Windows: Use the "Uninstall a program" feature and remove everything that is not from your organization.
- Remove Third-Party Software: Remove tools to ensure your data is secure.
Uninstalling ensures a clean environment and removes potential security vulnerabilities.
9. Resetting Your Browser Settings
Your browser is a treasure trove of personal information: browsing history, saved passwords, cookies, cached files. Resetting your browser goes a long way towards cleaning up your digital footprint.
- Clear Browsing Data: Select "all time" when clearing your history.
- Remove Saved Passwords: If allowed, remove saved passwords.
- Reset Browser Settings: Reset the settings to their default values.
A clean browser is a fresh start.
10. Running System Diagnostics (Optional but Recommended)
Before wiping, consider running system diagnostics. This is more important if you're experiencing performance issues. It can provide a snapshot of your laptop's health and identify any potential pre-existing problems.
- Windows: Use the built-in "Performance Monitor" or "Resource Monitor".
- macOS: Use Activity Monitor.
Diagnostics can identify potential errors.
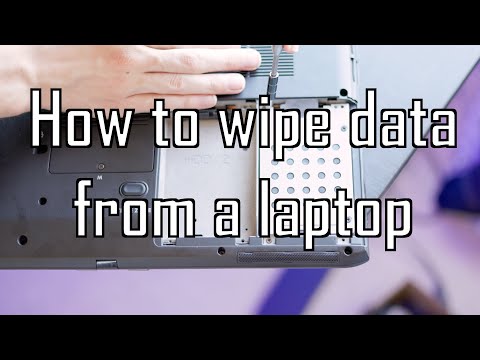
11. The Factory Reset: The Nuclear Option
This is the equivalent of nuking your work laptop. A factory reset returns your laptop to its original state, as it was when you first received it. This is the most comprehensive cleaning method.
- Windows: Go to Settings > Update & Security > Recovery > Reset this PC.
- macOS: Restart your Mac > hold Command + R to enter Recovery Mode.
Be absolutely sure you've backed up your personal data before initiating a factory reset.
12. Important Considerations for Different Operating Systems (Windows vs. macOS)
The specific steps for how to wipe your laptop depend on your operating system (OS). Windows and macOS have different built-in tools and procedures.
- Windows: Has built-in security tools, but it may require additional software for secure deletion.
- macOS: Generally user-friendly tools, but requires attention to security settings.
The point is to understand the unique features for your OS.
13. What To Avoid While Wiping
There are several mistakes you need to avoid:
- Rushing: Take your time. A rushed wipe is a messy wipe.
How to EASILY Factory Reset ANY WINDOWS School Laptop - no password

By Theboys2 How to EASILY Factory Reset ANY WINDOWS School Laptop - no password by Theboys2
How To Delete Everything On Laptop & PC - Full Guide

By GuideRealm How To Delete Everything On Laptop & PC - Full Guide by GuideRealm
How to wipe all data from a old Laptop
By ElectronicsWizardry How to wipe all data from a old Laptop by ElectronicsWizardry

Title: How To Factory Reset A Laptop shorts pcrepair computerrepair pc laptoprepair tech
Channel: Matt's Computer Services
How To Factory Reset A Laptop shorts pcrepair computerrepair pc laptoprepair tech by Matt's Computer Services
Wifi On Laptop
Wipe Your Work Laptop CLEAN: The Ultimate Guide (Before IT Notices!)
Your work laptop. It’s a portal. A digital extension of your professional self. It’s where you build presentations, crunch numbers, compose emails, and participate in countless meetings. But what happens when your time with that laptop comes to an end? Perhaps you're leaving for a new opportunity, or maybe your role is shifting. Whatever the reason, the thought of returning your device, brimming with sensitive data, can be unsettling. This comprehensive guide will walk you through every step of securely wiping your work laptop, ensuring your personal privacy and protecting your former employer's intellectual property. Consider this your personal shield, safeguarding your digital footprint.
Why a Secure Wipe is Non-Negotiable
The consequences of an improperly sanitized laptop can be severe, ranging from personal embarrassment to significant legal ramifications. Think about the emails, the documents, the browser history, and the saved passwords – all potential gateways to personal and professional vulnerability. A thorough wipe isn't just about deleting files; it’s about rendering data unrecoverable, making it virtually impossible for anyone to access sensitive information. It's about taking control of your digital narrative, ensuring that your departure is clean, complete, and secure.
Understanding the Risks: What's at Stake?
Before diving into the practical steps, it's important to understand the potential dangers of inadequate data removal. Consider this:
- Personal Information Exposure: Your work laptop likely contains sensitive information like social security numbers, bank details, and home addresses. Leaving this data intact puts you at risk of identity theft and financial fraud.
- Confidential Company Data: Your employer's intellectual property, trade secrets, and client information could be compromised if the laptop isn’t properly wiped. This can lead to legal action and reputational damage for both you and your former employer.
- Browser History and Search Data: Your browsing history can reveal a vast amount of personal information, including your interests and preferences. This data could be used to profile you or to access your social media accounts.
- Saved Passwords: If your passwords are saved and accessible, this presents a significant security risk. A skilled hacker could potentially access your personal accounts, leading to data breaches and financial loss.
- Legal and Compliance Issues: Certain industries and job roles are subject to strict data privacy regulations. Failure to properly wipe a laptop could result in fines and other legal penalties both for you and the company.
Preparation is Key: Before You Start the Process
Before initiating the wiping process, meticulous preparation is essential. This includes backing up any necessary documents and ensuring you have the appropriate permissions.
- Back Up Your Data: The most crucial step is to back up any data you need to retain. This includes personal files, important emails, and any other information that isn't directly related to your work. Utilize cloud storage services, external hard drives, or USB drives to create a secure backup.
- Identify and Assess Data Sensitivity: Carefully review your laptop for any sensitive data, whether it's personal or work-related. This will help you understand the extent of the data and determine the most appropriate wiping method.
- Understand Your Employer's Policies: Most companies have specific policies regarding data security and laptop disposal, including how to wipe work laptops. This will advise you on the approved methods and provide guidance regarding any specific procedures.
- Locate Your Recovery Keys: Determine your laptop's settings, or your IT admin, to get your Recovery Key to get access back.
- Administrative Rights Verification: Ensure you have administrative privileges on your laptop. This is usually required to perform a factory reset or to use data wiping software. If you don’t have admin rights, you will need to consult with IT.
- Gather Your Tools: Depending on the wiping method you choose, you might need certain tools, such as a USB drive, a bootable disc, or data wiping software.
Choose Your Weapon: Data Wiping Methods
Several methods can be used to securely wipe your work laptop. The optimal choice depends on your operating system, the sensitivity of the data, and your IT department's guidelines.
Factory Reset (Windows)
A factory reset is a built-in Windows feature that returns your laptop to its original state. It's a relatively straightforward process that overwrites the hard drive, removing most of your data.
- Access Settings: Go to Settings > Update & Security > Recovery.
- Initiate Reset: Under "Reset this PC," click "Get started."
- Choose Your Options: Select "Remove everything" to erase all data.
- Data Overwrite: Select the option that says to clean the drive and securely wipe the data.
Factory Reset (macOS)
Mac computers offer a user-friendly factory reset process through the macOS Recovery utility.
- Backup Data: Back up your files using Time Machine or another backup solution.
- Enter Recovery Mode: Shut down your Mac, then power it on while holding down Command (⌘) + R until you see the Apple logo or a spinning globe.
- Disk Utility: In the macOS Utilities window, select "Disk Utility."
- Erase the Disk: Select your startup disk in the sidebar and click "Erase."
- Specify the Format: Choose "APFS" or "Mac OS Extended (Journaled)" as the format.
- Reinstall macOS: After erasing the disk, close Disk Utility and select "Reinstall macOS" from the Utilities window.
Third-Party Data Wiping Software
Specialized software offers more advanced wiping capabilities, often including multiple overwrite passes and support for various hard drive types.
- Research and Select Software: Choose a reputable data wiping software, such as DBAN (Darik's Boot and Nuke), Eraser, or CCleaner.
- Download and Install: Download and install the software on a separate computer or USB drive.
- Boot from the Software: Create a bootable USB drive with the wiping software and boot your work laptop from it.
- Follow Instructions: Follow the software’s instructions to select the hard drive and initiate the wiping process.
Physical Destruction (For Extreme Security)
For situations involving highly sensitive data or compliance requirements, physical destruction of the hard drive provides the ultimate level of security. This is typically handled by IT departments.
- Consult with IT: Contact your IT department to discuss the possibility of physical destruction.
- Professional Disposal: Your IT department will likely use a secure shredding service to destroy the hard drive.
Step-by-Step Guide: Wiping Your Laptop
Here's a detailed walkthrough, combining the best practices for a secure and thorough wipe, applicable to both Windows and macOS systems.
- Back Up Everything: As mentioned earlier, create comprehensive backups. This should include all essential documents, emails, photos, and any other data you wish to preserve.
- Disconnect from the Internet: Before starting the wipe, disconnect from the internet to prevent any data syncing or remote access attempts.
- Start the Wipe: Follow the appropriate method for your operating system (factory reset or third-party software). Be sure to select the option that over-writes data.
- Verify the Wipe (Optional): After the wiping process is complete, you can attempt to recover a few deleted documents or files using data recovery software. If the process was successful, you should not be able to recover any data.
- Confirm and Return: Once you're confident that the data has been securely wiped, contact your IT department and return the laptop according to their procedures.
After the Wipe: Final Checks and Considerations
Following the data wiping process, there are several important considerations to ensure your digital security.
- Documentation: Keep a record of the wiping method used, the date, and any confirmation you received from IT.
- Software and Licenses: Uninstall any software you installed and deactivate any licensed software to avoid potential issues.
- Password Management: Change passwords for any accounts that may have been accessed from the work laptop.
- Monitor Your Accounts: Keep an eye on your financial accounts and credit reports for any suspicious activity. This is a proactive step to detect any potential identity theft attempts.
- Follow-Up with IT: Confirm with your IT department that they've received the laptop and have completed the process as per company guidelines.
Common Pitfalls to Avoid
To ensure a secure data wipe, avoid these common mistakes:
- Using Quick Format: Quick format only removes the file allocation table, leaving the underlying data intact. Instead, choose the full format option (overwrites the data).
- Skipping the Backup: Backing up all the necessary data before beginning the wiping process.
- Ignoring IT Policies: Familiarize yourself with and follow your company's specific procedures.
- Using Inadequate Wiping Methods: Do not rely on the basic deletion of files. You must use the correct methods to guarantee that your data is permanently removed.
- Hesitating to Seek Help: If you're unsure about any part of the wiping process, reach out to your IT department or a data security professional.
Securing Your Future: Data Privacy is Paramount
Securing your data is more than just a one-time task; It’s a continuous process of awareness and vigilance
