ketboard stopped work laptop

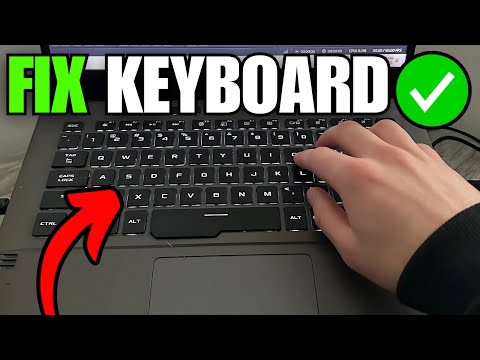
Title: How to Fix Keyboard Not Working Issue in Windows 108.1 Easy
Channel: MJ Tube
How to Fix Keyboard Not Working Issue in Windows 108.1 Easy by MJ Tube
keyboard stopped working laptop, keyboard stopped working laptop windows 11, keyboard stopped working hp laptop, keyboard stopped working dell laptop, keyboard key stopped working laptop, keyboard stopped working lenovo laptop, keyboard stopped working surface laptop, keyboard randomly stopped working laptop, keyboard stopped working on laptop windows 10, keyboard stopped working on laptop reddit
Laptop Keyboard Dead? FIX IT NOW! (Easy Steps)
My Laptop Keyboard Died! Now What? (Troubleshooting Guide)
Ugh, the dreaded moment. You stare at your laptop screen, poised to type, but your fingers meet…nothing. The keyboard's gone silent. Don't panic! It happens to the best of us. Therefore, let's get that keyboard resurrected. Instead of immediately running for a new device, let's try some fixes. Consequently, this guide will walk you through troubleshooting steps. It's designed to revive your keyboard. Prepare to be typing again in no time!
First Things First: The Obvious Checks
Before we delve into complex solutions, let's tackle the simple stuff. After all, initial evaluations are crucial. First, ensure your laptop is actually on. Sounds silly, right? But, it's the easiest check. Next, consider an external USB keyboard. If that works, you know the issue lies with your laptop's built-in keyboard. Furthermore, check for sticky keys. Sometimes, a rogue crumb can wreak havoc.
The Power Cycle: A Reboot for Your Keyboard
Sometimes, a simple restart does wonders. So, power down your laptop completely. Furthermore, unplug the power adapter. Next, remove the battery (if possible). This can help drain any residual power. Wait about a minute. Then, replace the battery (if applicable) and plug the adapter back in. Afterward, power it back on. Hopefully, this simple power cycle will do the trick.
Driver Drama: Is Your Keyboard Seen?
Driver problems are a common culprit. Therefore, let's verify your keyboard's driver is up to date. Begin by right-clicking on the Windows start menu. Choose "Device Manager." Look for "Keyboards" in the device list. Expand it. You should see your keyboard listed. Right-click on your keyboard device. After that, select "Update driver." Follow the prompts. Windows will search for the latest drivers. It's best to reboot after the driver update completes.
Sticky Situation: Cleaning Up Your Keyboard
Sticky keys are a nightmare. It can cause unresponsive typing. Therefore, let's clean your keyboard carefully. First, turn off and unplug your laptop. Next, turn it upside down and gently shake it. This may dislodge loose debris. Then, use compressed air in short bursts. Direct the air between the keys. Moreover, you can gently wipe the keys with a microfiber cloth dampened with isopropyl alcohol. Be incredibly careful not to spill liquid inside the laptop.
Hardware Hiccups: When the Keyboard is the Problem
If the above steps fail, a hardware issue is possible. The keyboard itself might be faulty. Or the connection could be loose. First, investigate the connection. For some laptops, accessing the keyboard is simple. Others require more disassembly. Before you start, consult your laptop’s manual. It will guide you. Once open, gently detach and reattach the keyboard's ribbon cable. Ensure it's firmly seated.
The BIOS Blues: A Boot-Up Test
Sometimes, a keyboard issue can affect the boot process. So, you should test your keyboard in the BIOS. Restart your laptop. Repeatedly press the key that accesses your BIOS (usually Del, F2, F10, or F12). If the keyboard works in the BIOS, the problem lies with your operating system. If not, there's a hardware issue or a corrupted BIOS. In that case, you may require professional help.
Operating System Woes: Reinstall or Reset
If all else fails, a more drastic solution is needed. A corrupted operating system can cause various problems. Therefore, consider reinstalling your operating system. This process will erase all your data. So, back up your crucial files beforehand. Moreover, you could try resetting your laptop to factory settings. Again, back up your data. Resetting can often resolve software conflicts.
External Keyboard: Your Temporary Savior
In the meantime, while you're troubleshooting or awaiting repairs, use an external USB keyboard. It's a simple solution. It allows you to continue working. It proves your laptop’s internal keyboard is the problem. Furthermore, external keyboards are affordable. And, as a result, they are a good backup plan.
Professional Help: When to Call for Backup
If you've tried everything, it may be time to seek professional help. A repair shop can diagnose and fix hardware issues. Furthermore, they have the tools. They have the expertise too. Don't hesitate to call a technician. They can often diagnose the root issue swiftly.
Conclusion: Typing Triumph!
Hopefully, one of these steps helped your keyboard recover. Remember, patience and persistence are key. Don't give up! Your keyboard will likely be typing again. However, if the problem persists, seek professional help. Finally, enjoy your revived keyboard!
Dell Laptop Touchpad DEAD? Windows 8 FIX (EASY!)Laptop Keyboard Dead? FIX IT NOW! (Easy Steps)
Hey everyone! Ever been there? You're in the zone, fingers flying across the keyboard, ideas pouring out like a rushing river… and then, bam! The keys go silent. Your laptop keyboard has decided to take a permanent vacation. Panic sets in, right? Don't worry, we've all been there. It's like having a beautiful, powerful race car with a flat tire. Useless! But before you start mentally budgeting for a new laptop (or throwing your current one across the room!), let’s take a deep breath and dive into some simple fixes. We're going to get that keyboard back to life, and we'll do it together, step by step. Think of this as your keyboard resuscitation guide.
1. The Dreaded "Is It Plugged In?" Check (Yes, Really!)
Okay, I know, I know. Seems obvious. But trust me, it’s the first thing you have to check. Like, did you actually plug your phone in before complaining that it won't charge? Sometimes the simplest solutions are the ones we overlook. If your laptop has an external keyboard plugged in, make sure that’s securely connected. If you're using a wireless keyboard, double-check those batteries. Are they dead? Did that tiny little Bluetooth receiver get knocked loose? These are the keyboard equivalent of a lost car key. It's about the easiest way to solve the problem, so let's get this one out of the way first.
2. Restarting Your Laptop: The Digital Reboot
Often, the problem is a software glitch, a minor hiccup in your operating system. Think of it like your brain – sometimes a good night’s sleep is all you need to reset things. Restarting your laptop can often be the digital equivalent of that. Just a simple reboot can clear out temporary files and reset various system processes, including the keyboard driver. This can often clear up the issue. If that doesn’t work, don't sweat it - we've got plenty more tricks up our sleeves, like a magician pulling a rabbit out of a hat.
3. External Keyboard Test: Is It the Keyboard or the Laptop?
This is crucial for diagnosing the problem. If you have a spare USB keyboard, or even a wireless one, connect it to your laptop. Does that keyboard work? If so, then the issue almost certainly lies with your laptop's built-in keyboard. If the external keyboard also doesn't work, then the issue could be deeper, possibly a driver problem or something more serious within the operating system. It’s like using a stethoscope to figure out where the cough is coming from – helps you pinpoint the problem.
4. Cleaning Your Keyboard: Dust Bunnies Beware!
Okay, this might sound silly, but crumbs, dust, and spilled liquids can wreak havoc on your laptop's keyboard. Think of it as a mini-battleground in the middle of your desk! They can get lodged under the keys, interfering with their function. Grab some compressed air (available at any electronics store – it's your digital cleaning arsenal!) and carefully blast between the keys. Turn your laptop upside down and give it a gentle shake to dislodge any debris. If it's really bad, you might even try a soft-bristled brush. Just don’t use anything wet until you’ve unplugged and are absolutely sure the keyboard is dry – electricity and water are like fire and gasoline, not a good mix.
5. Driver Issues: The Silent Keyboard Culprit
Sometimes, your keyboard driver gets corrupted or outdated. Think of it as the translator between your keyboard and your laptop. If the translator doesn’t speak the same language anymore, words get lost in translation. Here's how to fix it:
- Windows: Press the Windows key + X, then select "Device Manager." Expand the "Keyboards" section. Right-click on your keyboard (it might be listed as "Standard PS/2 Keyboard" or something similar) and select "Update driver." Choose "Search automatically for drivers."
- macOS: Press the Apple menu > System Preferences or System Settings > Keyboard. Check your keyboard settings and test your key presses. You may also need to seek assistance from Apple directly, as sometimes that is the only way to resolve the issue.
6. Sticky Keys: The Problem of the Stubborn Key
Maybe one or two individual keys aren't working. They could be stuck due to debris or some other mechanical issue. Try gently pressing down on each key and wiggling it side to side. If a key feels gummy or sticky, it’s likely the culprit. Sometimes, gently prying the key cap off with a small, flat tool (a small screwdriver or even a guitar pick) and cleaning underneath can do the trick. Just be careful not to break anything!
7. Keyboard Shortcuts: Your Temporary Lifesavers
While you're troubleshooting, knowing a few keyboard shortcuts can be a lifesaver. For example:
- Copy: Ctrl + C (Windows) or Cmd + C (Mac)
- Paste: Ctrl + V (Windows) or Cmd + V (Mac)
- Select All: Ctrl + A (Windows) or Cmd + A (Mac)
These shortcuts let you get work done even if some keys aren't cooperating. It's like having a backup plan when your main plan hits a snag.
8. Battery Life Consideration
If using a Bluetooth keyboard, a dead battery is a common reason for non-functionality. Consider checking the battery life, charging your keyboard, or replacing the batteries. Do not disregard the simple steps as they can solve the issue rapidly.
9. Software Conflicts: The Software Showdown
Sometimes, conflicting software can interfere with your keyboard's function. Think of it like two apps fighting for control. Try closing any recently installed programs or running the laptop in safe mode (which loads a minimal set of drivers). While it may be a temporary fix, it can provide a reliable way to write data.
10. Malware/Virus Scan: The Digital Enemy
Malware or viruses can sometimes interfere with your system’s processes, including keyboard functionality. Run a full scan with your antivirus software. Think of it like a digital security guard, protecting your computer from bad actors.
11. Hardware Issues: The Endgame
If none of the above steps work, it's possible there's a hardware issue – a broken internal ribbon cable, a faulty keyboard circuit board, or a problem with the motherboard. This is the grim part – it's like the point of no return. In this case, you might need to take your laptop to a repair shop. It's an expensive option, but ultimately may be necessary.
12. Factory Reset (Last Resort): The Nuclear Option
This is a drastic measure, but it can sometimes resolve deep-seated software issues. Be warned: a factory reset will erase everything on your hard drive, so back up your files first! Think of it like hitting the reset button on a video game.
- Windows: Go to Settings > Update & Security > Recovery and choose "Reset this PC."
- macOS: Restart your Mac and hold down Command + R to enter Recovery Mode. Then, use Disk Utility to erase your hard drive and reinstall macOS.
13. Keyboard Replacement: The Final Solution
If your keyboard is beyond repair, the only option is to buy a keyboard replacement. You can buy a keyboard online, such as a replacement for the keyboard, or hire a professional to replace it for you. Make sure it's compatible with your laptop model. It's like getting a new heart for your laptop.
14. Preventive Measures: Keeping Your Keyboard Happy
To avoid future keyboard problems, there are a few things you can do:
- Clean Regularly: Make cleaning your keyboard a regular habit.
- Avoid Food and Drinks: Keep food and drinks away from your laptop.
- Use a Keyboard Cover: Consider a silicone keyboard cover for extra protection.
- Gentle Handling: Avoid slamming keys.
15. Alternative Input Methods: Temporary Solutions
While your keyboard is out of commission, there are alternative ways to input text:
- On-Screen Keyboard: Use the on-screen keyboard built into your operating system.
- Voice Typing: Utilize voice-to-text software.
- External Keyboard: Use a spare USB or Bluetooth keyboard.
- Touch Typing: Use a touch screen to enter text.
The Bottom Line
So, there you have it. A step-by-step guide to resurrecting your laptop’s keyboard. We’ve covered everything from simple restarts to more complex troubleshooting. Remember, don’t panic! Nine times out of ten, the issue is something fixable. Now go forth, armed with knowledge, and reclaim your typing freedom. Whether you're a student, a writer, or just someone who loves to browse the internet, having a functioning keyboard is essential. We hope that by following the above-mentioned steps, you'll be able to get your keyboard back to life. Good luck, and let us know in the comments which step helped you the most!
Frequently Asked Questions:
1. My keyboard still doesn't work after trying all these steps. What should I do?
It's possible there's a more serious hardware issue. You should consider taking your laptop to a qualified repair
Apple TV on Laptop? FIX This Annoyance NOW!Your laptop keyboard or touchpad stopped working That's how you fix it

By Electronics Repair School Your laptop keyboard or touchpad stopped working That's how you fix it by Electronics Repair School
How To Fix Keyboard Not Working on Asus Laptop
By Your Fix Guide How To Fix Keyboard Not Working on Asus Laptop by Your Fix Guide
How to Fix Keyboard not Typing in Windows 11 PC or Laptop keyboard keyboardtroubleshooting

By Discover You How to Fix Keyboard not Typing in Windows 11 PC or Laptop keyboard keyboardtroubleshooting by Discover You

Title: SOLUTION Some Keys Not Working on Laptop Keyboard
Channel: Tech Express
SOLUTION Some Keys Not Working on Laptop Keyboard by Tech Express
Laptop Wifi Connect
Laptop Keyboard Dead? FIX IT NOW! (Easy Steps)
Are you staring at a laptop screen, utterly reliant on a digital keyboard, because your physical keys have gone unresponsive? A dead laptop keyboard can be a frustrating experience, grinding productivity to a halt. Don't despair! This guide offers a structured, step-by-step approach to troubleshooting and restoring your laptop keyboard to full functionality. We will walk through a series of diagnostics and solutions, from the simplest fixes to more involved procedures, empowering you to reclaim control of your device. Prepare to troubleshoot – your keyboard is about to get a new lease on life.
Step 1: Initial Assessment – Pinpointing the Problem’s Source
Before diving into fixes, a careful assessment is vital. Is it a complete failure, where no keys respond? Or are certain keys malfunctioning, acting erratically, or producing unexpected characters? The scope of the problem will guide us toward the most effective solutions.
- Observe the Behavior: Pay attention to what’s happening on screen. Are all keys dead, or are some functional? Does the Caps Lock or Num Lock indicator light up when pressed? These clues help narrow down the issue.
- External Keyboard Test: The simplest test is to connect an external USB keyboard. If the external keyboard functions correctly, the issue is almost certainly with your laptop's integrated keyboard hardware or software. If the external keyboard also fails to function, the problem might lie deeper within the operating system or with overall system hardware.
- Restart and BIOS Access: Reboot your laptop. Access the BIOS/UEFI setup (usually by pressing Del, F2, F12, or Esc during startup - consult your laptop's manual for specifics). Can you navigate the BIOS using the keyboard? If so, the keyboard hardware itself is likely fine and the problem is likely software-based.
- Look for Obvious Signs: Examine the keyboard for any visible damage. Is there any liquid spillage, physical impacts, or debris lodged between the keys?
Step 2: The Software-Based Solutions – Taming the Digital Demons
Often, the root of the problem lies within your operating system or with drivers. These steps frequently solve common keyboard woes.
Restart Your Laptop (Again): This simple act resolves temporary software glitches. A basic shutdown and restart will refresh the system resources that could be causing your keyboard malfunction.
Driver Updates: Outdated or corrupted keyboard drivers are a primary culprit.
For Windows: Right-click the Start button and select ‘Device Manager’. Expand the ‘Keyboards’ section. Right-click your keyboard device (likely listed as ‘Standard PS/2 Keyboard’ or similar). Choose ‘Update driver’. Select ‘Search automatically for drivers’. Follow the prompts. If the driver update fails, consider visiting the manufacturer’s website (e.g., Dell, HP, Lenovo) to download the latest driver specific to your laptop model.
For macOS: Apple generally handles driver updates automatically via software updates. Go to System Preferences > Software Update. Install any available updates.
Uninstall and Reinstall Drivers: If updating doesn't work, consider uninstalling and reinstalling the keyboard driver. In Device Manager (Windows), right-click the keyboard device and select ‘Uninstall device’. Restart your laptop. Windows will attempt to automatically reinstall the driver upon restart.
Keyboard Filter Drivers: Sometimes, third-party software interferes with keyboard function. Check for any recently installed programs; they might be causing problems, especially those related to accessibility or keyboard customization. Consider temporarily uninstalling them.
Run a System Scan: Malware can sometimes affect keyboard functionality. Run a full scan using your antivirus software to eliminate the possibility that a virus compromises your system. Consider a scan using a reputable, free online scanner in addition to your installed antivirus.
Step 3: Deep Dive Into Hardware Checks and Cleaning
If software solutions don’t yield results, it’s time to investigate the hardware itself, a crucial step in the repair process. Before you begin any physical intervention, power down, and disconnect your laptop from its power source.
Inspect the Keyboard's Connection (If Possible): Some laptops allow direct access to the keyboard connection. If this is the case, open up the laptop’s base carefully. Disconnect and reconnect the keyboard ribbon cable. Make sure it is securely seated with no visible signs of damage or corrosion. The exact location of the connection varies depending on the laptop model. Research your specific laptop's disassembly instructions before doing this.
Basic Keyboard Cleaning: Debris is a common cause of keyboard failure.
Compressed Air: Use compressed air (canned air) to blow out dust, crumbs, and other particles from between the keys. Hold the can upright and direct the airflow at an angle, to the base of the keys.
Gentle Cleaning: Use a soft, slightly damp (not wet) cloth to wipe the key surfaces. Avoid excessive moisture. Do not use any cleaning agents unless specifically designed for electronics.
Key Removal and Deep Cleaning: For stubborn debris or sticky keys, you might need to remove some or all of the keycaps.
- Locate the Keycaps' Design: Most laptops use a scissor-switch mechanism under the keycaps. There are variations. Research your specific model to determine the best approach to removing and replacing keys.
- Careful Removal: Use a plastic spudger or a small, flat-head screwdriver to gently pry each keycap upwards. (Be extremely careful, these keycaps and their mechanisms are delicate.)
- Clean the Interiors: Once keycaps are removed, focus on cleaning the area surrounding the switch mechanism. Use compressed air and a cotton swab dipped in isopropyl alcohol (90% or higher) to remove any debris or dried liquids.
- Reassembly: Carefully reattach each keycap, ensuring it clicks back into position securely.
Step 4: Advanced Troubleshooting and Potential Hardware Replacement
When simple fixes fail, more involved troubleshooting is required.
Boot into Safe Mode: Booting Windows into Safe Mode loads a very basic version of the operating system, bypassing many drivers and potential software conflicts. If the keyboard works in Safe Mode, a third-party program or driver is likely the problem. You can troubleshoot from safe mode.
System Restore: Use System Restore in Windows (if enabled) to revert your system to a previous point in time when the keyboard was working correctly. This can undo recent software changes that might have introduced the problem.
Check for Liquid Damage: If you can confirm liquid has entered the laptop, move quickly. Corrosion will quickly set in. Immediately power down the laptop and do not attempt to power it back up until the damage is assessed.
- Professional Assessment: Take your laptop to a qualified repair technician as soon as possible. Liquid damage can cause widespread issues on circuit boards. Delays can drastically worsen the damage.
- Potential for Complete Keyboard Replacement: A corroded or damaged keyboard often requires replacement.
Hardware Replacement (The Final Resort): If none of the above solutions work, the keyboard itself might need replacing. This is frequently the issue with older laptops.
- Identify Your Laptop Model: You must find the exact model number of your laptop before ordering a replacement keyboard. This information is often found on the laptop’s bottom or under the battery.
- Source the Correct Replacement: Obtain a replacement keyboard that is specifically designed for your laptop model. Ordering the wrong keyboard is a common mistake.
- Follow Disassembly Instructions: Find detailed disassembly instructions specific to your laptop model. These are often available on YouTube or from repair websites. Following these instructions is critical to avoid damaging your laptop.
- Prioritize Static Protection: Discharge static electricity by touching a grounded metal object before working on your laptop.
- Careful Installation: Take care with the ribbon cable connections. Make sure they are correctly seated.
- Test Before Reassembly: Once the new keyboard is installed, test it before fully reassembling the laptop.
Step 5: Keyboard Prevention and Maintenance
Once you have resolved the problem, preventive measures will help extend the life of your laptop keyboard.
Protective Measures:
- Keyboard Cover: A silicone keyboard cover is a simple, effective way to protect your keyboard from spills, dust, and crumbs.
- Placement: Avoid eating or drinking directly over your laptop.
- Carry with Care: Transport your laptop in a padded sleeve or case to prevent physical damage.
Regular Cleaning:
- Dust Regularly: Clean your keyboard regularly to prevent the buildup of dust and debris.
- Gentle Wipe-downs: Occasionally wipe down the key surfaces with a slightly damp microfiber cloth.
Software Habits:
- Keep Drivers Updated: Regularly update your keyboard drivers and operating system.
- Run Antivirus Software: Regularly scan for malware and viruses.
Conclusion: Reclaiming Keyboard Control
A dead laptop keyboard can be an annoying roadblock. By following these steps—from initial assessment to software and hardware fixes—you can diagnose the problem, implement solutions, and regain control of your device. Patience, a methodical approach, and careful attention to detail are the keys to success. With these techniques, you are well-equipped to bring your keyboard back to life and return to productive computing. Remember to consult your laptop's manual and external resources for model-specific
