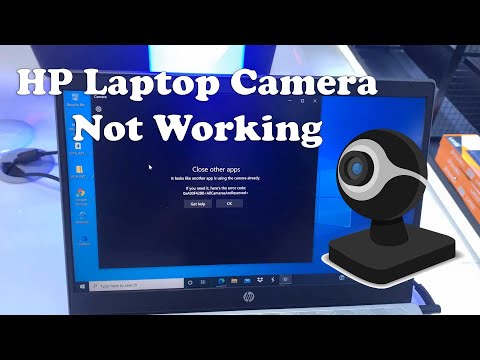
hp laptop built in camera not working

Title: FIXED - Camera Not Working in Windows 11 Laptop or PC
Channel: Techie Leopard
FIXED - Camera Not Working in Windows 11 Laptop or PC by Techie Leopard
hp laptop built in camera not working, hp pavilion built in camera not working, hp laptop built in camera not detected, hp laptop internal camera not working, hp built in camera not working, why is my camera on my hp laptop not working
HP Laptop Camera Dead? FIX This NOW!
HP Laptop Camera Troubles? Don't Panic, Let's Get It Back!
It's a familiar frustration, isn't it? You click a button, preparing for a video call, ready to join that important meeting. Suddenly, you're met with a blank screen. The dreaded news flashes before your eyes: your HP laptop camera has gone dark. Before you toss your hands up in defeat, take a deep breath. You're not alone, and, believe it or not, there's a good chance we can fix this.
Is It Really Dead? Let's Make Sure!
First things first, let's rule out any simple issues. Before assuming the worst, make sure the camera is actually the problem. Ensure the camera isn't accidentally disabled. Some laptops have a physical switch or a function key that disables the camera. Look closely at your keyboard for a camera icon, often accompanied by an "Fn" key. If it's lit up, push it. Moreover, confirm basic settings haven't been altered.
Software Shenanigans: Checking the Drivers
Drivers, those crucial software pieces, are the key to your camera's operation. Quite possibly, there is a driver problem. Think of them as the translators that allow the camera to communicate with your laptop. If these are outdated, corrupted, or missing, the camera simply won't work. Don't worry; we can get them back in order.
Driver Management: Go to the Device Manager. You can find it easily by searching through the Windows search bar.
Camera Search: Locate "Cameras" or "Imaging devices." Expand this section.
The Right Click: Right-click your camera. Choose "Update driver." Select "Search automatically for drivers." Windows will search for the latest versions.
Manual Intervention: Still no luck with automatic updates? You might need a manual update. Visit the HP support website. Enter your laptop's model number. Download the camera driver.
Permissions Please! Ensuring Proper Access
Even with the right drivers, the camera needs permission to work. Maybe a setting is blocking its use.
Privacy Settings Dive: Open the Windows Settings panel. Search for "Privacy." Then choose "Camera."
App Access Check: Make sure the apps you need the camera for have permission to use it. Toggle the switch to "On" for each relevant app.
Background Apps Consideration: Also, ensure your web browser, video conferencing software, and other applications aren’t restricted from using the camera in the background. This can sometimes interfere with functionality.
The Hardware Hurdle: Is It Physical?
Sometimes, despite our best software efforts, it’s a hardware issue. Let's explore some possibilities.
External Camera Check (If Applicable): If using an external webcam, verify its connections. Unplug it, then plug it back in firmly. Attempt a different USB port.
Internal Camera Inspection (Proceed with Caution!): If the camera is integrated, gently check if there's an obstruction. Don't take apart your laptop if you’re not comfortable! Ensure no physical objects are blocking the lens.
Other Hardware Culprits: It's possible, albeit less likely, that a hardware failure has occurred.
Troubleshooting Tips & Tricks – Beyond the Basics
Let's delve into some often-overlooked solutions.
Restart, Restart, Restart: A simple restart can work wonders. Restarting your laptop can clear temporary glitches. This can include those impacting camera performance.
Virus Scan: Carry out a thorough virus scan. Malware can sometimes interfere with system functions.
Clean Boot: Perform a "clean boot." This starts Windows with a minimal set of drivers and startup programs. This helps identify potential software conflicts.
System Restore: Consider a "system restore." This reverts your system to an earlier point in time. Be aware that you will lose any software added. This can be beneficial if a recent change caused the problem.
When to Get Professional Help
If you have tried everything mentioned above, and the camera still isn't working, it may be time to call in the experts. But, before running to a repair shop:
Warranty Check: First, check your laptop's warranty status. HP Support may address the issue at no charge.
Contact HP Support: Contact HP support directly. They offer several support options. They can provide further troubleshooting steps.
Local Repair Shops: Consider a local computer repair shop. However, ensure they are reputable and experienced with HP laptops.
Wrapping Up: Your Camera’s Comeback
Don't lose hope! HP laptop camera issues are incredibly commonplace. By systematically working through these steps, you've increased your odds of getting your camera back up and running. Remember patience. In many cases, you can resolve the problem on your own. Moreover, if you do need professional help, you’re well-prepared. Now, go forth, and get back to taking those video calls.
ASUS UX330U Dead? FIX This NOW!HP Laptop Camera Dead? FIX This NOW!
Hey there, fellow tech travelers! Ever felt that jolt of panic when you're about to hop on a Zoom call, only to be met with the dreaded black screen of a dead camera? I've been there. We've all been there. It's like the universe is conspiring against your ability to look presentable (or even remotely awake) for that important meeting. But fear not! If your HP laptop camera has decided to stage a disappearing act, we’re going to resurrect it. Let's dive into the problem headfirst and get that camera working again.
1. The Silent Killer: Understanding the Problem
Before we start waving our digital wands, let's understand what we're battling. A "dead" camera can manifest in several ways. It could be a completely black screen, an error message, or perhaps even a flickering image. Think of it like this: something is blocking the signal, and we need to find the culprit. It might be a software glitch, a driver issue, or, in the worst-case scenario, a hardware malfunction. But don't jump to conclusions just yet! We'll explore all the possibilities.
2. Is It REALLY Dead? A Quick Reality Check
Before we go nuclear and start reinstalling things, let’s do a quick sanity check. Seriously, it’s happened to the best of us.
- Check The Camera App: Open your pre-installed "Camera" app (search for it in the Windows search bar). Does it work? If it does, the problem might be with the app you're trying to use (like Zoom or Teams). If it doesn't, keep reading…
- The Physical Switch (if applicable): Some HP laptops have a physical switch or a slider right next to the camera that disables it. Make sure that switch isn’t activated. It's a classic "turned it off and forgot" scenario.
- The BIOS/UEFI: If you're feeling techy, check your BIOS (Basic Input/Output System) settings. Some BIOS systems disable the camera. Accessing the BIOS usually involves pressing a specific key (like Delete, F2, or F12) during startup. Every laptop has its own key, so a quick Google search for your model's BIOS key is in order.
3. Driver Mayhem: Updating and Reinstalling Drivers
Alright, let's get technical. The driver is like the translator between your camera and your computer. If the translator is out of commission (or just doesn't understand the language anymore), your camera won't work.
- Update Your Drivers: This is the first line of defense. Go to the Device Manager. You can search for it in the Windows search bar. Expand "Cameras," "Imaging devices," or "Integrated webcam." Right-click on your camera and select "Update driver." Let Windows search automatically for updates. It's like giving your driver a fresh dose of understanding.
- Reinstall, Reinstall, Reinstall: If updating doesn’t work, try uninstalling and then reinstalling the camera driver. Right-click on the camera in Device Manager, choose "Uninstall device," and then restart your laptop. Windows should automatically reinstall the driver upon reboot. Think of it as giving your camera a fresh start.
4. App Permissions: Giving the Green Light
Sometimes, the problem isn't the camera; it's the permission. Windows has privacy settings that control which apps can access your camera.
- Check App Permissions: Go to Settings > Privacy > Camera. Make sure that "Let apps access your camera" is turned on. And then, for each app you want to use (Zoom, Teams, etc.), double-check that it is also granted permission to use the camera. Imagine it as the bouncer at a club, only letting in the right people.
5. Software Conflicts: The Digital Squabble
Sometimes, other apps can interfere with your camera. It’s like having too many cooks in the kitchen, or worse, too many chefs, with none of them getting along together.
- Close Other Apps: Close any other apps that might be using your camera, such as other video conferencing tools or screen recording software. It's like giving the camera a clear runway.
- Run a Clean Boot: A clean boot starts Windows with a minimal set of drivers and startup programs. This can help you identify if a third-party app is causing the issue. Search "msconfig" in the Windows search bar. In the System Configuration window, go to the "Services" tab, check "Hide all Microsoft services," and then click "Disable all." Then, go to the "Startup" tab in the same window and click "Open Task Manager." In the Task Manager, disable all startup items. Restart your computer. If the camera works in a clean boot, you know a program is the culprit.
6. Antivirus Interference: A Security Overload
Your antivirus program is your digital bodyguard, but sometimes, it can get too protective. It can block access to your camera.
- Check Your Antivirus Settings: Check your antivirus software's settings to see if it's blocking camera access. You might need to add the camera app or the entire camera device to the "allowed" list.
7. Hardware Hiccups: The Last Resort
If all else fails, we have to face the possibility of a hardware malfunction. Don't panic!
- The Obvious (but Necessary) Check: Does the camera lens look clean? It sounds silly, but sometimes a smudge can block your view.
- External Webcam (if applicable): If you have an external webcam, try connecting it. If that works, it points to a problem with your laptop's internal camera, but you at least have a temporary solution.
- Contact HP Support: At this stage, it's time to contact HP support. They can provide further troubleshooting steps or, if necessary, initiate a repair.
8. Troubleshooting Tips: Quick Fixes and Common Pitfalls
Here are a few extra handy tips to keep in mind:
- Restart Your Laptop: Seriously, it solves a surprising number of problems. Think of it as hitting the reset button on your day.
- Keep Your Windows Up-to-Date: Windows updates often include driver updates and bug fixes. Embrace the updates!
- Avoid Third-Party Driver Updaters: Sometimes, these tools can cause more harm than good. It's best to stick with the official drivers from HP or Windows Update.
9. Camera Test Apps: Confirming the Diagnosis
To confirm whether the issue lies with your camera itself or the specific applications, you can use camera test applications.
- Camera Test Apps: These apps are designed to diagnose camera problems by verifying their functionality. They're essential for swiftly pinpointing whether the camera is working correctly or is facing technical hitches.
10. Using the HP Support Assistant: A Helping Hand
HP provides a handy tool – the HP Support Assistant – that can help diagnose and hopefully resolve camera issues.
- Utilize the HP Support Assistant: Its diagnostic tools can identify driver problems, hardware faults, and more. It might just be the key to unlocking your camera's potential.
11. System Restore: Rolling Back the Clock
If the camera stopped working after a specific event (like installing a new program), a system restore might be your friend.
- System Restore: This lets you roll back your system to a previous state, potentially undoing whatever caused the camera problem.
12. BIOS Updates: Breathing New Life
Although less common, a BIOS update can sometimes address camera problems, especially if they're related to hardware compatibility.
- BIOS Updates: While a bit more technical, updating your BIOS can resolve hardware compatibility issues and boost performance in many cases.
13. Physical Inspection: A Gentle Examination
Sometimes, a simple visual inspection can reveal problems that software troubleshooting misses.
- Physical Inspection: If possible, check the physical camera setup to confirm that there are no loose wires or external damages that may be interfering with the camera's functionality.
14. Avoidance of Obvious Mistakes: Checklist Review
Sometimes, it's the simplest things that cause problems.
- Checklist Review: Recheck the basics: is the camera enabled in the device manager, and are permissions correctly configured? These basic details are vital to restore your camera.
15. Preventative Measures: Keeping Your Camera Happy
Once you've fixed the problem, it's time to prevent it from happening again.
- Preventative Maintenance: Regularly update your drivers, perform system scans, and be cautious about the applications you install.
Closing Thoughts: Stay Connected!
So, there you have it! We've navigated the digital trenches and hopefully brought your HP laptop camera back to life. Remember, technology is rarely perfect, but with a bit of troubleshooting, we can usually conquer whatever problems come our way. Keeping your camera functional is vital in this digital age. And remember, staying connected is the most important thing. So, now go forth, and video conference with confidence!
FAQs: Your Burning Questions Answered
1. My camera worked fine until the last Windows update. What now?
That's a classic scenario. Try rolling back the update (if possible), or, more immediately, try
Unleash Your Inner Gamer: The BEST Laptop for Work AND Play!How to Fix Camera Black Screen Problem on Windows 11

By Crown GEEK How to Fix Camera Black Screen Problem on Windows 11 by Crown GEEK
How To Fix HP Laptop Camera Not Working In Windows 10
By Cap Trong Nam - How To How To Fix HP Laptop Camera Not Working In Windows 10 by Cap Trong Nam - How To
Hp Laptop Built In Camera Not Working

By Ultimate PC Guide Hp Laptop Built In Camera Not Working by Ultimate PC Guide
Title: How To Fix HP Laptop Microphone Not Working In Windows 10 and Windows 11
Channel: TechFixIT
How To Fix HP Laptop Microphone Not Working In Windows 10 and Windows 11 by TechFixIT
Wifi Not Found
HP Laptop Camera Dead? FIX This NOW!
We understand the frustration. You're in the middle of a video call, a virtual meeting, or simply trying to capture a memory when the dreaded happens: your HP laptop camera refuses to cooperate. The screen stares back blank, or perhaps an error message pops up, leaving you stranded. Don't despair! We've compiled a comprehensive guide to diagnose and resolve the issue, empowering you to get your camera back up and running swiftly. Let's breathe life back into your HP laptop's integrated webcam.
Initial Troubleshooting: The First Steps to Recovery
Before diving into complex solutions, we begin with the simplest checks. Often, the problem stems from something easily corrected. Please take a moment to check these crucial initial steps:
- Physical Inspection: Is the camera physically obstructed? Give it a gentle wipe with a clean, soft cloth. Sometimes, a speck of dust or a fingerprint can disrupt the image. Be sure that the camera lens itself is not blocked by a screen protector.
- Check the Camera's Privacy Slider/Switch (if applicable): Many HP laptops offer a physical privacy shutter or a dedicated switch. Ensure this is not engaged, physically blocking the camera. Locate this by carefully inspecting the bezel above your laptop's screen.
- Restart Your Laptop: This age-old trick often works wonders. A simple reboot can clear temporary glitches and software conflicts that might be affecting the camera. Close all programs and reboot your laptop.
- Test in Different Applications: Try using the camera in various applications like Skype, Zoom, or the built-in Windows Camera app. This helps determine if the issue is specific to one program or affects the camera universally.
Software Conflicts and Driver Solutions
If the initial checks don't provide a solution, we'll explore software-related roadblocks that must be addressed. Driver issues and conflicting software installations are frequent culprits.
Updating Your Camera Driver: The Core of the Problem
Outdated or corrupted camera drivers are a common source of camera malfunctions. The quickest fix is to update or reinstall them:
- Access Device Manager: Right-click the Windows Start button and select "Device Manager." Alternatively, search for "Device Manager" in the Windows search bar.
- Locate the Camera: In Device Manager, look for "Cameras," "Imaging devices," or a similar category. Expand this section, and your integrated webcam should be listed (likely with the model name like "HP TrueVision HD Webcam").
- Update the Driver: Right-click your camera and choose "Update driver." Select "Search automatically for drivers." Windows will then search for the most recent version online and install it.
- If Updates Fail: Reinstall the Driver: If the update fails, right-click the camera again and choose "Uninstall device." Restart your laptop. Windows will automatically attempt to reinstall the driver upon reboot.
- Manual Driver Updates: If automatic updates are not working, visit the official HP support website. Use your laptop’s exact model number to locate and download the most current drivers for your camera from their website.
Troubleshooting with the HP Support Assistant
HP provides its own diagnostic tool. The HP Support Assistant can scan your system and identify potential hardware and software issues, including camera problems:
- Open the HP Support Assistant: This can usually be found on your desktop or in the Start menu.
- Run a System Scan: Look for an option to "Check for updates and messages" or "Check your PC for problems." Run a full diagnostic scan.
- Follow the Recommendations: The HP Support Assistant may recommend driver updates, software fixes, or hardware tests specific to your laptop model.
Software Conflicts and Application Permissions
Software conflicts and incorrect application permissions can also impede camera functionality.
- Close Conflicting Programs: Close any applications that might be using the camera, such as video editing software or other programs that may be running in the background.
- Check App Permissions: Go to "Settings" -> "Privacy" -> "Camera" in Windows. Ensure that camera access is enabled for the apps where you wish to use the webcam. Toggle the permission to "On" for the applications in question.
- Consider Third-Party Interference: Sometimes, third-party security software, such as antivirus or firewall programs, can block camera access. Temporarily disable these programs (with caution) to test if they are the cause. Remember to re-enable them afterwards.
BIOS and Hardware Considerations
If software solutions fail, consider if the problem is at the BIOS or hardware level.
BIOS Updates and Hardware Settings
The BIOS (Basic Input/Output System) controls essential hardware functions. An outdated BIOS can sometimes cause issues with your camera.
- Check for BIOS Updates: Visit the HP support website and use your laptop model number to find BIOS updates. Ensure you follow the specific instructions provided by HP. BIOS updates can be risky if handled incorrectly.
- BIOS Settings: While in the BIOS settings on your laptop, check if the internal camera is enabled. The exact location of this setting will vary depending on your laptop model. Examine the "Configuration" or "Advanced" menus.
Hardware Diagnostics and External Webcam Considerations
If camera issues persist, a hardware problem is possible.
- HP Hardware Diagnostics: The HP Support Assistant often includes hardware diagnostic tests, including a test for your webcam. Run these tests to identify any hardware malfunctions. These tests may require you to restart your computer.
- External Webcam as a Bypass: As a workaround, consider using an external USB webcam. This can help confirm if the problem is related to your integrated hardware or software-related. If an external webcam works correctly, the problem is most likely isolated to your integrated camera.
Advanced Techniques and System Restores
If the previous steps have not resolved the problem, go forward with more advanced approaches.
System Restore: Rolling Back to a Working State
If you suspect that a recent software update or installation caused the camera malfunction, a System Restore can be a valuable tool:
- Access System Restore: Search for "Create a restore point" in the Windows search bar, and then select "System Restore."
- Choose a Restore Point: Select a restore point from before the problem emerged. Take into account the date and time to locate the point. (Make sure that you acknowledge all of the programs that were affected).
- Follow the On-Screen Instructions: Your system will revert to the selected point. After the restore, test your camera.
Reinstalling Windows (As a Last Resort)
If all else fails, a clean reinstallation of Windows may be necessary to eliminate deep-seated driver or software corruption. Be sure to back up all your important data before proceeding.
- Create a Backup: Copy important files to an external hard drive, USB drive, or cloud storage.
- Create a Windows Installation Media: Download the Media Creation Tool from Microsoft. This tool will help you create a bootable USB drive.
- Boot from the USB Drive: Restart your laptop and access the BIOS to modify your boot order settings to boot from the USB drive.
- Follow the Windows Installation Prompts: Make sure you select the correct partition, format your drive if needed, and follow the on-screen instructions.
- Reinstall Your Drivers: After the reinstallation, you'll need to reinstall all your drivers, including your camera driver.
Prevention is Key: Proactive Camera Management
Once your camera is operational, follow these steps to avoid future issues.
- Regular Driver Updates: Keep your device drivers, including the camera driver, updated regularly.
- Software Hygiene: Uninstall unused software and be cautious when installing new applications.
- Hardware Protection: Handle your laptop with care, and avoid any physical damage to the camera hardware.
By methodically working through these solutions, you should be able to diagnose and fix the issue. Remember to be patient, follow the instructions carefully, and don't hesitate to consult the official HP support resources or call the customer support department if needed.
