gateway laptop microphone not working windows 7
Title: How to DisableEnable your Internal Microphone on Windows 7
Channel: Noah's Tech Info
How to DisableEnable your Internal Microphone on Windows 7 by Noah's Tech Info
Gateway Laptop Mic Dead? Windows 7 Fix Inside!
Gateway Laptop Microphone Mayhem? Don't Toss That Laptop Just Yet!
So, your Gateway laptop's microphone has gone silent, has it? Frustrating, isn’t it? You are not alone. Many users experience this issue. Let’s be honest; it can be incredibly irritating. You suddenly can’t participate in video calls. You can’t record your voice memos. It’s a real problem, isn't it? Then again, don't despair. Before running out to buy a new laptop, take a deep breath. The solution might be simpler than you think. This guide is for you. We’ll explore potential fixes for your Windows 7 Gateway laptop.
Is It Really the Microphone? Troubleshooting 101
Before we dive deep, let’s perform some quick checks. First, ensure the microphone is actually enabled. It sounds obvious, however, it's a crucial first step. Go to your sound settings. Look for the microphone device. Verify whether it’s muted. There is absolutely no point in skipping this. See if the microphone is even selected as the default recording device; after all, it's essential. Often, this simple check resolves the issue. Also, check the physical connection, if you're using an external microphone. Therefore, make sure it’s securely plugged in. In fact, try a different USB port. If you've ruled out those obvious fixes, then let's move forward. We've got many more troubleshooting steps to perform.
Digging Into Windows 7 Sound Settings
Now, let's get into the heart of the matter. We will now venture into your Windows 7 sound settings. Access this through your Control Panel. Alternatively, click the sound icon in your system tray. Click on “Recording” to view your available microphones. You will see a list of your recording devices here. Your internal microphone should be listed. Click on it. Moreover, select "Properties." Check the levels tab. Ensure the microphone volume isn't set to zero. Therefore, it would be silent. Adjust it as needed. Moving on, go to the “Enhancements” tab. You also may have an enhancement enabled, such as noise cancellation. Try disabling it. Apply the changes and test your microphone. It is a fundamental step in the process.
Driver Drama: Updates and Reinstallations
Drivers play a vital role. They are the software that allows Windows to communicate with your hardware. Outdated or corrupted drivers often cause microphone problems. Thus, updating your audio drivers is a good idea. Go to Device Manager. You can search for it in the Start menu. Expand “Sound, video and game controllers.” Now, right-click on your audio device. Select "Update driver." Choose "Search automatically for updated driver software." This will search for updates. If that doesn't work, try uninstalling and reinstalling the drivers. Right-click on the audio device. Select “Uninstall.” Restart your laptop. Windows should automatically reinstall drivers upon reboot. In addition, this often resolves driver-related issues.
Codec Conflicts and Audio Software Interference
It's possible other audio software is interfering. Software, such as applications for audio recording, can take control of your microphone. In consequence, this causes problems with other programs. Close any unnecessary audio software. Test your microphone again. Another potential issue can be a codec conflict. Audio codecs are used to encode and decode audio. They are an essential part of the process. Corrupted or conflicting codecs can cause problems. If you suspect this, try uninstalling recently installed audio codec packs. After that, restart your laptop. Check to see if your microphone functions correctly.
Hardware Hints: The Internal Microphone Itself
Let’s not forget the hardware component. It's very important. The microphone itself could have a problem. If you've tried everything else, that is the next step. Carefully inspect the area around the internal microphone. This is usually located near the webcam. Look for any physical damage, or loose connections. If you see any obvious issues, it might require professional repair. At this time, it's worth contacting Gateway support. They can offer further assistance or advice. Otherwise, consider using an external microphone as a workaround. This can quickly solve your immediate need.
External Microphone Solutions and Workarounds
So, what if you are not able to fix your laptop's internal mic? Fortunately, there are alternatives. An external microphone is a simple solution. You can connect a USB microphone to your laptop. Alternatively, use a headset with a microphone. These are affordable options. They typically provide better sound quality. These options are also very convenient. Another workaround involves troubleshooting software issues. You can completely disable your internal microphone. After that, make your external microphone your default device.
The Final Word: Don't Give Up!
In conclusion, a dead microphone on your Gateway laptop can be solved. You can try several troubleshooting steps. These range from simple checks to more advanced techniques. Remember to systematically work through the steps. Don't jump to conclusions. It's rare, but your problem could be more permanent. If everything fails, seek professional help. However, in many cases, a fix is within reach. Good luck, and hopefully, you will be back to crystal-clear audio in no time at all!
HP Pavilion Keyboard Nightmare: FIXED! (Easy Steps Inside)Gateway Laptop Mic Dead? Windows 7 Fix Inside!
Hey tech adventurers! Ever felt like you're shouting into a void when you try to use your Gateway laptop's microphone? You're not alone! Many of us have been there, grappling with the dreaded "mic dead" scenario. Don't chuck your trusty old Windows 7 Gateway laptop in the bin just yet. We're diving deep into the issue, exploring potential culprits, and more importantly, providing you with some practical fixes that could resurrect your voice capabilities. Think of this as your personal rescue mission, a digital defibrillator for your forlorn microphone!
1. The Mystery of the Silent Speaker: Why Did My Mic Die?
First things first: let's play detective. What could be causing your Gateway laptop microphone to go silent? The possibilities, like a tangled web of wires, are numerous. It could be a simple software glitch, a driver issue, hardware malfunction, or a setting that's been inadvertently switched off. Think of it like a puzzle – we need to find the missing piece to make the picture whole again. More often than not, it's something easily rectified.
2. Before We Dive In: Quick Checks to Rule Out the Obvious
Before we get our hands dirty with complex troubleshooting, let’s run through a few easy checks – the equivalent of checking the batteries in your flashlight before assuming it’s completely broken.
- Microphone Physical Check: Is the microphone itself physically intact? On some Gateway models, the microphone is a tiny pinhole. Is it blocked by dust or debris? Blow gently into it. Seriously, sometimes the simplest solutions are the best!
- Volume Levels: Ensure the microphone volume isn't set to zero or muted. This sounds obvious, but you'd be surprised how often it’s overlooked!
- External Microphone: If you have an external microphone, does it work? This can help determine if the issue is specific to the built-in microphone.
3. Diving into the Settings: Windows 7 Sound Control Panel Secrets
Now, let’s venture into the heart of the matter: the Windows 7 Sound Control Panel. This is where our detective work ramps up.
- Accessing the Sound Control Panel: Click on the Windows “Start” button, then select “Control Panel.” If you see the “View by:” option in the upper right, make sure it’s set to “Large icons” or “Small icons.” Click on “Sound.”
- The “Recording” Tab: Click the “Recording” tab. Here, you should see all the microphones detected by your system (including your Gateway laptop’s built-in mic).
- Ensure the Microphone is Enabled: Is your microphone listed? If not, right-click anywhere in the blank space and select “Show Disabled Devices” and “Show Disconnected Devices.” Your microphone might be hidden.
- Set as your Default Device: Right-click on your microphone (now visible!), and select “Set as Default Device.” This ensures that your applications use the correct microphone.
- Properties Check: Double-click your microphone to open the “Properties” window.
- Levels Tab: Make sure the microphone volume isn't muted and that the slider is turned up.
- Enhancements Tab: (If available). Experiment with disabling any enhancements. Sometimes, these can interfere.
- Advanced Tab: Check the bit rate and sample rate. This might be an issue if compatibility is in question.
4. Driver Dilemma: The Often-Overlooked Culprit
Ah, drivers! They're like the conductors of your computer's hardware orchestra. If they're out of tune (or missing), things get a bit chaotic.
- Checking Your Drivers:
- Open the "Device Manager." (Type "Device Manager" in the Windows search bar and click on it)
- Expand the "Sound, video, and game controllers" section.
- Look for your microphone listed. There should be no yellow exclamation marks!
- Updating or Reinstalling Drivers:
- Right-click on your microphone device and select "Update driver software…"
- Choose “Search automatically for updated driver software.” Windows will try to find and install the latest driver.
- if it fails, you can uninstall and reinstall the driver. Right-click on the microphone again and select "Uninstall." Restart your computer, and Windows should automatically reinstall the driver.
- In some cases, you might need to download the driver from the Gateway website (if you can still access it) directly.
- Right-click on your microphone device and select "Update driver software…"
5. Software Conflicts: The Unseen Troublemakers
Sometimes, software conflicts can play havoc with your microphone. Think about it like a crowded party, where everyone is trying to talk at once!
- Applications Access: Some applications have exclusive control over your microphone and can interfere with others. Ensure that the audio settings for the application you are trying to test are correctly programmed with the source selected.
- Troubleshooting: Close any applications that might be using your microphone or causing conflicts (such as voice chat software).
6. Microphone Hardware Troubleshooting: When Things Get Serious
If you’ve tried all the above, and your Gateway laptop mic is still dead, it might be a hardware issue. This gets a bit more complex.
- Internal Microphone: The internal microphone’s placement might be affected. Inspect the area near the device to see if you can notice any physical damage.
- Professional Assistance: If you're not comfortable opening up your laptop, it's best to take it to a qualified technician.
7. Test, Test, Test!: Confirming Your Microphone Is (Hopefully) Alive!
After each step, it's crucial to test your microphone.
- Sound Recorder: Use the built-in Sound Recorder in Windows 7. Record a short clip of yourself speaking.
- Voice Chat Applications: Test your microphone in Skype, Discord, or any other voice chat application.
- Check the input: Record a video to quickly see if the microphone is working.
8. Common Gateway Laptop Microphone Models and Their Quirks
Different Gateway laptop models might have unique quirks. Some common models include the Gateway NV series, the T series, and the SX series desktops that come as a package that may include a microphone attachment. Research your exact model online for known issues specific to it.
9. Volume Boosters and Noise Cancellation: Fine-Tuning Your Audio
Once your microphone is active, you might want to optimize the settings further.
- Volume Boosters: If the mic volume is still too low, play with the volume boost settings in the “Levels” tab of the microphone’s properties.
- Noise Cancellation: Experiment with noise cancellation settings in the “Enhancements” tab to minimize background noise.
10. The Case of the Missing Audio Drivers: Identifying and Reinstalling
Sometimes, the correct audio drivers are missing or corrupted. This is a common problem, and luckily, it's usually fixable.
- Identifying Your Audio Driver: Go to the Device Manager (as described in section 4) and look under “Sound, video, and game controllers.” The driver’s name will be listed there.
- Reinstalling Drivers: You can try the automatic update method (mentioned previously) or download the drivers from the Gateway website (if available). If not, you can often find drivers on the websites of the audio hardware manufacturers (e.g., Realtek).
11. Power Management Shenanigans: Could Your Mic Be Hibernating?
Windows 7 power management settings could be affecting your microphone.
- Device Manager Investigation: Return to the Device Manager, find your microphone device, right-click, and select "Properties."
- Power Management Tab: Go to the "Power Management" tab (if it exists). Uncheck the box that says “Allow the computer to turn off this device to save power.”
12. Compatibility Conundrums: Windows 7 and Modern Technology
Windows 7 is an older operating system. Some newer microphones or audio devices might not be fully compatible.
- Driver Compatibility: Ensure you're using drivers specifically designed for Windows 7. Newer Windows versions might not work.
- Alternative Microphones: Consider using an external microphone that is compatible with Windows 7.
13. Hardware vs. Software: Diagnosing the Root Cause
It's important to determine whether the issue is hardware- or software-related.
- The Process of Elimination:
- If an external microphone works, the internal microphone might be faulty.
- If the microphone doesn't work on other computers, it might be defective.
- If nothing seems to work, a visit to a technician may be your only solution.
14. Gateway Laptop Microphone Testing Tools: Beyond the Simple Recorder
Beyond the default Sound Recorder, you can use other tools to test your microphone.
- Third-Party Software: Experiment with third-party software specifically designed for testing audio devices.
- Online Testing Tools: Various websites offer online microphone testing tools that can help diagnose potential issues.
15. Final Thoughts and Next Steps: Breathing Life Back into Your Mic!
So, there you have it! We've covered a lot of ground in our journey to revive your Gateway laptop's microphone.
Microsoft Surface Dock SHOCKER: Works With OTHER Laptops?!How to fix microphone problem in windows 7
By Being Selftech How to fix microphone problem in windows 7 by Being Selftech
Cara Memperbaiki Mikrofon Laptop Windows 7 yang Tidak Berfungsi
By logistech ID Cara Memperbaiki Mikrofon Laptop Windows 7 yang Tidak Berfungsi by logistech ID
Cara aktifkansetting microphone di windows 7

By djibril el faisal Cara aktifkansetting microphone di windows 7 by djibril el faisal

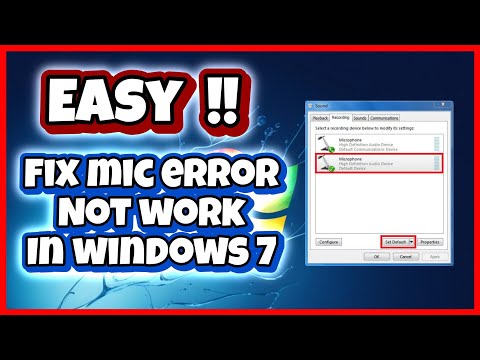
Title: Mic not working on Windows 7
Channel: Vishal Singh
Mic not working on Windows 7 by Vishal Singh
Wifi On Laptop
Gateway Laptop Mic Dead? Windows 7 Resurrection Guide
Have you encountered the frustrating silence? That moment when you realize your Gateway laptop microphone has gone AWOL, leaving you unable to participate in video calls, record voiceovers, or even utilize voice commands? Don't despair! This guide serves as your comprehensive map, detailing a series of troubleshooting steps and potential solutions specifically crafted to revive your defunct microphone on a Windows 7-equipped Gateway laptop.
Initial Assessment: Pinpointing the Problem
Before diving into intricate fixes, it's crucial to conduct a preliminary assessment to pinpoint the root cause of your Gateway laptop microphone malfunction. Is the microphone entirely unresponsive, or is it simply emitting a low or distorted sound? Knowing the specifics will direct our efforts more effectively.
1. Hardware vs. Software: The Diagnostic Check
The first step is to distinguish between a hardware issue and a software configuration problem. We perform a quick hardware test. If your Gateway laptop has multiple microphone inputs (a built-in mic and an external port), test a separate microphone (like a headset) in the external port to see if it works. If the external microphone functions, this suggests a potential issue with the internal microphone itself. If the external microphone also fails, then we have to scrutinize the internal configuration.
2. The Sound Settings Deep Dive
Navigate to the Windows 7 sound settings. Access this by clicking the speaker icon in your system tray (lower right corner) and selecting "Playback devices." This reveals a list of devices used for audio output. Then, click on the "Recording" tab. Here, you should see your microphone listed, hopefully alongside other recording devices. Crucially, ensure your microphone is enabled and not muted. An icon resembling a muted speaker indicates the microphone is disabled. Right-click the microphone and select "Enable" to restore functionality.
3. Driver Status Investigation
Outdated or corrupted drivers are a common culprit. In the sound settings (Recording tab), right-click your microphone and select "Properties." Then, select the "Drivers" tab. Here, you'll find information regarding the current driver on your device. Take note of the driver's date. Next, open the Device Manager (search for "Device Manager" in the Start Menu). Expand the "Sound, video and game controllers" category. Locate your microphone device (likely integrated audio) and check for any warning icons (usually a yellow exclamation mark or a red "X") indicating driver problems.
Windows 7 Solutions: Restoring Microphone Functionality
Having completed the initial assessment, let's embark on the solutions aimed at breathing life back into your Gateway laptop microphone.
1. Driver Updates: The Cornerstone of Compatibility
As highlighted earlier, outdated drivers can be the genesis of microphone woes. We must update them.
- Automatic Driver Update: Within Device Manager, right-click your microphone device and select "Update Driver Software…". Choose "Search automatically for updated driver software." Windows will search for and install the latest drivers if available.
- Manual Driver Update (Recommended): Sometimes, automatic updates fail to locate the most recent drivers. Navigate to the Gateway support website and find the driver downloads for your specific Gateway laptop model. Search for "audio drivers" or "sound drivers." Download the appropriate driver package for your operating system (Windows 7, in this case). Install the driver manually.
- Driver Removal: If the problem persists or the update doesn't work, uninstall the sound drivers, then reinstall the drivers.
2. Microphone Settings: Fine-Tuning for Optimal Performance
Even with updated drivers, fine-tuning your microphone settings is necessary.
- Volume Level Adjustment: Back in the sound settings (Recording tab), right-click your microphone and select "Properties." Navigate to the "Levels" tab. Adjust the microphone volume slider to an appropriate level. Be aware that excessive input volume can lead to distortion, while insufficient volume results in a faint signal.
- Enhancements: Noise Cancellation and More: The "Enhancements" tab (in Microphone Properties) offers features like noise cancellation and echo cancellation. Experiment with these settings to minimize background noise and improve audio clarity.
3. Application-Specific Settings: Configuring for Each Program
Often, the issue stems from the way specific applications utilize your microphone.
- Skype/Zoom/Other Applications: Open the program and delve into its audio settings. Ensure the correct microphone is selected as the input device. Often, there are separate volume controls within the application. Adjust them accordingly. Test your microphone within the application to verify functionality. If it's not working in one program, try another one.
- Windows Recording Settings: Verify that the microphone is selected as the default recording device in Windows. Open the "Sound" settings and, on the "Recording" tab, ensure the microphone has a green checkmark next to it, indicating it's the default device.
4. Troubleshooting Software Conflicts:
Sometimes, there's a conflict between your software and your microphone.
- Close Unnecessary Programs: Close any other applications that might be using the microphone simultaneously. This includes other video conferencing programs or voice recording software.
- Check for Background Processes: Examine the Task Manager (Ctrl+Shift+Esc) for any background processes that could be interfering with your microphone. Close any potentially conflicting processes.
Hardware-Related Troubleshooting: When Software Isn't the Answer
If software solutions prove ineffective, we must delve into potential hardware-related issues.
1. Physical Connections: Ensuring a Secure Link
If your Gateway laptop has an external microphone input, verify the physical connection. Unplug and replug the microphone. Test another microphone to ensure the port itself works.
2. Microphone Cleaning: Dust and Debris
Dust and debris can obstruct your laptop's built-in microphone. Gently clean the microphone ports with a soft brush or compressed air.
3. Internal Microphone Inspection (Advanced): If Applicable
Warning: This is an advanced step and should only be attempted if you are comfortable with computer hardware. Opening your laptop may void your warranty. Locate the internal microphone. It's usually a small, circular component located near the webcam or near the screen. Inspect the wiring. If any wires are loose or disconnected, they must be reconnected. Consult your Gateway laptop's service manual or a reliable online guide for disassembly instructions.
Final Considerations: Prevention and Maintenance
Preventative measures will help keep your microphone online.
1. Regular Driver Updates: Make it a habit to periodically check for driver updates on the Gateway support website.
2. Cleanliness and Care: Keep your laptop clean and free from dust and debris. Avoid exposing it to extreme temperatures or moisture.
3. Software Management: Regularly clean your system of unnecessary software. Unwanted programs can sometimes interfere with your microphone.
By methodically following these detailed steps, you'll substantially increase your chances of restoring your Gateway laptop microphone's functionality. Remember to document each step you take and note the results. This will help you troubleshoot more efficiently and, if necessary, provide helpful information to technical support. Good luck, and here's to crisp, clear audio!
