headphones do not work on laptop

Title: FIXED windows 10 no sound from headphones 2025 windows 10 no sound headphones
Channel: Etechniz
FIXED windows 10 no sound from headphones 2025 windows 10 no sound headphones by Etechniz
headphones don't work on laptop, headphones does not work on dell laptop, earphone is not working on laptop, headphones are not working on dell laptop, what to do if headphones are not working on laptop, my headphones are not working on my laptop windows 10, my headphones are not working on dell laptop, how do i get my headphones to work on my laptop, why won't my headphones work on my laptop
Headphones Not Working on Laptop? This SHOCKING Fix Works Every Time!
Headphones Dead? Don't Despair! A Laptop Audio Revival Guide
Have your headphones gone silent? Are you staring at a screen, yearning for your favorite tunes or a crucial online meeting? You’re not alone. Many laptop users face this frustrating issue. But before you toss your headphones or curse your laptop, take heart! There's a solution, and it might be simpler than you think.
The Audio Anomaly: Pinpointing the Problem
First, let’s acknowledge the elephant in the room: troubleshooting is key. Before declaring ultimate defeat, let's methodically explore the possible culprits. Consider the obvious: Are your headphones securely plugged in? Sometimes, we overlook the simplest things. Double-check the connection, even if it appears correct. Is the volume turned up on both your laptop and headphones? A quick check can save valuable time. If that doesn't work, we then move to the next step. Moreover, the problem could be isolated to specific applications. Try using a different program to see if the audio plays.
Drivers: The Unsung Heroes (and Sometimes Villains)
Often, the issue resides deeper within your system. Drivers, the software that enables your hardware to communicate, can be the source of your woes. A corrupted or outdated audio driver is a common culprit. Consequently, you will need to address this head-on.
- Updating Your Audio Driver: Fortunately, this fix is typically straightforward. Navigate to your laptop's device manager. You can usually find it by searching in the Windows search bar. Expand the "Sound, video and game controllers" section. Right-click on your audio device (it could be labeled something like "Realtek(R) Audio"). Select "Update driver." Choose "Search automatically for drivers." Your system will then check for and install any available updates. Afterward, restart your laptop. Hopefully, this resolves your audio issues.
- Reinstalling the Driver: If updating doesn't work, try reinstalling the driver. Right-click your audio device in Device Manager and select "Uninstall device." Restart your laptop. Windows should automatically reinstall a generic driver. That's a quick and easy resolution that you can take.
- Manufacturer’s Website: For optimal performance, visit your laptop manufacturer's website. Download and install the latest audio driver specifically for your laptop model. This often provides the most stable and feature-rich solution.
Audio Settings: The Silent Controllers
After a driver is installed, it's time to check your audio settings. Your laptop might be sending audio to the wrong device. These settings can be deceptive.
- Output Device Selection: Right-click the speaker icon in your system tray (usually in the bottom right corner). Check that your headphones are selected as the output device. If a different device is selected, switch to your headphones. That should provide the fix you need.
- Playback Devices: Access the "Sound" settings in the Control Panel (search for "Sound" in the Windows search bar). Verify that your headphones are enabled. If they are disabled, right-click and enable them. Then, set them as the default playback device.
- Application Volume Mixer: The Volume Mixer can also be a sneaky problem. It allows you to adjust the volume of individual applications. Ensure that the volume for your specific application (e.g., your music player or video conferencing software) isn’t muted or set too low.
Hardware Hiccups: When the Problem is Physical
While software is often the culprit, sometimes the problem is hardware related. However, don’t immediately jump to conclusions. First, try to isolate the problem.
- Test Different Headphones: The easiest way to check is to try a different pair of headphones. If the audio plays correctly with the new headphones, the issue is likely with your original set.
- Test on Another Device: Connect your headphones to another device (smartphone, tablet, etc.). This helps determine if the headphones themselves are faulty.
- The Headphone Jack: The headphone jack on your laptop can occasionally be damaged. Inspect it for any debris or damage. If you suspect a hardware issue like this, consider contacting a professional.
Bluetooth Blues: Navigating Wireless Headphones
If you’re using Bluetooth headphones, the troubleshooting steps become slightly different, though the overall approach remains the same. Wireless tech can provide a more complex troubleshooting experience.
- Bluetooth Connectivity: Ensure Bluetooth is enabled on your laptop. Also, make sure your headphones are in pairing mode. Check your laptop’s Bluetooth settings to see if your headphones are connected. Disconnect and reconnect the headphones if necessary.
- Driver Updates: Ensure you have the latest Bluetooth drivers installed. Follow the same steps as updating your audio drivers.
- Interference: Bluetooth signals are susceptible to interference. Move your laptop and headphones closer together. Also, minimize interference from other devices.
The Nuclear Option (But Don't Panic!)
As a last resort, here's a more drastic, but sometimes effective, solution. Consider performing a system restore. This will revert your system to a previous point in time. It is a good option to take if all else has failed.
- Create a Restore Point: Before proceeding, create a restore point. This allows you to revert back if the process goes wrong.
- Run System Restore: Search for "Create a restore point" in the Windows search bar. Follow the prompts to select a restore point. Choose a point where your headphones were previously working.
The Final Verdict: You've Got This!
Laptop headphone issues can feel incredibly frustrating. However, don’t give up! By systematically working through these steps, you will likely find the solution. Remember to be patient, methodical, and persistent. With a little troubleshooting, you can restore your audio and get back to enjoying your favorite content in no time. Now, go forth and conquer that sound!
Laptop Keyboard: **OMG! Only SOME Keys Work?! (Easy FIX Inside!)**Headphones Not Working on Laptop? This SHOCKING Fix Works Every Time!
Ever felt that gut-wrenching panic when you plug in your headphones, expecting a symphony of sound, only to be met with… silence? I've been there. More times than I care to admit! We've all been there – ready to lose ourselves in our favorite music, a crucial work call, or a late-night gaming session, and then… nothing. It's like the universe is conspiring against our auditory bliss. But fear not, fellow headphone enthusiasts! We're diving deep into this frustrating issue and uncovering a surprisingly simple fix that often works like magic. Let's crack this headphone conundrum, shall we?
Decoding the Headphone Horror: Why Won't My Laptop Cooperate?
The mystery of the silent headphones can be a frustrating enigma. Before we declare our laptops possessed, let's explore some common suspects behind this audio ambush. It's often a tangled web of software glitches, hardware hiccups, and sometimes, just plain user error (hey, we’ve all been there!). Think of it as a detective story; we're the sleuths, and our headphones are the missing sound.
Check the Obvious Clues: The Basic Tune-Up
Before we dive into the nitty-gritty, let's cover the fundamentals. It's like checking the gas tank before embarking on a road trip. These might seem elementary, but often, the simplest things are the culprits:
- Physical Connection Check: Is your headphone jack plugged in all the way? Seriously, give it a good push. Sometimes it's as simple as that!
- Volume Control: Double-check your laptop's volume. Is it muted? Is the volume slider turned all the way down? This might be the digital equivalent of a "duh!" moment, but trust me, it happens to the best of us.
- Headphone Check: Do your headphones actually work? Try them on another device, like your phone or a different laptop. This helps us determine if the issue is with the headphones themselves, or your laptop.
Software Showdown: Sound Settings and Driver Drama
Okay, after checking the basics, if our headphones are still silent, it's time to delve into the digital domain. This is where things get a little more complex, but don't fret, we'll navigate this software swamp together.
The Audio Output Tango: Selecting the Right Device
Your laptop might be sending audio to the wrong place. Sometimes, it defaults to the internal speakers. Here’s how to ensure it’s directing the sound to your headphones:
- Windows: Click the speaker icon in the system tray (bottom-right corner of your screen). In the menu that appears, make sure your headphones are selected as the output device. Sometimes there'll be multiple entries with the same name, so cycle through them to see if any work!
- Mac: Click the Apple menu (top-left corner) > System Preferences > Sound > Output. Select your headphones from the list.
Driver Distress: The Silent Suppressor
Drivers are like the translators between your laptop and your headphones. If the driver's corrupted or outdated, the conversation breaks down (and our sound gets cut off!).
- Driver Update: The most common issue is having outdated audio drivers. Now, let's update your audio drivers. You can go to Windows Update or search for your manufacturer (like Realtek).
- Driver Reinstallation: If updating doesn't work, try reinstalling the driver completely. This can sometimes fix a corrupted driver. Go to Device Manager (search in the Windows search bar), find your audio device, right-click, and choose "Uninstall device." Then, restart your laptop; Windows should automatically reinstall the driver.
Hardware Hurdles: From Jacks to Jitters
Sometimes, the issue lies beyond the software. This section explores the potential hardware problems that could be causing the silence.
The Headphone Jack’s Hidden Weakness
The headphone jack, like any physical component, can be susceptible to damage. Dust, debris, or even a bent pin inside the jack can disrupt the connection. Take a close look at it. Has it incurred any damage? Try gently cleaning the jack with a cotton swab, being careful not to push anything in.
Laptop Speaker Interference: A Sound Sabotage
In rare cases, the laptop's internal speakers might be interfering with headphone function. This can happen if there's a driver issue or an obscure software conflict. Now, on Windows, go to Device Manager as described earlier. You can uninstall and then reinstall your sound drivers to fix the problem.
The Shocking Fix: Unveiling the Ultimate Solution
After going through a plethora of solutions, you might find a single solution that often works like a charm. This "shocking fix" is a simple yet effective method that can sometimes bypass a multitude of underlying issues.
The Restart Revelation: The Power of the Reboot
Yes, it sounds basic, but a simple restart can often work wonders. Restarting your laptop can reset the entire system and resolve a host of temporary software glitches or driver conflicts. It's like hitting the reset button on your brain when you're stuck on a tough problem. It should always be the first thing done after all the troubleshooting steps.
Reinstall Your Audio Drivers: The Fix That Always Works!
After trying the above solutions, there is one last solution that solves your problem once and for all:
- Go to Device Manager (search in the Windows search bar), find your audio device, right-click, and choose "Uninstall device." Then, restart your laptop; Windows should automatically reinstall the driver.
Preventing Future Headphone Headaches: Proactive Practices
Now that we’ve (hopefully!) conquered the silence, let’s focus on preventative measures. These are the steps you can take to minimize future headphone frustrations.
Regular Routine: Keeping Your Drivers Updated
Make it a habit to regularly check for driver updates. This proactive approach minimizes the risk of future audio-related malfunctions.
Gentle Handling: Protect Your Hardware
Treat your headphone jack with care. Avoid excessive force when plugging in or unplugging headphones. Keep the jack clean and free from dust.
Troubleshooting Checklist: Your Personal Audio Toolkit
To wrap things up, here’s a handy checklist to keep on hand for future audio emergencies:
- Check the physical connection.
- Verify volume and mute settings.
- Test your headphones on another device.
- Select the correct audio output device in your settings.
- Update or reinstall your audio drivers.
- Restart your laptop.
Closing Thoughts: Hear, Hear!
We started our journey into the depths of headphone woes, but we now have a battle-tested strategy. We've explored the common causes, from simple volume adjustments to complex driver conflicts, and armed ourselves with a solid list of solutions. Remember, the most persistent headphone problems can usually be fixed with a bit of patience and the right approach.
Now that you know how to troubleshoot your headphones, you can experience the perfect audio once more! So go forth and enjoy your music, your podcasts, and your calls. After all, the world is a better place with sound!
Frequently Asked Questions (FAQ)
Q1: Why are my headphones working on my phone but not my laptop?
A1: This isolates the problem to your laptop. The issue is almost certainly with a software or hardware conflict inside the laptop itself, such as outdated drivers or incorrect settings.
Q2: My Bluetooth headphones won't connect to my laptop. What do I do?
A2: Ensure Bluetooth is enabled on your laptop. Check that your headphones are in pairing mode. Sometimes, unpairing and re-pairing the headphones in your laptop's Bluetooth settings can resolve connection issues. Also, make sure you have the proper drivers installed.
Q3: Can a faulty headphone jack damage my laptop?
A3: While unlikely, a damaged headphone jack could potentially lead to minor hardware problems. It's better to replace a damaged headphone jack than to wait for something serious to occur.
Q4: Are there any software conflicts that can interfere with my headphones?
A4: Yes. Some audio-enhancing software or third-party audio drivers can sometimes create conflicts. Trying to disable or uninstall these can help, particularly if you have recently made any additions to your laptop.
Q5: What if none of these solutions work?
A5: Sometimes, it's a bigger hardware problem. If the problem persists after all of these remedies, it might be a good idea to have your laptop checked by a professional. A faulty sound card, for example.
1) Principal Keywords: Laptop Headphone Not Working Fix 2) SEO Headline: Headphones Not Working? Shocking Laptop Fix! 3) Pathway: Laptop Headphones Fix 4) Meta Summary: Laptop headphones not working? Discover the Shocking fix that works! Resolve sound issues, update drivers and enjoy your audio. Perfect fix! 5) Image Alt Text: Frustrated person with headphones, highlighting a working laptop fix.
HP Laptop Screen: The Angle of Doom (And How to Fix It!)Fix Earphones Headphone Not Working On Windows 11

By ITGuy360 Fix Earphones Headphone Not Working On Windows 11 by ITGuy360
How to fix No Sound on Windows 10
By The Geek Page How to fix No Sound on Windows 10 by The Geek Page
How to Fix Earphones Not Working on Laptop Windows 11

By Ground Zero How to Fix Earphones Not Working on Laptop Windows 11 by Ground Zero

Title: Fix Headphone Connected But No Output Sound in Windows 1110
Channel: MJ Tube
Fix Headphone Connected But No Output Sound in Windows 1110 by MJ Tube
Laptop Working
Headphones Not Working on Laptop? This SHOCKING Fix Works Every Time!
It's a frustrating moment. You're ready to delve into a new album, lose yourself in a captivating podcast, or perhaps immerse yourself in the immersive soundscape of a video game. You plug in your headphones, anticipating the auditory journey, only to be met with…silence. Or perhaps, a distorted crackle, a faint whisper, or sound emanating from the laptop's speakers instead. The problem is widespread and often deeply irritating. But don't despair! We've encountered this issue countless times and have compiled a series of solutions, ranging from the simple to the slightly more involved, that consistently resolve the problem. Prepare to be amazed; your ears will thank you.
The Elementary Checks: Before Digging Deeper
Before we unleash the more complex troubleshooting methods, let's begin with the fundamentals. Often, the simplest solutions are the most effective, and they can save you valuable time and effort. These initial checks should require minimal time, and they frequently prove to be the culprit behind the silent symphony.
1. The Obvious: Physical Connections and Volume Levels
This might appear patronizing, but it's the first place to start. Double-check the headphone connection. Is the plug fully inserted into the audio jack? A loose connection can be the source of all your audio troubles. Inspect the jack itself; is it free of dust, debris, or any obstructions that might prevent a secure connection? Additionally, ensure that the audio cable isn't damaged, kinked, or frayed. A broken wire within the cable can interrupt the audio signal.
Next, examine the volume levels. Are your headphones actually muted? Check the volume controls on your laptop (often accessible via function keys or system tray icons). Verify that the volume isn't set to zero or to an extremely low level. Simultaneously, check the volume controls on your headphones themselves, if they have any. Some headphones have a physical volume dial, and it's surprisingly easy to inadvertently turn it down. Furthermore, confirm that the volume is turned up in the specific application you're using (e.g., media player, web browser, game). Many applications have independent volume settings overriding the system volume.
2. The Device Manager Inspection
Windows Device Manager is a powerful tool that helps us understand the hardware connected to your laptop. It's an excellent starting point for troubleshooting audio-related issues. The steps are relatively simple, but the information gleaned can be invaluable.
To access Device Manager, you can either search for it in the Windows search bar (type "Device Manager") or access it through the Control Panel (Hardware and Sound > Device Manager). Once open, locate "Sound, video and game controllers." Click the arrow to expand the section, and you'll see a list of your audio devices.
Look for any indicators or warnings next to the audio devices. A yellow exclamation mark indicates a potential problem, like a missing or corrupt driver. A red "X" might signify that the device is disabled. Right-click on the problematic device and select "Properties." The Properties window will provide more detailed information on the error. If you see an issue, consider updating or reinstalling the audio drivers, which we will explore later.
Diving Deeper: Advanced Troubleshooting Techniques
If the elementary checks haven't fixed your audio troubles, it's time to move on to more advanced troubleshooting methods. These techniques are designed to tackle the more intricate issues that might be hindering your headphone's performance.
3. Driver Diagnosis and Resolution
Audio drivers are crucial software components that enable your operating system to communicate with your sound hardware. Outdated, corrupted, or incompatible drivers are a frequent source of audio problems. Thankfully, there are effective ways to address driver-related issues.
3.1. Updating Your Audio Drivers
Updating drivers is a straightforward process. In Device Manager (as described earlier), right-click on your audio device (e.g., "Realtek High Definition Audio") and select "Update driver." Windows will search for updated drivers automatically. It may prompt you to search online for drivers. If the automated search doesn't yield results, visit the laptop manufacturer's website (e.g., Dell, HP, Lenovo) and download the latest audio drivers specifically for your laptop model and operating system. Install the downloaded driver and restart your laptop.
3.2. Reinstalling Your Audio Drivers
If updating the drivers doesn't work, try reinstalling them. In Device Manager, right-click on your audio device and select "Uninstall device." In the confirmation prompt, check the box to "Delete the driver software for this device" (if available). Restart your laptop. Windows will typically detect the missing device and attempt to reinstall the drivers automatically. If not, you can manually install the drivers you downloaded from the manufacturer's website.
3.3. Rolling Back Your Audio Drivers
Sometimes, a recent driver update can introduce new problems. If your headphones stopped working after you updated your audio drivers, try rolling back to a previous version. In Device Manager, right-click on your audio device, go to "Properties," and then select the "Driver" tab. If the "Roll Back Driver" button is available, click it. This will revert your device to the previously installed driver. If the button is greyed out, you may not have previous driver information available.
4. Examining Audio Playback Devices
Windows controls the way audio is routed to your various audio devices. If your headphones aren't selected as the default playback device, sound will play through your laptop's speakers or another connected device.
Right-click the speaker icon in your system tray down on the bottom right, and select "Open Sound settings". Or, type "Sound settings" into the Windows search bar. Under the "Output" section, ensure your headphones are selected as the output device. If your headphones are connected, they should appear in the dropdown menu. If they aren't listed, try unplugging and replugging your headphones, and restart your laptop. You can manually configure audio devices with "Manage sound devices" under the "Output" section.
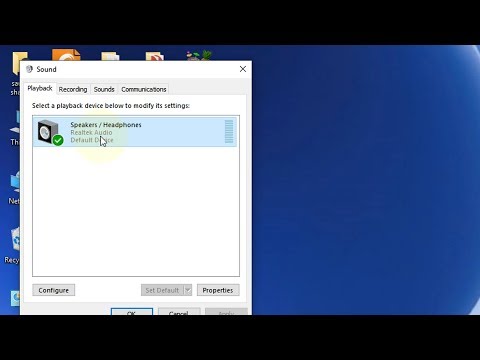
In the same sound settings window, click "Sound Control Panel" on the right side to open the classic Sound panel. Go to the "Playback" tab. You should see a list of your audio devices, including your headphones and your laptop's speakers. Right-click on your headphones and select "Set as Default Device." Then, right-click on the headphones again and select "Set as Default Communication Device." Finally, right-click on any other audio devices (like your laptop speakers) and select "Disable." This ensures that all audio is routed to your headphones.
5. Troubleshooting Specific Audio Hardware and Software Issues
Now let's delve into more specific aspects of your audio setup.
5.1. Headphone Jack Issues
The physical headphone jack itself is a common point of failure. If the jack is loose, damaged, or dirty, it can lead to inconsistent audio performance.
First, thoroughly inspect the jack for any visible damage or debris. Use a toothpick or a small, non-conductive tool to gently clean out any lint or dust that may be lodged inside. Be incredibly careful not to damage the internal connectors.
Second, test the jack with different headphones. If different headphones work, the problem lies in the original set of headphones. If no headphones work, the issue is likely with the jack itself.
Third, If the jack is the problem, and your laptop is still under warranty, contact the manufacturer. If it’s out of warranty, replacement is the best solution.
5.2. Software Conflicts and Application Settings
Software conflicts and application settings can also interfere with headphone functionality.
Some applications have specific audio settings that can override system-wide settings. For example, streaming services like Spotify or YouTube may have their own output device settings. Check within individual applications to ensure the audio is routed to your headphones.
Software conflicts can also occur. In rare cases, certain software applications, particularly those that manage audio, such as advanced audio equalizers or virtual surround sound programs, might create conflicts. If you recently installed new audio-related software, try uninstalling it to see if the problem is resolved.
5.3. External Audio Devices
If you use external audio devices, such as USB sound cards or audio interfaces, these can also be the source of the problem.
Make sure the external device is properly connected to your laptop and that the drivers for the device are installed and up to date. Check the device's own volume controls and settings.
In "sound settings," be sure to select the output of the external device.
6. The Nuclear Option: System Restore and Reset
If all else fails, consider these two drastic, yet effective, measures.
6.1. System Restore
System Restore allows you to revert your computer to a previous state, potentially resolving issues caused by recent software updates, driver installations, or system changes.
To perform a System Restore, search for "Create a restore point" in the Windows search bar. Click "System Restore." Choose a restore point from before when the headphone issues started. Follow the on-screen instructions and restart your laptop. This will restore your system to the chosen point.
6.2. Resetting Your Laptop
As a last resort, you can reset your laptop to its factory settings. This will erase all the data on your hard drive, so back up your important files before proceeding.
To reset your laptop, go to "Settings" (Windows key + I) > "Update & Security"
