keyboard on laptop not working mac

Title: How to Fix Keyboard Macbook Not Working Repair Keys
Channel: iSolution
How to Fix Keyboard Macbook Not Working Repair Keys by iSolution
keyboard on laptop not working mac, keyboard on macbook laptop not working, some keys on laptop keyboard not working mac, why won't my keyboard work on my macbook, why is my keyboard on mac not working, why keyboard is not working in my laptop
Mac Keyboard Dead? This One Weird Trick Fixes It!
Mac Keyboard Troubles? Conquer the Chaos and Revive Your Input!
Have you ever stared blankly at your Mac, willing the keyboard to respond? It’s a frustrating experience, to say the least. Suddenly, your sleek, stylish machine becomes a digital brick. The good news? Often, a simple fix is all you need. This isn't about complex technical jargon. Instead, it's about getting you back to typing without a massive headache.
Decoding the Silent Treatment: Pinpointing the Problem
Before you panic, take a breath. What happened right before your keyboard went AWOL? Did you install new software? Maybe you spilled something nearby? Identifying the circumstances can provide crucial clues. For instance, a reboot may solve things in many scenarios. Similarly, external devices may interfere. So, unplug any unnecessary peripherals. This includes printers, external hard drives, and any USB hubs.
Restart, Reawaken, and Reclaim Control
Sometimes, the simplest solution is the best. A classic reboot can miraculously work wonders. Initiate it by clicking the Apple menu in the top left corner. Then, select "Restart." If your mouse is functional, use it. Nevertheless, if the mouse itself is also unresponsive, you might need to force a shutdown. This is possible by pressing and holding the power button. Be warned, this method can potentially lead to data loss, so try any other method first.
The Mysterious Dance of Wireless Connections
If you use a wireless keyboard, the connection could be the culprit. Firstly, check your Bluetooth settings. Is Bluetooth turned on? Secondly, is your keyboard listed as connected? Sometimes, the connection can become unstable. Therefore, try disconnecting and reconnecting your keyboard. Furthermore, ensure your keyboard has adequate battery power. Low batteries are a frequent cause of connection problems. Finally, move your keyboard closer to your Mac. Distance can significantly impact the signal strength.
Software Shenanigans: Ruling Out Conflicts
Software conflicts can sometimes wreak havoc on your keyboard. Moreover, recently installed applications are highly suspect. Immediately, consider whether a new app might be causing the problem. To troubleshoot, boot your Mac in Safe Mode. Safe Mode loads only essential system components. This helps determine if a third-party application is the issue. To enter Safe Mode, restart your Mac. As it restarts, quickly press and hold the Shift key. Release the Shift key when you see the login window. If the keyboard functions correctly in Safe Mode, the problem likely lies in a recently installed program.
The Anatomy of a Keyboard: Cleaning Up the Mess
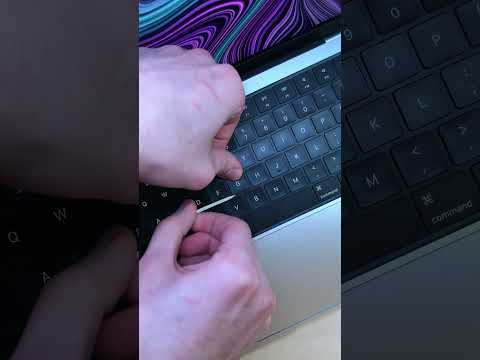
Sometimes, the issue is purely physical. Dust, crumbs, and other debris can jam the keys. Consequently, it’s time for a thorough cleaning. First, turn your Mac off. Then, gently turn your keyboard upside down and shake it. This may dislodge loose particles. After that, use a can of compressed air. Direct the air between the keys. This helps to remove stubborn debris. Moreover, a soft brush can also be helpful. Brush gently between the keys to dislodge anything remaining.
Hidden Settings Unleashed: Digging Deeper
Your Mac offers various keyboard settings that might need adjustment. To access these settings, open System Preferences. Then, click on "Keyboard." Explore the different tabs. For example, confirm that your keyboard layout is correct. Ensure that "Use F1, F2, etc. keys as standard function keys" is set to your preference. Furthermore, investigate "Input Sources" to verify your preferred input language. There may be an accidental issue.
Hardware Hurdles: Recognizing the Limits
Unfortunately, sometimes the problem is a hardware issue. If you've tried all the above and your keyboard remains silent, a physical problem might exist. For instance, keys may be stuck or damaged. First, examine the keyboard for any obvious damage. Second, if you own an external keyboard, connect it. If the external keyboard works, it confirms an internal hardware issue. In this case, you may seek professional repair. Alternatively, if your Mac is still under warranty, you should contact Apple Support.
The Final Word: Embracing the Solution
Facing a dead keyboard can feel like a digital nightmare. However, the fixes are often surprisingly simple. You can usually solve the problem quickly. So, don't despair! Often, restarting, checking connections, and cleaning the keyboard will do the trick. Also, knowing the process is empowering. By following these steps, you’ll regain control of your Mac. Now go forth and type with confidence!
HP Laptop 5 Dead? FIX IT NOW! (Easy Steps)Mac Keyboard Dead? This One Weird Trick Fixes It!
Alright, let's be real. There's nothing quite as panic-inducing as staring at a seemingly unresponsive Mac keyboard. You’re mid-sentence, the deadline's looming, and suddenly? Crickets. Your fingers are firing, your brain is buzzing, but the screen? Blank. It's like your trusty keyboard has decided to stage a silent protest. We’ve all been there, haven't we? The immediate frustration, the frantic Googling (“Mac keyboard not working!”), the desperate attempts to restart your computer for the tenth time. But what if I told you there's a quick, easy fix that often gets your keyboard back in action faster than you can say "Command-Z"?
1. The Silent Assassin: Recognizing the Keyboard Breakdown
Before we dive into the magic, let's talk about what “dead” actually means in the context of a Mac keyboard. Is it completely unresponsive? Are some keys working while others are playing hooky? Is it a hardware issue, or is it just a software glitch? Pinpointing the problem is the first step to solving it. Think of it like diagnosing a patient – you wouldn't prescribe medicine without a proper examination, right? So, take a moment to assess the situation. Try these quick checks:
- Test an External Keyboard: Plug in another keyboard, if you have one. Does it work? If yes, at least you know your Mac itself is functioning. The issue likely lies with the internal keyboard.
- Restart Your Mac: This sounds cliché, but it often works! A simple restart can clear up temporary software glitches.
- Look for Visual Clues: Is the Caps Lock key lighting up? Does the power button respond? These little indicators can point you in the right direction.
2. The Culprit: The Bluetooth Gremlin (Even If You Don't Think So!)
Now for the juicy part – the one "weird trick." Get ready, because this often-overlooked culprit is Bluetooth. Yes, even if your Mac keyboard isn't a Bluetooth keyboard. Hear me out. Macs, especially MacBooks, automatically search for nearby Bluetooth devices. Sometimes, this constant searching can interfere with your internal keyboard's ability to communicate properly. It's like trying to listen to a conversation in a crowded room – too much background noise!
3. The Hero's Method: Disconnecting Bluetooth (and Reconnecting)
Here’s the super-simple, often surprisingly effective, fix:
- Open System Preferences: Click the Apple icon in the top-left corner of your screen and select "System Preferences." (Or, on newer macOS versions, it might be called "System Settings.")
- Navigate to Bluetooth: Click the "Bluetooth" icon.
- Turn Bluetooth Off: Toggle the Bluetooth switch to "Off."
- Wait a Moment: Give it a good 30 seconds. Let the digital gremlins settle down.
- Turn Bluetooth On: Toggle the Bluetooth switch back to "On."
- Test Your Keyboard: Try typing again. Fingers crossed!
This simple toggle can often reset the Bluetooth connection and, in turn, solve the keyboard issue. It's like a digital reset button for your Mac's internal communication systems.
4. Why This Works: A Technical Explanation (Simplified!)
Okay, let's get a little technical, but I promise to keep it easy. Your Mac's keyboard communicates with the operating system – the brain of your computer – through a series of protocols. Bluetooth congestion, even if there isn't a connected Bluetooth device, or a weak wireless signal can disrupt this communication. Turning Bluetooth off and on forces the system to refresh its connections, clearing out any potential interference and re-establishing the link between your keyboard and your Mac. Think of it as clearing a clogged pipe.
5. Still Dead? Let's Troubleshoot Further!
If the Bluetooth trick didn't work (I know, I know, sometimes magic fails), don't despair! We have more tools in our troubleshooting toolbox:
- Check Your Keyboard Settings: Go back to System Preferences (or System Settings) and click on "Keyboard." Make sure the "Modifier Keys" are set correctly. Sometimes, inadvertently changing these can cause strange behavior.
- Run a Malware Scan: A virus or malware can sometimes interfere with your keyboard’s functionality. Run a scan using your preferred security software.
- Update Your macOS: An outdated operating system can cause all sorts of problems, including keyboard malfunctions. Go to System Preferences > Software Update (or System Settings > General > Software Update) and check for updates.
- Try a Safe Mode Boot: Restart your Mac and hold down the Shift key. This starts your Mac in Safe Mode, which loads only essential components and drivers. If the keyboard works in Safe Mode, you know a third-party application is likely causing the problem.
- Check for Physical Obstructions: Sometimes, dust or debris can interfere with the keys. Use compressed air to clean under and around the keys.
6. Battery Blues: The Power Perspective
For those rocking a wireless keyboard (or a MacBook), don't overlook the simplest culprit: the battery! It’s easy to miss, especially if you're used to a wired setup. A dead or dying battery can make your keyboard seem lifeless.
- For wireless keyboards, replace the batteries and test.
- For MacBooks, ensure your laptop is sufficiently charged, or try plugging it into an outlet.
7. The Case of the Sticky Keys: A Physical Examination
Sometimes, the issue isn't digital; it's physical. Sticky keys can happen for a variety of reasons, from spilled coffee (oops!) to a build-up of dirt and grime.
- Cleaning Time: Use a can of compressed air to blow out any debris trapped under the keys.
- Gentle Cleaning: If necessary, use a slightly dampened (not wet!) cotton swab to gently clean around the keys. Be very careful not to get any liquid inside your keyboard.
8. The Keyboard Viewer: A Built-In Diagnostic Tool
Did you know your Mac has a built-in keyboard viewer? It makes it easy to see if your keyboard is sending signals to the system.
- Enable Keyboard Viewer: Go to System Preferences > Keyboard (or System Settings> Keyboard) and check the box next to "Show keyboard and emoji viewers in the menu bar."
- Test Your Keys: Click the keyboard icon in your menu bar and select "Show Keyboard Viewer." Press a key on your physical keyboard. If it highlights on the viewer, you know the key is registering. If not, there might be a deeper problem.
9. The SMC Reset: For the Tech-Savvy
For those who feel confident, you could try an SMC (System Management Controller) reset. This resets some of the low-level settings on your Mac. Important: The process varies depending on the type of Mac you have (desktop vs. laptop). Google instructions specific to your Mac model before attempting.
10. The Hardware Hunt: Is It Truly Broken?
If you've tried everything, it's possible the keyboard is a hardware issue.
- External Keyboard Test (Again!): Connect an external keyboard. If the same keys don't work on both keyboards, and you're certain the issue isn't software-related, a hardware failure might be the reason.
- Professional Help: Find a reputable repair shop that specializes in Macs. Sometimes, keyboard-related issues are complex and require expert attention.
11. Preventative Measures: Keeping Your Keyboard Happy
Prevention is always better than cure. Here are some tips to protect your keyboard from future problems:
- Keep it Clean: Regularly dust and clean your keyboard. A clean keyboard is a happy keyboard.
- Avoid Spills: Be extra cautious around liquids and food.
- Use a Keyboard Cover: If you work in a dusty environment or eat near your computer, a keyboard cover can add an extra layer of protection.
- Update Regularly: Keeping your macOS and drivers up to date minimizes software conflicts that could affect your keyboard.
12. Beyond the Keyboard: Input Device Considerations
Remember your mouse or trackpad? Sometimes, seemingly keyboard-related problems are actually related to other input devices.
- Trackpad Troubleshooting: If you have a trackpad, try restarting the trackpad service.
- Mouse Check: If you have a mouse, try a different mouse or connect via a USB.
13. The Power of Patience: Don't Give Up!
Dealing with a dead or unresponsive keyboard can be frustrating, but don't give up hope! Take a deep breath, work step by step through these troubleshooting steps, and remember that even technology has its quirks. Often, the solution is simpler than you might think.
14. The Importance of Backup: Back Up Your Data!
While you're troubleshooting, remember to always back up your data. In the event of a more serious issue, backing up ensures you're not facing the additional agony of data loss.
15. The Final Frontier: When to Seek Professional Help
If you've tried everything and your keyboard is still unresponsive, it's time to call in the experts. A professional repair shop can diagnose and fix more
Laptop Backlight DEAD? FIX This Now!7 Ways To Fix a Mac Keyboard That Is Not Working Correctly

By macmostvideo 7 Ways To Fix a Mac Keyboard That Is Not Working Correctly by macmostvideo
Using WINDOWS Keyboard On MAC Easy setup & re-mapping guide

By KeebNews Using WINDOWS Keyboard On MAC Easy setup & re-mapping guide by KeebNews
I broke my MacBook's F key
By Bog I broke my MacBook's F key by Bog

Title: MacBook Keyboard FIXED in ONE CLICK Daily Vlog 019
Channel: Dave Hanson Hey there, Dave here.
MacBook Keyboard FIXED in ONE CLICK Daily Vlog 019 by Dave Hanson Hey there, Dave here.
Wifi On Laptop Phone
The title is: "The Ultimate Guide to Choosing the Perfect Hiking Boots"
The Ultimate Guide to Choosing the Perfect Hiking Boots
Embarking on a hiking adventure is an experience that invigorates the soul and challenges the body. However, the joy of conquering trails and basking in panoramic views hinges significantly on one critical piece of equipment: your hiking boots. Choosing the right boots is paramount. They are the bedrock of your comfort, safety, and overall enjoyment. This comprehensive guide will meticulously dissect the art of selecting hiking boots, ensuring that your next trek is not only memorable but also a testament to your well-preparedness.
Understanding the Spectrum of Hiking Boots: A Primer
The world of hiking boots is diverse, catering to a spectrum of terrains and activities. Understanding this spectrum is the first step toward making an informed decision. We’ll navigate this landscape together, unraveling the distinctions between various boot types.
Lightweight Hiking Shoes: These are the entry-level option, best suited for well-maintained trails, day hikes, and generally lighter loads. They offer flexibility and breathability, resembling a more robust running shoe. However, their ankle support and durability are limited.
Hiking Boots: These are the workhorses, versatile enough for day hikes, weekend backpacking trips, and off-trail adventures. They offer a balance of support, protection, and durability. The design usually includes higher ankle cuffs for added stability.
Mid-weight Hiking Boots: These offer increased support and sturdiness compared to trail shoes but also weigh more. These boots are a perfect selection for backpacking with moderate loads.
Backpacking Boots: Built for extended trips and heavy loads, these boots prioritize durability and support. They feature stiffer soles and more robust construction, designed to endure rugged terrain and carry significant weight.
Mountaineering Boots: The most specialized of the bunch, designed for technical mountaineering, ice climbing, and high-altitude expeditions. They're incredibly stiff, heavily insulated, and compatible with crampons.
Assessing Your Hiking Needs: A Critical Self-Evaluation
Before diving into the specifics of boot features, it's crucial to honestly assess your hiking proclivities. This introspection will guide your selection process, preventing costly mistakes and ensuring optimal performance on the trail.
Frequency of Hiking: How often do you hike? Casual weekenders will have different requirements than dedicated thru hikers. Gear that balances everyday use with performance is your go-to choice.
Type of Terrain: Consider the terrain you frequent. Are you primarily exploring groomed trails, or do you venture into rocky, uneven landscapes? This assessment is important for support needs.
Pack Weight: How much weight will you be carrying? Day hikers need less support than backpackers carrying a week's worth of supplies.
Climate Conditions: Will you be hiking in hot, dry conditions or cold, wet environments? Breathability and insulation are critical considerations based on your climate.
Personal Preferences: Do you prefer a stiff boot for maximum support or a more flexible boot for greater freedom of movement? Your comfort is paramount.
Key Features to Scrutinize in Your Hiking Boots
Once you've defined your hiking needs, it's time to delve into the specifics of boot features. These are the elements that will determine the fit, performance, and longevity of your chosen footwear.
Materials: The Foundation of Performance
The materials used in hiking boots significantly impact their durability, breathability, and water resistance. Consider the following:
- Leather: Traditionally a preferred material for its durability, abrasion resistance, and ability to mold to the wearer's foot over time. Full-grain leather is the most durable, but it requires regular maintenance. Split-grain leather is lighter and more breathable but less durable. This material needs to be properly waterproofed.
- Synthetic Materials (Nylon and Polyester): These often weigh less and are more breathable than leather. They dry faster and are more affordable. However, they are less durable and may not offer the same level of ankle support or abrasion resistance as leather.
- Waterproof Membranes (Gore-Tex and Similar Options): These membranes are woven into the boot's upper, creating a barrier against water while allowing moisture vapor to escape. They're essential for hiking in wet conditions.
The Sole: Traction and Stability Underfoot
The sole is the part of the boot that makes contact with the trail, making it the most important component.
- Outsole: The outsole provides traction and grip. Look for outsoles made of durable rubber compounds, such as Vibram, known for its excellent performance in various terrains.
- Midsole: The midsole is responsible for cushioning and shock absorption. It's typically made of materials like EVA (Ethylene-vinyl acetate) or PU (Polyurethane). EVA is lighter and more flexible, while PU is more durable.
- Shank: The shank is a stiffening component located between the midsole and outsole. It provides rigidity and helps with stability, especially when carrying heavy loads. The length and stiffness of the shank influence the boot's performance.
Fit is Paramount: Navigating the Crucial Considerations
Proper fit is the single most important factor in choosing hiking boots. Ill-fitting boots can lead to blisters, foot pain, and a miserable hiking experience.
Measuring Your Feet: It's best to measure your feet later in the day when they are likely to be at their largest, due to swelling from activity. Measure both feet, as their size may differ.
The Length of your Foot: Measure the distance from your heel to the longest toe. Add about a half-inch to this measurement for the ideal boot length. This will give you ample toe room to prevent jamming on descents.
Width: This is just as crucial as length. Boots come in various widths (narrow, regular, wide). Ensure the boot doesn't pinch your foot at any point.
The Heel and Ankle: Your heel should fit snugly in the heel cup, with minimal lift when you walk. The ankle should be adequately supported, but not restricted.
Try Boots On With Hiking Socks: Always try boots on with the type of socks you intend to wear while hiking. This accounts for the added thickness.
Lacing Systems: Finding the Perfect Fit
The lacing system is a critical factor in achieving a secure and comfortable fit.
- Eyelets vs. Speed Hooks: Eyelets provide a more traditional and customizable fit. Speed hooks allow for quicker lacing and adjustment.
- Lace Material: Consider the material of the laces. Durable, water-resistant laces are essential.
- Proper Lacing Technique: Learn the basic lacing techniques to optimize the fit and prevent hotspots.
Maintenance and Longevity: Extending the Life of Your Boots
Taking care of your hiking boots will significantly extend their lifespan and ensure optimal performance on the trail.
Cleaning: Regularly clean your boots after each hike. Remove dirt and debris with a brush and mild soap. Rinse thoroughly and allow the boots to air dry.
Waterproofing: Leather boots require regular waterproofing treatments. Synthetic boots may benefit from water-repellent sprays.
Storage: Store your boots in a cool, dry place, away from direct sunlight.
Addressing Common Hiking Boot Challenges
Even with careful selection, challenges may arise. Here's how to address them:
Blisters: Blisters are a common enemy. Wear proper socks, ensure a good fit, and apply anti-friction balm. Foot Pain: Try different insoles to address arch support and comfort. Water Leaks: Reapply waterproofing treatments and inspect the boot's seams for wear and tear.
The Final Considerations: Making the Ultimate Selection
Choosing the perfect hiking boots is an iterative process. Consider:
- Reviews: Read online reviews. Learn from the experiences of other hikers.
- Try Them On: Visit a reputable outdoor retailer and try on multiple pairs of boots. Walk around the store with them on to assess the fit.
- Trust Your Instincts: Ultimately, the best hiking boots are the ones that feel the best on your feet.
By following this comprehensive guide, you'll be well-equipped to select the hiking boots that will empower you to conquer any trail. Happy hiking!
