usb ports not working windows 10 lenovo laptop

Title: How to Fix USB Ports Not Working in Windows 1011
Channel: The Geek Page
How to Fix USB Ports Not Working in Windows 1011 by The Geek Page
usb port not working windows 10 lenovo laptop, lenovo usb ports not working windows 10, lenovo laptop usb ports not working, lenovo usb ports not working
Lenovo Laptop USB Ports Dead? FIX This NOW!
Lenovo Laptop USB Ports Gone Silent? Don't Panic! Quick Fixes Await!
We've all been there. That sinking feeling when you plug in your trusty USB drive. Instead of the familiar 'ding,' silence. Your Lenovo laptop's USB ports seem mysteriously dead. Frustration mounts. But before you launch your laptop across the room, breathe! This is a common issue, and often, the solution is surprisingly simple. I can help you through it. Let's get those ports back to life, pronto!
Troubleshooting Your USB Woes: Where Do We Begin?
Before we dive into complex solutions, start with the basics. Sometimes, it's the simplest things. First, gently inspect the USB ports themselves. Look for any debris, bent pins, or anything that might be physically blocking the connection. Also, are you sure the USB device itself is working? Try plugging it into another device. If it's dead there too, the problem isn't your laptop. It's the device.
Restarting Your Laptop: The Oft-Forgotten Hero
This sounds cliche. However, it often works. A simple restart can magically resolve many tech glitches. It clears temporary files. It also resets the operating system. Restart your Lenovo laptop. Then test those USB ports again. Fingers crossed, this might just do the trick!
Power Management Mayhem: Unleashing the USB Ports
Windows has power management settings. These can sometimes interfere with USB ports. They might be putting them to sleep to save battery life. To adjust these settings, start by opening the Device Manager. You can find it by searching in the Windows search bar. Scroll down to "Universal Serial Bus controllers". Expand this section. Right-click on each "USB Root Hub." Select "Properties." Then, navigate to the "Power Management" tab. Uncheck the box that says "Allow the computer to turn off this device to save power." Click "OK" and then test the ports again. If that doesn't work, move on to the next solution.
Driver Dilemmas: Updating Your USB Drivers
Outdated or corrupted drivers can wreak havoc. They can prevent your USB ports from functioning correctly. Back in the Device Manager, right-click on each "USB Root Hub" again. This time, select "Update driver." Choose the option to search automatically for drivers online. Windows will attempt to find and install the latest drivers. Afterwards, restart your laptop. Check your USB ports again.
Checking the BIOS for USB Support
Sometimes, the BIOS settings may be causing the problem. Access your BIOS settings during startup. You can usually do this by pressing a specific key (like F2, Del, or Esc) repeatedly as the laptop boots. Look for settings related to USB support. Ensure USB features are enabled. Save the changes and exit the BIOS. Later, reboot your laptop.
USB Selective Suspend Setting: A Possible Culprit
Within Windows, a specific setting called "USB selective suspend setting" can sometimes cause issues. This setting allows Windows to conserve power by suspending individual USB ports. The setting disables the USB port to save power. To check this setting, go to your Power Options in the Control Panel. Select the power plan you're using. Click "Change plan settings." Locate "USB settings." Then, change the "USB selective suspend setting" to "Disabled." Click "Apply" and restart your laptop.
Hardware Hang-Ups: A Deeper Inspection
If the software solutions fail, there might be a hardware problem. This can include a detached USB port. Or, it could be a problem on the motherboard. If you're comfortable opening up your laptop, you could visually inspect the USB ports. Check for any loose connections. However, opening a laptop can void your warranty. So, it's best to consult a professional.
The USB Port Itself: Consider a Replacement
If the problem stems from a damaged USB port, consider replacing the port. This is a more involved fix. It might require soldering skills. If you are not comfortable, take your laptop to a qualified technician. Sometimes, the ports are physically damaged. In that case, replacement is often the best route.
External USB Hubs: A Temporary Lifeline
As a temporary workaround, consider using an external USB hub. This will allow you to connect your USB devices. It can help you bypass the malfunctioning ports on your laptop. Plug the hub into a working USB port. This gives you extra functioning ports.
Seek Professional Help: When to Call in the Cavalry
If you've tried everything, and your Lenovo laptop's USB ports are still dead, it's time to seek professional help. There may be a more serious hardware issue. A qualified technician can diagnose the problem and provide a solution. They have the tools and expertise. They'll know how to fix this issue.
Final Thoughts: Back to Connectivity!
Dealing with dead USB ports can be incredibly frustrating. It can also disrupt your work. However, with a little troubleshooting, you can often resolve the issue. With these steps, you should be back up and running in no time! Armed with this knowledge you should be able to fix this issue.
Investment Banking Analyst: Laptop Essential? (Shocking Truth Inside!)Lenovo Laptop USB Ports Dead? FIX This NOW!
Hey there, fellow tech travelers! Ever found yourself staring at your Lenovo laptop, desperately trying to transfer files, charge your phone, or connect a vital peripheral, only to be met with the dreaded silence of dead USB ports? We've all been there, that heart-sinking moment when you realize your lifeline to connectivity has snapped. But don't fret! We're going to delve deep into this frustrating issue, dissecting the potential causes and, more importantly, providing you with actionable solutions to get those USB ports buzzing back to life. Consider this your survival guide, your all-in-one toolkit for reviving those essential connections.
1. The USB Port Apocalypse: Recognizing the Symptoms
Before we charge headfirst into solutions, let's make sure we're even dealing with a USB port problem. Sometimes, the issue is merely user error, a faulty cable, or a device that's simply not playing nice. So, how do you know for sure?
- Nothing is happening: The most obvious sign – plugging in a device yields absolutely zero response. No charging, no device recognition, nothing. It's as if the port is a black hole for electrons.
- Intermittent connectivity: The device connects and disconnects randomly, often with a familiar ding-dong sound announcing its arrival and departure. This can be incredibly frustrating.
- Power, but no data: The device might charge, indicating power is flowing, but data transfer – accessing files, syncing, etc. – fails.
- Error messages: Your operating system might throw up an error message, such as "USB device not recognized." This is a direct SOS signal.
If you're experiencing any of these symptoms, chances are we have a USB port situation on our hands. Don't worry, we'll fix it.
2. Unmasking the Culprits: What Could Be Causing the USB Port Failure?
Think of your laptop's USB ports like vital arteries. They can get clogged, constricted, or even completely blocked. Numerous culprits could be the root of your problem, ranging from simple software glitches to hardware malfunctions. Let's uncover some of the most common suspects:
- Software Conflicts: Sometimes, a misbehaving driver or a software conflict can block communication with your USB ports. It's like a road blockade preventing traffic flow.
- Hardware Damage: Physical damage to the port itself, like bent pins or loose connections, is a common issue, especially if the laptop has been dropped or subjected to rough handling. Think of it as a busted artery.
- Power Management Issues: Your laptop's power settings might be configured to disable USB ports to conserve battery life. This can be especially true if your laptop is running in a power-saving mode.
- Outdated or Corrupted Drivers: Drivers are the language your laptop uses to talk to your USB devices. If the drivers are old, damaged, or missing, your devices can't understand the communication.
- USB Root Hub Problems: The USB root hub acts as the central traffic controller, managing all the USB ports. If this controller malfunctions, all ports will be affected.
- Static Electricity: This is a sneaky one! Static discharge can sometimes fry the delicate components inside a USB port. It's like a silent, invisible assassin.
3. The First Aid Kit: Simple Fixes You Can Try Right Now
Before we get into more drastic measures, let's start with the easy stuff. These are the quick fixes you can attempt without cracking open your laptop or calling in the tech cavalry.
- Reboot Your Laptop: Seriously, this should always be the first step. It's like hitting the reset button on your entire system, clearing out temporary glitches and restarting the communication channels.
- Try a Different USB Port: If one port isn't working, test all the others. It's possible only one port is faulty. That's a relief.
- Try a Different USB Cable and Device: The problem might not be your laptop at all; it might be the cable or the device you're using. Switching them out is a fast way to test if this is the issue.
- Unplug Everything: Disconnect all USB devices and then re-plug them back in one at a time. Sometimes a device can interfere.
- Check for Physical Damage: Carefully examine the USB ports for any bent pins, debris, or other visible damage. Use a flashlight if needed.
4. Driver Detective: Updating and Troubleshooting USB Drivers
Drivers are often the gatekeepers of USB functionality. So, let's make sure they're up-to-date and functioning correctly.
- Open Device Manager: (Search for it in the Windows start menu.) This is your central control panel for all your devices.
- Expand "Universal Serial Bus controllers": You'll see a list of USB-related devices.
- Right-click on each entry (starting with USB Root Hubs and USB Composite Devices) and select "Update driver": This will search for the latest drivers online. Follow the on-screen prompts.
- If updating doesn't work, try uninstalling and reinstalling the drivers: Right-click on each item, select "Uninstall device," and then restart your laptop. Windows should automatically reinstall the drivers upon restarting.
- Look for any devices with yellow exclamation marks: These indicate driver problems. See if you can solve them with driver updates.
5. Power to the Ports: Adjusting Power Management Settings
Your laptop might be conserving power by disabling your USB ports. Let's fix this.
- Locate your Power Plan: (Search for "power plan" in the Windows start menu.)
- Click "Change plan settings" for the plan you are using.
- Click "Change advanced power settings."
- Scroll down to "USB settings" and expand it.
- Expand "USB selective suspend setting."
- Change the setting to "Disabled." This will prevent Windows from turning off your USB ports to save power.
- Click "Apply" and then "OK."
6. Unplugging the Unnecessary: Disabling Fast Startup (Windows)
Fast Startup is a Windows feature that can sometimes interfere with USB devices. Let’s disable it.
- Go to Control Panel and select “Hardware and Sound” -> “Power Options”.
- Click “Choose what the power buttons do”.
- Click “Change settings that are currently unavailable”. (You might need administrator privileges.)
- Under "Shutdown settings," uncheck the box next to "Turn on fast startup (recommended)."
- Click “Save changes” and restart your computer.
7. The BIOS Whisperer: Checking USB Settings in the BIOS
BIOS settings might be slightly different for each laptop model. If you are not comfortable accessing BIOS settings, then skip this step and consult your technician.
- Restart your laptop and enter the BIOS setup: The key to press to access BIOS varies by manufacturer (e.g., Delete, F2, F12). Consult your Lenovo laptop's documentation if you're unsure.
- Navigate to the "USB Configuration" or similar section: This is where you'll find settings related to USB ports.
- Make sure USB support is enabled: Ensure that USB ports are enabled and that there are no specific settings that might be interfering with the ports.
- Save the changes and exit the BIOS.
8. Hardware Hurdles: Identifying and Addressing Physical Damage
If you've inspected your ports and noticed any physical damage, you have a hardware problem.
- Bent Pins: Try using a small, non-conductive tool (like a toothpick) to carefully straighten any bent pins. Be exceedingly gentle, as you could damage them further.
- Debris: Use compressed air to blow out any dust, dirt, or other debris that might be obstructing the port.
- Loose Connections: Loose connections within the port are more difficult to address and often require professional repair.
Warning: If you're not comfortable dealing with hardware, it's best to take your laptop to a qualified technician. You don't want to make a bigger mess.
9. Diagnosing Deeper: Running Hardware Diagnostics
Lenovo laptops typically come with built-in diagnostic tools that can find hardware problems that can damage the USB ports.
- Restart your laptop and enter the Lenovo diagnostics mode: How you do this depends on your model. It usually involves pressing a specific key during startup (often F2, F10, or Fn+F2 ).
- Run the diagnostics: Follow the on-screen instructions to run a full hardware test.
- Review the results: The diagnostics will identify any hardware failures, including those related to USB ports.
10. The Nuclear Option: Reinstalling Windows (Use with Extreme Caution)
If everything else fails, and you suspect some deep-seated software corruption, a clean install of Windows may be necessary. Be warned: this will erase all your data, so back everything up first!
- Back up all your important files: Documents, photos, videos, etc. Save them to an external hard drive or cloud storage!
- Create a bootable Windows installation media: Download the Media Creation Tool from Microsoft's website and use it to
USB Ports Not Working on Laptop or PC - Windows 10 - Quick Fix

By Ask A Computer Geek USB Ports Not Working on Laptop or PC - Windows 10 - Quick Fix by Ask A Computer Geek
Fix USB Not Working How to Fix Motherboard USB Ports Not Working Asus H61M-CS

By Debjeet Mahata Fix USB Not Working How to Fix Motherboard USB Ports Not Working Asus H61M-CS by Debjeet Mahata
How To Fix USB Ports if Not Working 5 StepsUSB Port RepairUSB RepairLaptop Usb Circuit Repair

By Rajkumar Kushwaha How To Fix USB Ports if Not Working 5 StepsUSB Port RepairUSB RepairLaptop Usb Circuit Repair by Rajkumar Kushwaha
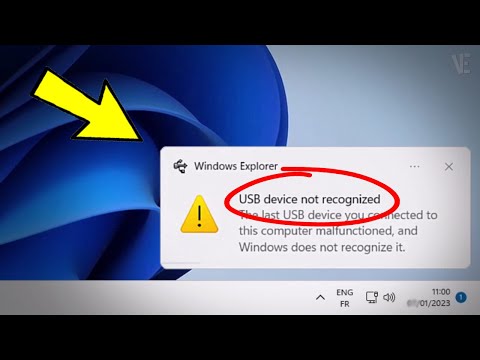
Title: Fix USB Device Not Recognized in Windows 11 10 How To Solve usb device not recognized 5 Ways
Channel: Victor Explains
Fix USB Device Not Recognized in Windows 11 10 How To Solve usb device not recognized 5 Ways by Victor Explains
Laptop Wifi Hotspot
Lenovo Laptop USB Ports Dead? FIX This NOW!
We understand the frustration. Your Lenovo laptop, a vessel for productivity and entertainment, suddenly presents a crippling problem: non-functional USB ports. These ports, the lifelines connecting you to external drives, printers, mice, keyboards, and countless other peripherals, are now unresponsive. Before you resign yourself to a costly repair or, worse, replacement, let's systematically diagnose and address this issue. We'll navigate through the potential causes, from the simplest software glitches to more intricate hardware malfunctions, and provide actionable solutions to get your USB ports back in working order.
Initial Troubleshooting: A Quick Diagnostic
Before diving into complex solutions, let's perform a series of quick checks. These initial steps can often resolve the issue and save valuable time.
- The Obvious Check: Ensure the USB device itself is functioning. Try connecting the problematic device to another computer or laptop to verify its operational status. If the device works elsewhere, the issue lies within your Lenovo laptop.
- Port-Specific Testing: Test each USB port individually. Plug a known working device into each port. This helps identify if the problem is isolated to a single port or affects all of them.
- Reboot Your Lenovo: A simple restart can often clear temporary glitches. Save your work, close all applications, and restart your Lenovo laptop. After the reboot, test your USB ports again.
- Physical Inspection: Carefully examine the USB ports themselves. Look for any visible debris, such as dust, lint, or bent pins. A compressed air duster can be a useful tool for cleaning the ports. Be extremely gentle when cleaning to prevent damaging the ports.
Software Solutions: Addressing Driver-Related Issues
If the initial checks didn't provide a solution, the problem likely stems from driver issues or software conflicts. Here's how to address these common culprits.
- Device Manager: Your First Line of Defense: Access the Device Manager. You can usually find it by searching for "Device Manager" in the Windows search bar or by right-clicking the Start button and selecting it from the menu. Within Device Manager, expand the "Universal Serial Bus controllers" section.
- Driver Updates: The Key to Compatibility: Look for any devices listed with yellow exclamation marks or error messages. These indicate driver problems. Right-click on each problematic device and select "Update driver." Choose the option to "Search automatically for drivers." Windows will attempt to find and install the latest drivers. If this fails, try browsing your computer for driver software, and use the files from the manufacturer's website.
- Uninstall and Reinstall Drivers: If updating drivers doesn't work, try uninstalling and reinstalling them. Right-click on the problematic devices in Device Manager and select "Uninstall device." Then, restart your Lenovo laptop. Windows should automatically attempt to reinstall the drivers upon startup.
- Roll Back Driver Updates: If the USB ports stopped working after a recent driver update, you might need to roll back to a previous version. Right-click on the device in Device Manager, select "Properties," then go to the "Driver" tab. If a "Roll Back Driver" button is available, click it.
- Power Management Settings: Preventing Power-Down: Sometimes, power management settings can cause USB ports to shut down to conserve energy. In Device Manager, right-click on each USB Root Hub and select "Properties." Go to the "Power Management" tab. Uncheck the box that says "Allow the computer to turn off this device to save power."
- BIOS Updates: Firmware's Role: Outdated BIOS versions can sometimes cause USB issues. Check your Lenovo laptop's support website for BIOS updates specific to your model. Carefully follow the instructions to update your BIOS. Be warned: BIOS updates can be risky, so ensure you have a stable power supply and follow the instructions meticulously.
Hardware Troubleshooting: Delving Deeper
If software solutions fail, the problem might be hardware-related. This section involves more advanced troubleshooting and may require opening your laptop. Proceed with caution and, if you're not comfortable, seek professional assistance.
- External USB Hub Test: Try connecting a powered USB hub to your laptop. If the external hub's ports work, it suggests a problem with your laptop's internal USB circuitry. The laptop may not be providing sufficient power to the ports.
- Internal USB Port Inspection: Carefully open your Lenovo laptop (refer to your model's service manual for instructions). Inspect the internal USB ports for any signs of damage, such as loose connections, corrosion, or burnt components.
- Check USB Cable Connections: If you have experience, reseat the cables, ensuring they are fit firmly.
- Motherboard Inspection: A faulty motherboard is a potential cause. Look for any visible damage, such as burned components, bulged capacitors, or signs of liquid damage. This assessment requires familiarity with electronics, and a motherboard replacement usually means professional repair.
- USB Port Replacement: Replacing the USB ports themselves can be a viable solution, particularly if the ports are physically damaged. This, however, typically involves soldering and requires expertise in electronics repair.
Specific Lenovo Model Considerations
Certain Lenovo laptop models are known to have specific USB-related issues. Research your specific model online (e.g., "Lenovo [Model Number] USB issues") to see if there are any known problems or specific solutions. Some models may have specific firmware updates or driver configurations designed to address common USB problems. Consult the Lenovo support website for your model's documentation.
Preventative Measures: Safeguarding Your USB Ports
Once you've resolved the issue, it's essential to take steps to prevent future USB port problems.
- Regular Cleaning: Clean your USB ports regularly, using compressed air to remove dust and debris.
- Avoid Excessive Force: Avoid forcing USB devices into the ports.
- Proper Ejection: Always safely eject USB devices before unplugging them to avoid data corruption and potential damage to the ports.
- Surge Protection: Use a surge protector to protect your laptop and its USB ports from power surges.
- Quality Cables and Devices: Use high-quality USB cables and devices to reduce the risk of short circuits or power-related issues.
- Monitor the Environment: Keep your laptop in environments that are not prone to moisture, debris, or extreme temperatures.
When to Seek Professional Help
If you've tried all the troubleshooting steps above and your USB ports are still not working, it's time to seek professional help. Take your Lenovo laptop to a qualified computer repair technician. A technician can diagnose the problem accurately and perform any necessary repairs, such as replacing damaged components or repairing the motherboard. Attempting repairs beyond your skill level can potentially worsen the issue and damage the laptop further.
We hope these comprehensive solutions help you resolve your Lenovo laptop USB port issues. By systematically working through the steps outlined above, you'll be able to diagnose the problem, implement effective solutions, and get your USB ports up and running again, restoring full functionality to your laptop. Remember to back up your data regularly to prevent potential data loss.
