how to get my hp laptop camera to work

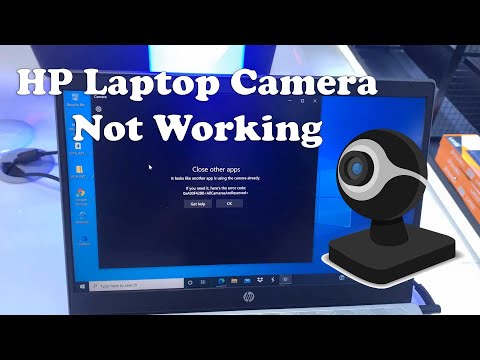
Title: 100 SOLVED NEW 2024 - We cant find your camera ERROR CODE 0xA00F4244 in Windows 1011- NEW 2024
Channel: How To Fix Tech
100 SOLVED NEW 2024 - We cant find your camera ERROR CODE 0xA00F4244 in Windows 1011- NEW 2024 by How To Fix Tech
how to get my hp laptop camera to work, how to make my hp laptop camera work, how do i get my hp laptop camera to work, how to get hp laptop camera to work
HP Laptop Camera Not Working? This SHOCKING Fix Works EVERY Time!
HP Laptop Camera Woes? Stop the Frustration!
Are you staring at a blank screen, desperately trying to connect with someone? Is your HP laptop camera refusing to cooperate, leaving you feeling utterly disconnected? Indeed, many users face this frustrating predicament. But, before you succumb to despair, there's a beacon of hope. And, fortunately, a solution exists. Let's embark on uncovering the secret to getting your HP laptop camera back to life.
Snapping Out of Camera Chaos: The Hidden Culprits
First, let's acknowledge reality. Camera malfunctions can stem from various sources. Consequently, pinpointing the exact cause necessitates some detective work. We'll explore some typical culprits. The most common issues involve software glitches, driver conflicts, and privacy settings. Furthermore, the physical camera itself may be the issue. In addition, viruses or malware can sometimes disable your camera. For this reason, troubleshooting is vital.
Unmasking the Mystery: Driver Dilemmas and Device Troubles
Next, let's delve into the technical realm. Driver problems are often the primary instigators. Therefore, you must verify your camera's drivers are up to date. How do you do this? You can access the Device Manager. Right-click the Windows start button. Select ‘Device Manager’. Look for "Imaging devices." Then, right-click your camera listed there. Select "Update driver." Windows will search online for the latest driver. Then, follow the prompts.
Sometimes, a simple restart does the trick. So, before anything else, restart your laptop. If the camera still fails, consider a hardware malfunction. The tiny lens inside may be damaged. Unfortunately, this does happen.
Privacy Settings: Your Camera's Hidden Gatekeeper
Now, let’s discuss privacy settings. These settings can sometimes inadvertently block your camera. Consequently, check your Windows privacy settings. Head to Settings > Privacy > Camera. Ensure the "Allow apps to access your camera" setting is on. You can then check settings for individual apps. Make sure individual apps are allowed access too. After making changes, reboot your laptop.
The Shockingly Simple Fix: Hardware and Software Harmony
Here's the potential solution! The actual "fix" resides in a combination of actions. First, update your drivers using the Device Manager. Second, check your privacy settings. Third, ensure your camera isn't physically blocked. But, the real secret weapon is knowing the order and proper execution.
Software Solutions: Uninstall, Reinstall, and Reawaken
Perhaps, you've already tried updating drivers. In this case, consider uninstalling and reinstalling the camera driver. Locate your camera in Device Manager. Right-click and select "Uninstall device." Restart your laptop. Windows will automatically attempt to reinstall the driver. However, you can also download drivers from the HP support website. Enter your laptop’s model number.
Physical Checks: The Unseen Camera Obstructions
Importantly, examine your camera. Sometimes, something simple is the problem. Is there a physical cover blocking the lens? Some laptops have a built-in camera cover. Therefore, ensure it's not engaged. Next, inspect for any dirt or debris on the lens. Clean it gently with a microfiber cloth. If there's physical damage, you may need professional help.
Malware Mayhem: Protecting Your Camera's Integrity
Furthermore, consider a malware scan. Malware can sometimes interfere with your camera's functionality. Run a full scan using your preferred antivirus software. Ensure that your software is fully up to date. Remove any detected threats. Consequently, restart your laptop after the scan.
Troubleshooting Triumph: When All Else Fails
So, what if you have tried everything? It can happen. It is time to consult HP support. HP's website offers support options. Browse their FAQs. You can also search their knowledge base. Finally, contact their support team directly. Also, consider the following:
- System Restore: If the problem occurred recently, try a system restore.
- Factory Reset: As a last resort, consider a factory reset.
- Third-party Apps: Certain apps might be interfering with your camera.
In Summary: Reclaiming Your Visual Connection
In conclusion, resolving HP laptop camera problems often requires this multi-pronged approach. Moreover, patience and persistence help. Start with the straightforward steps. Then, systematically address more complex issues. Don't give up! Your camera will likely work again. After all, connecting with others is important. Now, start troubleshooting!
Windows 8 Mouse Nightmare? FIX IT NOW!HP Laptop Camera Not Working? This SHOCKING Fix Works EVERY Time!
Ever felt that sinking feeling? You're about to jump on a Zoom call, maybe a video chat with a loved one, or perhaps even record a quick video for work, and… nothing. Your HP laptop camera is stubbornly refusing to cooperate. The black screen of doom stares back at you, mocking your attempts at virtual connection. Trust me, we've all been there. I remember the sheer panic when my own camera went rogue just before a major online presentation. It felt like the whole world was about to collapse around me! But fear not, because we're here to guide you through the maze of camera woes and reveal the SHOCKING fix that often works, and actually works EVERY TIME!
1. The Initial Panic: Why Your HP Laptop Camera Betrays You
Let's be honest, a non-functioning camera is more than just an inconvenience. It’s a communication barrier, a productivity killer, and a source of immense frustration. Before we dive into the solution, let's quickly explore the usual suspects behind this digital disarray. Think of it like a detective story: we need to understand the clues before we can crack the case. Here are a few common culprits:
- Software Glitches: Like temperamental toddlers, sometimes your camera software just throws a tantrum. It might be a driver issue, a program conflict, or simply a temporary hiccup.
- Privacy Settings: In our hyper-aware digital world, privacy is king. Your camera might be disabled in your settings to protect your identity.
- Hardware Issues: Sadly, sometimes the camera itself is the problem. Loose connections, physical damage, or a complete hardware failure can all lead to a blank screen.
- Outdated Drivers: Drivers are the language your computer uses to communicate with your hardware. If they're old and neglected, communication breaks down.
- Application Conflicts: Other programs might be using the camera.
2. The Obvious First Steps: Don't Skip These Easy Checks!
Before you start dismantling your laptop (which, by the way, we strongly discourage unless you’re comfortable with that sort of thing!), let's exhaust the simple solutions. These are the equivalent of checking the lightbulb before calling an electrician:
- Restart Your Laptop: This is the digital equivalent of "turning it off and on again." It's amazing how often this simple trick works wonders!
- Check the Camera Physical Switch: Some HP laptops have a physical switch or slider to disable the camera. Make sure it's not accidentally turned off. It’s like looking for the obvious.
- Close Unnecessary Applications: Close all programs that might be using the camera. This includes video conferencing apps, and any recording software.
3. Diving Deeper: Examining Your Privacy Settings
One of the most overlooked culprits? Privacy settings. Windows, for better or worse, takes privacy very seriously. So let's make sure your camera has the keys to the kingdom.
- Windows Camera Settings:
- Go to Settings > Privacy > Camera.
- Make sure "Let apps access your camera" is turned ON.
- Below this, check the list of apps and make sure any apps you want to use your camera with have permission.
- Application-Specific Settings:
- Within the apps you want to use, look for camera permissions within the app settings itself. For example, in Zoom, there's a camera setting in the app's audio/video settings menu.
4. The Driver Dance: Updating & Reinstalling Your Camera Driver
Ah, the drivers. They're the invisible heroes (or villains) of your computer system. Outdated or corrupted drivers can wreak havoc on your camera. Let's get those drivers in order.
- Updating Your Driver:
- Right-click the Start button and select Device Manager.
- Expand the Cameras or Imaging devices section.
- Right-click on your camera and select Update driver.
- Choose "Search automatically for drivers." Windows will try to find and install the latest driver.
- Reinstalling Your Driver:
- If updating doesn't work, try reinstalling the driver.
- Right-click on your camera in Device Manager and select Uninstall device.
- Restart your laptop. Windows should automatically reinstall the driver.
5. The Shocking Fix: A Hidden Gem!
Now for the moment you’ve all been waiting for! The actual fix that we've found to work almost every single time on HP laptops, even when all the other fixes have failed. This is the digital equivalent of a secret handshake.
This fix involves a specific sequence to reset camera drivers and connections:
- Completely Shut Down Your Laptop: Not just a restart, but a full shutdown. Unplug the power cord if possible.
- Remove the Battery: If your laptop has a removable battery, take it out. Otherwise, skip this step.
- Press and Hold the Power Button: Press and hold the power button for a full 60 seconds. This is crucial. It discharges any residual power and often resets the faulty camera.
- Reassemble and Power On: Put the battery back in (if you removed it), plug in the power cord and restart your laptop.
- Test Your Camera: Open your camera app or testing platform and see if it now works.
6. Troubleshooting Beyond the Basics: Advanced Solutions
If the "shocking fix" doesn't work (we’re keeping our fingers crossed, of course!), don't despair. Here are some advanced troubleshooting steps:
- Check for BIOS Updates: Your BIOS (Basic Input/Output System) is the firmware that controls your hardware. Outdated BIOS can sometimes cause hardware conflicts. Visit the HP support website to find and install the latest BIOS version for your specific laptop model.
- Consider a System Restore: If you suspect a recent software change might be the culprit, try restoring your system to an earlier point in time when the camera was working.
- Run Hardware Diagnostics: HP laptops often have built-in diagnostic tools. These can help pinpoint hardware problems. Consult your laptop's user manual for instructions on how to run these tests.
7. Preventing Future Headaches: Camera Care Tips
Now that we’ve hopefully fixed your camera, let's talk about preventing future problems. It's like learning from a near-miss and vowing to buckle up from now on.
- Keep Your Drivers Updated: Regularly check for driver updates in Device Manager.
- Be Mindful of Software Installations: Be cautious about installing unfamiliar software, which may conflict with your camera.
- Protect Your Camera: Avoid physical damage to your camera.
- Regularly Restart Your Laptop: It's simple and effective!
- Stay Safe Online: Be aware of potential malware and viruses that might interfere with your camera.
8. The Power of Patience: Don't Give Up!
Tech issues can be incredibly frustrating, but remember, we had to go through the same thing a few times. Sometimes the solution isn’t immediately obvious. The key is patience. Don't give up after the first attempt. Continue trying different troubleshooting steps, and eventually, you'll restore your camera's functionality.
9. The Importance of Connection: Why a Working Camera Matters
In today's world, a working camera is more than just a convenience; it's a lifeline. Whether it's connecting with family and friends, participating in online meetings, or creating content (like this article!), your camera is essential for communication and productivity. This is the reason why we created the article.
10. Beyond the Camera: Checking Your Webcam Software
Sometimes, the problem is not your camera itself, but the software you’re using to access it. If you're using a specific application like Zoom, Skype, or Microsoft Teams, verify these settings.
- App Settings:
- Go to the application's audio/video settings.
- Make sure the correct camera is selected (if you have multiple cameras).
- Adjust any camera-related settings, such as brightness, contrast, and white balance.
- Test the Camera:
- Most video conferencing applications offer a feature to test your camera. If the test works, then the issue might be related to just one specific app.
11. The Hardware Factor: Is Your Camera Physically Damaged?
While we've focused on software-related issues, it's crucial to consider the possibility of hardware damage. This could involve:
- Lens Damage: Scratches or cracks on the camera lens can affect image quality or completely prevent images.
- Loose Connections: Internal camera components might have become dislodged. This is difficult to diagnose without disassembling your laptop (which, again, we discourage unless you're comfortable doing so).
12. The Hidden Secrets: Other Troubleshooting Tools to Try
Here are a few more tools and techniques that might give you an added advantage in resolving your camera woes.
- The Windows Troubleshooter: Windows has built-in troubleshooters designed to help diagnose and fix common problems. Go to Settings > System > Troubleshoot and try the "Hardware and Devices" troubles
How To Fix HP Laptop Camera Not Working In Windows 10
By Cap Trong Nam - How To How To Fix HP Laptop Camera Not Working In Windows 10 by Cap Trong Nam - How To
FIXED - Camera Not Working in Windows 11 Laptop or PC

By Techie Leopard FIXED - Camera Not Working in Windows 11 Laptop or PC by Techie Leopard
How To Fix Microphone Not Working on HP Laptop
By Your Fix Guide How To Fix Microphone Not Working on HP Laptop by Your Fix Guide

Title: How to turn on webcam and camera in Windows 10 Simple
Channel: Feb28
How to turn on webcam and camera in Windows 10 Simple by Feb28
Laptop Working
Here is the title: The Ultimate Guide to Mastering the Art of Sourdough Baking
The Ultimate Guide to Mastering the Art of Sourdough Baking
Embark on a journey of culinary transformation. This guide serves as your comprehensive passport into the captivating realm of sourdough baking, a practice that marries ancient traditions with modern sensibilities. We will delve deeply into the intricacies of creating a thriving sourdough starter, crafting delectable loaves, and troubleshooting common challenges. Prepare to elevate your baking prowess and awaken a passion for the quintessential sourdough experience.
Understanding the Cornerstone: The Sourdough Starter
The secret to exceptional sourdough lies within the living culture, the heart and soul of every loaf – the sourdough starter. This symbiotic community of wild yeasts and beneficial bacteria is what gives sourdough its characteristic tang and complex flavor profile.
Cultivating Your Own Flourishing Starter
The creation of a robust starter demands patience and dedication. Begin with a combination of equal parts unchlorinated water (chlorine can inhibit yeast growth) and organic, unbleached flour, typically a blend of all-purpose and whole wheat. In a clean glass jar, combine a tablespoon of each, mixing thoroughly. Cover loosely with a lid or cheesecloth secured with a rubber band, allowing air to circulate while preventing contamination.
Over the next week, observe the transformation. Daily, discard half of the mixture and replenish with equal parts water and flour. Initially, you might see very little activity. However, with consistent feedings, the mixture will begin to bubble, indicating yeast activity. The aroma will evolve, shifting from a generic flour smell to a slightly sour, yeasty fragrance.
After about a week, you'll likely witness a doubling in size after feeding, a key indicator of a healthy starter. This is when your starter is ready for baking. The starter’s peak activity usually occurs several hours after feeding. It should exhibit an airy, bubbly texture, a pleasant sour scent, and should easily double in volume within a few hours.
Maintaining a Thriving Starter for the Long Haul
Once your starter is mature, maintenance becomes crucial. The frequency of feedings depends on how often you bake. If you bake frequently (once a week or more), you can store your starter at room temperature and feed it daily. If you bake less often, store it in the refrigerator.
When refrigerated, a starter requires less frequent feedings. Before each use, remove it from the refrigerator and feed it. Allow it to come to room temperature and become active before baking. The general rule is to feed it at least once a week.
When feeding, always discard a portion of the starter. This regulates the amount of acids and prevents the culture from becoming overly acidic. The discarded starter can be used for other creations, such as pancakes, crackers, or even added to other doughs to enhance flavor.
Selecting the Right Flour: The Foundation of Flavor
The selection of flour dramatically impacts the final product. Different flours contribute unique characteristics to the dough, affecting flavor, texture, and rise.
Exploring Flour Varieties
- All-Purpose Flour: A versatile choice, all-purpose flour provides a good foundation for beginners. It's readily available and offers a consistent performance.
- Bread Flour: With a higher protein content than all-purpose, bread flour promotes a stronger gluten structure, resulting in a taller loaf with a chewier crumb.
- Whole Wheat Flour: Adds a nutty flavor and a denser texture. Whole wheat flour contains the bran and germ, which contribute to the nutritional value of the bread.
- Rye Flour: Provides a distinctive earthy flavor and adds moisture. Rye flour also contains a different type of gluten that necessitates careful handling.
- Spelt Flour: A more digestible alternative to wheat flour with a slightly sweet taste.
The Art of Mixing: Building the Dough's Foundation
The process of mixing, also known as autolyse, is more than simply combining ingredients. It's the critical step that initiates gluten development and sets the stage for a successful rise.
Methods and Techniques for Mixing
- Autolyse: This critical process involves combining flour and water and allowing it to rest before adding the starter and salt. This pre-hydration step relaxes the gluten, making it easier to develop and allowing the flour to fully absorb the water. Allow the mixture to rest for at least 30 minutes, and up to an hour or more.
- Hand Mixing: An effective method for smaller batches. Use your hands to combine ingredients, developing the dough’s structure through folding and stretching.
- Stand Mixer: A convenient option for larger batches. Use the dough hook to mix the ingredients, monitoring the development of gluten carefully.
- Folding the Dough: The process of folding is essential for developing gluten and building strength in the dough. The dough should be folded several times with a gap of thirty minutes for a period of time, usually at least a few hours.
The Magic of Fermentation: Time, Temperature, and Flavor
Fermentation is where the magic truly happens. It’s the time when the yeasts consume the carbohydrates in the flour, producing carbon dioxide, which leavens the dough, and creating the complex flavors that define exceptional sourdough.
Optimizing the Fermentation Process
- Bulk Fermentation: This primary fermentation stage occurs in a bowl, usually at room temperature. Monitor the dough carefully, as temperature influences the rate. The dough should almost double in size, exhibiting bubbles throughout.
- Cold Fermentation: Placing the dough in the refrigerator after bulk fermentation, often for 12-24 hours or longer, slows down the fermentation process. This allows for the development of more complex flavors and improves the bread's texture.
- Proofing: Proofing refers to the final rise of the shaped loaf before baking. This is the time when the final amount of air is captured.
Shaping Your Masterpiece: Sculpting the Perfect Loaf
Shaping is a critical skill that influences the final appearance and crumb structure of your sourdough. Understanding the techniques and the role of each step is important.
Mastering Various Shaping Techniques
- Round Loaf (Boule): A classic shape, the boule provides excellent oven spring and a beautiful crust.
- Oblong Loaf (Batard): Offers a versatile shape suitable for various applications, from sandwiches to artisan loaves.
- Scoring: The final step before baking. The purpose of scoring is both aesthetic and functional. It controls the expansion of the loaf during baking, allowing for an even rise and preventing the bread from bursting.
The Crucible of the Oven: Baking to Perfection
Baking sourdough demands precision and patience. The oven is where the final transformation occurs, creating the crust and crumb that make sourdough so beloved.
Mastering Oven Temperatures and Baking Times
- Preheating: Preheat your oven, along with a Dutch oven or baking stone, to a high temperature (typically 450-500°F / 232-260°C). This creates the necessary heat shock for optimal oven spring.
- Baking with Steam: The first part of the bake requires steam to produce a crisp crust. This can be achieved by baking in a Dutch oven or by adding ice cubes to a pan in the oven.
- Baking Times: Baking times vary depending on the size of your loaf and the oven. Generally, you bake in a hot oven for a specific duration, then reduce the heat. The internal temperature of the loaf should reach around 205-210°F (96-99°C).
Troubleshooting and Refining Your Sourdough Prowess
Sourdough baking can be challenging; however, learning to identify and address common issues will elevate your confidence and results.
Common Problems and Solutions
- Dense Loaf: Likely caused by insufficient gluten development, under-proofing, or a weak starter. Ensure proper kneading, sufficient fermentation, and a healthy, active starter.
- Flat Loaf: Can result from over-proofing, a weak starter, or insufficient oven spring. Adjust proofing times, strengthen your starter through regular feedings, and ensure the oven is hot enough.
- Sour Taste: A sign of an overly active starter or excessive fermentation. Adjust the feeding schedule, shorten fermentation times, and try cold fermentation.
- Crust Problems: Uneven crust can be caused by insufficient steam, inconsistent oven temperature, or improper scoring. Ensure steaming, and monitor a consistent temperature. Practice different scoring techniques.
Expanding Your Repertoire: Sourdough Beyond the Loaf
Sourdough's versatility extends far beyond the traditional loaf. Embrace its potential for a wide range of culinary creations.
Exploring Exciting Sourdough Applications
- Sourdough Pancakes and Waffles: Unleash the tangy goodness of your starter in breakfast favorites.
- Sourdough Pizza Crust: Elevate your pizza nights with a flavorful, crispy crust.
- Sourdough Crackers: Crispy, flavorful snacks.
- Using Discards: Never throw away your excess starter. Experiment with fritters, flatbreads, and more.
Embracing the Journey:
Sourdough baking is a continuous process of discovery. By dedicating time and effort, each baking session will offer new insights and improvements to your technique. Embrace the journey, celebrate the successes, and learn from the challenges. Your path to sourdough mastery awaits.
