hp laptops 5 not work
Title: Tombol Kecerahan Laptop HP Tidak Berfungsi PERBAIKI
Channel: Graphically Challenged
Tombol Kecerahan Laptop HP Tidak Berfungsi PERBAIKI by Graphically Challenged
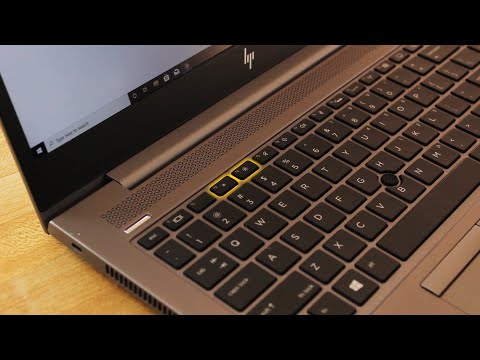
hp laptop 5 and 6 keys not working, hp laptop numbers not working, hp laptop not working, hp laptop not working after update
HP Laptop 5 Dead? FIX IT NOW! (Easy Steps)
HP Laptop 5: Resurrecting Your Digital Companion (Without the Tears!)
It's a sinking feeling. That moment when your trusty HP Laptop 5 decides to take an unexpected nap. The screen goes dark. The cursor vanishes. Silence descends where once there was digital life. Fear not, however! Because this isn’t necessarily the end of the road. In fact, often, a little troubleshooting can bring your machine back from the brink. Consequently, let’s embark on a journey to revive your silent partner.
Diagnosis: Unveiling the Mystery Behind the Black Screen
First things first: remain calm. Panicking won't help. So, let's start by confirming the problem. Is it truly dead, or merely hibernating? Check the power adapter. Ensure it’s securely plugged into both the laptop and the wall outlet. Sometimes, the simplest solutions are the most effective. Moreover, look for any signs of life. Are the power light or charging indicator illuminating? If they are, good news! Your laptop is likely receiving power.
Step 1: The Power Button Prayer (And Other Gentle Persuasions)
Next, attempt a basic reset. This is often the digital equivalent of a reboot. So, press and hold the power button for a full 15-20 seconds. Then, release the button. After that, wait for a few seconds before trying to power it back on. This action might clear any temporary glitches. Similarly, try a different outlet. A faulty outlet could be your culprit.
Step 2: Battery Blues and a Power-Cycle Remedy
The battery might be the issue, especially if your laptop is old. So, remove the battery (if possible). Disconnect the power adapter. Then, press and hold the power button for 30 seconds. After that, reinsert the battery. Now, connect the power adapter, and switch on the laptop. In addition, this process is often called a "power cycle." It can resolve various power-related issues.
Step 3: The External Monitor Test: A Glimmer of Hope?
Here's a clever diagnostic trick. Connect an external monitor to your laptop. If the external monitor displays an image, it indicates that the problem lies with your laptop's screen. The laptop’s internal display could be faulty. If the external monitor functions properly, the laptop likely boots. Therefore, the display could be the problem. Alternatively, it could be a graphics card issue.
Step 4: Booting into Safe Mode: A Digital Emergency Room
Safe Mode can come to the rescue. It starts Windows with minimal drivers and programs. To access Safe Mode, repeatedly press F8 or F12 (depending on your HP model) during startup. If you can get into Safe Mode, it signifies a software issue. Then, you can attempt system restores or driver updates. However, this isn't a guarantee.
Step 5: Hardware Hiccups: Checking for Clues
Sometimes, the problem is hardware related. So, listen carefully. Are there any unusual noises? Beeps, clicks, or whirring sounds? These sounds might indicate a failing hard drive or other component issues. Moreover, check for any visible damage. Is the screen cracked? Are there any loose components inside?
Step 6: The Peripherals Paradox: Unplug and Play
Occasionally, a connected peripheral can cause problems. So, unplug all external devices. Remove any USB drives, external hard drives, and other accessories. Then, restart your laptop. Furthermore, the issue might simply be a faulty peripheral. If your laptop starts without them, reconnect each device one by one. Doing so helps you to identify the culprit.
Step 7: Driver Dilemmas: The Software Tango
Outdated or corrupted drivers can be problematic. If you can access Windows (even in Safe Mode), check your device manager. You can find this by searching for "Device Manager" in the Windows search bar. Look for any devices marked with a yellow exclamation mark. Those need updating. Afterwards, you may have to reinstall the driver.
Step 8: Factory Reset: The Nuclear Option (Proceed with Caution!)
This is your last resort. Performing a factory reset will erase everything on your laptop. Therefore, back up your important files first (if possible). This is crucial to prevent data loss. After that, consult your HP laptop's manual. Follow the instructions for resetting the operating system.
Step 9: Seeking Professional Assistance: When to Call the Cavalry
Sometimes, a DIY fix simply isn't possible. If you’ve tried everything without success, don't hesitate. Contact HP support or a qualified repair technician. They have specialized tools and knowledge. They can further diagnose the problem. Professional help can save you time and potentially prevent further damage.
Conclusion: Embracing Resilience – Your Laptop’s Second Chance
So, there you have it. A set of steps to try when your HP Laptop 5 goes dark. Keep in mind that not every problem has a simple solution. However, most issues are resolvable. Consequently, by following these steps, you can often breathe new life into your computer. More than that, you'll learn valuable troubleshooting skills. In the end, you will feel confident facing any digital challenge.
CBS All Access on Laptop: Does It REALLY Work? (Shocking Truth!)HP Laptop 5 Dead? FIX IT NOW! (Easy Steps)
Ever stared at a black screen, your HP laptop a lifeless brick, mocking your deadlines and streaming plans? We've all been there, haven't we? That sinking feeling, the panic… It's like your digital life has flatlined. But take a deep breath! Before you start grieving your data, let's bring that HP laptop back from the digital graveyard. We're going to walk through some easy steps, and trust me, most of the time, the solution is simpler than you think. Getting a dead laptop working is like trying to kickstart a classic car – it just requires a bit of know-how and patience.
1. The Initial Diagnosis: What's REALLY Going On?
First things first: let's figure out why your HP laptop is playing dead. Is it completely unresponsive – no lights, no sounds, nothing? Or are you getting some signs of life – a flicker, a beep, a frustrated whirring sound? This initial assessment is crucial, like a doctor taking your vital signs before prescribing medicine. This initial assessment helps us determine if the culprit is hardware, software, or something else entirely.
2. The Simple Stuff: Checking the Obvious Suspects
Sometimes, the simplest solutions are the best, and that’s definitely true when it comes to troubleshooting a dead laptop. Before you get too technical, let’s rule out the easy fixes. Think of it like checking your car's gas tank before calling a mechanic.
- Power Problems: Is your laptop plugged in properly? Sounds silly, I know, but give both the wall socket and the charging port on your laptop a good look. Try a different outlet to see if it's just a faulty power source.
- The Battery Blues: Although most modern laptops are pretty intelligent, sometimes a battery can be the issue. If your laptop won't work without being plugged in, or only works plugged in or a low capacity, replace the battery.
- Visual Inspection: Look for any signs of physical damage. Are there any cracks, dents, or anything that looks out of place? A spilled coffee or a drop to the floor can wreak havoc.
3. The Power Button Dance: A Forced Restart
Sometimes, your laptop gets stuck in a digital rut. A forced restart can be like giving it an electrical shock to the heart. Here's how to do it:
- Unplug Everything: Remove the power adapter and any other peripherals (mouse, USB drives, etc.).
- The Long Hold: Press and hold the power button for at least 15-30 seconds. Yes, really! Think of it as hitting the reset button on your sanity.
- Re-Plug and Try Again: Plug the power adapter back in and try turning your laptop on. Fingers crossed!
4. Battling the Black Screen of Death: Hard Reset Strategies
If the forced restart doesn't work, let's try a hard reset, an even more aggressive, but sometimes necessary, tactic. This is a bit like a more thorough reboot. This step often resolves the underlying issue.
- Completely Power Down: Ensure your laptop is fully powered off.
- Remove Battery and Power Cord: Unplug the power adapter and, if possible, remove the laptop battery. (Some laptops have internal batteries, making this trickier).
- The Discharge Ritual: Press and hold the power button for at least 30 seconds. This releases any residual power that might be causing problems.
- Reassemble and Re-attempt: Put the battery back in (if you removed it), plug in the power adapter, and try turning on your laptop.
5. Boot Menu Magic: Navigating to Safety Mode
Now it's time to see if you can reach your laptop's boot menu. This is usually accessed by pressing a specific key during startup (often Delete, F2, F10, or Esc). What you choose could be different depending on your laptop model, so be sure to check your laptop's manual or search online for specifics for your HP laptop model.
- The Startup Dance: Press the power button, and immediately start tapping the designated key repeatedly.
- BIOS or Boot Options: You should see a screen with various options. This is where you can access the BIOS setup or boot selection menu.
- Safe Mode is Your Friend: Look for an option to boot into Safe Mode. Safe Mode loads Windows with a minimal set of drivers, giving you a chance to troubleshoot software issues.
6. Hardware Hiccups: The External Monitor Test
Got an external monitor? Let's connect it to your HP laptop and see if anything appears on the screen. This tells us if the problem lies with the laptop's display or with the internal components. If the external monitor works, the problem is likely the laptop's screen or its related components.
- Connect the Dots: Plug the external monitor into your laptop's HDMI or VGA port.
- Power On and Pray: Try turning on your laptop.
- If Displayed: If you see an image on the external monitor, it’s a good sign! It confirms that the laptop's core components are likely functional. The issue is probably a faulty display or a connection issue.
7. The Battery's Last Stand: Assessing Battery Health
A failing battery can sometimes act like a kill switch, preventing your laptop from starting.
- Power Adapter Only: Try running your laptop solely on the power adapter, with the battery removed (if removable).
- Battery Test: If it starts, the battery is the likely culprit. You might need a replacement. Search for your HP Laptop model number.
8. Internal Investigations: The RAM Check-Up
RAM (Random Access Memory) is crucial for your laptop's operation. A faulty RAM stick can cause all sorts of problems, including the dreaded black screen.
- The Access Protocol: Before starting remove the battery and the power cord. Usually, they are located under a panel that you can unscrew.
- The Stick Swap: If you have multiple RAM sticks, try removing one at a time and attempting to start the laptop.
- Diagnosis: If the laptop starts with one stick, and not the other, you've identified a problem.
9. The Hard Drive Hurdle: Checking for Data Errors
A corrupt hard drive can also prevent your laptop from starting.
- Accessing the BIOS: Restart your computer and enter the BIOS setup menu.
- Diagnostic Tests: Often, the BIOS offers diagnostic tools to test your hard drive's health.
- S.M.A.R.T. Status: Look for a S.M.A.R.T. (Self-Monitoring, Analysis, and Reporting Technology) status. If it reports errors, your hard drive might need attention.
10. Driver Demons: Safe Mode's Sleuth Work
If your laptop boots into Safe Mode (from Step 5), a driver issue might be the culprit.
- Device Manager: Once the laptop is on in Safe Mode, go to the Device Manager (search for it in the Windows search bar).
- Driver Updates: Look for any devices with yellow exclamation marks, indicating driver problems.
- Updating Drivers: Try updating or uninstalling and reinstalling the drivers for those devices.
11. The Overheating Overload: Cooling System Check
Sometimes, overheating can cause a laptop to shut down or refuse to start.
- Feel the Heat: If your laptop was hot before it died, it might be an overheating issue.
- Check the Vents: Make sure the air vents (usually on the sides or bottom) are not blocked by dust or debris.
- The Cleanse: Use compressed air to clean out the vents.
12. Recovery Mode Rescue: Restoring from System Images
If you have a system image or recovery partition on your hard drive, you can try restoring your laptop to an earlier state.
- Recovery Options: During startup, look for options to enter recovery mode (again, your laptop model's manual will be your guide).
- System Restore: Follow the on-screen instructions to restore Windows to a previous working point.
13. The BIOS Blunder: Resetting BIOS Settings
Sometimes, incorrect BIOS settings can prevent your laptop from booting.
- BIOS Menu: Enter the BIOS setup menu (usually by pressing Delete, F2, F10, or Esc during startup).
- Load Defaults: Look for an option to "Load Default Settings" or "Reset to Factory Defaults."
- Save and Exit: Save the changes and restart your laptop.
14. When All Else Fails: The Professional Touch
If you've tried all these steps and your HP laptop is still playing dead, it's time to consult the experts.
- HP Support: Contact HP support for advice or to arrange a repair.
- Local Repair Shop: Take your laptop to a reputable local computer repair shop. They have the tools and expertise to diagnose and fix more complex issues.
15. Prevention is Key: Tips for Future-Proofing Your Laptop
Let’s not just fix the problem; let's prevent it from happening again!
- Regular Maintenance: Keep your laptop clean and free of dust.
Perbaiki Komputer HP Tidak Ada Suara di Windows 11 MEMPERBAIKI Masalah Suara Di HP Tutorial

By TechFixIT Perbaiki Komputer HP Tidak Ada Suara di Windows 11 MEMPERBAIKI Masalah Suara Di HP Tutorial by TechFixIT
Hp Laptop Tanpa Layar Caps Lock Blinking FIXED BIOS Recovery Instal ulang dengan USB
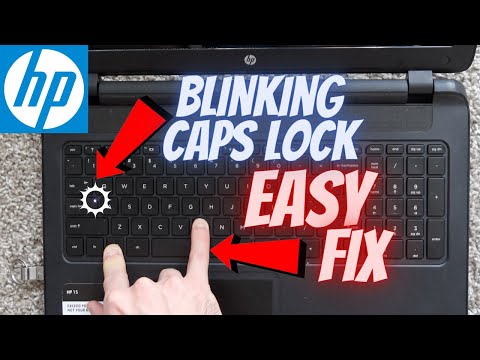
By thecollegepicker Hp Laptop Tanpa Layar Caps Lock Blinking FIXED BIOS Recovery Instal ulang dengan USB by thecollegepicker
HP Laptop Wifi Not Working Fix Shortcut Keymacnitesh2023shortskeyboardtricks

By Mac Nitesh HP Laptop Wifi Not Working Fix Shortcut Keymacnitesh2023shortskeyboardtricks by Mac Nitesh

Title: If Function keys do not work on the Laptop F1 - F12
Channel: Simple Tech
If Function keys do not work on the Laptop F1 - F12 by Simple Tech
Laptop Wifi Connect
The title for the article is: How to Choose the Right Running Shoes: A Comprehensive Guide
How to Choose the Right Running Shoes: A Comprehensive Guide
Embarking on a running journey, whether a seasoned marathoner or a nascent jogger, begins with a crucial decision: selecting the correct running shoes. This isn’t merely about aesthetics or brand loyalty; foundational to injury prevention, performance enhancement, and overall enjoyment is the proper shoe. This guide, painstakingly crafted, will navigate you through the intricate process of finding the ideal footwear, ensuring each stride is optimized for your unique needs. We'll eschew generic advice and delve into the specifics, providing you with the knowledge to make an informed choice.
Understanding Your Foot Type: The Foundation of Shoe Selection
The human foot, a marvel of engineering, comes in diverse shapes and sizes. Understanding your foot type is the cornerstone of successful shoe selection. Three primary foot types dictate the mechanics of your gait, influencing how your foot interacts with the ground. These are neutral, pronated, and supinated. Identifying your foot type involves a simple, yet informative, assessment method.
The Wet Test (or Footprint Test): This practical method involves dampening your bare feet and stepping onto a piece of cardboard or dark paper. The resulting footprint reveals crucial insights.
- Neutral Foot (Normal Arch): A footprint showing a clear outline of the entire foot, with a moderate curve along the inside arch. The connection between the heel and the forefoot is about halfway between the inside and the outside edges of the foot.
- Pronated Foot (Low Arch or Flat Foot): A footprint displaying a nearly complete impression of the foot, with a wide connection between the heel and forefoot. Almost the entire sole makes contact with the ground.
- Supinated Foot (High Arch): A footprint characterized by a high, narrow arch, with very little contact between the midfoot and the ground. The footprint shows a distinct, deep curve along the inside of the foot.
Professional Gait Analysis: For a more precise assessment, consider a professional gait analysis at a specialty running store. This typically involves a treadmill-based video analysis, expertly evaluating your running form and foot strike patterns providing invaluable insight into your pronation or supination degree.
Matching Foot Type to Shoe Categories: The Perfect Pairing
Once you've determined your foot type, the next step is matching it with the corresponding shoe category. Running shoes are engineered with varying levels of support and cushioning to accommodate different foot mechanics.
Neutral Shoes: Designed for runners with neutral foot types, these shoes provide a balance of cushioning and flexibility. They allow for the natural movement of the foot during the gait cycle. Neutral shoes often feature a curved or semi-curved last, allowing for a greater degree of flexibility. They're ideal for runners who strike the ground evenly and don’t experience excessive inward or outward rolling. Look for terms like "neutral," "cushioned," or "flexible" in the product description.
Stability Shoes: Stability shoes cater to runners who mildly pronate. They offer medial support–primarily the inside of the shoe–reducing excessive inward rolling. They often incorporate features like dual-density midsoles, firmer foam on the inner side of the shoe to prevent overpronation. Stability shoes typically have a semi-curved or straight last, providing more stability along the medial (inner) edge of the shoe. Key terms to look for here include "stability," "support," and "motion control."
Motion Control Shoes: These shoes are specifically designed for overpronators, offering the maximum level of support to control excessive inward rolling of the foot. They typically feature a straight last and robust support systems, using dense materials like TPU (Thermoplastic Polyurethane) or firmer foams in the midsole to counteract the pronation forces. The design is often very structured and reinforces the medial side of the shoe. They are the most supportive shoes and are ideal for runners with severe overpronation.
Cushioned Shoes: While often categorized as a separate group, a lot of neutral shoes fall into the category of cushioned shoes. They prioritize cushioning and impact absorption. They're an excellent choice for runners of any foot type who are looking for a comfortable ride, especially for long-distance training. These shoes make use of a lot of soft materials for shock absorption.
Considering Your Running Style and Terrain:
Beyond foot type, your running style and the surfaces you run on significantly influence your shoe choice.
Road Running Shoes: Engineered for asphalt, concrete, and other hard surfaces, these shoes prioritize cushioning, responsiveness, and durability. They usually feature a slightly more closed upper design for weather protection and are made to withstand the constant impact of road running. The outsoles typically feature durable rubber compounds for excellent grip and abrasion resistance.
Trail Running Shoes: Designed to tackle uneven and unpredictable terrain, these shoes prioritize traction, stability, and protection. They feature aggressive lug patterns on the outsole for superior grip on trails, rock plates in the midsole to protect against sharp objects, and more durable uppers for abrasion resistance.
Track Spikes: For track runners, spikes are highly specialized footwear designed to maximize speed and efficiency on synthetic tracks. Features include a rigid outsole with spike receptacles and a minimal upper designed for light weight and a snug fit.
Racing Flats: These are lightweight shoes designed for speed and efficiency in races. They have minimal cushioning and support, prioritizing responsiveness and a streamlined design.
Walking Shoes: While not specifically running shoes, it's important to acknowledge walking-specific shoes because their design considerations are different from those of running shoes. They offer more support, cushioning, and stability for walking.
The Upper: A Critical Component for Comfort and Fit
The upper, the part of the shoe that encompasses your foot, shouldn't be overlooked. It plays a vital role in comfort, breathability, and overall fit.
Mesh Uppers: Offer excellent breathability and flexibility, making them ideal for warmer weather. The weave can vary widely, influencing the level of ventilation and durability.
Synthetic Uppers: Often used for durability and water resistance, synthetic materials are often incorporated to reinforce specific areas of the shoe, such as the toe box and heel counter.
Heel Counter: The heel counter provides stability and support to the heel, preventing excessive movement or pronation. It is particularly important for runners with stability concerns.
Toe Box: The toe box should offer ample space for your toes to splay naturally, avoiding any constriction or pressure points. Make sure your toes are not compressed and have some space.
The Midsole: The Heart of Cushioning and Support
The midsole, located between the upper and outsole, is the workhorse of cushioning and support.
Cushioning Materials: EVA (Ethyl Vinyl Acetate) and TPU (Thermoplastic Polyurethane) are commonly used for cushioning, with variations in density and properties dictating the level of shock absorption and energy return.
Midsoles Technologies: Many manufacturers have developed proprietary midsole technologies to enhance cushioning, stability, and responsiveness. Examples include Adidas' Boost, Nike's React, and Asics' GEL. These help tailor the shoe to the runner's needs.
The Outsole: Grip and Durability for a Long Haul
The outsole provides traction and durability, determining how well the shoe grips various surfaces.
Rubber Compounds: Carbon rubber, abrasion-resistant rubber, and blown rubber are common outsole materials, each offering different levels of durability and grip.
Lug Patterns: Trail shoes feature aggressive lug patterns for grip on uneven surfaces, while road shoes have smoother patterns.
Finding the Right Fit: A Personalized Experience
The perfect running shoe fit is crucial for preventing blisters, injuries, and maximizing performance.
Length: Allow for a thumb's width of space between your longest toe and the end of the shoe. This accommodates foot swelling during runs.
Width: Ensure the shoe fits comfortably across the widest part of your foot, without feeling too tight or constricting.
Try on Shoes at the End of the Day: Your feet tend to swell throughout the day; try shoes when your feet are at their largest.
Walk and Run in the Shoes: Spend some time walking and running in the shoes within the store or at a treadmill to see how they feel. If possible, try them on for a few minutes. This allows you to test the fit and feel under realistic conditions.
Consider Socks: Bring the socks you typically wear for running when trying on shoes to ensure an accurate fit.
Shoe Longevity and Rotation: Maximizing Performance and Comfort
Even the best running shoes don't last forever. Knowing when to retire a pair and incorporating shoe rotation can prolong performance and minimize the risk of injury.
Mileage: Generally, running shoes should be replaced every 300-500 miles, depending on the shoe type, your weight, and your running style.
Signs of Wear: Look for signs of wear and tear, such as worn-down cushioning, compressed midsoles, and worn outsoles.
Shoe Rotation: Rotating between different pairs of running shoes can reduce the stress on your feet and legs and extend the lifespan of each shoe. Different shoes can also address different training needs.
Conclusion: Your Journey to Running Bliss
Choosing the right running shoes is an individual journey. By understanding your foot type, considering your running style and terrain, paying attention to the upper, midsole, and outsole characteristics, and ensuring a perfect fit,
