hp tablet laptop touchpad not working

Title: Fix Touchpad Not Working for All Laptops 100 Fix
Channel: Tech Flicks
Fix Touchpad Not Working for All Laptops 100 Fix by Tech Flicks
hp pavilion x360 convertible laptop touchpad not working, hp tablet touchpad not working, hp laptop touchpad not working, hp laptop touchpad not working windows 10, hp laptop touchpad not working light on
HP Tablet Laptop Touchpad DEAD? FIX IT NOW!
HP Tablet Laptop Touchpad Troubles? Don't Panic!
Ah, the dreaded unresponsive touchpad. You're staring at your HP tablet laptop, fingers itching to navigate, yet the cursor remains stubbornly frozen. Suddenly, it hits you: your touchpad is dead. Before you chuck your beloved device across the room, breathe. We're going to tackle this head-on. It's frustrating, undeniably. However, a solution is often closer than you think.
Troubleshooting Your Touchpad: A Gentle Approach
First things first: let's rule out the obvious. Is your touchpad accidentally disabled? Sometimes, we unknowingly trigger a key combination that shuts it off. Moreover, many HP laptops have dedicated buttons or functions specifically for this purpose. Look closely at the keyboard for a touchpad icon, often with an accompanying "Fn" (function) key. Pressing these keys together usually toggles the touchpad on or off. If this is the solution, then fantastic! Problem solved. That was easy, right?
Driver Dilemmas: The Software Sidekick
If a simple toggle didn't work, drivers could be the culprit. Drivers are the essential software connections that allow your touchpad to communicate with your operating system. Consider them the interpreter translating your finger movements to the computer. Outdated, corrupted, or missing drivers are common causes of touchpad failure. Thankfully, troubleshooting drivers isn't nearly as daunting as it sounds.
Updating the Driver: Your Digital Upgrade
Let's update those drivers together. Navigate to your Device Manager. You can often find this by typing "Device Manager" in the Windows search bar. Expand the "Mice and other pointing devices" section. You should see your touchpad listed here with something like "Synaptics Touchpad" or similar. Right-click on your touchpad listing. Select "Update driver." Windows will automatically search for the most recent drivers online. Follow any on-screen prompts to complete the installation. Restart your laptop after the update. Hopefully, your touchpad is back in action.
Reinstall the Driver: A Fresh Start
Sometimes, an update isn't enough. Instead, try reinstalling the driver. In Device Manager, right-click your touchpad and choose "Uninstall device." Then, reboot your HP tablet laptop. Windows should attempt to reinstall the driver automatically upon restart. If not, visit the HP support website. Search for your specific laptop model and download the correct touchpad driver for your operating system. Install it manually. This, in some cases, restores functioning.
Hardware Hiccups: Examining the Physical Realm
Assuming software isn’t the problem, we turn our attention to hardware. Less often, the issue stems from physical damage. It could be a loose connection or a complete failure of the touchpad itself. First, inspect the touchpad surface itself. Is there any noticeable damage? Cracks or debris could be interfering with its operation.
External Mouse: A Tactical Bypass
In the meantime, while we're troubleshooting, here is an alternative. Using an external mouse, either wired or wireless, can provide a temporary workaround. This way, you can still navigate your system while you investigate the touchpad issue. Plug in the mouse, and get back to working.
Cleaning the Touchpad: A Simple Solution
It might seem trivial, but sometimes the simplest solutions work best. Dirt, dust, or even a sticky residue can interfere with the touchpad's sensitivity. Gently clean the touchpad's surface. Use a soft, slightly damp cloth. Avoid harsh chemicals. Clean any visible grime. You could be surprised.
BIOS Updates: The Firmware Fix
Occasionally, the BIOS (Basic Input/Output System) can cause issues. BIOS is the fundamental software that starts your computer. Check for BIOS updates on the HP support website. Be cautious when updating the BIOS. Follow the instructions carefully.
Contacting HP Support: Professional Help
If you've tried all these steps, and your touchpad remains lifeless, it's time to contact HP support. Explain the troubleshooting steps you've taken. They can offer more specific guidance. More importantly, they can determine if the issue requires a repair. Perhaps your device is still under warranty.
Preventive Measures: Keeping Your Touchpad Happy
Once you get your touchpad working, there are steps to prevent future issues. Avoid placing heavy objects on the touchpad. Keep the area clean. Also, update your drivers regularly. Treat your device gently.
Conclusion: The Quest for Touchpad Recovery
Dealing with a non-functional touchpad is a hassle. I understand! But hopefully, this guide provided you with some workable solutions. Remember to stay calm, and work methodically. You have several options to explore. By following these steps, you significantly increase your chances of restoring your touchpad functionality. Keep in mind that persistence pays off. With a little patience, you can have your HP tablet laptop running smoothly again. Good luck!
Laptop Enter Key Broken? FIX IT NOW! (Emergency Guide!)HP Tablet Laptop Touchpad DEAD? FIX IT NOW!
Alright, let's be honest, staring at a frozen cursor on your HP tablet laptop is about as fun as getting a flat tire on a rainy day. Suddenly, your sleek, portable workstation turns into a glorified paperweight. The good news? More often than not, a dead touchpad isn't the end of the world. We’re going to dissect this digital dilemma, pulling apart the problem like a detective piecing together a case. We’ll troubleshoot, explore, and hopefully, resurrect your touchpad and get you back to swiping, tapping, and clicking with ease. Join me, because let’s get this fixed!
1. The Silent Treatment: Recognizing the Dead Touchpad
First things first: how do we know the touchpad is actually deceased? This might seem obvious, but sometimes, it’s simply a case of user error. Make sure you haven't accidentally disabled it. (More on that later!). If your cursor refuses to budge, the click functions are useless, and gestures like scrolling and zooming are completely ignored, then, sadly, we're likely dealing with a dead touchpad. It's a digital corpse, and our mission is to bring it back to life!
2. Check the Obvious: The Power of the On/Off Switch (Yes, Really!)
Before we delve into the technical labyrinth, let’s consider the simple things. Think of this as checking the engine light before you call AAA. Some HP tablet laptops, especially those with detachable keyboards, have a physical button or switch to disable the touchpad. It might be a tiny button, a function key combination (like Fn + a specific key), or even a setting within the operating system. Let's start here, because you might be surprised at how often this simple step solves the problem. We’re not talking rocket science, people!
3. Driver Dilemmas: A Software Snafu Under the Hood
Drivers are the unsung heroes of computing. They're essentially the translators that allow your hardware (the touchpad, in this case) to communicate with your operating system. Corrupted or outdated drivers are a common culprit for touchpad malfunctions. Think of them like broken phone lines - no communication, no function.
Here’s how to check and potentially fix the issue:
- Device Manager: Access the Device Manager (search for it in the Windows search bar).
- Locate Your Touchpad: Look for "Mice and other pointing devices." Expand the section and right-click on your touchpad device (it might be listed as "HID-compliant mouse" or something similar).
- Update Driver: Select "Update driver." Windows will search for updated drivers automatically.
- Roll Back (If Necessary): If the problem started recently, try "Roll Back Driver." This will revert to the previous driver version. Uninstall and Reinstall: If the above steps don't work, try uninstalling the driver and then restarting your laptop. Windows will hopefully reinstall the driver automatically.
- Manufacturer's Website: Sometimes, the best drivers aren’t from Windows. Go to the HP support website, enter your laptop model, and download the latest touchpad drivers directly. This is like getting a tailored fix, made just for your machine!
4. Hardware Hiccups: Is It Actually Broken?
Sadly, sometimes it is a hardware problem. It's a bit like finding out you have a flat tire after you've checked the gas cap – not what you wanted to hear! If the touchpad suddenly stopped working after a drop, a spill (even a tiny one!), or some other physical trauma, the touchpad itself might be damaged.
In this case:
- External Mouse Test: Connect an external USB mouse. If the external mouse works, it strongly suggests a problem with the touchpad itself.
- Warranty Time: If your laptop is still under warranty, contact HP support. Trying to replace the touchpad yourself can be tricky and may void your warranty. Let the pros handle it!
5. The Battery Blues: Power Issues & The Touchpad
This may sound strange, but low battery can sometimes cause strange behavior. If your laptop is barely hanging on to life, ensure you have a full battery.
6. Software Conflicts: The Unexpected Suspects
Sometimes, it's not the touchpad itself but a piece of software causing the issue. Programs that use the touchpad for advanced features can sometimes conflict with the device.
- Recent Installations: Did the touchpad stop working after you installed any new software? Try uninstalling that software to see if it's the culprit.
- Background Processes: Some background processes can also interfere. Close unnecessary programs, or perform a clean boot of Windows to see if the touchpad starts working again.
- Anti-Virus Software: Rarely, some overzealous antivirus programs might block touchpad functionality. Temporarily disable your antivirus to see if this resolves the issue.
7. BIOS/UEFI Updates: A Firmware Fix?
The BIOS (Basic Input/Output System) or UEFI (Unified Extensible Firmware Interface) is the software that runs before your operating system loads. Sometimes, an outdated BIOS/UEFI can cause hardware compatibility problems, including touchpad issues.
- Proceed With Caution: Updating your BIOS/UEFI carries some risk. If interrupted, it could render your laptop unusable. Only do this if you're comfortable and follow the manufacturer's instructions carefully.
- HP Support: Visit the HP support website, find your laptop model, and download and install the latest BIOS/UEFI update.
8. System Restore: Rolling Back the Clock
If the touchpad started failing recently and you suspect a software conflict, a System Restore can be a lifesaver. It rolls your system back to a previous state when everything was working correctly.
How to:
- Search: Search for "Create a restore point" in the Windows search bar.
- System Restore: Click "System Restore."
- Choose a Restore Point: Select a restore point from before the touchpad problem started.
This is like hitting the rewind button on your computer, letting you undo software changes that might have caused the issue.
9. Clean Boot: Isolating the Culprit
A clean boot starts Windows with a minimal set of drivers and startup programs. This can help you determine if a third-party program is interfering with your touchpad.
How to:
- System Configuration: Type "msconfig" in the Windows search bar and open "System Configuration."
- Services Tab: Click on the "Services" tab.
- Hide Microsoft Services: Check the box "Hide all Microsoft services."
- Disable All: Click "Disable all."
- Startup Tab: Click on the "Startup" tab and click "Open Task Manager."
- Disable Startup Items: Disable all startup items.
- Restart: Restart your computer. If the touchpad works in a clean boot, one of the disabled programs is the problem child. Enable them one by one to identify the culprit.
10. Check for Updates: Beyond Windows Updates
While we often equate updates with Windows, ensure all applications are up to date. Outdated software can sometimes cause conflict with the touchpad. Additionally, there might be application-specific bugs that are fixed with an update.
- Application Settings: Navigate to the help section or settings menu of your common software (office suites, browsers, etc.) and see if there’s an “Update” section.
- Manual Updates: Some software is updated through the application itself, rather than through Windows Update.
11. Hardware Inspection: A Closer Look (If You're Comfortable)
I highly recommend this only if you're technically inclined and comfortable working with electronics. However, if you’re experienced, and warranty isn’t a concern, carefully opening your laptop to visually inspect the touchpad connections and the internal cables that connect the touchpad to the motherboard could reveal loose connections or damaged components.
- Safety First: Disconnect the power adapter and remove the battery before opening your laptop.
- Consult the Manual: Search for your laptop's service manual online for disassembly instructions.
- Look for Damage: Check the touchpad cable for any signs of damage, such as cuts or tears. Ensure the cable is securely connected to both the touchpad itself and the motherboard.
12. The Ultimate Reset: A Factory Reset
This is the nuclear option. A factory reset wipes your hard drive and reinstalls Windows to its original state. It's a scorched-earth approach that should be reserved as a last resort. Back up all your important files before proceeding!
How to:
- Settings: Go to Settings > Update & Security > Recovery.
- Reset this PC: Click "Get started" under "Reset this PC."
- Follow On-Screen Instructions: Choose to keep your files or remove everything.
A factory reset is like giving your laptop a fresh start, like a car receiving a new paint job.
13. External Mouse as a Temporary Solution: Don’t Abandon Ship!
While you're troubleshooting, a simple and effective solution is using an external USB mouse. This allows you to navigate your system while you try to fix the touchpad. It's a digital life raft, keeping you afloat until you can get the main system back in working order.
14. HP Support: When to Call in the Professionals
Don’t be a hero. Sometimes, the best course of action is to seek
Laptop Volume Dead? This SHOCKING Fix WORKS!Disabling touchpad on HP laptops

By BurbankITDepartment Disabling touchpad on HP laptops by BurbankITDepartment
Fix HP Touchpad Not Working in Windows 11 10 How To Solve hp Laptop touchpad Issues

By Victor Explains Fix HP Touchpad Not Working in Windows 11 10 How To Solve hp Laptop touchpad Issues by Victor Explains
FIX Touchpad Not Turning On

By CODEPHENOM FIX Touchpad Not Turning On by CODEPHENOM
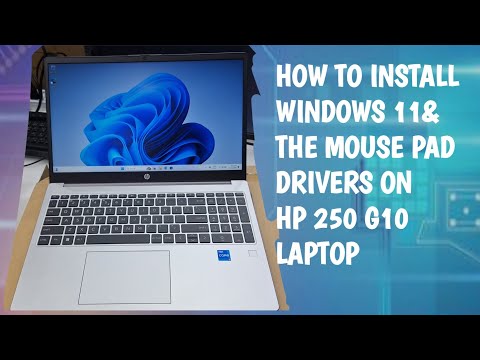
Title: Install windows and touchpad driver in HP Laptop 250 G10
Channel: NPRS Tech and Vlogs
Install windows and touchpad driver in HP Laptop 250 G10 by NPRS Tech and Vlogs
Working With Laptop
Here is the title I have selected: "The Ultimate Guide to Brewing the Perfect Cup of Coffee at Home".
The Ultimate Guide to Brewing the Perfect Cup of Coffee at Home
The aroma. The ritual. The sheer promise of a perfect cup. For coffee enthusiasts, the home brewing experience is more than just a daily task; it's a craft. It’s a journey into flavor, a symphony of carefully chosen beans, precise measurements, and a dedication to extracting all the rich potential held within each roasted bean. This in-depth guide serves as your compass, navigating the complex world of home brewing, revealing the secrets to unlocking coffee perfection, one delicious cup at a time. Understanding the Fundamentals: The Coffee Bean and Its Journey
Before delving into brewing methods, a fundamental understanding of the coffee bean itself is paramount. Coffee beans are the seeds of the Coffea plant, a genus encompassing numerous species, with Coffea arabica and Coffea robusta being the most commercially significant. Arabica beans, typically favored for their nuanced flavor profiles, account for the majority of specialty coffee production. Robusta beans, known for their higher caffeine content and robust flavor, are often used in espresso blends.
The journey of the coffee bean begins with cultivation, dependent on the specific varietal and geographical region. Factors such as altitude, soil composition, and climate influence the bean’s development, shaping the unique flavor characteristics. After harvesting, the coffee cherries undergo processing. Common methods include washed, natural (dry), and honey processing. Washed coffees are generally cleaner and brighter, while natural coffees often possess intense fruity notes. Honey-processed coffees fall somewhere in between.
Upon processing, the green coffee beans are shipped to roasters. Roasting is a critical step, fundamentally altering the bean's composition and unlocking its flavor potential. Roasters expertly control time, temperature, and airflow to produce a range of roasts, from light to dark. Light roasts retain more of the bean's origin characteristics, showcasing bright acidity and delicate flavors. Dark roasts, on the other hand, emphasize the bean's inherent roast flavors, ranging from chocolate to caramel. Choosing the right roast is crucial for finding the perfect cup of coffee.
Selecting Your Equipment: The Tools of the Trade
The equipment you choose for home brewing can significantly impact the final outcome. Let's explore the essential tools, from grinders to brewers.
The Crucial Grind: The Burr Grinder Advantage
The grind is perhaps the most critical element in brewing coffee. A consistent grind size ensures even extraction, producing a balanced cup. A burr grinder is the preferred choice over blade grinders, which chop beans irregularly. Burr grinders use two revolving abrasive surfaces to crush the beans uniformly. Consider these types of Burr Grinders:
- Conical burr grinders: These grinders are typically more affordable, producing a consistent grind and are easy to maintain.
- Flat burr grinders: Offering greater precision and potential for particle size distribution control, these are often found at higher price points.
Adjust the grind size based on your chosen brewing method; finer for espresso, medium-fine for pour-over, and medium-coarse for French press.
Brewing Methods: Unveiling Flavor Extraction
Different brewing methods extract flavors uniquely. Here is a breakdown of some of the popular methods:
Pour-Over Perfection: A Symphony of Control
Pour-over methods, such as the Hario V60 and Chemex, allow for meticulous control over every aspect of brewing, from water temperature to pour rate. This level of flexibility makes pour-over ideal for highlighting the subtleties of single-origin coffees.
- Equipment: V60, Chemex, paper filters, gooseneck kettle, scale, timer.
- Process: Preheat your kettle to the ideal brewing temperature (generally between 195-205°F / 90-96°C). Rinse your filter to eliminate any paper taste, then add the ground coffee to the filter. Slowly saturate the grounds with a small amount of hot water, allowing them to “bloom” for approximately 30 seconds. Afterwards, gradually pour the remaining water in a slow, circular motion. This process takes around 2-4 minutes.
French Press: Simplicity and Full-Bodied Flavor
The French press is a straightforward method, known for producing a full-bodied cup with a rich, oily mouthfeel.
- Equipment: French press, scale, timer, gooseneck kettle.
- Process: Heat water to the optimal temperature, add coarsely ground coffee to the French press, and gently pour hot water over the grounds. Stir to ensure even saturation. Allow the coffee to steep for 4 minutes before slowly pressing the plunger.
AeroPress: Versatility in a Portable Package
The AeroPress is a versatile and portable brewing device. It is known for producing a clean, bright cup with minimal sediment.
- Equipment: AeroPress, AeroPress filter, scale, timer, gooseneck kettle.
- Process: Insert the filter into the cap, and rinse it to remove the papery taste. Add fine-ground coffee to the AeroPress chamber. Saturate the grounds, and steep for a designated time depending on the coffee you select. Then insert the plunger and slowly press down.
Espresso Extraction: The Art of Pressure
Espresso requires specialized equipment, including an espresso machine and a portafilter. The machine uses pressure to force hot water through finely ground coffee, resulting in a concentrated, intensely flavored beverage.
- Equipment: Espresso Machine, scale, tamper.
- Process: Grind the beans at the very fine level to create a puck in the portafilter. Tamp the coffee grounds firmly, creating an even surface. Attach the portafilter to the machine. The espresso should extract in approximately 25-30 seconds, producing a rich espresso.
Water: The Silent Hero
Water quality significantly impacts your coffee's taste. Use filtered water, as tap water often contains minerals and chlorine that can negatively affect the flavor. Consider using a water filter pitcher or a dedicated coffee water filter for consistent quality. The ideal brewing water temperature fluctuates between 195°F-205°F (90-96°C).
The Golden Ratio: Mastering the Coffee-to-Water Ratio
The coffee-to-water ratio is the foundation of a well-brewed cup. Experiment with ratios to achieve the ideal strength and flavor profile. A general guideline is 1:15 to 1:17 coffee-to-water ratio, which means one gram of coffee for every 15 to 17 grams of water. For example, if you're brewing a French press with 30 grams of coffee, you would use approximately 450-510 grams of water.
The Art of the Bloom: Unleashing Aromatics
The bloom is an essential step in the pour-over and French press methods. Pour a small amount of hot water over the freshly ground coffee, just enough to saturate the grounds. Allow them to "bloom" for 30-45 seconds. This process releases trapped carbon dioxide, which occurs during the roasting process and creates an improved flavor.
Troubleshooting Common Brewing Challenges
Even with careful preparation, you might encounter issues. Here are some common problems and how to resolve them:
- Sour Coffee: This is a sign of under-extraction.
- Solutions: Use a finer grind, increase the brewing time, or increase the water temperature.
- Bitter Coffee: This is a sign of over-extraction.
- Solutions: Use a coarser grind, decrease brewing time, or decrease water temperature.
- Weak Coffee:
- Solutions: Use more coffee grounds, a finer grind if brewing with the French Press.
- Muddy Coffee
- Solutions: Use proper filtration to avoid sediments. Storing Your Coffee: Preserving Freshness
Proper storage preserves the coffee's flavor. Store whole beans in an airtight container, away from light, heat, and moisture. Avoid storing beans in the refrigerator or freezer, as this can affect their flavor and lead to condensation. Grind your beans just before brewing for the best flavor.
Beyond the Basics: Experimentation and Exploration
Once you've mastered the fundamentals, experiment with different coffee beans, brewing methods, and grind sizes. Explore the world of specialty coffee, seek out single-origin coffees, and discover the unique flavors of different regions. The journey of home brewing is ongoing, with endless opportunities for discovery, and the reward is a truly exceptional cup of coffee.
