hp bang and olufsen laptop microphone not working

Title: How To Fix HP Microphone Not Working
Channel: lapfix
How To Fix HP Microphone Not Working by lapfix
hp bang and olufsen laptop microphone not working, hp bang and olufsen audio not working
HP Bang & Olufsen Laptop Mic DEAD? FIX THIS NOW!
Is Your HP Bang & Olufsen Laptop Microphone Silent? Don't Panic!
We've all been there. You're in a crucial video call, ready to wow everyone, when suddenly, silence. Your voice, the very thing you need, vanishes. This isn't the plot of a bad spy movie; it's a frustrating reality for many HP laptop users, especially those with Bang & Olufsen audio. So, what do you do when your HP Bang & Olufsen laptop mic goes silent? Don't fret! Let's dive into this digital dilemma and get you talking again.
Troubleshooting the Silent Symphony: Initial Checks
First, let's eliminate the obvious. Before you leap into complex solutions, rule out the simple culprits. Is the physical mute button, often found on the keyboard, accidentally engaged? It’s easy to overlook. Additionally, check the microphone settings within your operating system. Confirm the correct microphone is selected. Ensure its volume isn’t muted or set incredibly low. The settings might be right under your nose. After all, sometimes the solution is simpler than you think.
Software Snafus: A Deep Dive
Software issues are often the root cause. Restarting your laptop is a classic first step. It can miraculously fix many glitches. If that doesn’t work, it's time to investigate your drivers. Outdated or corrupted drivers are common microphone killers. Go to your device manager. Locate your microphone under "Sound, video and game controllers." Right-click it. Then, select "Update driver." Windows will search for the latest version. Furthermore, consider uninstalling and reinstalling the driver. This often clears out any corrupted files.
Bang & Olufsen Specifics: Tailoring the Tactics
Now, let's focus on solutions tailor-made for Bang & Olufsen audio. HP laptops equipped with this audio system sometimes have unique quirks. Firstly, inspect the Bang & Olufsen audio software. Make sure your microphone isn’t inadvertently disabled within its settings. Within this software, locate the microphone and verify that the noise cancellation features aren’t too aggressive. Such settings can sometimes filter out your voice entirely.
Hardware Hurdles and How to Overcome Them
If software isn't the culprit, the issue might be rooted in hardware. Sadly, component problems can occur. Check your laptop’s audio jack if you're using an external microphone. A loose connection can cause issues. Gently wiggle the cable to check for any intermittent contact. If you use an external microphone, try another one. This isolates the problem. Now, evaluate the internal microphone. This is trickier to diagnose. However, a hardware malfunction is less likely than a software issue.
Navigating the Noise: Advanced Troubleshooting
Still no joy? Well, let's try some advanced techniques. Sometimes, other applications can interfere with your microphone. Close any unnecessary programs. Especially those that might be hogging audio resources. It might be that a third-party application is causing the issue, such as a game or recording software. Next, consider a system restore. This reverts your laptop to an earlier state. Do this before your microphone stopped working. But ensure you back up your data first. After all, system restores can sometimes lead to data loss.
The Final Frontier: Contacting Support and Considering Repairs
When all else fails? It’s time to seek professional help. Contact HP support directly. Explain your troubleshooting steps. They can often provide specific solutions. If your laptop is still under warranty, this is the best time to use it. Explain the problem to the support team. They can also guide you through any necessary repair options. If your warranty has expired, consider a reputable local repair shop. They specialize in laptop hardware. They often offer diagnostic services. In other words, don't give up hope.
Preventive Measures: Keeping the Silence Away
Prevention is always better than cure. So, how can you prevent this from happening again? Regularly update your drivers. This is a simple, yet essential, habit. Make sure you have updated your operating system. Periodically check your microphone settings. These simple steps can prevent many audio headaches. Back up your important files. Regularly back up your system. It ensures your data is safe.
Conclusion: Your Voice Reclaimed
Losing your microphone can feel like a communication roadblock. But, armed with these troubleshooting steps, you can get back to speaking clearly. Remember to start with the easy fixes. Then, work your way through the more complex solutions. We hope this guide helps you restore your laptop’s voice. You'll be back to chatting, recording, and conferencing in no time. Now, go forth and be heard!
Laptop Mic + Discord: The SHOCKING Truth You NEED to Know!HP Bang & Olufsen Laptop Mic DEAD? FIX THIS NOW!
Hey there, fellow tech travelers! Ever felt that sinking feeling when you're in a crucial online meeting, ready to wow ‘em, but your mic decides to take a permanent vacation? Specifically, if you're rocking an HP laptop, especially one of those sleek, Bang & Olufsen-branded beauties, a dead microphone can be a real party pooper. We've all been there, staring blankly at a screen while the audio silence is deafening. Don’t sweat it; we’re diving headfirst into the world of troubleshooting and fixing that HP Bang & Olufsen laptop mic pronto. Let's get you back in the conversation!
1. The Sound of Silence: Identifying the Culprit
Before we start throwing metaphorical wrenches at the problem, let's diagnose it. Imagine your microphone as the heart of your audio operation. Is it truly dead, or just experiencing a temporary arrhythmia? We need to find out if the issue is:
- Hardware: The microphone itself is kaput.
- Software: A glitch in your drivers, software, or settings.
- Environment: Something simple, like a muted mic or the wrong input selected.
Think of it like this: is your car dead because the engine blew up, or because you forgot to turn the key? Simple things first, always.
2. The Mute Button Maverick: A Simple Check
Alright, let's start with the low-hanging fruit. This is where we check for the proverbial “forgotten to turn the key” scenario. Is your microphone actually muted? Sound obvious? Believe me, it's a common culprit.
- Visual Inspection: Look for a mute button, usually located on your keyboard (often with a microphone icon). A red light often indicates mute.
- System Tray Check: In the bottom-right corner of your Windows screen (or on your Mac's menu bar), you'll find the speaker icon. Click on it and make sure your microphone isn’t muted there.
It's like checking if your lights are off before declaring a power outage.
3. Driver Dilemmas: The Digital Doctor's Visit
Drivers are the language your laptop uses to communicate with its hardware, including that all-important microphone. Think of them as the translators between your voice and the digital world. If the drivers are outdated, corrupted, or simply missing, your microphone will be mute.
- Device Manager Examination (Windows):
- Right-click the Start button and select "Device Manager."
- Expand "Sound, video, and game controllers."
- Look for your microphone. A yellow exclamation mark or a downward-pointing arrow indicates a problem.
- Right-click on your microphone and select "Update driver." Choose "Search automatically for drivers."
- About This Mac (macOS): Go to Apple menu > About This Mac > System Report. Then click on "Audio." Verify that your microphone is listed. If not, you might need to reinstall the audio drivers.
It's kind of like getting a software checkup – keep your drivers up to date!
4. System Settings Serenade: Tweaking Your Audio Inputs
Even if your drivers are happy, you need to ensure Windows (or macOS) knows which microphone to use. It’s like choosing the right speaker for a concert.
- Windows Audio Settings:
- Right-click the speaker icon in the system tray and select "Open Sound settings."
- In the "Input" section, make sure your Bang & Olufsen microphone is selected as the input device.
- Click "Device properties" to test your microphone and adjust the input volume.
- macOS Sound Preferences:
- Go to Apple menu > System Preferences > Sound.
- Select the "Input" tab.
- Choose your microphone from the list and adjust the input volume.
Ensure the right stage is set for your voice!
5. App-Specific Adjustments: Targeted Troubleshooting
Sometimes the problem isn't a system-wide issue; it’s confined to a specific application, like Zoom, Microsoft Teams, or Skype. Each app has its own audio settings, leading to possible discrepancies.
- Zoom/Teams/Skype Audio Settings: Within each application, go to the settings and check the audio input selection. Ensure your Bang & Olufsen microphone is chosen, and test the volume. It is like verifying the venue's sound system.
6. Bang & Olufsen Audio Control Software: Embrace the Sound
Many HP laptops with Bang & Olufsen audio come with pre-installed software. This software might provide additional control over your audio settings. If it is available, it’s a great place to start.
- Check for B&O Software: Search your applications for a Bang & Olufsen audio control panel. Explore the settings within to see if the microphone is enabled and set to the correct input.
This is your personal sound engineer, ready to dial in the perfect audio balance.
7. The External Microphone Solution: A Quick Fix (and Upgrade!)
If all else fails, and you're in a real pinch, an external microphone can be your lifesaver. They are often far more adept than their built-in counterparts.
- USB Microphones: Plug-and-play simplicity. Connect a USB microphone, and it should automatically be recognized.
- 3.5mm Jack Microphones: Connect it to your laptop's audio input jack.
This is your emergency backup plan so that your voice isn't lost.
8. Hardware Hardware, Wherefore Art Thou? Physical Inspection
Okay, we have been through software, but what about hardware? This is the point where you need to check the physical situation of your microphone.
- Inspect the Microphone Mesh: Look for any obstructions – dust, debris, or damage. A gentle cleaning might sometimes do the trick.
- Warranty Check: Does you HP laptop have a warranty? If so, and the hardware is the issue, immediately seek support from HP.
9. Restarting Your Digital Heart: The Reboot Remedy
Sometimes, the simplest solution is the most effective. A good old-fashioned restart can shake off those digital cobwebs, clearing temporary glitches that might be affecting your microphone.
- Restart Your Laptop: Not just shutting down and turning it back on, but a complete, full system restart. This means, shutting your laptop down, and then turning it back on again.
The metaphorical "reset" button for your computer.
10. Resetting Your HP Laptop: A Last Resort Reset
If nothing else works, a factory reset is a bit drastic, but it can sometimes resolve deeper software issues. It is literally like going back to square one. Important: This will erase all your data, so back up everything first!
- Windows Reset: Go to Settings > Update & Security > Recovery. Then click "Reset this PC." Follow the on-screen instructions.
- macOS Reset (If Applicable): This process varies. Research the proper method for your specific macOS version.
Think of it this way: if everything else fails, you can start again.
11. Check Microphone Usage Permissions: Gatekeeping for Voice
Modern operating systems have privacy settings that can restrict microphone access to certain applications. It is like granting access to whoever you want to let into the party.
- Windows Microphone Permissions: Go to Settings > Privacy > Microphone. Make sure the microphone access is enabled and that the apps you are using are authorized.
- macOS Microphone Permissions: Go to System Preferences > Security & Privacy > Privacy > Microphone. Ensure that the applications you want to use your microphone with are checked.
12. Sound Troubleshooter (Windows): The Digital Detective
Windows has a built-in troubleshooter that can automatically detect and sometimes fix common audio problems.
- Run the Audio Troubleshooter: Right-click on the speaker icon in the system tray and select "Troubleshoot sound problems." Follow its prompts.
Your personal tech detective, searching for a potential solution.
13. Consider Your Environment: External Interference
Sometimes, the issue isn't your laptop, but the environment. Background noise, electromagnetic interference, or other factors can impact your microphone’s performance.
- Noise Reduction: Move to a quieter location.
- Avoid Interference: Keep away from large electronics that might generate radio interference.
It's about making sure you have an effective stage.
14. Update Your Operating System: The Foundation of Functionality
Like drivers, the operating system itself needs to be updated. Modern operating systems come with performance upgrades and bug fixes that might resolve audio issues.
- Windows Updates: Go to Settings > Update & Security > Windows Update. Check for and install any available updates.
- macOS Updates: Go to System Preferences > Software Update. Install any available updates.
A freshly upgraded foundation for your operating system.
15. Contacting HP Support: The Expert Approach
If you've tried everything, and your HP Bang & Olufsen microphone is still dead, it's time to call in the professionals. HP support can provide more specialized troubleshooting or advise on repair or replacement options.
- HP Support Website: Visit the HP support website for
How To Fix HP Laptop Microphone Not Working In Windows 10 and Windows 11
By TechFixIT How To Fix HP Laptop Microphone Not Working In Windows 10 and Windows 11 by TechFixIT
How To Fix Microphone Not Working on HP Laptop
By Your Fix Guide How To Fix Microphone Not Working on HP Laptop by Your Fix Guide
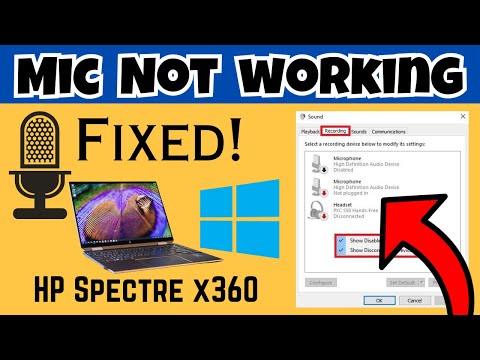
Microphone Not Working In HP Spectre x360 Easy Tutorial
By Ultimate PC Guide Microphone Not Working In HP Spectre x360 Easy Tutorial by Ultimate PC Guide

Title: How to troubleshoot the microphone on your HP Notebook in Windows 11 HP Support
Channel: HP Support
How to troubleshoot the microphone on your HP Notebook in Windows 11 HP Support by HP Support
Wifi On Laptop Phone
Here's the title you requested: The Ultimate Guide to Mastering the Art of Sourdough Baking at Home
The Ultimate Guide to Mastering the Art of Sourdough Baking at Home
Embark on a culinary journey, a venture into the ancient and rewarding world of sourdough. This guide is more than a collection of recipes; it's a comprehensive exploration designed to transform you, the home baker, into a confident sourdough artisan. Forget the fleeting trends; this is a timeless craft, a dance between flour, water, salt, and the patient hand of the baker, yielding loaves of unparalleled flavor and texture. Ready to create bread that both nourishes the body and delights the soul? Let’s begin.
Understanding the Essence: The Living Culture of Sourdough
At the heart of every perfect sourdough loaf lies the starter, a vibrant, living culture of wild yeasts and beneficial bacteria. This natural leavening agent, the very essence of sourdough, is where the magic originates. A thriving starter is the key to achieving the characteristic airy crumb, the tangy flavor, and the magnificent crust that define true sourdough. Cultivate a healthy starter, and you'll be well on your way to sourdough success.
The creation of a sourdough starter is a testament to the power of patience and observation. It begins with the blending of equal parts flour and water, a simple act that sets the stage for a complex microbiological ballet. Initially, the mixture might seem lifeless, but within days, signs of activity will emerge. Tiny bubbles, a subtle sour aroma, and a slight rise indicate that the wild yeasts and bacteria are beginning to flourish, feeding on the starches in the flour and producing carbon dioxide, the gas that gives sourdough its rise.
The type of flour used significantly impacts the starter's development and flavor profile. Whole wheat flour, rich in bran and nutrients, provides a fertile ground for the early proliferation of microbes. However, all-purpose flour can also be used, resulting in a slightly milder flavor. Experimenting with different flour combinations will allow you to tailor your starter to your personal preferences.
Regular feedings, a crucial aspect of starter maintenance, provide the nourishment required for continued growth and activity. The ratio of flour and water to starter will evolve over time, but a common feeding schedule involves discarding a portion of the starter (usually about half) and replenishing it with fresh flour and water. Precise measurements and consistent timing are essential for maintaining a well-balanced and active starter.
Nurturing Your Starter: Feeding, Storage, and Troubleshooting
The health of your starter is paramount. A well-cared-for starter is a happy starter, and a happy starter translates directly into exceptionally good bread.
Feeding Your Starter: The frequency with which you feed your starter depends on its activity level and your baking schedule. If you bake frequently (weekly, or even more often), you can feed your starter once or, sometimes, twice a day. For less frequent baking, a once-a-week feeding is usually sufficient. The key is to find a rhythm that suits your lifestyle and your starter. Remember to discard a portion of your starter before each feeding to prevent it from becoming too large, and to maintain a healthy balance of nutrients.
Storage Techniques: Your starter can be stored in a variety of ways. In the refrigerator, the cold temperature slows down fermentation, allowing you to feed less frequently. Just be sure to bring your starter to room temperature and feed it a few times before baking. Alternatively, you can store your starter at room temperature if you plan to bake frequently, but be prepared for more frequent feedings. Consider the container; a glass jar with a loosely fitting lid offers a visible window into your starter's activity.
Troubleshooting Common Starter Issues: Is your starter sluggish? If your starter is not rising or bubbling as expected, several factors could be at play. Ensure that the flour you’re using is fresh and that the water is at the right temperature—lukewarm, not hot, as heat can kill the wild yeasts. Another possibility is that the starter might need more time. Give it a few extra days at room temperature, feeding regularly, to see if activity improves. A slightly acidic starter is normal; however, if the aroma is overwhelmingly sour or smells of acetone, there might be an imbalance in the microbial community. In this case, try feeding it more frequently and consider adding a small amount of whole-wheat flour to the mix.
The Flour: Your Foundation for Exceptional Sourdough
The choice of flour significantly influences the flavor, texture, and overall characteristics of your sourdough bread. Experimentation is encouraged, but understanding flour types is critical for success.
Bread flour, with its higher protein content, is a staple for many sourdough bakers. The increased gluten development resulting from the higher protein content provides structure and contributes to a more open crumb. All-purpose flour can be used, particularly for beginners, but the final product may have a slightly less airy texture.
Whole wheat flour adds complexity and a nutty flavor to the dough. However, it absorbs more water than white flour, so you may need to adjust your hydration levels accordingly. Consider incorporating spelt, rye, or other alternative flours to add further depth of flavor and textural nuances. Each flour type will impart its unique character to the finished loaf.
Beyond the type of flour, consider the quality. Freshly milled flour from a local source can often offer superior flavor and nutritional value compared to commercially produced options. It’s a worthwhile investment for a truly outstanding loaf.
The Hydration Equation: Water and Its Impact
Hydration, the ratio of water to flour, is a critical factor in sourdough baking. It influences everything from the dough’s handling characteristics to the final crust and crumb.
Generally, sourdough bread requires a higher hydration level than conventional breads. This is because the sourdough process benefits from the increased water content, which aids in gluten development, fermentation, and the creation of a more open crumb.
The optimal hydration level for sourdough can vary depending on the flour used and your experience level. A novice might start with a hydration level of around 68-70%, while more experienced bakers may work with doughs at 75% or even higher. High-hydration doughs can be challenging to handle, but they often result in a more open, airy crumb.
Accurate measurement of water is crucial. Use a kitchen scale to measure both flour and water by weight for the best results.
Mixing, Resting, and Shaping: The Path to Perfect Dough
The process of mixing, resting, and shaping is where your dough takes on life, evolving from a shaggy mass into a structured, elastic form ready for baking.
Autolyse: The autolyse is a critical step, allowing the flour to fully hydrate and begin gluten development. This involves combining the flour and water (the liquid component of your recipe) and allowing it to rest, covered, for a period ranging from 30 minutes to several hours, prior to adding the starter and salt.
Mixing the Dough: After autolysing, add your starter and salt. Mix the dough, either by hand or with a mixer, until it is well-combined. You want a shaggy mass, but the gluten hasn't fully developed yet.
Bulk Fermentation: Bulk fermentation is the first rise of your dough. This is where the wild yeasts and bacteria in your starter work their magic, creating the characteristic sour tang and airy crumb. During bulk fermentation, your dough will undergo a series of “stretch and folds.” This is a simple technique where you gently stretch the dough and fold it over itself to build strength. This process should be repeated several times throughout the bulk fermentation period, usually every 30-60 minutes, for the first few hours.
Shaping the Dough: After bulk fermentation, gently shape your dough into the desired form (round or oblong). There are various shaping techniques, each with its own advantages. For a round loaf, the "boule," pull the edges of the dough towards the center, forming a tight ball (a batard), or a long oval shape. Your shaping technique will directly affect your final product’s appearance and structure.
Proofing: After shaping, your dough needs time to proof. This final rise is crucial for developing the final flavor. The length of the proofing period will vary depending on the temperature, the hydration of the dough, and the activity of your starter. Proofing can occur at room temperature or in the refrigerator.
Baking: The Culmination of Your Craft
Baking is the final act, transforming a shapeless mass of dough into a magnificent loaf of bread. The heat of the oven is the catalyst for the final transformation.
Preparing your Oven: Preheating is critical. A Dutch oven is an ideal tool for baking sourdough, as it traps steam, resulting in a beautiful crust and a fully risen loaf. Preheat your Dutch oven, with the lid on, to a high temperature (usually around 450-500°F / 232-260°C) for at least 30 minutes prior to baking.
Baking Procedure: Gently place your shaped loaf, seam-side up (or down if you prefer a more rustic look) into the preheated Dutch oven. Cover the Dutch oven with the lid, and bake for a specific period (usually 20-25 minutes). Then uncover the Dutch oven, and continue baking until the crust is a deep, golden brown and the internal temperature of the loaf reaches approximately 200-210°F (93-99°C).
Cooling the Bread: After baking, resist the urge to cut into your loaf immediately. Allow it to cool completely on a wire rack. This allows the crumb to fully set and prevents it from
