apple laptop filevault keyboard not working
Title: How to FIX Apple MacBook Air KEYBOARD & TRACKPAD Not Working After UPDATE
Channel: What Happens When
How to FIX Apple MacBook Air KEYBOARD & TRACKPAD Not Working After UPDATE by What Happens When
Apple Laptop FileVault Keyboard FAIL! (Emergency Fix Inside!)
Apple Laptop FileVault Keyboard Catastrophe: Don't Panic! (Easy Fixes!)
The heart leaps into the throat. Your Apple laptop, a sleek vessel of digital dreams, suddenly rebels. The keyboard, your trusty interface, seems to have abandoned ship. You're locked out of FileVault, the very vault that protects your precious data. Frustration mounts. Fear creeps in. But breathe. There's hope.
The FileVault Fiasco: A Familiar Foe
This scenario, unfortunately, isn't unique. Apple laptop keyboard failures, especially during FileVault password entry, are a frequent visitor to the online tech forums. It’s a frustrating experience, to say the least. You feel the cold grip of potential data loss. Your Mac, a supposed paradigm of user-friendliness, is now a frustrating roadblock. The keyboard refuses to cooperate precisely when you need it most.
Why This Happens: Decoding the Digital Demons
So, what's the culprit? Well, it's not always a single demon. Sometimes, particularly with older models, aging keys or hardware issues are to blame. However, software glitches, operating system hiccups, or driver conflicts also come into play. The FileVault initialization process can sometimes create conflicts. Consequently, the keyboard might not register your input correctly. Before you consider drastic measures, there are solutions.
Step-by-Step: Emergency Keyboard Recovery Protocols
Right, let’s get you back into your digital sanctuary. Follow these steps. They're designed to get you past the FileVault screen.
Restart and Recalibrate. This should be your first action. A simple restart often works wonders. Hold down the power button until your Mac shuts down. Wait a few seconds. Then, power it back on. As the Mac restarts, carefully observe the keyboard's response. Does it fully work? Great. If not, proceed to the next step.
External Keyboard Intervention. Connect an external USB or Bluetooth keyboard. FileVault often recognizes external keyboards. Now, enter your password using the external keyboard. You should now be logged in. This simple trick can bypass the internal keyboard issue. If this works, you have verified the problem may be the built-in keyboard.
Safe Mode Savior. When you restart the computer, hold down the Shift key. Keep holding it until you see the login screen. Safe Mode loads a minimal set of drivers. It’s a diagnostic tool. If the keyboard functions in Safe Mode, the issue probably lies with software or a driver. This is great news; it reduces the complexity of the problem.
Password Hints: Your Memory Jogger. FileVault prompts you for a password. Do you have any password hints enabled? They can sometimes provide the nudge you need to get into the system. It is always a good thing to have password tips enabled.
Troubleshooting Tactics: Delving Deeper
If the above steps don’t solve the problem, don’t lose hope. Several deeper troubleshooting strategies can help.
PRAM/NVRAM Reset. This clears settings related to the keyboard, etc. Shut down your Mac. Then turn it on. Immediately press and hold the Option-Command-P-R keys simultaneously. Keep holding those keys until you hear the startup chime twice. Release the keys. Log in and test the keyboard.
SMC Reset. The System Management Controller (SMC) manages hardware functions. Resetting the SMC can resolve keyboard issues. For MacBooks with a removable battery, remove the battery. Then, disconnect the power cord and hold down the power button for about 10 seconds. Then, put everything together, and boot it. For newer Macs, shut down the computer. Press and hold Shift-Control-Option. Press the power button and hold for 10 seconds. Release and start your computer.
User Account Password Reset. This can sometimes fix specific issues. Boot into Recovery Mode (hold Command-R during startup). Go to Utilities. Open Terminal. Type
resetpassword. Follow the prompts. Change and save your password. Restart your Mac.
The Software Sidekick: Exploring macOS Quirks
Software, surprisingly, can sometimes be the antagonist. Ensure you're running the most up-to-date version of macOS. Apple frequently releases updates. These updates include bug fixes. They can also address compatibility issues that might be impacting your keyboard. Also, examine any recently installed applications that might be interfering with keyboard functions. Uninstall them if necessary.
Hardware Horizon: Identifying and Addressing Physical Difficulties
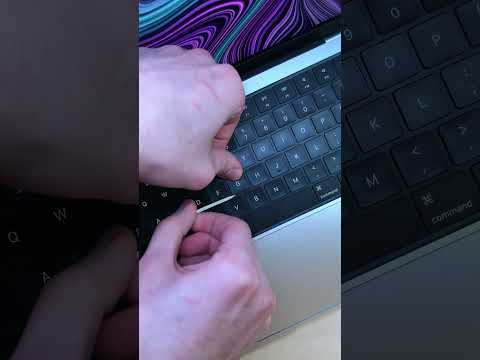
Sometimes, the problem is purely physical. Dust or debris can accumulate beneath the keys. They can prevent proper key registration. Use compressed air to carefully clean the keyboard. Ensure the laptop is turned off. Consider visiting an authorized Apple service provider for professional diagnostics. They have specialized tools and expertise to accurately assess and fix hardware problems.
Long-Term Strategies: Preventing Future Keyboard Calamities
Prevention is always better than a cure. Protect your investment.
Regular Backups. Back up your data. Use Time Machine or another preferred backup solution. This ensures that even if the keyboard experiences a total failure, your data remains safe.
Keyboard Covers. Use keyboard covers. This protects against dust and spills. This can prolong the lifespan of your Mac's built-in keyboard.
Professional Maintenance. Consider an annual check-up. This involves a professional inspection and cleaning of your keyboard.
Conclusion: Triumph Over Tech Troubles
An Apple Laptop FileVault keyboard failure is alarming. But don’t despair. As you've seen, solutions exist. By using the strategies, you have the potential to regain access to your data. Always have a plan. Troubleshooting is important. By taking the time to evaluate the root cause, you can often resolve the issue yourself. You can also secure the invaluable data on your computer. Now get back to doing what you love with your Mac!
Laptop Refusing to Connect to Work WiFi? This SHOCKING Trick Works EVERY Time!Apple Laptop FileVault Keyboard FAIL! (Emergency Fix Inside!)
Okay, Apple aficionados, let's talk about something that can send a shiver down any Mac user's spine: the dreaded FileVault keyboard failure. We've all been there, haven't we? You're staring down the lock screen of your precious MacBook, ready to dive into your digital world, and…nothing. The keyboard's unresponsive. Your password, the key to your kingdom, is stuck on the other side of a silent, uncooperative keyboard. Panic? Probably. But don't worry, because we're going to get through this together. We've been through the trenches, faced the keyboard demons, and emerged victorious. This isn't just a fix; it's a lifeline. Let's dive in!
1. The Silent Scream: What IS the FileVault Keyboard Issue?
First things first, what are we even dealing with? The FileVault keyboard issue is, put simply, a scenario where your MacBook's keyboard refuses to cooperate during the FileVault password entry stage. This is the point before your Mac boots up, that crucial moment when it's asking for the decryption key to unlock your precious data. Often, this happens after a macOS update, a power surge, or sometimes, seemingly, for no reason at all. It's like your keyboard decided to stage a silent protest. Sound familiar?
2. Why Now? Decoding the Keyboard Chaos
So, why does this happen? The reasons are frustratingly varied. Sometimes, it's a driver issue – macOS's internal communication pathways get crossed. Other times, it's a quirk with the secure boot environment, the pre-boot system that handles FileVault. Or, let's be honest, sometimes it's just Apple. They're brilliant, but even the best produce a bug or two! The truth is, pinpointing the exact cause can be tricky, but don't worry, the fix is often the same. Think of it as needing the right key for unlocking a door, the cause of the door jamming isn’t as important as finding the key.
3. Before You Panic: The First Steps to Take
Before you assume the worst (like a full system reset, or a trek to the Apple Store), let's try some simple troubleshooting. This is your first line of defense.
- Reboot, Reboot, Reboot: Seriously. Force a shutdown (hold the power button) and try booting again. Sometimes, a simple restart is all that's needed. Think of this as the digital version of "turning it off and on again".
- External Keyboard: Connect an external USB keyboard. Often, the internal keyboard fails, but an external one will work. This is your immediate workaround and can allow you to unlock your system.
- Check the Lights: Are the Caps Lock and other lights on your keyboard working? If they're unresponsive, it's a strong sign the keyboard isn't communicating.
4. The Emergency Fix: The External Keyboard Revelation!
This is often the quickest and most effective solution. As mentioned, connect an external USB keyboard before you boot up. Leave it plugged in. Restart your Mac, and at the FileVault login screen, use the external keyboard to enter your password. Success! You're in! Now, you can troubleshoot the internal keyboard at your leisure (more on that later). This is your Ace in the hole.
5. Digging Deeper: Software Solutions to the Rescue
If the external keyboard works, but your internal keyboard remains stubbornly silent, there are a few software-based fixes. Try these in this order:
- Safe Mode Boot: Restart your Mac while holding down the Shift key. This boots into Safe Mode, which disables many drivers and startup items. If that keyboard works, it points toward a software conflict. After entering Safe Mode, reboot normally and try the internal keyboard again. Sometimes, this simple reset is all that's needed.
- Reset NVRAM/PRAM: NVRAM (Non-Volatile RAM) or PRAM (Parameter RAM) stores settings like volume, screen resolution, and boot disk. A reset can sometimes clear up keyboard communication problems. To do this, shut down your Mac, then turn it back on and immediately hold down Option + Command + P + R keys simultaneously until you hear the startup chime a second time.
- Reinstall macOS: (Last Resort) If all else fails, a clean macOS installation can sometimes resolve deep-seated driver problems. This is time-consuming, so it's best to attempt other fixes first. Remember to back up your data before this drastic measure! This is like taking a sledgehammer to a problem.
6. Why an External Keyboard Works (and Why You Need to Know)
Think of your Mac's booting sequence like a formal dinner party. The internal keyboard can act like a guest who refuses to speak until dessert is served. An external keyboard? That's the well-behaved, reliable guest who knows how to jump in when the situation calls for it. When your Mac is trying to communicate with the internal keyboard before the full operating system boots, sometimes it's a problem with the USB drivers. The external keyboard, however, utilizes a more straightforward USB protocol that can bypass these problems. Understanding why this works can help you better diagnose the issue if it ever happens again.
7. The Mysterious Case of Bluetooth Keyboards (and Why They Might Not Work)
Bluetooth keyboards are wonderfully convenient, but they can be a bit of a headache during the FileVault login. That's because your Mac's Bluetooth connection isn't usually active until after the operating system has loaded. Therefore, you need a wired connection or, sometimes, a pre-paired Bluetooth keyboard that is set up to connect on boot for it to function. This is because the connection hasn’t been fully established before the FileVault prompt.
8. The Dreaded "Password Reset" Option (And When to Use It)
If all else fails, and you've enabled it, the "reset password" option can be a lifesaver. If you have set up a recovery key, make sure you have it written down or stored somewhere. You'll be prompted to enter the key, and then you can reset your password. It's a last resort, but it can save you from a data disaster.
9. Preventing Future Keyboard Nightmares: Proactive Measures
Prevention is always better than cure. Here are a few things you can do to minimize the chances of this happening again:
- Keep Your macOS Updated: Apple releases updates for a reason – they often include bug fixes and security improvements.
- Back Up Regularly: This is non-negotiable! Use Time Machine or your preferred backup method to protect your precious data.
- Monitor Your Startup Items: Sometimes, a rogue startup item can interfere with the boot process. Review your startup items in System Preferences/System Settings.
10. The Apple Store: When to Seek Professional Help
Let's be honest. Sometimes, you're just not going to fix this yourself. If you've tried all the above steps and your internal keyboard still refuses to cooperate, it's time to visit the Apple Store or an authorized service provider. It could be a hardware issue, and professional intervention may be necessary.
11. Hardware Mayhem: Possible Keyboard Failures
Let's face it, physical damage happens. Spilled coffee, a rogue crumb, or even a worn-out key can cause your keyboard to malfunction. If the keys feel sticky, don't respond to input, or are physically damaged, it might be time for a keyboard replacement.
12. FileVault: Understanding the Encryption Beast
FileVault is a powerful security feature that encrypts your entire hard drive or SSD. It's fabulous for protecting your data in case your laptop is lost or stolen. However, it also means that the encryption process needs to be working absolutely fine during boot up. This is what makes the keyboard failure so incredibly frustrating.
13. Your Data's Fortress: The Password's Importance
Your FileVault password is the key to the kingdom. Protect it as you would your firstborn. Do not share it, do not write it down in unsecured places, and definitely do not forget it.
14. The Human Element: Our Experiences
We’ve all had our own personal battles with the MacBook keyboard of doom. I remember one time I was in a coffee shop, and my keyboard just went silent during the FileVault prompt. Anxiety levels went through the roof! Luckily, I had an external keyboard in my bag (always carry one now!). So, we get it. This is not a fun scenario. This article is built from experience!
15. What Now? You're Equipped to Conquer!
You've got this! You've armed yourself with knowledge, armed yourself with troubleshooting steps, and you're now ready to face the FileVault keyboard issue head-on. Remember, a cool head and a methodical approach are your best allies. Keep an external keyboard handy, back up your data regularly, and don't be afraid to seek professional help if needed. Your Mac, and your data, are worth it!
Closing Thoughts:
We've navigated the treacherous waters of the FileVault keyboard FAIL! together. We've learned the why, the
Lenovo Laptop Camera Nightmare? FIX IT NOW!How to Fix Keyboard Macbook Not Working Repair Keys

By iSolution How to Fix Keyboard Macbook Not Working Repair Keys by iSolution
FileVault What Is It and Should I Enable It on My Mac

By Moonlock FileVault What Is It and Should I Enable It on My Mac by Moonlock
I broke my MacBook's F key
By Bog I broke my MacBook's F key by Bog

Title: 7 Ways To Fix a Mac Keyboard That Is Not Working Correctly
Channel: macmostvideo
7 Ways To Fix a Mac Keyboard That Is Not Working Correctly by macmostvideo
Wifi On Laptop
Here's the title: The Ultimate Guide to Choosing the Perfect Hiking Boots: Comfort, Durability, and Performance
The Ultimate Guide to Choosing the Perfect Hiking Boots: Comfort, Durability, and Performance
Venturing into the wilderness, traversing challenging terrains, and immersing oneself in the breathtaking beauty of nature is an experience unparalleled. However, the success and enjoyment of any hiking expedition hinge significantly upon the footwear one chooses. Hiking boots are not merely an accessory; they are the very foundation upon which every step is taken, every summit conquered, and every memory forged. Choosing the right pair is a critical decision, and with a plethora of options available, the process can feel overwhelming. This comprehensive guide is meticulously crafted to empower you with the knowledge and insights necessary to choose the perfect hiking boots, ensuring your comfort, durability, and performance are optimized for every adventure.
Understanding Your Hiking Needs: Matching Boots to the Terrain
Before delving into specific features, it's essential to understand where your hiking aspirations lie. The type of terrain you'll be traversing is the foremost determinant in selecting the appropriate hiking boot. This understanding dictates crucial aspects like boot height, rigidity, and the overall construction.
Day Hikes on Well-Maintained Trails: For casual day hikes on established trails, a lighter-weight hiking shoe or a mid-cut boot often suffices. These options offer enhanced flexibility and breathability, ideal for shorter distances and less demanding terrain. Look for features like a durable outsole with good traction and a supportive midsole to absorb shock.
Backpacking and Multi-Day Treks: Backpacking trips require a more robust boot designed to withstand heavier loads and provide superior ankle support. Look for a high-cut boot constructed from durable materials like full-grain leather or synthetic blends. A stiff midsole is crucial for stability on uneven terrain, and a waterproof membrane is essential for protection from the elements.
Off-Trail Hiking and Mountaineering: If your adventures lead you off the beaten path or into challenging alpine environments, a rugged, stiff boot is paramount. These boots typically feature a high-cut design, crampon compatibility, and a robust construction that can withstand rugged terrain, ice, and snow. Consider features like a thick, insulated midsole for warmth and a durable outsole with aggressive tread for maximum grip.
Material Matters: Exploring the Construction of Hiking Boots
The materials used in constructing hiking boots play a significant role in their performance, durability, and comfort. Familiarizing yourself with these materials empowers you to make informed decisions tailored to your specific needs.
Uppers: The upper portion of the boot is the most visible component, providing protection and support.
- Leather: Full-grain leather is renowned for its durability and water resistance. It offers superior protection from the elements and molds to the shape of your foot over time, providing a custom fit. However, leather boots require regular maintenance, including cleaning, conditioning, and waterproofing, to preserve their integrity.
- Split-Grain Leather: This material is more economical than full-grain leather and often used in combination with nylon or other synthetic materials. It offers good breathability and flexibility but is less durable and less water-resistant than full-grain leather.
- Synthetic Materials: Synthetics, such as nylon and polyester, are lightweight, breathable, and quick-drying. They are also more affordable than leather and require less maintenance. However, they may not be as durable or provide the same level of support as leather boots.
- Waterproof Membranes: Many hiking boots incorporate a waterproof membrane, such as Gore-Tex, to protect your feet from rain, snow, and water crossings. These membranes are breathable, allowing moisture vapor to escape while preventing liquid water from entering, keeping your feet dry and comfortable.
Midsoles: The midsole is the cushioning layer between the upper and the outsole, providing shock absorption and stability.
- EVA (Ethylene-Vinyl Acetate): EVA is a lightweight, flexible, and cushioning material commonly used in midsoles. It offers good shock absorption but tends to compress over time, losing its cushioning properties.
- Polyurethane (PU): PU midsoles are more durable and provide greater support than EVA. They resist compression and offer long-lasting cushioning, making them ideal for backpacking boots.
Outsoles: The outsole is the bottom of the boot, responsible for providing traction and grip.
- Rubber Compounds: Various rubber compounds are used in outsoles, each offering different characteristics. Softer rubbers provide superior grip on wet surfaces, while harder rubbers are more durable and abrasion-resistant.
- Tread Patterns: The tread pattern determines the boot's grip and stability. Deep, aggressive lugs are ideal for muddy or uneven terrain, while shallower lugs are suitable for trails.
Key Features to Consider: Optimizing Comfort and Performance
Beyond the basic materials, several key features contribute to the overall comfort, durability, and performance of your hiking boots.
Boot Height:
- Low-Cut: Offer the least ankle support and are best suited for day hikes on well-maintained trails.
- Mid-Cut: Provide moderate ankle support and are versatile enough for various terrains.
- High-Cut: Offer maximum ankle support and are ideal for backpacking, off-trail hiking, and mountaineering.
Fit and Sizing:
- Proper Fit is Paramount: Your hiking boots should fit comfortably without any pressure points.
- Consider Sock Thickness: Wear the socks you intend to hike in when trying on boots. This ensures proper sizing.
- Toe Box Space: Ensure ample space in the toe box to prevent blisters and allow your toes to splay naturally.
- Heel Hold: The heel should fit snugly, preventing slippage.
- Try On Boots in the Afternoon: Your feet tend to swell throughout the day; therefore, trying on boots in the afternoon provides a more accurate fit.
Lacing Systems:
- Traditional Lacing: Provides a customizable fit and allows for even pressure distribution.
- Speed Lacing: Offers quick and easy lacing adjustments, ideal for on-the-go adjustments.
- Hooks and D-Rings: Facilitate efficient lacing and secure the boot.
Waterproofness and Breathability:
- Waterproof Membranes: Essential for keeping your feet dry in wet conditions.
- Breathable Materials: Prevent moisture buildup and keep your feet comfortable.
- Ventilation: Some boots feature ventilation ports to enhance breathability.
Weight:
- Lighter Boots: Offer greater agility and reduced fatigue, suitable for day hikes.
- Heavier Boots: Provide more support and durability, ideal for backpacking and rugged terrain.
Maintenance and Care: Extending the Life of Your Hiking Boots
Proper maintenance and care are crucial for extending the lifespan of your hiking boots and ensuring optimal performance.
Cleaning:
- Remove Dirt and Debris: After each hike, remove any dirt, mud, or debris from your boots.
- Use Mild Soap and Water: Gently clean the uppers with mild soap and water.
- Rinse Thoroughly: Rinse away all soap residue.
Drying:
- Air Dry: Allow your boots to air dry naturally; avoid exposure to direct heat.
- Remove Insoles: Remove the insoles to speed up the drying process.
- Stuff with Paper: Stuffing the boots with newspaper or paper towels can help absorb moisture.
Conditioning:
- Leather Boots: Regularly condition leather boots with a leather conditioner to maintain their suppleness and prevent cracking.
- Synthetic Boots: Avoid applying leather conditioners to synthetic boots.
Waterproofing:
- Reapply Waterproofing: Reapply waterproofing treatments, such as sprays or waxes, to maintain the boot's water resistance.
Storage:
- Store in a Cool, Dry Place: Store your boots in a cool, dry place away from direct sunlight and heat.
- Avoid Compressing: Avoid compressing your boots during storage.
Testing and Breaking-In: Preparing for the Trail
Before embarking on a long hike, it's crucial to test and break in your new hiking boots. This process ensures a comfortable fit and prevents blisters.
Initial Tests:
- Wear Around the House: Wear your boots around the house for short periods to identify any pressure points.
- Gradually Increase Wear Time: Gradually increase the time you wear your boots to allow them to conform to your feet.
Breaking-In:
- Short Hikes: Go on short hikes on easy trails to break in your boots.
- Vary Terrain: Gradually introduce more challenging terrain to evaluate the boot's performance.
- Address Issues Early: If you experience any discomfort, adjust the lacing or consider using different socks.
Sock Selection:
- Moisture-Wicking Socks: Choose socks made from moisture-wicking materials, such as merino wool or synthetic fibers.
- Avoid Cotton Socks: Cotton socks retain moisture and can increase the risk of blisters.
- Consider Sock Liners: Sock liners can provide an extra layer of protection and wick away moisture.
Making the Final Decision: Choosing the Right Boots for You
Choosing the perfect hiking boots involves careful consideration of your hiking needs, the materials used, key features, and proper maintenance. There is no one-size-fits-all solution, but by understanding the factors outlined in this comprehensive guide, you can confidently select a pair of boots that will provide comfort, durability, and performance on your next
