dns server not working on laptop
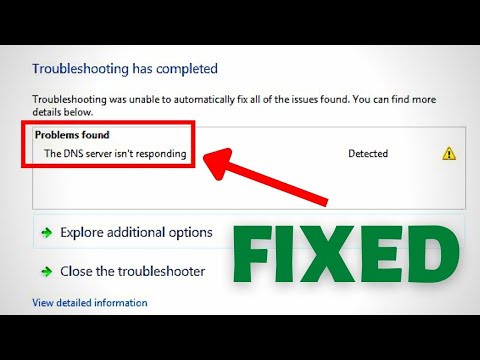
Title: Problem Found the DNS Server isn't responding Error on Windows 107 SOLVED
Channel: FIXsage
Problem Found the DNS Server isn't responding Error on Windows 107 SOLVED by FIXsage
dns server not working on laptop, dns server not responding on laptop, dns server not responding on hp laptop, dns server not responding only on laptop, dns server not responding dell laptop, how to fix dns server not responding on laptop, dns server error on laptop, dns server issue on laptop, dns on laptop not working, how to fix the dns server on my computer
Laptop DNS Nightmare: Fix Your Broken Internet NOW!
Laptop DNS Disaster: Rescuing Your Internet Connection, Right Now!
Oh no! Is your laptop throwing a digital tantrum, refusing to connect to the internet? Are you staring blankly at your screen, frustrated and disconnected? That sinking feeling is familiar, isn’t it? But fear not, friend! You’re not alone in this frustrating journey. Many of us have faced the dread of a broken internet connection. Let’s dive into a common culprit: the DNS (Domain Name System) issue. We’ll explore how to get your laptop back online, and fast.
Understanding the DNS Dilemma
Think of the internet as a vast, sprawling city. Websites are like buildings. Each building has a unique street address (IP address). The DNS works as a digital directory. It translates easy-to-remember website names (like google.com) into those complex IP addresses. Essentially, it’s the traffic controller of the internet. However, sometimes, this system can malfunction. Your laptop might struggle to find the address of the website you want to visit. Consequently, you wind up staring at an error message instead. Quite annoying, wouldn't you say?
Identifying the Problem: Is it Really DNS?
Before we leap into fixing anything, let's make sure the DNS is truly the culprit. Therefore, try a few quick tests. First, can you access the internet on other devices? If your phone, tablet, or another computer works perfectly, your laptop is likely the problem. Secondly, utilize a different website. Sometimes, a single website has issues. If several sites fail to load, the problem is broader. Furthermore, try pinging a website using the command prompt (Windows) or terminal (macOS/Linux). Do a search on how to do this. If you get a "request timed out" message, the DNS could be the issue.
The Quickest Fix: Flushing Your DNS Cache
Now, let's get to the fun part: actually fixing it! One of the most straightforward solutions is flushing your DNS cache. The DNS cache stores recently visited website addresses. Clearing it forces your laptop to retrieve fresh information. This frequently resolves problems. For Windows, open the command prompt as an administrator. Type ipconfig /flushdns and press Enter. For macOS, open the Terminal and type sudo killall -HUP mDNSResponder; say DNS cache flushed and hit Enter. You'll be prompted to enter your password. After doing so, restart your browser and attempt to browse again.
Switching DNS Servers: A Powerful Alternative
If flushing the cache doesn’t do the trick, it's time to try another method. Consider changing your DNS server. Your laptop likely uses your internet service provider's (ISP) default DNS servers. Sometimes, these can be slow or experience outages. Switching to a public DNS server can drastically improve speed and reliability. Google Public DNS (8.8.8.8 and 8.8.4.4) and Cloudflare (1.1.1.1 and 1.0.0.1) are popular and reliable choices.
How to Change Your DNS Settings
Here’s how to change your DNS settings on both Windows and macOS.
Windows: Open the Control Panel. Navigate to Network and Internet > Network and Sharing Center. Click “Change adapter settings.” Right-click on your active network connection (Wi-Fi or Ethernet). Next, select “Properties.” Double-click “Internet Protocol Version 4 (TCP/IPv4).” Select “Use the following DNS server addresses.” Enter your preferred DNS servers, such as Google’s or Cloudflare’s. Finally, click “OK” and close all windows.
macOS: Go to System Preferences > Network. Select your active network connection (Wi-Fi or Ethernet). Click “Advanced.” Select the “DNS” tab. Click the "+" button to add new DNS servers. Enter your preferred DNS servers. Click “OK” and “Apply.”
Investigating Your Router's Role
Your router might be the source of the problems. Restarting your router can often resolve DNS issues. Unplug it from the power outlet. Wait for thirty seconds. Plug it back in. Allow it to fully power up before testing your internet connection again. Sometimes, your router also has its own DNS settings. You might consider changing them.
Troubleshooting Steps: A More In-Depth Approach
If all else fails, it's time for deeper investigation. Ensure your network adapter drivers are up-to-date. You can find these in the Device Manager (Windows) or by checking for updates in System Preferences (macOS). Furthermore, run a network troubleshooter. Both Windows and macOS include built-in tools to diagnose network problems. Also, temporarily disable your firewall or antivirus software. Sometimes, these programs can interfere with DNS resolution. Remember to re-enable them afterward.
Keeping Your Connection Strong: Preventing Future Problems
Prevention is always better than cure. To prevent future DNS headaches, regularly flush your DNS cache. Periodically, check your router's firmware for updates. Additionally, consider using a reliable, public DNS server. This could save you a lot of time and frustration in the long run.
Beyond the Fix: A Connected World
Getting your laptop back online is a small victory, yet it reaffirms our connection to a wider world. So, go forth, browse freely, and stay connected. Now, you're ready to take on the internet—one website address at a time. You have conquered the Laptop DNS Nightmare!
Windows 11 Mouse Nightmare? FIX It NOW!Laptop DNS Nightmare: Fix Your Broken Internet NOW!
Ever had that gut-wrenching feeling? You're in the middle of something important – maybe a crucial Zoom call, finishing a work project, or even just streaming your favorite show – and bam! The internet decides to take a vacation. Your laptop, that trusty workhorse, suddenly looks as useful as a paperweight. The culprit? More often than not, it's a DNS issue. Don't panic! We've all been there, and we're here to help you navigate this digital minefield. Think of us as your internet sherpas, guiding you through the treacherous terrain of DNS troubles. We'll get you back online faster than you can say "reboot."
1. Why Is My Laptop Suddenly a Digital Dropout? Unmasking the DNS Drama!
The DNS, or Domain Name System, is essentially the internet's phonebook. When you type a website address (like google.com), your computer needs to translate that friendly name into a numerical IP address (a series of numbers) that the internet actually understands. The DNS server handles this translation for you. However, if your laptop can't reach the DNS server, or if the server itself is having issues, you'll likely see those frustrating "website cannot be reached" or "server not found" errors. It's like trying to call a friend but the phone company is down!
2. Decoding the Dreaded Error Messages: What's Your Laptop Trying to Tell You?
Before we dive into solutions, let's decipher the clues. Common error messages include:
- "This site can’t be reached"
- "DNSPROBEFINISHED_NXDOMAIN" (This one’s a mouthful! It generally means the DNS server couldn’t find the website you requested.)
- "Server DNS address could not be found"
- "The connection has timed out"
Identifying the specific error message is crucial. It provides a vital clue in our detective work. Consider it your starting point. If you see any of these, you're probably staring down a DNS issue. Don't worry, most of them are fixable!
3. The Usual Suspects: Common Culprits Behind Your Internet Woes
Sometimes, the problem isn't your laptop's fault. Here are some of the most likely suspects:
- Your Router: The router, the gatekeeper of your home network, can be having a bad day.
- Your Internet Service Provider (ISP): They might be experiencing an outage or have DNS server problems.
- Your Laptop's DNS Settings: These settings may be configured incorrectly, accidentally pointing to a non-existent server, or simply obsolete.
- Malware: Unfortunately, some malicious software can also interfere with your DNS settings.
- Outdated Network Drivers: Just like your car needs maintenance, so does your laptop's network card.
4. Simple First Aid: Reboot and Reset Your Way to a Solution!
Before we get into the nitty-gritty, let's try the digital equivalent of a cold compress. Sometimes, a simple reboot of your laptop and router can work wonders. It's the tech equivalent of turning it off and on again.
- Reboot Your Laptop: A fresh start can clear up temporary glitches.
- Restart Your Router: Unplug it, wait about 30 seconds, and plug it back in. This gives it a chance to refresh its connection.
5. Inspecting Your Laptop’s Network Settings: A Virtual Checkup!
Your laptop's network settings are the control center. Here’s how to check the basics (the exact steps might vary slightly depending on your operating system).
- Windows: Go to Control Panel > Network and Internet > Network and Sharing Center. Click on your active network connection (e.g., Wi-Fi or Ethernet). Then, click "Properties" and find "Internet Protocol Version 4 (TCP/IPv4)." Double-click it, and you'll see the DNS server settings.
- macOS: Go to System Preferences > Network. Select your network connection and click "Advanced." Then, click the "DNS" tab. You'll see the DNS server addresses currently in use.
6. The DIY DNS Doctor: Changing Your DNS Server Addresses
Your laptop likely uses your ISP's DNS servers by default. However, you can "upgrade" to more reliable and secure public DNS servers. It's like switching to a faster, more efficient internet highway.
- Google Public DNS: A popular and reliable option, using addresses 8.8.8.8 and 8.8.4.4.
- Cloudflare DNS: Known for its speed and security, with addresses 1.1.1.1 and 1.0.0.1.
- OpenDNS: Another widely used option, using addresses 208.67.222.222 and 208.67.220.220.
How to change them:
- Follow the steps in Section 5 to access your network settings.
- In the "Internet Protocol Version 4 (TCP/IPv4)" settings (Windows) or the DNS tab (macOS), select "Use the following DNS server addresses" (Windows) or click the "+" under DNS Servers (macOS).
- Enter the preferred and alternate DNS server addresses.
- Click "OK" or "Apply."
- Restart your browser or, ideally, your laptop.
7. Flushing the DNS Cache: Clearing Out the Digital Clutter
Your laptop stores a local "cache" of DNS information to speed up browsing. However, this cache can sometimes get corrupted. Flushing (clearing) it can resolve issues. Think of it as spring cleaning for your internet.
- Windows: Open Command Prompt (search for "cmd" in the Start menu) and type
ipconfig /flushdnsthen press Enter. - macOS: Open Terminal (search for "Terminal" in Spotlight) and type
sudo dscacheutil -flushcache; sudo killall -HUP mDNSResponderthen press Enter. You may be prompted for your password.
8. Diagnosing the Root Cause: Using Command-Line Tools
If the above steps don’t work, we can use some command-line tools to diagnose the problem. These are like the x-rays for your internet woes!
ping: Checks if your laptop can reach a specific website or IP address. For example, typeping google.comin Command Prompt or Terminal. If you see replies, your basic connection is likely working. If you see "Request timed out," the problem might be deeper.nslookup: Queries a DNS server to get the IP address for a domain name, revealing any issues with DNS resolution. Typenslookup google.comin the Command Prompt or Terminal. If the response comes back with the correct IP address, your DNS settings are probably okay. If not, your DNS settings are the likely cause.
9. Troubleshooting Your Router: The Gatekeeper's Troubles
Your router can be the source of the trouble.
- Check for Outages: See if other devices on your network are experiencing the same issues. If they are, the router is likely the problem.
- Restart Your Router: We touched on this earlier. It solves many problems.
- Update Router Firmware: Outdated firmware can cause issues. Check your router's manufacturer's website for updates.
- Check your router’s DNS settings: Some routers have DNS settings. Ensure these are correct and not overridden.
10. The Malware Check: Shielding Your Internet from Digital Threats
Malware can sometimes hijack your DNS settings. Running a malware scan is essential.
- Use a reputable antivirus program: Run a full system scan to detect and remove any malicious software. (e.g. Windows Defender, Malwarebytes, or others).
11. Advanced Tactics: Digging Deeper into the DNS Landscape
If the simpler fixes don't work, we can delve into more advanced troubleshooting:
- Check your hosts file: This file can override DNS lookups. On Windows, it's located at C:\Windows\System32\drivers\etc\hosts. On macOS and Linux, it's /etc/hosts. Ensure there aren't any unexpected entries.
- Consider a VPN: A Virtual Private Network (VPN) can bypass DNS issues by using its own DNS servers. This can be a temporary workaround.
12. Preventing Future DNS Nightmares: Proactive Planning
Once you've fixed the problem, how do you stay safe from DNS issues in the future?
- Choose reliable DNS servers: Stick with Google Public DNS, Cloudflare DNS, or OpenDNS.
- Keep your laptop updated: Regular operating system, software, and driver updates can help prevent problems.
- Use Antivirus and firewalls: Always keep your defenses up and running.
- Educate yourself: Being proactive can reduce the impact of a DNS issue.
13. When In Doubt, Seek Outside Help: Calling in the Pros!
If you've tried everything and still can't get online, don't despair! Consider contacting your ISP or a tech support professional
Laptop WiFi Nightmare Solved! (Finally!)Fix DNS Server Isnt Responding Error on Windows 107 Quick Solution

By Learn Infoxta Fix DNS Server Isnt Responding Error on Windows 107 Quick Solution by Learn Infoxta
The DNS Server isn't Responding - Cara Mengatasi Tidak Bisa Konek Internet

By Techdidak The DNS Server isn't Responding - Cara Mengatasi Tidak Bisa Konek Internet by Techdidak
Change DNS in Windows

By XLS Tech Change DNS in Windows by XLS Tech

Title: How To Fix Wifi No Internet Access Fix DNS Server Is Not Responding
Channel: AP CHANNEL ASLI
How To Fix Wifi No Internet Access Fix DNS Server Is Not Responding by AP CHANNEL ASLI
Laptop Working
Here is the title: The Ultimate Guide to Choosing the Right Photography Lens for Your Needs
The Ultimate Guide to Choosing the Right Photography Lens for Your Needs
Photography, at its core, is the art of capturing light. And the instrument through which we sculpt that light, shaping it into the images we envision, is the lens. Far more than just a piece of glass and metal, the lens is your primary tool, the very gateway through which you perceive and record the world. Choosing the correct lens isn't simply about acquiring equipment; it's about aligning your artistic vision with the technical capabilities of your tools. This guide will serve as your comprehensive atlas, navigating the complex landscape of lenses, demystifying the terminology, and ultimately empowering you to make informed decisions that will elevate your photography.
Understanding Focal Length: The Foundation of Your Vision
Focal length, measured in millimeters (mm), is arguably the most fundamental attribute of a lens. It dictates the angle of view and how the scene is rendered. This single specification profoundly impacts the final image, altering perspective and influencing the feel of the photograph. Comprehending focal length is paramount before even considering aperture, as it forms the groundwork for everything that follows.
Wide-Angle Lenses (e.g., 14mm - 35mm): Imagine standing on a mountaintop, able to encompass the entire panorama in a single glance. Wide-angle lenses provide a similarly expansive view, capturing a broad field of vision. They're invaluable for landscape photography, architectural shots, and situations where you want to include a large portion of the scene. These lenses tend to exaggerate the relative size of objects, making them excellent for emphasizing foreground elements. The distortion can be creatively employed, particularly in architecture, although it must be managed carefully to maintain structural integrity. Specific examples include the Canon EF 16-35mm f/2.8L III USM and the Sony FE 16-35mm f/2.8 GM.
Standard Lenses (e.g., 35mm - 50mm): These lenses approximate the perspective of the human eye, offering a natural-looking view of the world. Often referred to as "nifty fifties," 50mm lenses, in particular, are renowned for their versatility, affordability, and often, excellent image quality, especially in terms of sharpness at their maximum aperture. They excel in various genres, including street photography, portraiture, and general photography. The minimal distortion and natural perspective make them ideal for everyday shooting. Consider the Nikon AF-S NIKKOR 50mm f/1.8G or the Canon EF 50mm f/1.8 STM for accessible and high-performing options.
Telephoto Lenses (e.g., 70mm - 600mm+): Telephoto lenses are the binoculars of photography, bringing distant subjects closer. They compress the perspective, making backgrounds appear closer to the foreground, and are essential for wildlife photography, sports photography, and creating shallow depth of field effects, isolating the subject from its surroundings. The longer the focal length, the more amplified these effects become. Choices here include the Sony FE 70-200mm f/2.8 GM OSS for excellent versatility, or professional options like the Canon EF 100-400mm f/4.5-5.6L IS II USM for reaching far-off subjects.
Decoding Aperture: Controlling Light and Depth of Field
Aperture, often confused with focal length, is the opening within the lens that controls the amount of light passing through to the camera sensor or film. It is measured in f-stops (e.g., f/2.8, f/8, f/22). The lower the f-number, the wider the aperture, and the more light that enters the lens. This directly impacts two crucial aspects of photography: exposure and depth of field.
Exposure Control: A wider aperture (lower f-number) allows more light to reach the sensor, enabling faster shutter speeds in low-light conditions, which helps to freeze motion and reduce camera shake. This is invaluable when shooting in dimly lit environments or when you want to freeze a fleeting moment.
Depth of Field: Aperture profoundly influences the depth of field, which is the area of the image that appears in focus. A wide aperture (e.g., f/2.8) produces a shallow depth of field, blurring the background and isolating the subject. This is a cornerstone technique in portraiture, where the subject is sharply focused, and the background is elegantly diffused. In contrast, a small aperture (e.g., f/16 or f/22) yields a large depth of field, keeping both the foreground and background in sharp focus, ideal for landscape photography where you want everything from the blades of grass to the distant mountains to be crisp.
Consider the Sigma 35mm f/1.4 DG HSM Art for its excellent low-light performance and stunning background blur, perfect for portraits.
Exploring Lens Types: Prime vs. Zoom
The landscape of lenses further branches into two fundamental categories: prime lenses and zoom lenses. Each offers unique advantages and disadvantages, and the optimal choice hinges on your photographic needs and shooting style.
Prime Lenses: Prime lenses have a fixed focal length (e.g., 50mm, 85mm). They typically boast a wider maximum aperture than zoom lenses, allowing for superior low-light performance and shallower depth of field. Because they have fewer moving parts, prime lenses often deliver superior image quality, sharpness, and can sometimes be more compact and lightweight. The trade-off lies in their inflexibility; to change the framing, you must physically move closer or further away from your subject. They encourage a more deliberate and thoughtful approach to composition. Examples showcase the Nikon NIKKOR Z 50mm f/1.8 S or the Sony FE 85mm f/1.4 GM.
Zoom Lenses: Zoom lenses offer a range of focal lengths, providing versatility and convenience. With a single lens, you can switch between wide-angle, standard, and telephoto perspectives without changing lenses. They're invaluable for situations where you need to quickly adapt to changing conditions or want to frame your subject in various ways without physically moving. However, zoom lenses often have a narrower maximum aperture than prime lenses, impacting low-light capabilities and depth of field control. Their complex design can sometimes lead to a slight reduction in image quality compared to primes. Popular choices include the Canon RF 24-70mm f/2.8L IS USM and the Tamron 28-75mm f/2.8 Di III VXD.
Understanding Stabilisation: Reducing Camera Shake
Image stabilisation, often referred to as vibration reduction (VR) or optical stabilisation (OS), is a crucial feature that reduces the effects of camera shake, particularly when shooting handheld or at slower shutter speeds. This technology compensates for the subtle movements that can blur images, especially when using telephoto lenses or in low-light conditions.
How it Works: Image stabilisation systems work by using sensors that detect camera movement and then shift elements within the lens to counteract that motion. This allows you to use slower shutter speeds without introducing blur, giving you more flexibility in challenging lighting situations.
When it Matters Most: Image stabilisation is incredibly beneficial for:
- Telephoto lenses: The longer the focal length, the more susceptible the image is to camera shake.
- Low-light photography: Where slow shutter speeds are often necessary.
- Shooting handheld: Eliminating the need for a tripod in many situations.
Choosing a lens with image stabilisation can significantly improve your success rate, especially when working in these conditions. Lenses like the Sony FE 70-200mm f/2.8 GM OSS showcase this technology effectively.
Considering Lens Mounts: Compatibility is Key
Before purchasing a lens, you must ensure it's compatible with your camera's lens mount. The lens mount is the physical interface that connects the lens to your camera body. Different manufacturers have different mount systems, so lenses are often designed for specific camera brands.
- Popular Mount Systems:
- Canon EF/EF-S/RF: Canon's mount systems. EF lenses are for full-frame DSLRs, EF-S are for some crop-sensor DSLRs, and RF is for their mirrorless cameras.
- Nikon F/Z: Nikon provides F mount for their DSLRs, and Z mount for their mirrorless cameras.
- Sony E/FE: Sony has the E-mount for their mirrorless cameras, FE for full-frame and E for crop.
- Micro Four Thirds (MFT): A standard used by Olympus and Panasonic for mirrorless cameras.
- Choosing the Right Mount: Verify the mount of your camera, and choose a lens compatible with it. Incorrect mounting may result in a nonfunctional setup.
Additional Factors: Considering Build Quality and Special Features
Beyond the core specifications, several additional factors can influence your lens choice:
Build Quality: Consider the lens's construction, materials used, and weather sealing. High-quality lenses are typically constructed from durable materials and feature weather sealing to protect them from dust, moisture, and other environmental conditions. This is critical for outdoor photography.
**Autof
