laptop left click not working
Title: Fix Left Click Not Working Windows 10
Channel: MDTechVideos
Fix Left Click Not Working Windows 10 by MDTechVideos
laptop left click not working, laptop left click not working windows 10, laptop left click not working windows 11, touchpad left click not working, laptop mouse click not working, touchpad left click not working windows 11, macbook trackpad left click not working, touchpad left click not working lenovo, touchpad left click not working dell, dell laptop left click not working
Laptop Left Click Dying? FIX It NOW!
My Laptop's Left Click is Officially on the Brink! (And How I Saved It)
Alright, let's be honest. There’s a gut-wrenching moment every laptop user knows. It's the slow realization that your trusty left-click button is… well, dying. The dreaded single click that morphs into a double-click, the unresponsiveness, the click that only works if you’re willing to apply a Herculean amount of pressure. Trust me, I've been there. In fact, I've been here again recently. That little click, that all-important interface point between you and your digital world, suddenly going AWOL? It's a major headache.
The Click That Failed: Recognizing the Symptoms
First, you should know what you’re up against. Before diving in, be absolutely sure the left click is the villain. Does it consistently misbehave? Does it register a click when you haven't clicked? Does it take multiple tries to respond? Perhaps the click itself feels…different? These are the telltale signs. Often, though, the problems are subtle at first. You begin to unconsciously compensate. You apply more pressure. You click repeatedly. Therefore, don't ignore tiny changes. Soon, the annoyance morphs into frustration. Then, it becomes outright panic.
Quick Fixes: Before You Panic Sell
Before you consider trashing your laptop, let's explore a few rapid-fire solutions. Firstly, give your mouse a good clean. Yes, really! Dust and debris can accumulate in those tiny crevices. Therefore, grab a can of compressed air. Gently, blast it around the button's edges. Try it again; you might be surprised! Additionally, sometimes a simple restart can work wonders. This refreshes the system. Consequently, it can resolve minor software glitches.
Deep Dive: Tweaking Your Mouse Settings
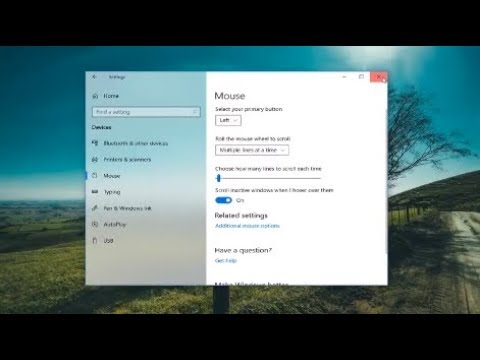
If those quick fixes didn't work, it's time to delve a little deeper. Navigate to your laptop's settings menu. Look for "Mouse" or "Devices". Different operating systems have different layouts, so search is your best friend. Within the settings, play around with the click speed. Sometimes, a slower setting can help. Also, inspect the other options as well. Also, ensure you haven't accidentally enabled some quirky setting. Often, it is a simple setting that is causing the issue.
Hardware Heroes: Tackling the Physical Problem
Now, for the potentially trickier stuff. We are now talking about the possibility of actual hardware issues. However, don't fret yet! The left click failing doesn’t necessarily mean the whole thing is ruined.
A) The External Mouse Experiment: If possible, plug in an external mouse. The moment of truth. IF the external mouse works as expected, the issue almost certainly lies within the laptop's built-in trackpad or its button.
B) The Trackpad Tango: If you’re comfortable (and confident), you can try disassembling the laptop. Be extraordinarily careful. You could accidentally make it worse. Remove the screws. Carefully access the trackpad. Look for anything obviously out of place. Inspect the ribbon cable connecting the trackpad to the motherboard. Often, this is enough to identify the problem.
C) Button Blues: Replacing the Click Replacing the click button itself is another option. This requires basic soldering skills. You’ll need a replacement button, which you can usually source online. Furthermore, watch a few videos. Don’t rush, and take your time. If you're not confident with soldering, find a local repair shop. This might be the best option.
Software Sabotage? Troubleshooting Potential Conflicts
It’s also worth considering software problems. Occasionally, a rogue driver will wreak havoc. First, head to the Device Manager. Look for your mouse or trackpad. From here, attempt to update the drivers. You can also uninstall them completely. Restart your laptop. Windows should automatically reinstall generic drivers. However, if the issue persists, consider restoring your system to a previous point in time. Remember, system restore is a powerful tool.
Preventative Measures: Keeping the Click Alive
So, you fixed it. Fantastic! But now what? Prevent future problems. Treat your trackpad with respect. Avoid aggressive clicking. Similarly, keep your fingers clean. From now on, regularly clear your trackpad of dust and debris. Finally, consider purchasing an external mouse. In other words, this will reduce wear and tear on the laptop’s built-in button.
The Final Click: A Lesson Learned
Ultimately, a dying left-click button is a common problem. It can be frustrating. Therefore, don't panic. By following these steps, you should be able to diagnose. You might even be able to fix the problem yourself. Ultimately, technology can fail, and it’s often not the end of the world. However, armed with the right knowledge, you can save your sanity, wallet, and your laptop!
Dell Laptop Disaster: Home & End Buttons DEAD! (Easy Fix Inside)Laptop Left Click Dying? FIX It NOW!
Hey everyone, let's be honest, there's nothing quite as frustrating as a wonky laptop left click. It's the digital equivalent of a sputtering engine, a tiny, persistent annoyance that can derail your productivity and send your stress levels soaring. We've all been there, haven't we? That frustrating moment when you click, and…nothing. Or maybe you get a double-click when you only wanted one. Don't worry, you're not alone! We're going to dive deep into this common computer ailment and, more importantly, how to fix it.
1. The Annoying Truth: Why Your Left Click Is Giving Up the Ghost
Think of your laptop's left click as the gatekeeper to everything. From opening files to selecting text, it's the workhorse of your computing experience. When it starts to fail, the world feels a little…clumsier. But why does this happen? Well, the reasons are as varied as the apps on your desktop, ranging from simple software glitches to more complex hardware problems. It's like a puzzle, and we're going to piece it together.
2. Troubleshooting 101: Quick Checks to Get You Started
Before we start dismantling your laptop (unless you're feeling particularly adventurous!), let's try some quick, non-invasive troubleshooting steps. Think of these as the digital equivalent of checking the fuses before calling the electrician.
- Restart, Restart, Restart: Seriously, this solves so many problems. It's the IT equivalent of "Have you tried turning it off and on again?". Give it a shot.
- Check Your Mouse Settings: Navigate to your control panel (or settings, depending on your operating system) and make sure your mouse settings are configured correctly. Accidental tweaks can lead to chaos.
- Test with an External Mouse: This is a crucial step. If an external mouse works perfectly, the problem is likely within your laptop’s trackpad or its associated drivers. If the external mouse is also acting up, you're looking at a broader issue.
3. Driver Drama: Updating or Reinstalling Your Touchpad Driver
Drivers are the unsung heroes (and sometimes villains) of the computing world. They're the software that allows your hardware to communicate with your operating system. Outdated or corrupted drivers can wreak havoc on your left click. Let's fix this!
- Locate Your Driver: You'll find your touchpad driver in Device Manager (search for it in the Windows search bar).
- Update or Reinstall: Right-click on your touchpad device and select "Update driver" or "Uninstall device" (and then restart your computer). Windows often automatically reinstalls the driver.
4. Trackpad Troubleshooting: Cleaning & Calibration
Sometimes, the simplest solutions are the best. Your trackpad could be clogged with dust, crumbs, or just plain gunk. A thorough cleaning might be all you need.
- Gentle Cleaning: Use a soft, lint-free cloth (like a glasses cloth) and gently wipe down the trackpad. Avoid harsh chemicals.
- Calibration: Some laptops have built-in trackpad calibration tools. Search your laptop manufacturer's website for instructions on how to access and use these tools.
5. The Hardware Headache: Inspecting the Physical Button (If Applicable)
If your laptop has a physical left-click button (as opposed to a trackpad that is the button), there might be a hardware issue. It’s like a clogged drain, sometimes you just need to take it apart and clean it. This is where things get a bit more involved.
- Look for Obvious Damage: Examine the button for any visible damage, like cracks or dents.
- The DIY Option (Proceed with Caution!): If you're comfortable, consult your laptop's service manual (search online for your specific model). This will guide you on how to disassemble and inspect the button. BE CAREFUL!
6. The Software Sabotage: Virus Attacks & Malware Mischief
Viruses and malware can be real digital gremlins, causing all sorts of unexpected issues, including problems with your mouse functions.
- Run a Scan: Use your antivirus software to perform a full system scan.
- Check for Suspicious Processes: In Task Manager (Windows) or Activity Monitor (Mac), look for any unfamiliar or resource-intensive processes that might be interfering with your mouse.
7. External Influences: Interference from Other Devices
Believe it or not, other devices can occasionally interfere with your laptop's functionality.
- Unplug External Devices: Disconnect any external mice, keyboards, or other USB devices to see if they're causing a conflict.
- Wireless Interference: If you're using a wireless mouse, try moving your laptop away from other electronic devices that might be causing interference.
8. Advanced Diagnostics: Checking System Files
Sometimes, the problem lies deeper within your operating system.
- Run System File Checker (SFC): This built-in Windows tool scans for and repairs corrupted system files. Open Command Prompt as an administrator and type
sfc /scannow. - (Mac Users): macOS also has system integrity protection that can help identify and fix some issues.
9. Resetting the Beast: Reinstalling Your Operating System as a Last Resort
If all else fails, a fresh install of your operating system might be the only solution. Think of it as hitting the "reset" button on your digital life.
- Backup Your Data: Back up all your important files before proceeding!
- Follow the Instructions: Consult your laptop manufacturer's website or the operating system's documentation for instructions on how to reinstall.
10. The Trackpad's Last Stand: Replacing the Trackpad Itself
If the trackpad itself is faulty, replacement might be the only option.
- Assess Your Skill Level: Replacing the trackpad requires some technical skill. If you're not comfortable, seek professional help.
- Find a Replacement: Search online for a replacement trackpad for your specific laptop model.
11. Seeking Expert Advice: When to Call in the Professionals
Sometimes, the problem is beyond your skillset. Don't be afraid to seek professional help!
- Find a Reputable Repair Shop: Do your research and find a trustworthy laptop repair shop in your area.
- Explain the Problem Clearly: Describe the problem you're experiencing in detail to the technician.
12. The Cost of Convenience: Understanding Potential Repair Costs
Laptop repairs can range in price, depending on the issue and the complexity of the repair.
- Get a Quote: Always get an estimate before authorizing any repair work.
- Consider the Value: Weigh the repair cost against the value of your laptop. Sometimes, it's more economical to replace the laptop.
13. Preventing Future Failures: Maintaining Your Trackpad and Avoiding Problems
Prevention is always better than cure! Here’s how to keep your left click happy and healthy.
- Keep It Clean: Regularly clean your trackpad to prevent the buildup of dirt and debris.
- Avoid Rough Treatment: Treat your laptop with care. Avoid dropping it or subjecting it to extreme temperatures or humidity.
- Install Updates: Keep your drivers and operating system updated to ensure optimal performance and compatibility.
14. The Alternative: Embracing the External Mouse Life
If all else fails, or if you just prefer it, an external mouse can be a great solution. It's like switching from a manual to an automatic transmission.
- Choose Your Weapon: There's a vast selection of mice available, from basic models to high-end gaming mice.
- Connect and Conquer: Simply plug in your mouse or connect it wirelessly, and you're back in business.
15. Beyond the Click: Exploring Accessibility Options
Sometimes, physical limitations or personal preferences make using a traditional mouse difficult.
- Consider Alternative Input Devices: Explore options like trackballs, touchscreens, or even eye-tracking technology.
- Customize Your Settings: Adjust your mouse settings to suit your needs, such as adjusting the double-click speed or enabling mouse keys (using the number pad to control the mouse pointer).
Conclusion: Taking Control of Your Click
So, there you have it! We've covered a lot of ground, from simple troubleshooting steps to more complex repairs. Remember, don’t panic! Take it one step at a time, and armed with this knowledge, you’re well on your way to fixing that pesky left click and regaining control of your laptop. Think of it as becoming the maestro of your digital orchestra, where every click is in perfect harmony. Now go forth and conquer!
FAQs: Your Burning Left Click Questions Answered
My left click sometimes works; sometimes it doesn’t. What could be the problem? This intermittent behavior often points to a driver issue, a hardware problem (like a loose connection), or a software conflict. Try updating your drivers and running a system scan. If it continues, consider a more in-depth hardware diagnostic, and look into external influences.
Is it possible to fix a laptop left click at home? Absolutely! Many of the solutions we’ve discussed can be done at home with some basic troubleshooting skills. Cleaning your trackpad, updating drivers, and running
Right and Left click not working in laptop keypad

By Smart Security Right and Left click not working in laptop keypad by Smart Security
how to fix laptop right click mouse bottom in windows, kaise right click mouse bottom fix kare.

By RaiSolutionTech how to fix laptop right click mouse bottom in windows, kaise right click mouse bottom fix kare. by RaiSolutionTech
How To Fix Left Click Not Working While Using Keyboard

By qwertypop How To Fix Left Click Not Working While Using Keyboard by qwertypop

Title: How To Fix Mouse Left-Click Not Working Solved
Channel: HowtoUS
How To Fix Mouse Left-Click Not Working Solved by HowtoUS
My Laptop Work
Here is your article title: The Ultimate Guide to Choosing the Perfect Hiking Boots for Any Adventure
The Ultimate Guide to Choosing the Perfect Hiking Boots for Any Adventure
Embarking on a hiking adventure is an experience unlike any other. The allure of the open trail, the challenge of navigating diverse terrains, and the breathtaking vistas that reward your efforts all contribute to an unforgettable journey. However, the foundation of any successful hike lies beneath your feet: your hiking boots. Choosing the right pair is paramount, essential to ensuring comfort, preventing injury, and maximizing your enjoyment of the trail. This comprehensive guide will equip you with the knowledge needed to select the perfect hiking boots, tailored to your individual needs and the adventures that await.
Understanding the Anatomy of a Hiking Boot: Decoding the Key Components
Before diving into the selection process, it's crucial to understand the various components that make up a hiking boot and their specific functions. Each element contributes to the overall performance and suitability of the boot for different terrains and activities.
The Upper: This is the outermost layer of the boot, providing protection and support to the foot. Uppers are typically constructed from leather, synthetic materials, or a combination of both. Leather uppers offer excellent durability and water resistance, conforming to the foot over time for a personalized fit. Synthetic uppers, on the other hand, are often lighter, more breathable, and faster drying. The choice between leather and synthetic depends on your priorities: durability and water resistance versus weight and breathability.
The Midsole: This layer is sandwiched between the upper and the outsole, responsible for cushioning and shock absorption. Midsole materials commonly include EVA (Ethylene Vinyl Acetate) and PU (Polyurethane). EVA midsoles are known for their lightweight properties and good cushioning, making them ideal for lighter hikes. PU midsoles offer superior durability and support, suitable for heavier loads and more rugged terrain.
The Outsole: This is the bottom of the boot, the component that makes contact with the ground. Outsoles are made of rubber and feature a tread pattern designed to provide traction on various surfaces. The lug design (the pattern and depth of the grooves) is crucial: deeper, more aggressive lugs are preferred for muddy or uneven trails, while shallower lugs may suffice for well-maintained paths. The type of rubber also affects performance; Vibram outsoles are renowned for their grip and durability.
The Shank: This stiffener is located within the insole and running through the midsole, providing structural support and rigidity. Shanks enhance stability, particularly when carrying heavy loads or traversing uneven terrain. Stiff shanks are crucial for mountaineering boots, while flexible shanks may be sufficient for day hikes on relatively smooth trails.
The Insole: This is the removable footbed inside the boot, providing cushioning and arch support. Aftermarket insoles can be used to customize the fit and provide further support, especially for individuals with specific foot needs such as high arches or flat feet.
Determining Your Hiking Needs: Assessing Your Hiking Style and Terrain
The "perfect" hiking boot doesn't exist; the ideal choice is the one that best suits your individual needs and the types of trails you'll be traversing. Consider the following factors to guide your selection:
Hiking Distance and Frequency: If you're a casual hiker venturing out for short day trips, a lighter-weight boot or even a supportive hiking shoe might suffice. For longer hikes, backpacking trips, and frequent use, you'll need a more robust boot that offers greater support and durability.
Terrain Type: The terrain you'll be hiking on significantly influences your boot choice. For well-maintained trails with minimal elevation gain, a lighter boot with a flexible sole may be adequate. However, for rocky, uneven, or steep trails, a stiffer boot with more ankle support and a durable outsole is essential.
Weather Conditions: Consider the climate and weather conditions you anticipate encountering. For wet environments, prioritize waterproof and breathable boots. If you hike in cold conditions, opt for insulated boots to keep your feet warm.
Load Carrying: Are you carrying a heavy pack? If so, you'll need a boot with superior ankle support and a stiffer midsole to distribute the weight and prevent foot fatigue.
Types of Hiking Boots: A Comprehensive Overview
Hiking boots come in various styles, each designed to meet specific hiking needs. Understanding these categories will help you narrow down your options:
Hiking Shoes (Day Hiking): These are low-cut shoes ideal for day hikes on well-maintained trails. They offer excellent breathability and flexibility, making them comfortable for shorter distances.
Light Hiking Boots: These mid-cut or high-cut boots provide more ankle support than hiking shoes while remaining relatively lightweight. They are suitable for day hikes and shorter backpacking trips on moderate terrain.
Midweight Hiking Boots: These boots offer enhanced support and durability, making them suitable for longer backpacking trips and more rugged terrain. They typically feature stiffer midsoles and better ankle support than lighter options.
Heavyweight Hiking Boots: Designed for serious backpacking, mountaineering, and demanding conditions, these boots offer maximum support, durability, and often, insulation. They feature rigid midsoles and are compatible with crampons.
Mountaineering Boots: These are specialized boots designed for high-altitude climbing and ice travel. They are exceptionally rigid, providing excellent support and compatibility with crampons.
The Fit is King: Ensuring a Proper Fit for Optimal Comfort and Performance
A well-fitting hiking boot is crucial for preventing blisters, minimizing foot fatigue, and maximizing overall comfort. Follow these guidelines when trying on boots:
Try on Boots at the End of the Day: Your feet tend to swell throughout the day, so trying on boots later in the day ensures a more accurate fit.
Wear Appropriate Socks: Always wear the type of socks you plan to hike in when trying on boots. This includes hiking socks made of merino wool or synthetic materials. Avoid cotton socks, which can trap moisture and lead to blisters.
Leave Room in the Toe Box: There should be approximately a thumb's width of space between the end of your longest toe and the end of the boot. This allows for foot expansion on descents and prevents your toes from hitting the front of the boot.
Check the Heel Cup: The heel should fit snugly in the heel cup, without excessive movement. A slight amount of heel lift is acceptable, but too much can lead to blisters.
Walk Around the Store: Spend time walking around in the boots to assess comfort and evaluate how they perform. Walk up and down ramps if available to test the stability of your ankles.
Lace the Boots Properly: Ensure the laces are laced snugly, but not overly tight, to provide even support and prevent pressure points. Experiment with different lacing techniques to optimize fit.
Consider Wide or Narrow Widths: If your feet are wide or narrow, look for boots specifically designed in those widths. This will improve comfort and prevent issues related to improper fit.
Materials Matter: Choosing the Right Construction for Your Needs
The materials used in hiking boots significantly impact their performance and suitability for different environments:
Leather: Durable, water-resistant (when treated), and molds to your foot over time, providing a personalized fit. Requires regular maintenance and is typically heavier than synthetic options.
Synthetic: Lighter, more breathable, and dries faster than leather. Offers good performance in wet conditions and requires less maintenance. May not be as durable as leather.
Waterproofing: Look for boots with a waterproof membrane, such as Gore-Tex, to keep your feet dry in wet conditions. However, waterproof membranes can also reduce breathability; consider this tradeoff based on your typical hiking environment.
Breathability: Hiking boots with breathable uppers and moisture-wicking linings help to reduce sweating and prevent blisters.
Outsole Rubber: Vibram outsoles are a standard for quality, with designs optimized for various terrains. Consider the lug pattern and rubber compound to ensure appropriate traction for your needs.
Caring for Your Hiking Boots: Extending Their Lifespan and Performance
Proper care and maintenance are essential to prolong the lifespan of your hiking boots and ensure they perform optimally:
Cleaning: After each hike, remove dirt and debris from your boots using a brush and mild soap. Thoroughly dry the boots before storing them.
Waterproofing: Regularly treat leather boots with a waterproofing product to maintain their water resistance. Reapply as needed, especially after extended use or exposure to wet conditions.
Storage: Store your boots in a cool, dry place, away from direct sunlight and extreme heat. Consider using boot trees to help maintain their shape.
Lacing and Unlacing: Lacing and unlacing correctly helps extend your boots' lifespan by preventing premature wear and tear. This can be done by loosening the laces properly to the end and gently removing the boot.
Choosing the Right Brand: Exploring Reputable Hiking Boot Manufacturers
Numerous reputable brands specialize in hiking boots. Researching the various brands and models is a crucial step in the decision-making process. Some of the top brands include:
- Asolo: Known for their high-quality boots, versatile designs, and innovative technologies.
- Salomon: Offers a wide range of boots, from lightweight hiking shoes to more rugged options, with a focus on performance and innovation.
- Merrell: Known for its comfortable, accessible, and versatile footwear options, especially for day hikes and light backpacking.
- **
