backlight on acer laptop not working

Title: How To Fix ACER Aspire 3 Laptop Backlight Not Working
Channel: Wealth Quint
How To Fix ACER Aspire 3 Laptop Backlight Not Working by Wealth Quint
acer laptop backlight not working, how to turn on backlight on acer laptop, backlight of my laptop is not working, how to change backlight on acer laptop
Acer Laptop Backlight DEAD? FIX IT NOW!
Acer Laptop Backlight Blues? Don't Panic - Let's Get You Lit Up!
So, your Acer laptop screen has gone dark, huh? Suddenly, you're staring at a blank abyss instead of your important documents or favorite game. This can be incredibly frustrating. But, take a deep breath. Before you toss your Acer across the room, know this: chances are, there's a fix. And it might be simpler than you think.
Diagnosing the Darkness: Is It Really the Backlight?
First, let's make sure we're facing the right culprit. Often, the issue isn't the backlight itself. Therefore, consider these initial checks.
- External Monitor Test: Connect your Acer to an external monitor. If the external display works perfectly, the problem is likely with the laptop's screen or backlight. However, if it doesn't work either, the issue is likely the graphics card or a related problem.
- Brightness Key Check: Have you accidentally dimmed the screen all the way down? Press the brightness increase key (usually a sun icon) multiple times. Consequently, see if the screen brightens at all.
- Shine a Light: With the laptop on, shine a flashlight at the screen. If you can faintly see the display's contents, the backlight is indeed the issue.
Backlight Basics: What's Actually Going On?
Think of your laptop screen like a sandwich. The components include layers. However, at the core, you've got an LCD panel. Backlights illuminate this panel. Without them, you see nothing. Often, the issue is either a failed light source (LEDs or a CCFL bulb), a faulty inverter (which powers the bulb), or a broken connection.
Troubleshooting Time: Easy Fixes to Explore
Now that we have identified the root of the problem, let’s try some simple solutions. These steps are worth trying.
- Power Cycle It: Turn off your laptop completely. Unplug the power adapter and remove the battery (if possible). Wait a few minutes. Then, reinsert the battery, plug in the power adapter, and turn it back on. Sometimes, a simple reset works wonders.
- The "Flex" Check: The cable connecting the screen to the motherboard can loosen over time. Therefore, gently open and close your laptop lid. See if the screen flickers back to life. If it does, you might need to reseat this flex cable.
- Driver Update Delight: Outdated display drivers can cause black screens. Hence, try updating them. Go to Acer's website. Then, download the latest drivers for your specific laptop model.
Diving Deeper: More Advanced Solutions
If the easy solutions don't work, it's time to consider more in-depth approaches. The following options might require some technical comfort level.
- External Monitor Confirmation: Before you start any serious work, confirm that your Acer laptop is working fine. To do so, repeat the initial external monitor test.
- Inverter Inspection (If Applicable): Older Acer laptops may use an inverter to power the backlight. It's a small circuit board. Generally, these can fail. Replacing the inverter, which is usually easy, solves the issue.
- Disassembly Danger and LED/CCFL Replacement: This is where things get trickier. It involves disassembling your laptop screen. You'll need screwdrivers and a good understanding of electronics. You would then have to replace the LED backlight strip or CCFL bulb. This is often a delicate process.
- Screen Replacement as a Final Resort: If every other option fails, a whole LCD screen replacement could be necessary. Replacement screens are available online. Make sure you get the correct model number.
Preventative Care: Keeping Your Backlight Bright
You've fixed the problem. But, how do you prevent it from happening again? The following actions can extend its lifespan.
- Gentle Lid Handling: Avoid opening and closing your screen roughly. Flexing the screen can damage the cable.
- Optimal Brightness Settings: Don't keep the brightness at full blast all the time. Running your screen at full brightness shortens its life.
- Temperature Awareness: Extreme temperatures can affect laptop components. Avoid leaving your laptop in direct sunlight.
- Professional Cleaning: A clean laptop runs better. Make sure your Acer is cleaned regularly.
When to Call in the Pros
Sometimes, DIY repair isn't the right choice. If you're uncomfortable with electronics or hesitant to take apart your laptop, it's time to seek help.
- Warranty Coverage: Check your Acer's warranty. Consequently, you might be eligible for a free repair or replacement.
- Local Computer Repair Shops: Local shops can handle the issue quickly. They have experience with laptop repairs.
- Acer Support Direct: If all else fails, contact Acer directly for assistance. .
Conclusion: Your Acer and its Bright Future
A dead Acer laptop screen is a pain. However, don't despair. By understanding the problem and trying these solutions, you can probably get your laptop back to its bright, glorious state. Remember to stay calm. Take your time. And, hopefully, your Acer backlight will shine brightly once more.
Dell Laptop Spacebar Nightmare? FIX IT NOW!Acer Laptop Backlight DEAD? FIX IT NOW!
Alright, folks, let's be honest. Staring at a black screen on your Acer laptop is like trying to navigate a moonless night. Utterly frustrating, right? We've all been there – you flip open your laptop, expecting the familiar glow of a vibrant display, only to be greeted by a frustrating void. Fear not, because a dead Acer laptop backlight isn't always a death sentence. In fact, there's a good chance we can resurrect that screen and get you back to binge-watching your favorite shows or crushing those spreadsheets. So, buckle up, because we're about to dive into a comprehensive guide to fixing your Acer laptop's backlight woes.
1. The Dark Screen Descent: Understanding the Problem
First things first: let's get a good understanding of what's actually happening. Think of your laptop screen like a sandwich. The delicious "meat" (the image) sits between the bread (the screen's layers). The backlight is the baker, supplying the light that illuminates the whole darn thing. Without the baker, the meat's invisible. A dead backlight equals a black screen. This darkness can stem from a few different culprits, and diagnosing the issue is the first crucial step.
2. Is It Really the Backlight? Confirming the Culprit
Before we start taking things apart, let's make sure the backlight is actually the problem. Sometimes, the issue lies elsewhere.
- External Monitor Test: Connect your Acer laptop to an external monitor. Does the external monitor display an image? If yes, the problem is likely with your laptop's screen or backlight. If the external monitor also shows a blank screen, the problem is probably with your graphics card or motherboard.
- Shine a Light: With your laptop on (even if the screen is dark), shine a flashlight at the screen. Can you faintly see the image? If so, the backlight is the likely culprit.
- Listen for Audio: Can you hear the familiar sounds of Windows starting up? If you can, the operating system is functioning, and again, it points towards the screen or backlight.
3. Power On: Basic Troubleshooting Steps to Try First
Okay, so we've established that the backlight might be the problem. Let’s try the easy fixes first—the equivalent of jiggling the handle on a stuck door.
- Brightness Controls: It might seem obvious, but are you sure the brightness isn't turned all the way down? Check your keyboard's function keys (often with a sun symbol) for brightness control.
- Power Cycle: Turn off your laptop completely. Remove the battery (if possible) and the power adapter. Press and hold the power button for 30 seconds. This drains any residual power. Put everything back together and try powering it on. Sometimes, this resets things.
- Driver Updates: Outdated or corrupted display drivers can cause issues. Boot into safe mode (search online for instructions specific to your Acer model), and update your graphics drivers.
- Check the Power Adapter: A failing power adapter might not supply enough power to the backlight. Try a different adapter if you have one.
4. The Display Cable: A Common Source of Trouble
Now, let's move onto the more hands-on approach. One of the most common culprits is a loose or damaged display cable, the wire that connects the motherboard to the screen. This is like the road that carries the light signals; if it’s cracked or unplugged, nothing gets through.
- Accessing the Display Cable (Proceed with Caution!): This involves opening up your laptop. We HIGHLY recommend watching a video tutorial specific to your Acer model before attempting this. You'll need a small screwdriver set.
- Locate the Cable: Once you open the laptop (often by removing screws from the bottom and top), search for the display cable. It's typically a ribbon-like cable connecting to the motherboard and the back of the LCD screen. Follow a YouTube tutorial for the exact location on your model.
- Check for Disconnections: Carefully unplug and replug the display cable on both ends. Ensure it's securely seated.
- Inspect the Cable: Look for any visible damage, such as kinks, tears, or burns. If you see damage, you'll likely need a replacement cable.
5. The Inverter Board: A Tiny But Mighty Component
The inverter board is a small circuit board that converts low-voltage DC power from the motherboard into the high-voltage AC power needed by the backlight. Think of it as the amplifier for the light, boosting the signal from the battery. If this component malfunctions, your backlight goes dark.
- Finding the Inverter Board: The location varies by model, but it's usually near the bottom of the LCD screen or on the motherboard. Refer to a repair guide for your specific Acer model.
- Visual Inspection: Look for any signs of damage, such as bulging capacitors or burn marks.
- Replacement: If you suspect the inverter board is faulty, replacing it is often the best course of action. Replacements are readily available online, and they're generally not too expensive.
6. The LED Strips (for LED Backlights): A Modern Approach
Modern laptops often use LED backlights, which are more energy-efficient and long-lasting than older CCFL (Cold Cathode Fluorescent Lamp) backlights found in older laptops.
- Locating the LED Strips: These are contained inside the LCD panel. Replacing them is a more involved process.
- Symptoms: LED backlights often fail, causing the screen to dim, flicker, or show only a faint image.
- Replacement: Replacing the LED strips is usually a more complex and involved repair than replacing the inverter board or display cable, often requiring more disassembly of the screen. If you're not comfortable with this, it's best to consult a professional.
7. CCFL Backlight (For Older Laptops): A Different Approach
If you have an older laptop, your backlight might use a CCFL. This is like a tiny fluorescent tube behind the screen.
- Identifying CCFL: CCFL backlights are less common these days, but if you have an older laptop, that might be the case.
- Symptoms: The screen may grow dimmer with time. The bulb may burnout and darken the display.
- Replacement: Requires replacing the CCFL bulb, a more complex operation.
8. The LCD Panel: The Nuclear Option
If all else fails, the LCD panel itself might be faulty. This is the most expensive repair.
- Diagnosing LCD Failure: If none of the above solutions work, it's possible the LCD panel has failed.
- Replacement or Upgrade: Replacing the entire screen is the final step. You can replace it with the same model or, in some cases, upgrade to a higher-resolution display.
9. Hiring a Professional: When in Doubt, Get Help!
Let’s be real: not everyone’s a tech whiz. Opening up a laptop can be tricky, and you could potentially cause more damage if you’re not careful.
- Benefits: A professional can diagnose the problem accurately, have access to specialized tools, and guarantee their work.
- Finding a Reputable Repair Shop: Check online reviews, ask for recommendations, and make sure the shop specializes in laptop repairs.
10. Preventative Measures: Keeping the Light On
Once you've fixed your Acer laptop's backlight, you'll want to avoid a repeat performance.
- Gentle Handling: Avoid dropping your laptop or slamming the lid.
- Proper Storage: Store your laptop in a safe place, protected from extreme temperatures and humidity.
- Regular Cleaning: Clean dust from the vents to prevent overheating.
- Battery Care: Avoid frequently running your battery from 0% to 100%.
11: Software Glitches and Backlight Control
Sometimes, the issue isn't hardware at all, but software. This section will cover what you can do from a software point of view.
- Driver Issues: The obvious thing to check again are the display drivers. Make sure these are up to date. You can use the device manager to do this, or you can use the Acer support site and download the correct drivers for your model.
- Power Settings: Check Windows power settings. Sometimes, a power-saving option might dim the backlight.
- BIOS Settings: Less common, but sometimes the BIOS can influence the display settings. Be very careful if you change anything here.
- Operating System Glitches: Try booting into Safe Mode. If the screen works in Safe Mode, a conflict with software is the likely cause.
12: The Cost of Repair: Weighing Your Options
Repairing a dead Acer laptop backlight comes with a cost.
- DIY Repair Costs: This will vary based on the parts you need. Display cables and inverters are relatively affordable. LED strips are more costly.
- Professional Repair Costs: Labor costs can vary, depending on the repair shop. The cost often varies based on the component that need to be replaced.
- The Value of Your Laptop: It's important to consider the age of your laptop and its overall value. Is the repair worth the cost?
13. Step-by-Step
Is Your Work Laptop SPYING On You? (Shocking Truth!)Acer Laptop No Backlight Fix

By tevz TV Acer Laptop No Backlight Fix by tevz TV
Acer Netbook no backlight full repair guide

By Wayne's Link Acer Netbook no backlight full repair guide by Wayne's Link
Laptop LCDLED no backlight repair guide
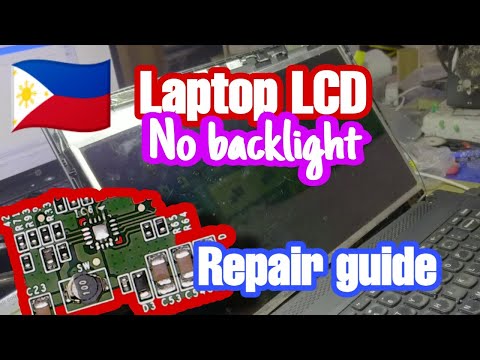
By Wayne's Link Laptop LCDLED no backlight repair guide by Wayne's Link

Title: Acer laptop keyboard light on
Channel: TopRespect
Acer laptop keyboard light on by TopRespect
My Laptop Work
Acer Laptop Backlight DEAD? FIX IT NOW!
The stark, unsettling black screen of a laptop can strike fear into the heart of any Acer user. One moment, you’re engrossed in your work or entertainment; the next, a frustrating void. The culprit, more often than not, is a failed backlight. But before you resign yourself to expensive repairs or a new machine, understand that a dead Acer laptop backlight is often fixable. This comprehensive guide will empower you to troubleshoot and potentially resurrect your screen, illuminating the path back to productivity and enjoyment.
Understanding the Backlight: The Illumination Engine
At the core of your Acer laptop's visual presentation lies the backlight. This is the unsung hero, the behind-the-scenes player that provides the illumination necessary for you to see the images displayed on the screen. Without the backlight, the liquid crystal display (LCD) would remain a dark canvas, rendering your laptop effectively useless.
There are primarily two types of backlights used in Acer laptops:
- LED Backlights: These are the most common type in modern Acer laptops. LEDs (Light Emitting Diodes) are small, energy-efficient light sources that are typically arranged around the edges of the LCD panel or, less frequently, directly behind it (known as direct-lit LED).
- CCFL Backlights (Cold Cathode Fluorescent Lamp): Older Acer laptops may still utilize CCFL backlights. These are essentially small fluorescent tubes that emit light when electricity passes through them. They're less energy efficient than LEDs and are gradually being phased out.
Identifying the Problem: Pinpointing the Backlight Failure
Before diving into solutions, accurate diagnosis is paramount. Not every dark screen indicates a backlight failure. Here's how to differentiate and confirm the issue:
- The "Flashlight Test": This is the most straightforward initial assessment. Close your laptop and power it on. Shine a flashlight directly onto the screen, at a slight angle. If you can faintly see images, your backlight is likely the problem. You should be able to see icons, menus, or other visual elements. If absolutely nothing is visible, the issue may lie elsewhere (e.g., another hardware issue).
- External Monitor Test: Connect your Acer laptop to an external monitor. If the external monitor displays a picture, this points strongly towards a screen-related problem, such as a failed backlight or damaged LCD panel. If the external monitor also displays nothing, your issue could be related to your graphics card or other significant hardware damage.
- Listen for Sounds: Can you hear the familiar sounds of Windows starting up (or the sound of your Acer’s operating system booting if you're using Linux or macOS)? If you can hear sounds but see no image, this strongly suggests the backlight is defective.
Troubleshooting Steps: A Step-by-Step Approach to Restoration
Once you've confirmed a backlight issue, the following steps can help diagnose and potentially fix the problem. Proceed systematically; do not skip steps. Remember to back up any crucial data before proceeding with hardware-related troubleshooting.
Step 1: Power Cycle and Driver Check
A simple power cycle, often overlooked, can sometimes resolve temporary glitches.
- Shut down your Acer laptop.
- Disconnect the power adapter.
- Remove the battery (if possible; some Acer laptops have integrated batteries).
- Press and hold the power button for 30-60 seconds. This fully discharges any residual power.
- Reinsert the battery (if applicable).
- Reconnect the power adapter.
- Power on your laptop.
If this doesn't restore your backlight (and it often won't), the next step is to verify your display drivers are up-to-date.
- Boot into Safe Mode: Repeatedly press F8 or Shift+F8 during startup (before Windows logo appears) to access the Advanced Boot Options. Select "Safe Mode." Safe Mode generally uses basic display drivers.
- From Safe Mode: If the screen is now illuminated, the problem may be a driver issue or conflict.
- Update Display Drivers: Search online for "Acer [Your Laptop Model] drivers." Download and install the latest drivers for your graphics card (typically Intel, NVIDIA, or AMD) from the Acer support website. Reboot your laptop after installing the updated drivers.
Step 2: Check the Inverter (For CCFL Backlights - if relevant)
If your Acer laptop uses a CCFL backlight, the inverter is a crucial component. The inverter converts the low-voltage DC power from the motherboard to the high-voltage AC power that the CCFL bulb needs to function. A faulty inverter is a common cause of backlight failure in older laptops.
- Locate the Inverter: This component is usually a small, rectangular board located near the display panel or along the bottom of the display's casing.
- Visual Inspection: Carefully examine the inverter for any signs of physical damage, such as bulging capacitors, burn marks, or disconnected wires.
- Inverter Replacement: If you can't visually inspect it, or you suspect a faulty inverter, you'll need to replace it. Many replacement inverters are available online; ensure you purchase one compatible with your Acer laptop's model number.
Step 3: Inspect the LCD Cable Connections
The LCD cable (or LVDS cable - Low-Voltage Differential Signaling cable) is the lifeline connecting the motherboard to the screen. This cable carries both power for the backlight and the video signal. A loose or damaged cable is a frequent cause of backlight issues. This step will require some basic technical skill.
- Power off and unplug your laptop!
- Disassemble the Laptop: Consult your Acer laptop's service manual (search online for "[Your Laptop Model] service manual") for detailed instructions on how to disassemble your specific laptop model. If you're not comfortable with this, seek professional assistance. Remember to work in a clean, well-lit area, and keep track of all screws.
- Locate the LCD Cable: The LCD cable usually connects to the back of the LCD panel and the motherboard.
- Check the Connections: Carefully unplug and reseat the LCD cable connections on both the LCD panel side and the motherboard side. Ensure they are securely connected. Inspect the cable for any signs of damage: bends, crimps, or breaks.
- Reassemble the Laptop (partially): After securing the cable connection, reassemble enough of the laptop to power it on, enough to test the screen. If it works and your backlight comes back on, you can reassemble the entire laptop.
Step 4: Examine the Backlight LED Strip (For LED Backlights)
If your Acer laptop uses an LED backlight, the LED strip itself may be faulty. This requires a more advanced level of disassembly and repair.
- Complete Disassembly: Continue disassembling your laptop, following your service manual, until you can access the LCD panel.
- Inspect the LED Strip: The LED strip is usually located at the bottom or around the edges of the LCD panel. Carefully examine it for any burned-out LEDs or other signs of damage.
- LED Strip Replacement: Replacing an LED strip can be challenging, as it typically involves removing the LCD panel from its frame. Replacement LED strips specifically designed for your Acer model laptop can be bought online.
- Panel Reassembly: After you've swapped the old strip for a new one, reassemble the screen, and then reassemble your entire laptop.
Step 5: The Last Resort – The LCD Panel Replacement
If you've exhausted all other troubleshooting steps, the problem may be with the LCD panel itself. The LCD panel contains the backlight, and a failure in the panel's internal circuitry can manifest as a black screen.
- LCD Panel Replacement: Replacing the LCD panel is often more complex than inverter or LED strip replacement, requiring a precise level of care during disassembly of the screen.
- Find a Compatible LCD Panel: Search online for a replacement LCD panel specifically designed for your Acer laptop model. Ensure the resolution and other specifications match the original panel.
- Follow a Detailed Guide: If you are not comfortable, it's best to seek professional assistance here.
Preventative Measures: Protecting Your Acer's Backlight
Once you've restored your backlight, a few preventative measures can help extend its lifespan:
- Avoid Excessive Heat: Keep your laptop in a well-ventilated area and avoid direct sunlight. Heat is a common enemy of electronic components.
- Manage Screen Brightness: Using the lowest acceptable brightness level extends the life of the backlight.
- Gentle Handling: Avoid dropping or applying excessive pressure to your laptop screen.
- Regular Cleaning: Use a soft, microfiber cloth to clean your screen regularly. Do not use harsh chemicals or excessive moisture.
By following these steps, you can diagnose, troubleshoot, and potentially fix your Acer laptop's dead backlight. While some repairs are straightforward, others require a higher level of technical ability. Never be afraid to seek professional help if you're not comfortable with any of these procedures. The ultimate goal is to get your Acer laptop back to providing functionality, so you can get back to doing what you need.
