why does my laptop charger not work
Title: What To Do If Your Laptop Is Plugged In But Not Charging
Channel: PCMag
What To Do If Your Laptop Is Plugged In But Not Charging by PCMag
why does my laptop charger not work, why does my laptop charger not work sometimes, why is my laptop charger not working dell, why is my laptop charger not working lenovo, why is my laptop charger not working hp, why is my laptop not working without charger, why do laptop chargers stop working, what if my laptop charger isn't working, what to do when my laptop charger is not working
Laptop Charger DEAD? 😱 Fix It NOW! (Easy Guide)
My Laptop Charger Died! Now What? (Don't Panic!)
Ugh. The dreaded click and silence. Your laptop screen flickers, then… darkness. You've just encountered the digital equivalent of a power outage: a dead laptop charger. Breathe. First of all, don’t panic. Secondly, before you start making assumptions, know that you don't need to rush to the store (yet!). Let's troubleshoot this issue together because chances are, you can resurrect your charger from the digital graveyard. Is It REALLY Dead? Quick Diagnostics.
Before we start ripping and tearing (metaphorically, of course!), let's confirm the worst. Is your charger really the culprit? Many times, the problem lies elsewhere.
- The Obvious: Check the outlet. Seriously. Is it working? The most basic troubleshooting step is often the most effective. Plug something else in, like your phone charger. Does that work? Okay, let's continue.
- The Cable Connection: Examine the cable. Unplug and re-plug everything, at both ends. Give it a good wiggle. Sometimes a loose connection is the issue.
- The Charger Brick: Feel the power brick. Is it unusually hot? That could indicate a problem. Has it been plugged in since the dawn of time? That's a possibility.
- Your Laptop: Ensure your laptop isn't holding the battery. Try turning on your laptop without the charger. If it doesn't, it's dead. Only then can you assume the charger is the culprit.
Troubleshooting Steps: Bringing Your Charger Back to Life
Assuming your charger is truly dead, let's jump into some basic troubleshooting.
- Look for Damage: Carefully inspect the charging cable. Is there any visible damage? Frayed wires? Cracks? Any of these are potential red flags.
- The Fuse Factor: Some chargers have internal fuses. However, it's unlikely you can replace it because it can put you at risk.
- Disassemble with Caution (Maybe Not): Unless you're electrically inclined, avoid taking your charger apart. This is where things can get dangerous quickly.
- Clean Connections: Use a dry cloth to wipe down the charging port on your laptop and the tip of the charger. Dust and debris can sometimes interfere with the connection.
Advanced Troubleshooting: If Basic Steps Fail
If these initial diagnostics haven’t resurrected your charger, don't lose hope.
- Test with a Multimeter: If you own a multimeter and know how to use it, you can test the voltage output of the charger. This takes extra competence.
- Check the Connector: Inspect the charging port on your laptop carefully. Are the pins inside bent or damaged? This could require professional repair.
- Software Glitches: Very rarely, laptop software can interfere with charging. But, this is less likely to be the case.
- Manufacturer's website for solutions: Many brands have a comprehensive FAQs section. This may include solutions.
Considering a Replacement: When It's Time to Say Goodbye
Sometimes, despite our best efforts, a charger is beyond repair.
- Original vs. Generic: Consider buying a replacement. The original charger is usually the best option for your laptop. Always check the brand's website.
- Wattage Matters: Make sure the replacement charger has the same voltage and amperage as your original. Go higher, if you're unsure.
- Read Reviews: Before buying any replacement charger, read reviews. See what other users say about its reliability and performance.
- Purchasing from Retailers: Always buy from reputable retailers. This protects you against faulty products.
Preventing Future Charger Failures
Now that you might be saving your charger, let's look at preventive measures. You can protect your next charger by taking simple steps.
- Handle with Care: Avoid bending or twisting the cable excessively. Be gentle with the connector.
- Safe Storage: When traveling, wrap the cable neatly. Prevent tangling.
- Power Surge Protection: Consider using a surge protector. It protects your charger from power fluctuations.
- Avoid Extreme Temperatures: Don’t leave your charger in direct sunlight or extreme heat. This can degrade its components.
Final Thoughts: You've Got This!
Dealing with a dead laptop charger can be frustrating. However, most issues are fixable (or at least, easily remedied). By following these steps, you can quickly diagnose the problem. You can either revive your charger or get a replacement. Now, go forth and conquer that charging issue! Remember, stay calm, troubleshoot, and you'll be back online in no time.
Dell Laptop Enter Key Broken? FIX IT NOW!Laptop Charger DEAD? 😱 Fix It NOW! (Easy Guide)
Alright, friends, let's be real. There's a universal terror that grips us all: the dreaded click… followed by a black screen. Our laptop charger has decided to go on strike. It's a digital apocalypse waiting to happen, a silent scream for help in a world of deadlines, streaming binges, and virtual meetings. But fear not, because we’re going to navigate this crisis together. We're diving headfirst into the world of dead laptop chargers, armed with knowledge, a healthy dose of humor, and a whole lot of hope. Let's get your digital life back online!
1. The Silent Killer: Recognizing a Dead Charger (And Why It Matters)
Think of your laptop charger as the lifeline to your digital world. It's the constant hum of electricity that allows you to binge-watch that new show, finish that vital work presentation, or simply check in with loved ones. When it fails, the silence is deafening. But how do we know for sure the charger is the culprit? We don’t want to mistake a dead battery for a dead charger, do we?
First things first: the charger is the easiest thing to check. If your laptop isn’t turning on, or if it’s flashing a low battery warning despite being plugged in, you've got a problem. Another telltale sign is a complete lack of response when you plug the charger into the wall and into your laptop. No lights, no sounds, no nothing. It's like a digital ghost town! This is the moment we say, "Houston, we have a problem."
2. The Usual Suspects: Common Causes of Charger Failure
Okay, so we've established something is amiss. What could have caused this digital demise? It's usually one of a handful of common culprits, from the mundane to the slightly more dramatic (think power surges, which, trust me, I’ve seen the aftermath of!).
The Wall Outlet: Sounds simple, right? But often, the problem is simply a bad outlet. Try plugging your charger into a different outlet in your house. Seriously, it's the lowest-hanging fruit, so let's pluck it first!
The Power Brick's Demise: The "brick" itself, that bulky rectangular chunk of plastic, is prone to internal failure. Think of it like a tiny, stressed-out electrical worker, constantly converting power. Sometimes, they just…give up.
Cable Carnage: The cable itself, especially near the connectors, is a common weak point. Repeated bending, twisting, and the occasional unfortunate tug can damage those internal wires, cutting off the electrical flow.
Internal Laptop Issues (Less Likely, But Possible): While less frequent, sometimes the charging port on your laptop or the power circuitry inside the laptop might be the issue. We'll address that later.
3. Before You Panic: Basic Troubleshooting Steps (The Easy Wins)
Before you start pricing new chargers, take a deep breath and let's try some easy fixes. These are the digital equivalent of checking if your car's plugged in.
The Outlet Shuffle: As mentioned, switch it up! Try a different outlet.
Inspect the Cable: Carefully examine the entire cable, paying close attention to the connectors and any areas where it bends or twists. Look for fraying, cuts, or exposed wires.
The Connector Test: Unplug the charger from both the wall and your laptop. Then, firmly and repeatedly plug it back in. Sometimes, a loose connection is the culprit!
The Power Brick Examination: See if the power brick itself has any lights. If it is on, then the issue is more likely to do with your laptop. If the power brick has a light, but doesn't turn on the laptop, then the light could be broken.
4. Cable Concerns: Spotting and Solving Wire Woes
The cable is the most vulnerable part of your charger. It's like the umbilical cord of your laptop, constantly subjected to stress and strain.
Visual Inspection: Look for any visible damage – cuts, cracks, or fraying. Even small issues can interrupt the power flow.
The Jiggle Test: Gently wiggle the cable near the connectors while it's plugged into the wall and your laptop. If the lights flicker, or you hear a faint buzz, you’ve probably found the problem area.
Temporary Fixes (Use With Caution!): WARNING: We’re not electricians, so this is just to get you by (if you have the skills) until you can get a replacement. You might be able to temporarily tape or secure a cable with electrical tape to repair small breaks, but this is not a long-term solution. Safety First! If you're unsure, call a professional, or buy a new charger.
5. The Power Brick Blues: What to Do When the Brick Breaks
The power brick itself can be a fickle friend. Its lifespan can be shorter than a TikTok trend, and the causes of its demise can be varied.
Listen For the Silence: Is the brick completely silent? This is often a bad sign. If it does make a humming or hissing sound, unplug it immediately. That’s a sign of electrical distress!
Check For Overheating: Touch the brick gently (when unplugged, of course!). Is it unusually hot? This could indicate internal issues.
The Replacement Game: If your brick is definitively dead, you’ll need a replacement. More on that later!
6. Diving Deeper: Testing Your Charger's Output (For Tech-Savvy Souls)
Are you feeling confident and want to go further? You can actually test the output of your charger with a multimeter. (DISCLAIMER: If you're not comfortable with electrical devices, skip this section!)
Gather Your Supplies: You’ll need a multimeter (a device that measures electrical properties) and your charger.
The Voltage Check: Set your multimeter to the DC voltage setting. Carefully touch the probes to the correct points on the charger's output connector (refer to your charger's specifications for the correct polarities). The reading should match the voltage your laptop requires.
The Current Check (Advanced): You can also perform a current check, but this is more complex.
7. Laptop's Inner Workings: When the Problem Isn't the Charger
Sometimes, the problem lies inside your laptop. This is less common, but it's worth considering.
The Charging Port: The port itself can become damaged or filled with debris. Try cleaning it with a toothpick or compressed air.
The Motherboard: If your laptop isn't receiving power, the issue could be with the motherboard's power circuitry. This is a job for a qualified technician.
The Battery Itself: In some cases, the battery may be the problem. If the battery is old or damaged, it might not be able to charge, even with a working charger.
8. Buying a Replacement Charger: Navigating the Maze
Okay, your charger is officially toast. Now what? Finding a replacement can feel like navigating a minefield of specs and compatibility issues.
The Right Specs: You’ll need to find a charger that matches your laptop's specific voltage, amperage, and connector type. These specs are typically printed on the old charger, or on a sticker on your laptop.
OEM vs. Aftermarket: You can purchase an Original Equipment Manufacturer (OEM) charger from the laptop manufacturer or opt for an aftermarket charger. OEM chargers are typically pricier, but offer guaranteed compatibility. Aftermarket chargers can be a more budget-friendly option.
Online vs. In-Store: Online retailers offer the largest selection, but in-store purchases allow you to immediately solve the issues.
9. Safe Charging Practices: Extending Charger Lifespan
Once you’ve got your new charger, let’s make sure it lasts a while!
Avoid Extreme Temperatures: Don't leave your charger in direct sunlight or in extremely hot or cold environments.
Don't Overcharge: While modern laptops are designed to prevent overcharging, it's best to unplug your charger once the battery is full.
Cable Management: Coil the cable loosely when storing or traveling with your charger. Avoid tight bends and kinks.
Power Surges: Consider using a surge protector to protect your charger (and your laptop) from electrical damage.
10. The Battery Backup: Working Without An Outlet (Temporarily)
Even with a dead charger, all is not lost! If your laptop has a charged battery, you still have some time.
Conserve Power: Lower your screen brightness, close unnecessary programs, and turn off Wi-Fi and Bluetooth.
The Power Saving Mode: Enable your laptop's power-saving mode to extend battery life.
The Hunt for an Outlet: If possible, keep an eye out for a place to plug in.
11. Charger Troubleshooting Tips: When All Else Fails
Sometimes, even with the best troubleshooting, the problem is mysterious. Here's a few more things to try:
Check the BIOS: Ensure the BIOS settings are not interfering with the charger.
**Update
How to FIX Any Laptop Not Charging while plugged in

By GMODISM How to FIX Any Laptop Not Charging while plugged in by GMODISM
Laptop Battery Stuck at 0 Fix Plugged In But Not Charging - All Brands SOLVED

By Tech2AI Laptop Battery Stuck at 0 Fix Plugged In But Not Charging - All Brands SOLVED by Tech2AI
Asus Laptop No power Not Charging Repair- How Mosfets work and short circuit diagnosis

By NorthridgeFix Asus Laptop No power Not Charging Repair- How Mosfets work and short circuit diagnosis by NorthridgeFix
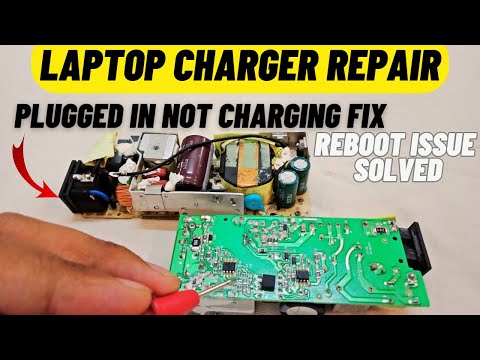
Title: How to Repair Laptop Charger Plugged In not charging charger Reboot problem solved laptop diy
Channel: Electricquantism
How to Repair Laptop Charger Plugged In not charging charger Reboot problem solved laptop diy by Electricquantism
Wifi Not Found
Laptop Charger DEAD? 😱 Breathe Easy: A Comprehensive Guide to Reviving Your Power Supply
We've all been there: that dreaded moment when your laptop screen flickers, dims, and then… nothing. Your lifeline to work, entertainment, and connection goes dark, and the finger of blame often points directly at the charger. But before you rush out to buy a replacement, take a deep breath. More often than not, a seemingly "dead" laptop charger can be coaxed back to life with a little detective work and some careful troubleshooting. We're here to guide you through the process, transforming potential panic into proactive problem-solving.
Understanding the Enemy: Common Causes of Laptop Charger Failure
A laptop charger is a relatively simple device, but it operates under significant electrical stress. Over time, components can degrade, connections can loosen, and external factors can take their toll. Before we commence with the fixes, let's identify the usual suspects.
- Internal Component Breakdown: This is the most common demise of a charger. Capacitors, resistors, and other delicate components within the charging brick are susceptible to age, heat, and power surges. A faulty capacitor, for example, can easily lead to a "no power" scenario.
- Cable Damage: The Achilles' Heel: Laptop charger cables face the most physical abuse. They're constantly bent, twisted, and tugged. This repeated stress can lead to internal wire breaks, particularly at the points where the cable connects to the charging brick or the laptop's power port.
- Loose Connections: The Invisible Culprit: Internal and external connections can become loose over time due to vibration, temperature fluctuations, and general wear and tear. A slightly disconnected wire can disrupt the flow of power, mimicking a complete failure.
- Power Surge Damage: Electrical surges, originating from lightning strikes or fluctuations in the power grid, send dangerous levels of voltage through your charger and, if unprotected, your laptop. This can fry sensitive components instantly.
- Overheating: A Silent Killer: Excessive heat can weaken components, leading to premature failure. Overheating can be caused by a number of things, including poor ventilation, excessive ambient temperature, or the charger being buried in a confined space.
Diagnostic Toolkit: Essential Tools and Pre-Requisite Information
Before diving into repairs, you'll need a basic toolkit to assist you. You may have some of these items.
- A Digital Multimeter (DMM): This is indispensable. A multimeter lets you measure voltage, current, and resistance, which are crucial for identifying the source of the problem.
- Screwdrivers: A set of precision screwdrivers (Phillips head and flathead) will be necessary to open the charging brick.
- Soldering Iron and Solder: If you need to repair broken connections or replace components, a soldering iron is essential.
- Electrical Tape or Heat Shrink Tubing: Allows easy repair of insulation and cable protection.
- Work Light: Allows one to work in low light, and helps with identifying the small components.
- Replacement Components: if you need to replace a capacitor, resistor, the original components and the manufacturer’s part number are required.
Crucial Safety Precautions: Your Safety First!
Electrical work can be hazardous. Always prioritize safety:
- Unplug Before Opening: Always disconnect the charger from both the wall outlet and your laptop before attempting any repairs.
- Never Work on a Live Circuit: Never attempt to test or repair a charger while it's plugged in.
- Exercise Caution with Capacitors: Inside the charging brick, you may find large capacitors that store a significant electrical charge even after unplugging. Handle these with extreme care and avoid touching the terminals. If in doubt, consult a professional.
- Professional Assistance: If you're not comfortable working with electricity, or if you're unsure about any of the steps, seek the help of a qualified electronics technician.
Step-by-Step Troubleshooting: Bringing Your Charger Back to Life
Now comes the moment of truth. Follow these steps methodically to diagnose and potentially repair your charger.
Phase 1: External Inspection & Simple Solutions
- Visual Examination (The Quick Scan): Start with the obvious. Inspect the entire length of the cable, from the charging brick to the laptop connector. Look for any signs of damage: cuts, abrasions, cracks, kinks, or exposed wires.
- The Connector Check: Carefully examine the connector that plugs into your laptop. Is it bent, broken, or dirty? Use a soft brush or compressed air to clean any dust or debris accumulated in the port of the laptop.
- The Wall Outlet Test: Isolate the issue. Verify that the wall outlet is functioning correctly by plugging in another device, such as a lamp or a phone charger, to confirm it's providing power.
Phase 2: Delving Deeper: Inside the Charging Brick
If the external inspection reveals nothing, it's time to open the charging brick.
- Opening the Brick: Most charging bricks are sealed and need to be opened carefully. Look for seams, screw plugs, or clips. You might need a small flathead screwdriver or a plastic pry tool to gently separate the halves. Be patient and avoid forcing it.
- Internal Inspection: With the brick open, conduct a detailed internal inspection. Look for:
- Burn Marks: These are a clear indicator of overheating or component failure.
- Swollen Capacitors: Capacitors are small cylindrical components. If any are bulging or leaking, they are faulty and must be replaced.
- Loose Connections: Check all solder points and wire connections for any signs of looseness.
- Broken Wires: Verify that the wires are connected securely to the board and the connector. Check that the wires are not crimped or cut.
Phase 3: Testing with a Multimeter (The Detective Work)
This is where your multimeter comes into play. Before you begin, refer to the charger's specifications to find the correct voltage output (usually printed somewhere on the charger itself).
- Voltage Test (Output): Set your multimeter to DC voltage setting. Plug the charger into the wall but make sure it is not plugged into the laptop. Carefully touch the multimeter probes to the positive and negative terminals of the charging connector that plugs into your laptop. Note carefully the voltage reading. Ensure it matches the charger's specified output voltage. If the reading is significantly lower or zero, there's a problem.
- Continuity Test (Cable Check): Unplug the charger from the wall. Set your multimeter to the continuity setting (usually a symbol that looks like a speaker). Place one probe on each end of the cable's positive wire, checking that the circuit is complete. Repeat the test for the earth and negative wires. If the multimeter does not beep or the resistance reads infinite (OL), the wire is broken, and you must replace the cable or repair the connection.
Phase 4: Repair and Replacement
Based on your findings, proceed with the necessary repairs:
- Cable Repair (If Possible): If you find a broken wire, carefully strip away the insulation with a wire stripper, being careful to avoid damaging the wires. Solder the wires back together, using a soldering iron and solder. Once soldered, apply electrical tape or heat shrink tubing to insulate the repair.
- Connector Repair/Replacement: If the laptop connector is damaged, you may need to replace the entire cable assembly. This will require opening the brick (if the cable is not detachable), desoldering the old connector, and soldering a new one in its place.
- Component Replacement: If you identify a faulty component (e.g., a swollen capacitor), you can try replacing it. This requires soldering skills and access to replacement parts. Obtain components with the exact same specifications as those that have failed.
Phase 5: Reassembly and Testing
- Reassembly: Once you've made the necessary repairs, carefully reassemble the charging brick. Ensure all the components are properly seated and that the halves of the brick are securely closed.
- Final Test: Plug the charger back into the wall and into your laptop. Verify that the laptop powers on and begins charging.
- Observe and Monitor: Keep an eye on the charger for a few hours, observing its temperature and ensuring it operates normally.
Troubleshooting and What to Do if the Charger STILL Doesn't Work
If, after all this, your charger remains unresponsive, don't despair. Try these additional troubleshooting steps:
- Check the Laptop's Power Port: A damaged charging port on the laptop may prevent power transfer. Inspect the port for any bent pins or debris.
- BIOS Reset: In rare cases, a BIOS issue may affect charging. Research how to reset your laptop's BIOS to its default settings.
- Other Power Cords: If you have access to a similar charger for your laptop's model, test the laptop with that charger to further verify it's the charger, not the laptop, that is faulty.
Deciding When to Replace and When to Repair
Not every charger is a good candidate for repair. Consider these factors:
- Cost of Parts: Replacing individual components can be time-consuming and may require ordering parts, which can increase the overall expense.
- Your Skill Level: If you are not comfortable working with electricity or soldering, a repair may not be the best
