how to fix dns server not working on wireless laptop
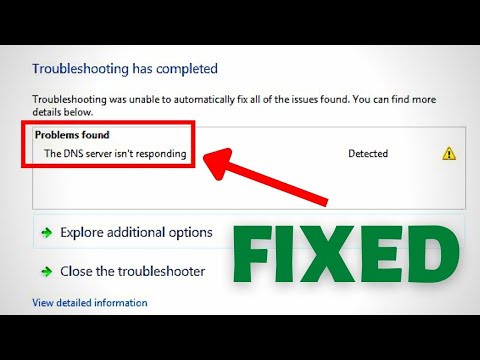
Title: Problem Found the DNS Server isn't responding Error on Windows 107 SOLVED
Channel: FIXsage
Problem Found the DNS Server isn't responding Error on Windows 107 SOLVED by FIXsage
Wireless Laptop DNS Disaster? FIX IT NOW!
Wireless Laptop DNS Woes? Conquer the Chaos!
Imagine this: You're poised at your laptop, ready to conquer the digital world. The ideas are flowing. The coffee is brewing. But then… nothing. The dreaded "unable to connect" message stares back. Your wireless connection seems fine, yet websites refuse to load. Sounds familiar? You are likely facing a DNS dilemma. Fortunately, we don't need to surrender; we can fix it.
Decoding the DNS Puzzle: What's the Problem?
Before we wield our digital screwdrivers, let's understand the culprit. DNS, or the Domain Name System, is the internet's address book. It translates human-readable web addresses (like google.com) into the numerical IP addresses computers need. Essentially, it directs traffic on the internet. Your laptop relies on a DNS server to look up these addresses. Now, if that server is experiencing difficulty, you’re stuck. This can manifest in many ways.
- Slow website loading is also a symptom.
- Websites might partially load.
- You might see the dreaded "server not found" error.
But don't despair. The fault might not be with your internet. It’s often localized to your machine.
Troubleshooting Steps: Your Digital Detox
First, resist the urge to chuck your laptop out the window. Instead, let’s methodically diagnose and rectify the situation. These solutions often work.
Restart Your Laptop: This seems overly simple. Nonetheless, it clears out temporary glitches. Therefore, it’s always the first port of call.
Flush Your DNS Cache: Your computer stores DNS records to speed up browsing. Sometimes, these cached records become outdated and stale. Flushing the cache is like hitting the reset button.
Here’s how to flush your DNS cache:
- Windows: Open Command Prompt (search "cmd" in the Windows search bar). Type
ipconfig /flushdnsand press Enter. - macOS: Open Terminal (search "Terminal" in Spotlight). Type
sudo killall -HUP mDNSResponder; sudo killall -HUP discoverydand press Return. You will be asked for your administrator password. Enter it and press Enter.
- Windows: Open Command Prompt (search "cmd" in the Windows search bar). Type
Check your DNS Configuration: Your laptop automatically obtains DNS server addresses. However, these options can sometimes cause issues.
- Windows: Open Settings. Navigate to "Network & Internet." Select "Change adapter options." Right-click your Wi-Fi connection and select "Properties." Double-click "Internet Protocol Version 4 (TCP/IPv4)." Select "Use the following DNS server addresses." Try Google's public DNS servers (8.8.8.8 and 8.8.4.4) or Cloudflare’s (1.1.1.1 and 1.0.0.1). Click "OK" twice.
- macOS: Open System Preferences. Click "Network." Select your Wi-Fi connection. Click "Advanced." Click the "DNS" tab. Click the "+" button and add Google’s (8.8.8.8 and 8.8.4.4) or Cloudflare’s (1.1.1.1 and 1.0.0.1). Click "OK." Then, click "Apply."
Beyond the Basics: Advanced DNS Fixes
If these simple steps don’t work, it is time to explore more dynamic solutions. Let's dive into deeper waters.
Router Reboot: Your router also caches DNS information. A simple reboot can resolve DNS-related issues within your network. Unplug your router for at least 60 seconds, then plug it back in. Wait for it to fully boot up.
Firewall Interference: Your firewall might be blocking DNS requests. Check your firewall settings to ensure DNS traffic is allowed. Consult your firewall’s documentation for specific instructions.
Malware Infection: Unfortunately, malware can sometimes tamper with DNS settings. Run a thorough scan with your antivirus software. It may detect and remove any unwanted guests.
The Ultimate Solution: Call for Backup
If you've tried everything above and are still struggling, it’s time to seek external assistance. After all, there exist times when more intervention is required.
- Contact Your ISP: Your Internet Service Provider could be experiencing DNS outages. Contact their customer support to inquire about the issue.
- Professional Help: Consider contacting a tech-savvy friend. A computer repair technician is also a viable option. They can diagnose more complex problems.
Preventative Measures: Staying Ahead of the Curve
Once your DNS problem is solved, let’s put some preventative measures in place. It's wise to avoid this issue from happening again.
Regularly Clear Your DNS Cache: Make this a routine. It ensures up-to-date DNS information.
Monitor Your Internet Speed: Keep an eye on your internet speed. Slow speeds can sometimes point to DNS problems.
Consider a DNS Changer App: Applications such as "DNS Jumper" or "Cloudflare WARP" can simplify DNS management. They also offer one-click solutions for switching DNS servers.
Conclusion: Reclaim Your Digital Freedom
Don't let a DNS disaster hold you back. These straightforward troubleshooting steps can swiftly restore your internet access. Armed with this knowledge, you can confidently tackle DNS issues. You are now ready to reclaim your digital freedom. Go forth, and browse the internet with ease!
HP Envy Keyboard Disaster? FIX IT NOW! (Windows 10)Wireless Laptop DNS Disaster? FIX IT NOW!
We've all been there. You're cruising along, lost in the digital ether, when suddenly… poof! The internet vanishes. No cat videos, no emails, no… well, connection to the outside world. And often, the culprit isn't your Wi-Fi signal, but that pesky thing called DNS. Specifically, a wireless laptop DNS disaster. Don't panic! We're going to unravel this mystery and get you back online faster than you can say "buffering."
1. The Silent Saboteur: Understanding the DNS Crisis
Think of DNS (Domain Name System) as the internet's phone book. When you type in “www.google.com”, your laptop doesn't actually know where Google is. It needs a phone number (an IP address) to connect. DNS translates that friendly website address into a numeric IP address, like 172.217.160.142. A DNS disaster happens when your laptop can't reach this phone book, or the phone book itself is having a bad day. Imagine trying to call someone, but the operator keeps giving you the wrong number! That's a simplified explanation of the problem.
2. Why Your Wireless Journey Hits a Roadblock: Common DNS Issues
So, what exactly goes wrong? Several things can lead to a wireless laptop DNS disaster.
- Incorrectly Configured DNS Settings: This is the most common culprit. Your laptop might be trying to use a DNS server that's down, overloaded, or simply not suited for your network. Think of it like trying to dial a long-distance call with a local area code.
- Router Woes: Your router, the hub of your home network, could be struggling. It might have a DNS problem of its own, or it might be blocking DNS requests. It's like having a gatekeeper who's decided to take a nap.
- ISP Instability: Sometimes, the problem isn't your equipment, but rather your Internet Service Provider (ISP). Their DNS servers might be experiencing outages or performance issues. This is the internet equivalent of a traffic jam caused by road construction.
- Cache Corruption: Your laptop stores DNS information in something called a cache. This speeds things up, but if the cache gets corrupted, it can lead to incorrect translations and connect issues. Imagine an old address book with wrong information.
- Malware Interference: In rare cases, malware can hijack your DNS settings, directing you to malicious websites instead of the ones you requested. This is like your phone being hacked and a stranger answering all your calls to forward them to the wrong direction.
3. Identifying the Culprit: Troubleshooting Your DNS Glitches
Before we start throwing solutions at the problem, let's diagnose the issue. Here’s how to tell if it's a DNS issue or something else.
- Check Other Devices: Does the internet work on your phone, tablet, or another laptop? If so, the problem is likely specific to your affected laptop.
- Try a Different Website: Can you access some websites but not others? This could point to an issue with a specific DNS entry.
- Ping a Website: Open the Command Prompt (Windows) or Terminal (Mac) and type
ping google.com. If you get a "request timed out" error, you've got connection issues.
4. The First Line of Defense: Resetting Your Router and Laptop
Sometimes, the simplest solutions are the most effective. Let's start with the basics.
- Restart Your Router: Unplug your router, wait 30 seconds, and plug it back in. This is like giving your router a digital reboot. It often clears up minor glitches.
- Restart Your Laptop: A simple restart can clear out temporary files and reset the DNS settings.
5. Diving Deeper: Changing Your DNS Server
If the basic steps didn't work, it's time to get a little technical. A common fix for DNS problems is to switch to a more reliable DNS server. We'll opt for Google's or Cloudflare's public DNS, which are generally fast and reliable.
- On Windows:
- Open the Control Panel and go to "Network and Sharing Center."
- Click on "Change adapter settings."
- Right-click on your Wi-Fi connection and select "Properties."
- Select "Internet Protocol Version 4 (TCP/IPv4)" and click "Properties."
- Click "Use the following DNS server addresses."
- Enter Google's DNS addresses:
8.8.8.8and8.8.4.4, or Cloudflare's:1.1.1.1and1.0.0.1. - Click "OK" and restart your computer.
- On macOS:
- Go to System Preferences > Network.
- Select your Wi-Fi connection.
- Click "Advanced."
- Go to the "DNS" tab.
- Click the "+" button to add Google's DNS addresses (
8.8.8.8and8.8.4.4), or Cloudflare's (1.1.1.1and1.0.0.1). - Click "OK" and "Apply."
6. Flushing the DNS Cache: Clearing Out the Junk
As mentioned before, your laptop stores DNS information in a cache. Resetting this cache can resolve outdated or corrupted entries.
- On Windows
- Open the Command Prompt as an administrator.
- Type
ipconfig /flushdnsand press Enter. - Type
ipconfig /registerdnsand press Enter. - Type
ipconfig /releaseand press Enter. - Type
ipconfig /renewand press Enter. - Restart your computer.
- On macOS:
- Open the Terminal.
- Type
sudo killall -HUP mDNSResponderand press Enter. (You might need to enter your password.) - Restart your computer.
7. Router Configuration Adventures (If You Dare!)
If you’re feeling brave, you can also change the DNS settings on your router. This affects all devices connected to your network. This is often done via a web interface accessible from your web browser. Find your router's IP address (usually 192.168.1.1 or 192.168.0.1) and enter it in your browser, then use your router's credentials to log in. Look for a menu related to "DNS Settings" or "WAN Settings" and enter Google's or Cloudflare's DNS addresses. Be careful, experiment, and back up your settings before making changes!
8. Is it the ISP? Checking for Internet Outages
Sometimes, the problem is beyond your control. Check if your ISP (Internet Service Provider) is experiencing outages. Visit their website, check social media, or call their customer service. If there's a widespread outage, all you can do is wait!
9. Software Conflicts? Examining Security Software
Security software, like firewalls and antivirus programs, can sometimes interfere with DNS resolution. Temporarily disabling this software can help determine if it's causing the issue. Be cautious and only disable your security software for a short time while testing.
10. The Dreaded Malware: Scanning for Infections
As previously mentioned, malware can hijack your DNS settings. Run a thorough scan with your installed antivirus software or a standalone malware scanner to ensure the issue is not caused by any malicious programs.
11. Analyzing Your Network Interface: Inspecting Your Wi-Fi Card
Sometimes, your Wi-Fi network card driver is the issue. Make sure it’s up-to-date, which can solve many issues that are encountered.
On Windows:
- Open Device Manager (search for it in the Start menu).
- Expand "Network adapters."
- Right-click your Wi-Fi adapter and select "Update driver."
- Choose "Search automatically for drivers."
- Restart your computer.
On macOS:
- Apple menu > About This Mac > System Report.
- Click "Wi-Fi" under "Network."
- Check the driver information. If any unusual issues are detected, research solutions online.
12. Network Profiling: Testing the Network Connection
Testing and verifying your internet connection can assist in troubleshooting the DNS issue. Network profiling involves assessing your network's speed, stability, and connectivity.
13. Is Your Hardware the Culprit? Checking Your Router and Modem
Your router or modem may be faulty. Try connecting directly to your modem (if possible) to bypass the router and see if the browsing issues persist. If browsing functions correctly, your router could be the issue. Consider replacing your router.
14. The Ultimate Fix: A Clean Installation (Only If Necessary!)
A clean installation of your operating system could be the last resort. Back up all your data before starting. This is drastic, but it can resolve deep
Clevo P650SG Keyboard Disaster: FIX Your Broken Keys NOW!How to Fix DNS Server Not Responding On Windows 111078 Wi Fi or Ethernet Connection 2023

By EasyTechGeek How to Fix DNS Server Not Responding On Windows 111078 Wi Fi or Ethernet Connection 2023 by EasyTechGeek
Fix DNS Server Isnt Responding Error on Windows 107 Quick Solution

By Learn Infoxta Fix DNS Server Isnt Responding Error on Windows 107 Quick Solution by Learn Infoxta
How To Fix Wifi No Internet Access Fix DNS Server Is Not Responding
By AP CHANNEL ASLI How To Fix Wifi No Internet Access Fix DNS Server Is Not Responding by AP CHANNEL ASLI

Title: How to fix dns server not responding on windows 11107 Wifi or Wired Connection 2025
Channel: Tech Mash
How to fix dns server not responding on windows 11107 Wifi or Wired Connection 2025 by Tech Mash
Laptop Wifi Hotspot
Wireless Laptop DNS Disaster? FIX IT NOW!
Have you ever experienced the frustrating sensation of your wireless laptop failing to connect to the internet, despite a seemingly strong Wi-Fi signal? You see those tantalizing bars, the reassuring glow of your router, yet the web remains stubbornly out of reach. This digital limbo is frequently a symptom of a "DNS disaster," and we're here to help you navigate the choppy waters of this common technical woe. This isn't just about a temporary inconvenience; a properly functioning DNS server is absolutely critical to your seamless online experience. Without it, you're locked out of the vast digital world. Let's dive into the specifics, and get your laptop back online.
Understanding the DNS: Your Internet's Address Book
Imagine the internet isn't made up of user-friendly website names like "google.com," but instead, a complex web of numerical addresses. That's where the Domain Name System (DNS) steps in. Think of it as the internet's address book. When you type "google.com" into your browser, your computer sends a request to a DNS server. This server translates the human-readable name into the numerical IP address (e.g., 172.217.160.142) that your computer needs to actually find the website. If your DNS server is down, misconfigured, or simply experiencing issues, you will be unable to access websites, a situation that's colloquially referred to as a DNS disaster.
Identifying the DNS Culprit: Symptoms and Diagnosis
Recognizing a DNS problem is often straightforward. You'll likely encounter messages like "This site can't be reached," "Server DNS address could not be found," or similar error codes within your web browser. You may have trouble accessing specific websites or all websites, which is another clue. Sometimes, even though other devices on your network are working perfectly fine, your laptop remains stubbornly disconnected, strongly suggesting a DNS issue specific to your wireless connection.
A simple diagnostic step is to try pinging a known website, such as Google, through the command prompt (on Windows) or Terminal (on macOS or Linux). Type "ping google.com" and press Enter. If you receive replies, your network connection is fine, and the problem likely lies with the DNS. If you receive "Request timed out" errors, then you will have to examine your wireless connection.
Wireless Laptop DNS Disaster: The Most Common Causes
Several factors can contribute to a DNS disaster on your wireless laptop. Here are the most frequent culprits:
- Incorrect DNS Server Addresses: Your laptop might be configured to use incorrect or outdated DNS server addresses. This can happen if your router's settings changed, or if previously manually entered DNS addresses are no longer functional.
- Router-Specific DNS Issues: Your wireless router itself could be experiencing DNS problems. It may be unable to forward DNS requests efficiently to the service providers' DNS servers. This is more probable if your router has not been updated recently.
- ISP DNS Server Problems: Your Internet Service Provider's (ISP) DNS servers might be temporarily down or experiencing performance hiccups. While less common, this can affect all devices connected to your network.
- Firewall or Security Software Interference: Overly aggressive firewall settings or security software could be blocking DNS requests, leading to connection errors.
Step-by-Step Solutions: Bringing Your Laptop Back Online
Now, let's get your laptop back online with these proven fixes. We'll move through a tiered approach, starting with the simplest solutions and progressing to more advanced troubleshooting steps.
1. Restart Everything: This is the digital equivalent of pressing the reset button. Power down your laptop, your modem, and your router. Wait for at least 30 seconds. Power the modem back on first, followed by the router, and then lastly your laptop. This often clears temporary glitches and can resolve minor DNS conflicts.
2. Flush Your DNS Cache: The Fresh Start
Your computer stores DNS records in a cache to speed up future lookups. Sometimes, these cached records become outdated or corrupted, contributing to DNS problems. It's time to flush them!
- Windows: Open the Command Prompt (search for "cmd" in the Start menu). Type
ipconfig /flushdnsand press Enter. You should see a confirmation message. - macOS: Open Terminal (found in Applications > Utilities). Type
sudo killall -HUP mDNSResponderand press Enter. You will be prompted for your administrator password. (Note: Starting with macOS Big Sur, this command issudo dscacheutil -flushcache; sudo killall -HUP mDNSResponderand press Enter).
3. Change Your DNS Servers: The Reliable Alternative
Your computer is likely configured to use your ISP's DNS servers or your router's settings. Consider switching to a more reliable and often faster public DNS server:
- Google Public DNS: 8.8.8.8 and 8.8.4.4
- Cloudflare: 1.1.1.1 and 1.0.0.1
To change your DNS settings:
- Windows: Go to Control Panel > Network and Internet > Network and Sharing Center. Click on "Change adapter settings" on the left. Right-click on your Wi-Fi connection and select "Properties." Select "Internet Protocol Version 4 (TCP/IPv4)" and click "Properties." Select "Use the following DNS server addresses." Enter the preferred and alternate DNS server addresses (e.g., Google's DNS). Click "OK" and then "OK" again.
- macOS: Go to System Preferences > Network. Select your Wi-Fi connection. Click "Advanced." Click the "DNS" tab. Click the "+" button to add new DNS servers. Enter the DNS server addresses (e.g., Google's DNS). Click "OK" and then "Apply".
- Linux The instructions depend on the Desktop Environment and the distrobution you are using. However, the most common distros will have their network settings in the settings app.
4. Troubleshoot Your Router: Diving Deeper into the Network
If changing DNS settings on your laptop doesn't work, investigate your router:
- Router Firmware Update: Outdated firmware can cause a variety of issues. Check your router manufacturer's website for the latest firmware version. Follow their instructions to perform the update, which often involves accessing the router's configuration page through your web browser (usually by entering the router's IP address, such as 192.168.1.1, in the address bar).
- Router DNS Settings: Access your router's configuration page (usually through your web browser, using the router's IP address). Locate the DNS settings and try setting the router itself to use a public DNS server (Google or Cloudflare). This forces all devices on your network to use the preferred DNS servers.
- Router Reset: As a last resort, you can reset your router to its factory default settings. This will erase your custom settings, so make sure you have your network password and other configuration details. Consult your router's manual for instructions on how to reset.
5. Check Your Antivirus and Firewall: The Security Considerations
Sometimes, overly protective security software can interfere with DNS resolution.
- Temporarily Disable Firewall: If you suspect your firewall is the problem, temporarily disable it to see if it resolves the issue. Be sure to re-enable it once you're finished troubleshooting.
- Review Security Software Settings: Check your antivirus or security software for any settings that might be blocking DNS requests. Specifically, look for features like "DNS filtering" or "web protection" and ensure they're not overly restrictive.
6. Network Adapter Drivers: The Underlying Infrastructure
Outdated or corrupted network adapter drivers can sometimes cause connection problems, including DNS issues.
- Windows: Open Device Manager (search for it in the Start menu). Expand "Network adapters." Right-click on your Wi-Fi adapter and select "Update driver." Choose "Search automatically for drivers."
- macOS: macOS usually handles driver updates automatically through system updates. Ensure your macOS is up to date.
7. Contact Your ISP: The Ultimate Resolution
If you've tried all the above steps and your laptop still can't connect, it might be an ISP issue. Contact your ISP to report the problem. They can check for any outages or issues on their end. Make sure to provide them with the error messages you're receiving, as well as the troubleshooting steps you've already taken.
Keeping Your Wireless Laptop Connected: Prevention is Key
Once you've fixed the immediate DNS problem, consider these preventative measures:
- Regularly Update Your Router Firmware: This is crucial for security and performance.
- Use a Reliable DNS Server: Consider using a public DNS server like Google or Cloudflare for a more reliable and potentially faster browsing experience.
- Maintain Your Security Software: Keep your antivirus and firewall up to date and configured properly.
- Monitor Your Network: Keep an eye on your network connection. If you start noticing connection issues, it's time to troubleshoot before it impacts your ability to go online.
By understanding the causes of DNS issues and implementing the troubleshooting steps outlined above, you can quickly resolve the "Wireless Laptop DNS Disaster" and get back to enjoying seamless connectivity. Remember to back up your valuable data and keep your operating system secure!
